开发工具
 ,
,
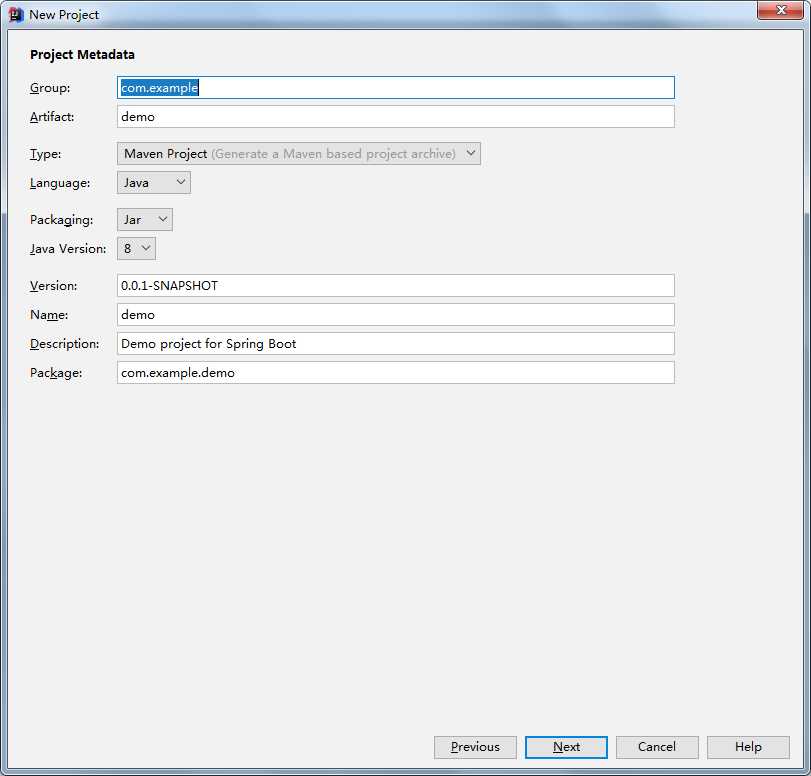
开始
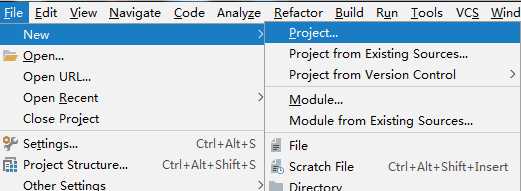
新建工程
.选择Spring Initializr
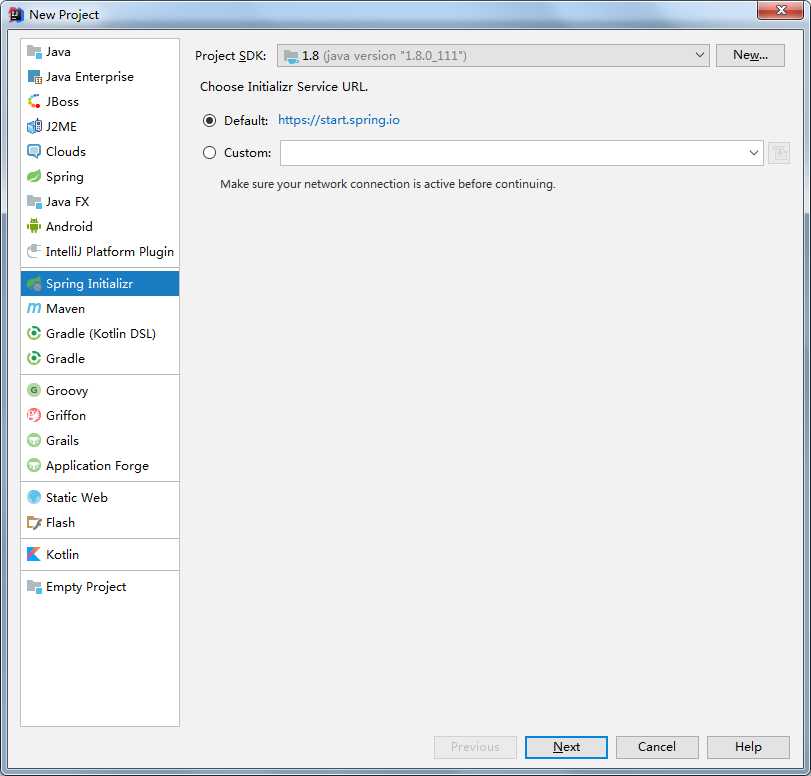
下一步
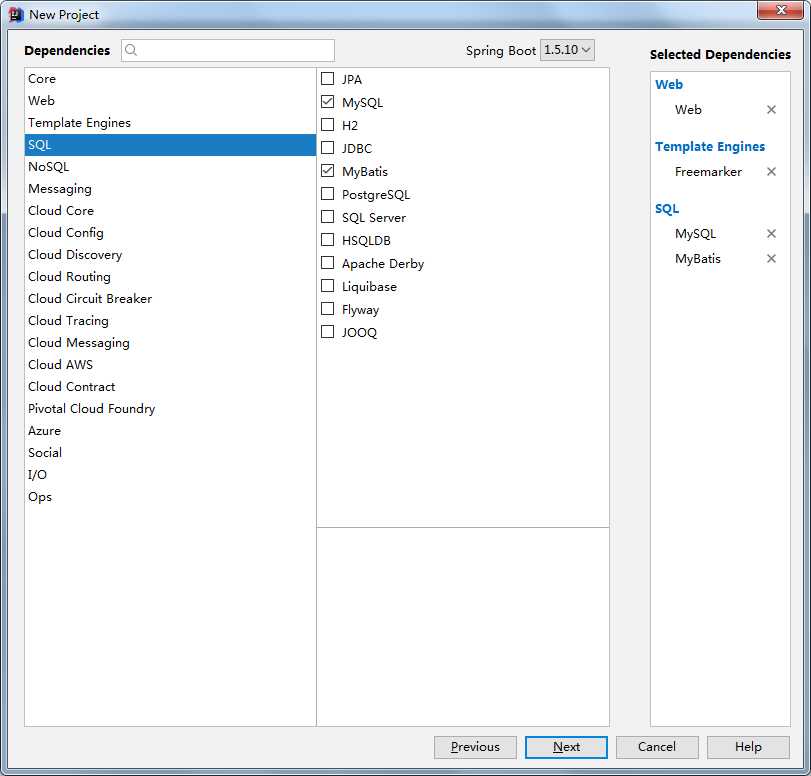
下一步,选择需要的组件
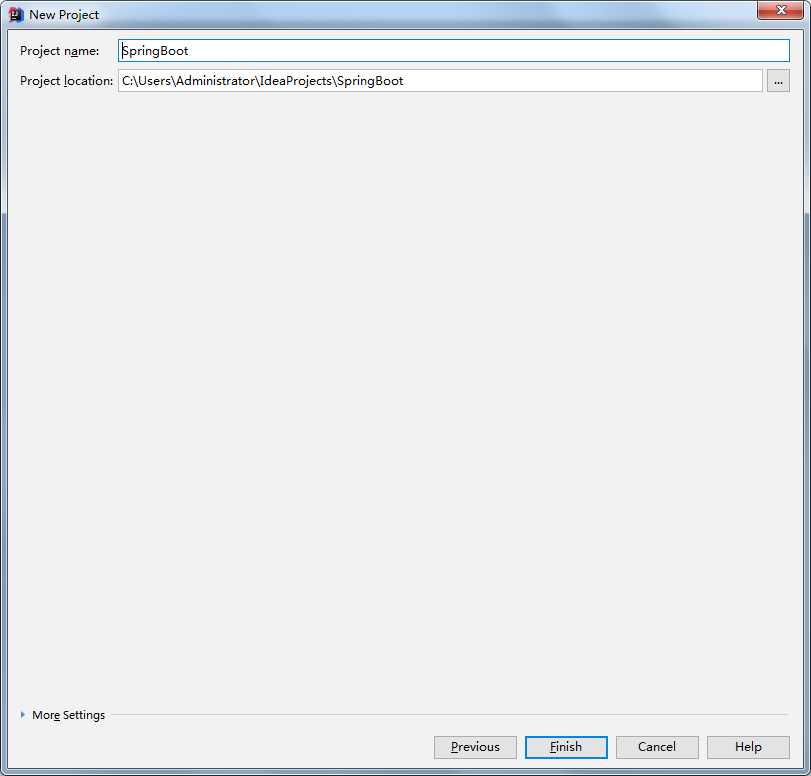
..改一下工程名,Finish
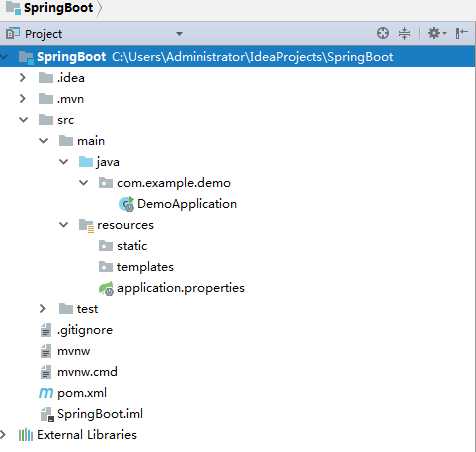
..目录结构
首先,修改pom文件
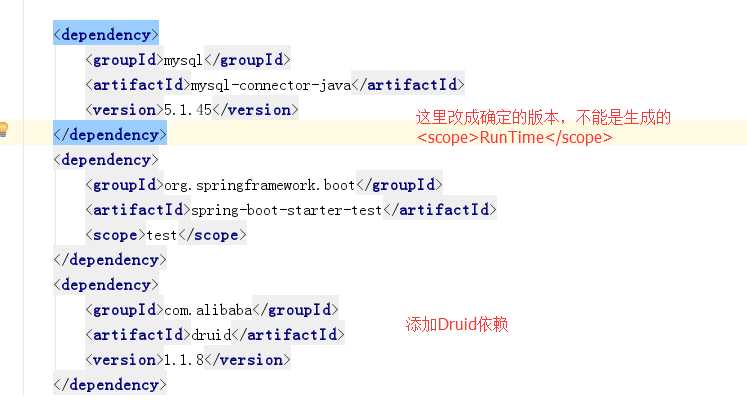
然后,将application.properties改成yml文件,并且配置相关参数
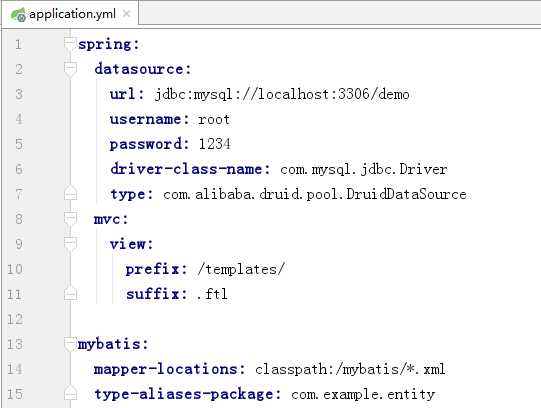
我的数据库很简单,user表,int类型的自增id,varchar类型的name。
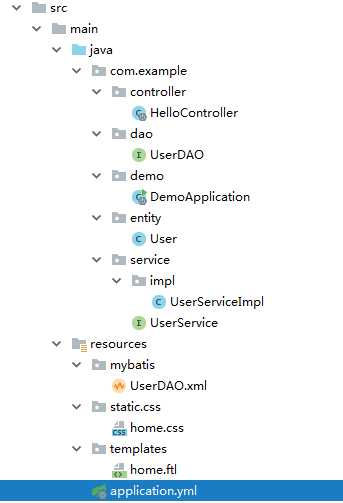
之后建立各个文件,目录结构如下:
HelloController

package com.example.controller;

import com.example.entity.User;
import com.example.service.UserService;
import org.springframework.beans.factory.annotation.Autowired;
import org.springframework.boot.autoconfigure.EnableAutoConfiguration;
import org.springframework.web.bind.annotation.RequestMapping;
import org.springframework.web.bind.annotation.RestController;
import org.springframework.web.servlet.ModelAndView;

import java.util.HashMap;
import java.util.Map;

@RestController
public class HelloController {

    @Autowired
    private UserService userService;

    @RequestMapping("/index")
    public String index(){
        return "Hello !!";
    }

    @RequestMapping("/add")
    public Map<Integer, Integer> addUsers(){
        Map<Integer, Integer> map = new HashMap<>();
        for (int i = 0; i < 10; i++){
            map.put(i, userService.addUser(new User("name-" + i)));
        }
        return map;
    }


    @RequestMapping("/get")
    public Map<String, Object> getUsers(){
        Map<String, Object> map = new HashMap<>();
        map.put("users", userService.getUsers());
        return map;
    }

    @RequestMapping("/view")
    public ModelAndView viw(){
        ModelAndView mv = new ModelAndView("home");
        mv.addObject("name","Tom‘s Table");
        mv.addObject("users", userService.getUsers());
        return mv;
    }
}
UserDAO

package com.example.dao;

import com.example.entity.User;
import org.springframework.stereotype.Repository;

import java.util.List;

@Repository
public interface UserDAO {

    int addUser(User user);

    List<User> getUsers();
}
User

package com.example.entity;

public class User {

    private int id;
    private String name;

    public User(String name) {
        this.name = name;
    }

    public User() {
    }

    public int getId() {
        return id;
    }

    public void setId(int id) {
        this.id = id;
    }

    public String getName() {
        return name;
    }

    public void setName(String name) {
        this.name = name;
    }

    @Override
    public String toString() {
        return "User{" +
                "id=" + id +
                ", name=‘" + name + ‘\‘‘ +
                ‘}‘;
    }
}
UserService

package com.example.service;

import com.example.entity.User;
import org.springframework.stereotype.Service;

import java.util.List;

@Service
public interface UserService {

    int addUser(User user);

    List<User> getUsers();
}
UserServiceImpl

package com.example.service.impl;

import com.example.dao.UserDAO;
import com.example.entity.User;
import com.example.service.UserService;
import org.springframework.beans.factory.annotation.Autowired;
import org.springframework.stereotype.Service;

import java.util.List;

@Service
public class UserServiceImpl implements UserService {

    @Autowired
    private UserDAO userDAO;

    @Override
    public int addUser(User user) {
        return userDAO.addUser(user);
    }

    @Override
    public List<User> getUsers() {
        return userDAO.getUsers();
    }
}
然后在Resource文件夹新建一个mybatis文件夹,用来存放mapper
UserDAO.xml
<?xml version="1.0" encoding="UTF-8"?>
<!DOCTYPE mapper PUBLIC "-//mybatis.org//DTD Mapper 3.0//EN" "http://mybatis.org/dtd/mybatis-3-mapper.dtd">
<mapper namespace="com.example.dao.UserDAO">

    <insert id="addUser" parameterType="User">INSERT INTO USER(NAME) VALUES (#{name})</insert>

    <select id="getUsers" resultType="User">SELECT * FROM USER </select>

</mapper>
home.css
@charset "UTF-8";


h1{
    color: #ff527d;
}
home.ftl
<!DOCTYPE html>
<html>
<head lang="en">
    <meta charset="UTF-8" />
    <title></title>
    <link rel="stylesheet" type="text/css" href="/css/home.css">
</head>
<body>
    <h1>${name}</h1>
    <table>
        <thead>
        <tr>
            <th>ID</th>
            <th>Name</th>
        </tr>
        </thead>
        <tbody>
        <#list users as u>
            <tr>
                <td>${u.id}</td>
                <td>${u.name}</td>
            </tr>
        </#list>
        </tbody>
    </table>
</body>
</html>
对于mybatis相关xml生成以及操作,ftl文件的新建,请看最后。
最关键的类:启动类,很有必要说明一下。
package com.example.demo;

import org.mybatis.spring.annotation.MapperScan;
import org.springframework.boot.SpringApplication;
import org.springframework.boot.autoconfigure.SpringBootApplication;
import org.springframework.context.annotation.ComponentScan;

@SpringBootApplication
@MapperScan("com.example.dao")
@ComponentScan("com.example")
public class DemoApplication {

    public static void main(String[] args) {
        SpringApplication.run(DemoApplication.class, args);
    }
}
默认SpringBoot的装配规则是: 只扫描Application所在的包以及所有子包!这个坑我一直踩却没有怀疑他。
@MapperScan-----扫描Mapper类
@ComponentScan----扫描指定的包
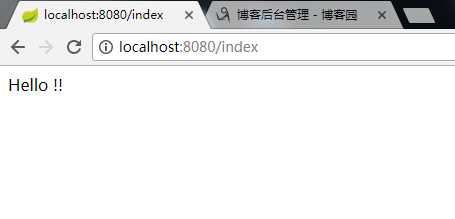
到此为止,可以启动SpringBoot应用了。
---------------------

---------------------

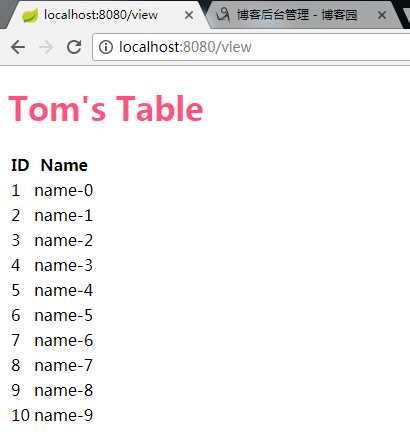
----------------------最后一个,从后台读取数据,freemarker渲染视图
下面进行采坑指南---
第一个,用过eclipse+mybatis插件的都知道,有个插件来生成mybatis配置文件和映射文件是个方便的事,其实IDEA也有,但是用的我有点不习惯↓↓
..Settings
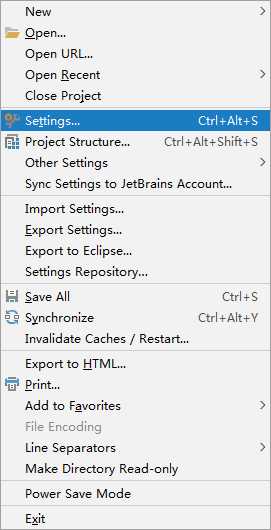
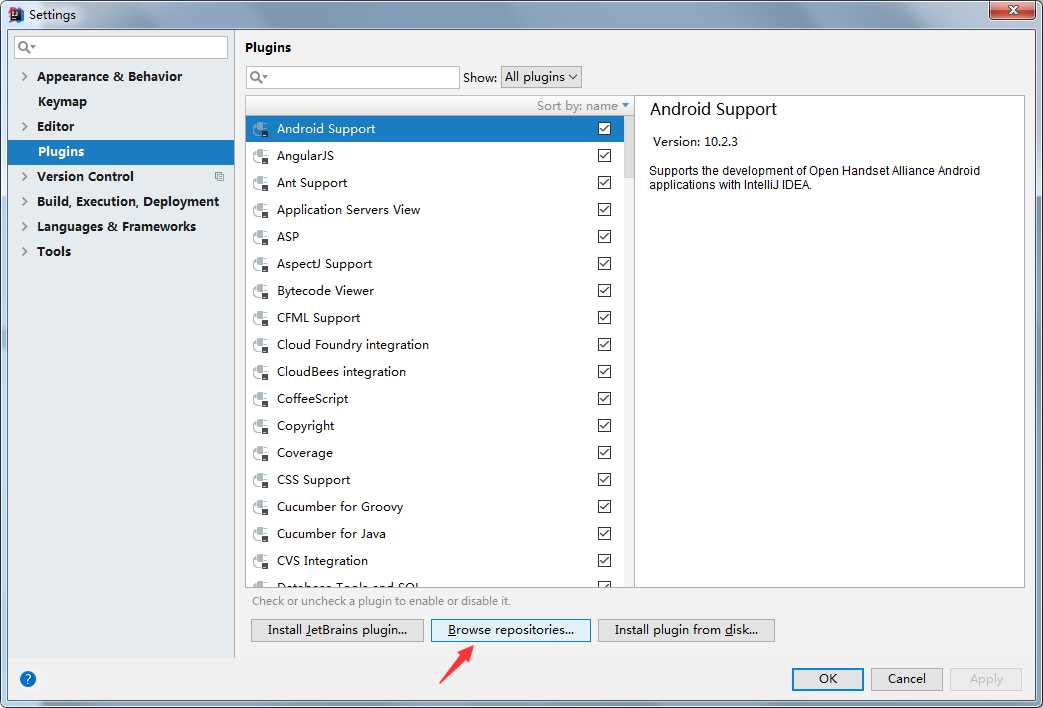
..找到下面这个
..搜索mybatis,选择下面这三个,主要是第二个和第三个,单独选中右侧会出现Install选项
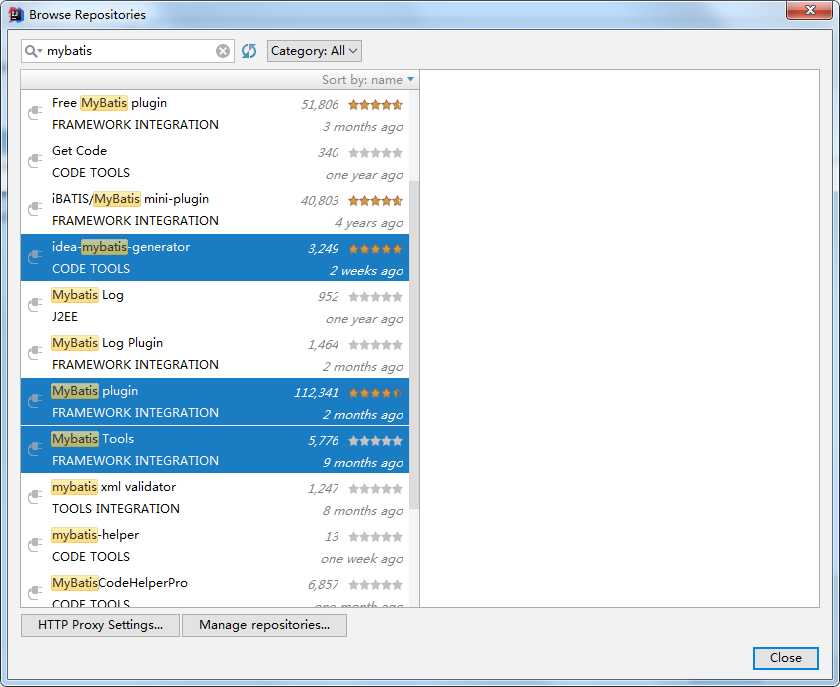
..安装完之后,会让你重启,重启之后,会出现Mybatis的选项,不过问题是,它只有config的新建选项,没有mapper的新建选项。
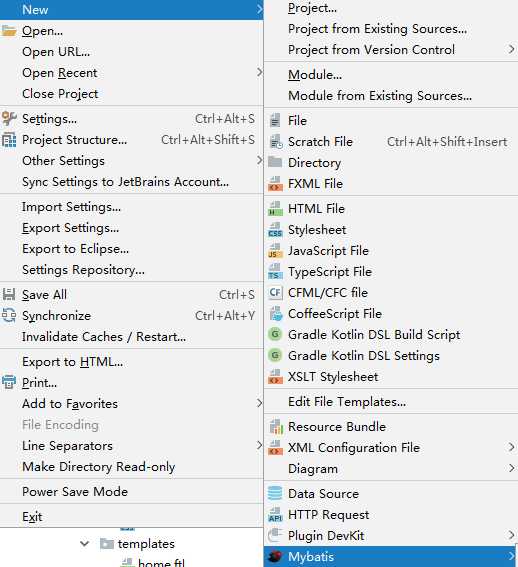
..我不知道大家有啥更好的方法没有,反正我去尝试编辑右键菜单,无果。只好采取以下方法。
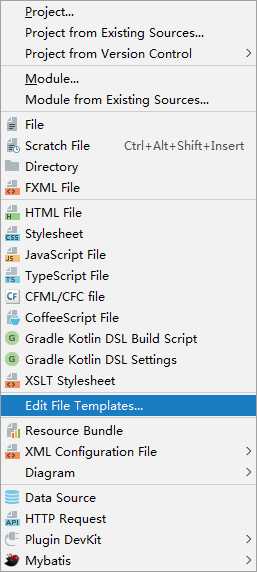
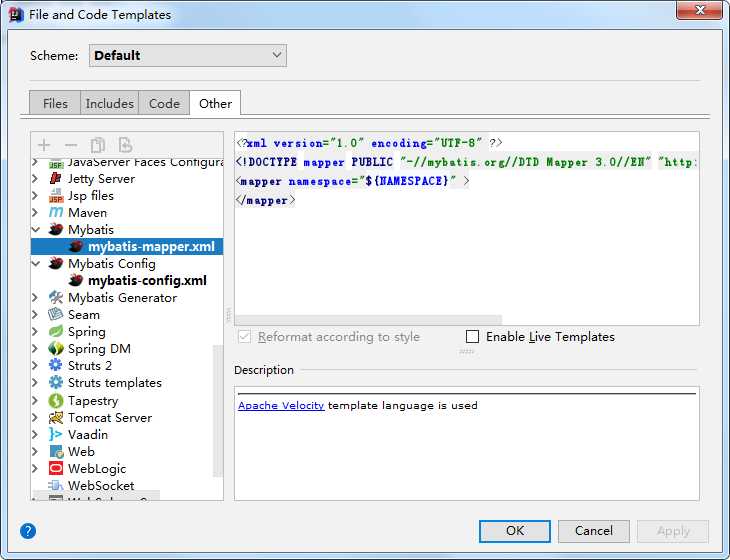
..找到other选项卡,看到这里你们肯定会问,这里不是有吗,对呀,你有本事把它搞到右键菜单啊。复制右侧的内容
..回到Files,点击加号,输入Name,扩展名,并把复制的内容粘贴到此处。注意把namespace里面的代码去掉
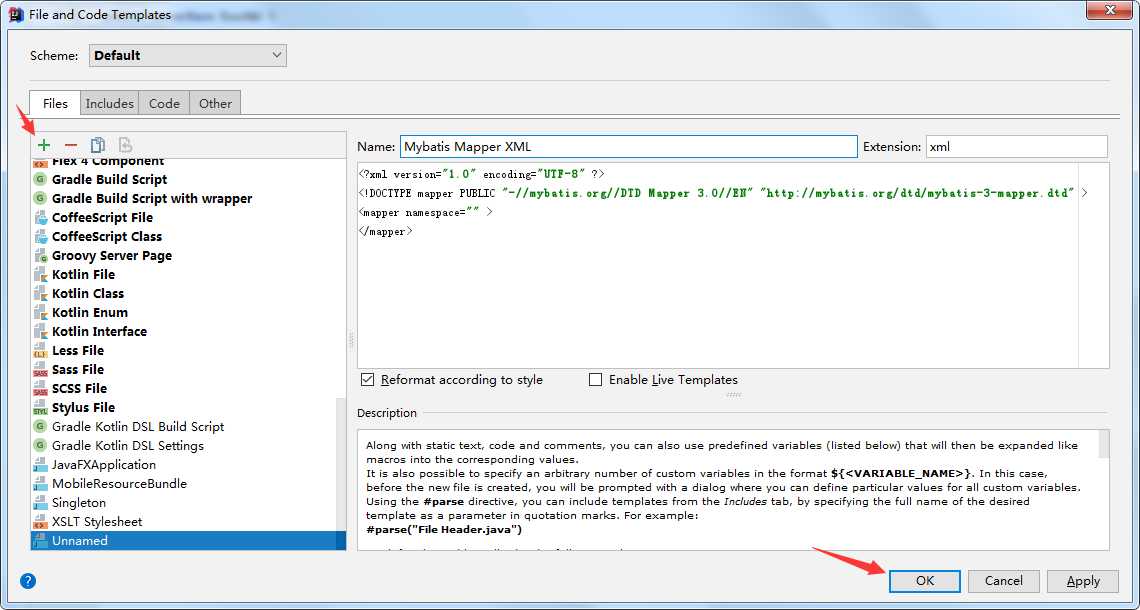
点击OK,可以看到,出现了Mapper选项,但是!他并没有像eclipse里面的插件那样智能,他只是生成一个普通的文件而已。里面的namespace的值需要你自己修改。
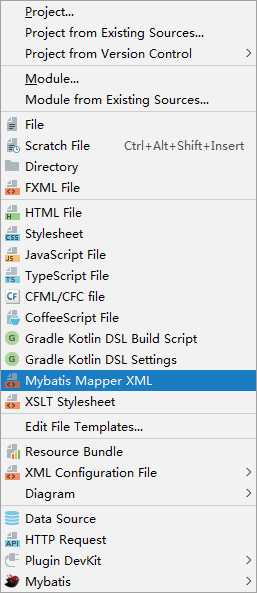
到此,实现了Mybatis配置文件的代码追踪等等实用的操作
插一句:网上都是告诉你使用generator来生成mapper文件以及简单的sql语句,节省了时间,但是我不是特别喜欢那种全自动的。
第二个,关于freemarker模板的问题。
SpringBoot的文件目录:static用来存放静态文件,templates用来存放视图。那么,freemarker模板需要引用static里面的css文件呢?

如果在freemarker文件里面直接这样写,他说他找不到,但是,你不用管它!当项目运行起来,SpringBoot会自动从static里面去找。如果你有强迫症,没关系,我能忍。
第三个,同样,IDEA如何创建freemarker文件?
唉,没有相应的模板。你可以自己建一个:
复制HTML5的模板
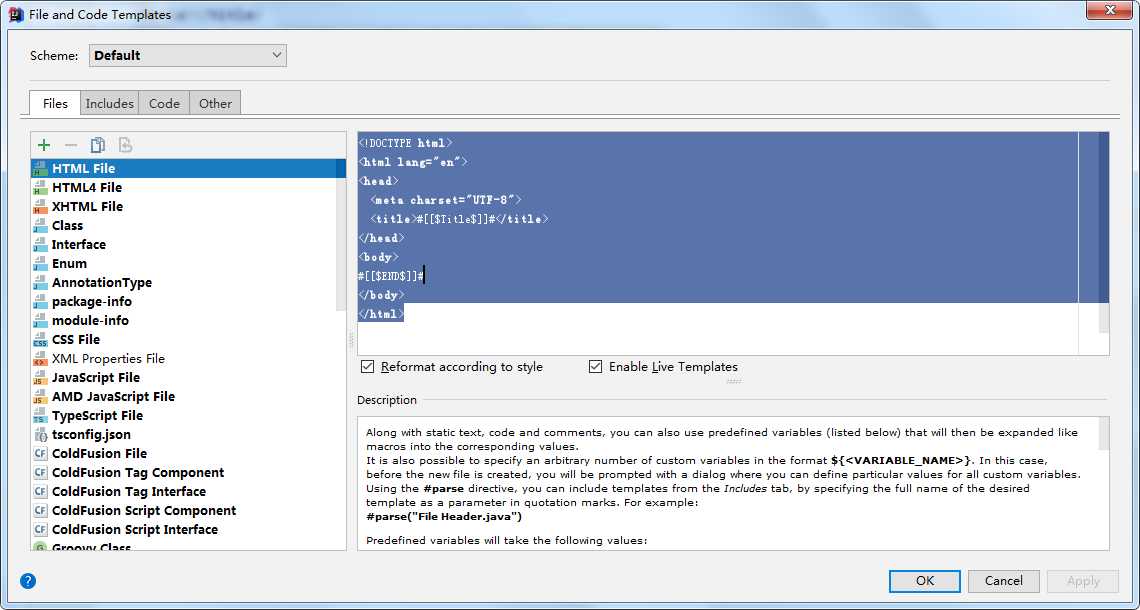
点击加号,新建一个
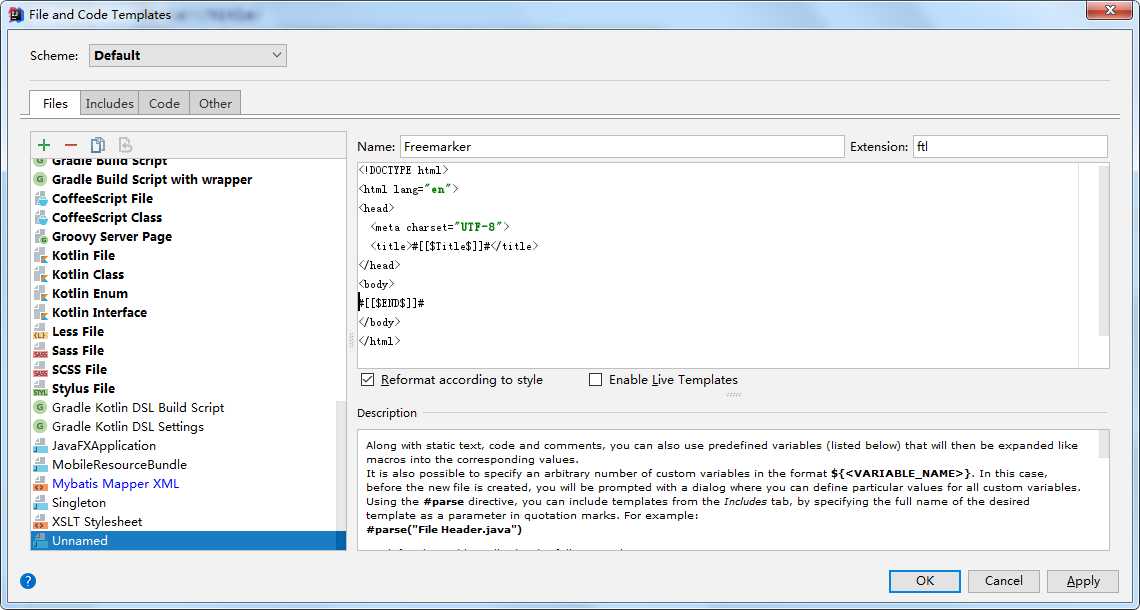
点击OK,右键new
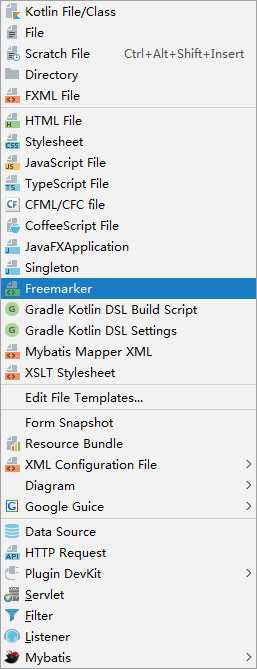
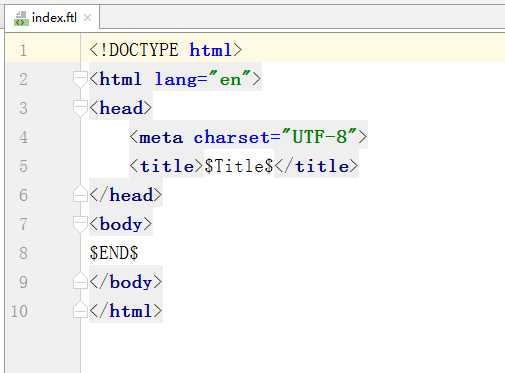
点击,输入文件名(这里的$Title$,因为不是html文件,所以识别不了,你看着费劲可以修改模板)
