springboot中已经不推荐使用jsp,而是推荐使用模板,如freemarker,thymeleaf等,本文记录在sprigboot中使用模板。
创建一个maven的springboot工程,
freemarker,要使用freemarker模板需引入所需要的jar,pom.xml如下:


 1 <project xmlns="http://maven.apache.org/POM/4.0.0" xmlns:xsi="http://www.w3.org/2001/XMLSchema-instance" xsi:schemaLocation="http://maven.apache.org/POM/4.0.0 http://maven.apache.org/xsd/maven-4.0.0.xsd">
 2   <modelVersion>4.0.0</modelVersion>
 3   <groupId>com.allen.springboot.learn</groupId>
 4   <artifactId>springboot_freemarker</artifactId>
 5   <version>0.0.1-SNAPSHOT</version>
 6
 7   <parent>
 8     <groupId>org.springframework.boot</groupId>
 9     <artifactId>spring-boot-starter-parent</artifactId>
10     <version>1.5.10.RELEASE</version>
11   </parent>
12
13   <dependencies>
14     <!-- web 依赖 -->
15     <dependency>
16         <groupId>org.springframework.boot</groupId>
17         <artifactId>spring-boot-starter-web</artifactId>
18     </dependency>
19
20     <!-- Freemarker 依赖 -->
21     <dependency>
22         <groupId>org.springframework.boot</groupId>
23         <artifactId>spring-boot-starter-freemarker</artifactId>
24     </dependency>
25   </dependencies>
26
27 </project>
在resources目录下创建application.properties文件,添加freemarker配置信息,代码如下:
 1 ##FREEMARKER
 2 spring.freemarker.template-loader-path=classpath:/view/
 3 spring.freemarker.suffix=.ftl
 4 #spring.freemarker.prefix=
 5 spring.freemarker.allow-request-override=false
 6 spring.freemarker.cache=true
 7 spring.freemarker.check-template-location=true
 8 spring.freemarker.charset=UTF-8
 9 spring.freemarker.content-type=text/html
10 spring.freemarker.expose-request-attributes=false
11 spring.freemarker.expose-session-attributes=false
12 spring.freemarker.expose-spring-macro-helpers=false
这些配置信息中,比较重要的是前两行,分别指定文件所在路径和文件名的后缀。
至此freemarker的配置已经完成,接下来创建controller,实体类和模板,使用freemarker模板
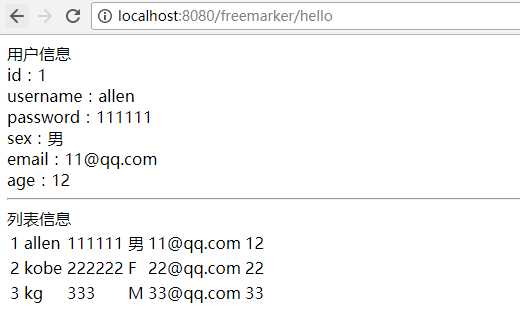
 1 /**
 2  *
 3  */
 4 package com.allen.springboot.learn.controller;
 5
 6 import java.util.ArrayList;
 7 import java.util.List;
 8
 9 import org.springframework.stereotype.Controller;
10 import org.springframework.ui.Model;
11 import org.springframework.web.bind.annotation.RequestMapping;
12
13 import com.allen.springboot.learn.entity.UserInfo;
14
15 /**
16  * @author admin
17  *
18  */
19 @Controller
20 @RequestMapping("/freemarker")
21 public class FreemarkerController {
22
23     @RequestMapping("/hello")
24     public String hello(Model model){
25         UserInfo u1 = new UserInfo();
26         u1.setId(1);
27         u1.setEmail("11@qq.com");
28         u1.setAge(12);
29         u1.setPassword("111111");
30         u1.setSex("男");
31         u1.setUsername("allen");
32         model.addAttribute("u1", u1);
33
34         List<UserInfo> userList = new ArrayList<UserInfo>();
35         userList.add(u1);
36         UserInfo u2 = new UserInfo();
37         u2.setId(2);
38         u2.setEmail("22@qq.com");
39         u2.setAge(22);
40         u2.setPassword("222222");
41         u2.setSex("F");
42         u2.setUsername("kobe");
43         userList.add(u2);
44         UserInfo u3 = new UserInfo();
45         u3.setId(3);
46         u3.setEmail("33@qq.com");
47         u3.setAge(33);
48         u3.setPassword("333");
49         u3.setSex("M");
50         u3.setUsername("kg");
51         userList.add(u3);
52         model.addAttribute("userList", userList);
53         return "fmk";
54     }
55
56 }
 1 /**
 2  *
 3  */
 4 package com.allen.springboot.learn.entity;
 5
 6 /**
 7  * @author admin
 8  *
 9  */
10 public class UserInfo {
11
12     private Integer id;
13     private String username;
14     private String password;
15     private String sex;
16     private String email;
17     private int age;
18
19     public Integer getId() {
20         return id;
21     }
22     public void setId(Integer id) {
23         this.id = id;
24     }
25     public String getUsername() {
26         return username;
27     }
28     public void setUsername(String username) {
29         this.username = username;
30     }
31     public String getPassword() {
32         return password;
33     }
34     public void setPassword(String password) {
35         this.password = password;
36     }
37     public String getSex() {
38         return sex;
39     }
40     public void setSex(String sex) {
41         this.sex = sex;
42     }
43     public String getEmail() {
44         return email;
45     }
46     public void setEmail(String email) {
47         this.email = email;
48     }
49     public int getAge() {
50         return age;
51     }
52     public void setAge(int age) {
53         this.age = age;
54     }
55
56 }
 1 <!DOCTYPE html>
 2 <html>
 3 <head>
 4 <title>Insert title here</title>
 5 </head>
 6 <body>
 7 用户信息<br/>
 8 id:${u1.id}<br/>
 9 username:${u1.username}<br/>
10 password:${u1.password}<br/>
11 sex:${u1.sex}<br/>
12 email:${u1.email}<br/>
13 age:${u1.age}
14 <hr/>
15 列表信息<br/>
16 <table>
17     <#if (userList ? size > 0 )>
18         <#list userList as user>
19             <tr>
20                 <td>${user.id}</td>
21                 <td>${user.username}</td>
22                 <td>${user.password}</td>
23                 <td>${user.sex}</td>
24                 <td>${user.email}</td>
25                 <td>${user.age}</td>
26             </tr>
27         </#list>
28     <#else>
29         没有数据
30     </#if>
31 </table>
32
33 </body>
34 </html>
现在就可以启动工程,访问controller了,信息正常信息
至此在springboot中使用freemarker已完成。
接下来看看使用thymeleaf模板,thymeleaf模板是springboot默认使用的模板,模板文件默认路径是在src/main/resources/templates下,和上文一样,只需要在pom.xml文件中引入对应的jar。

创建模板:
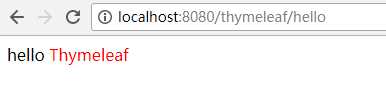
 1 <!DOCTYPE html>
 2 <html xmlns:th="http://www.thymeleaf.org" xmlns:tiles="http://www.thymeleaf.org">
 3 <head>
 4 <meta charset="UTF-8" />
 5 <title>Insert title here</title>
 6 </head>
 7 <body>
 8 hello <span style="color:red" th:text="${name}"></span>
 9 </body>
10 </html>
创建controller:
 1 /**
 2  *
 3  */
 4 package com.allen.springboot.learn.controller;
 5
 6 import org.springframework.stereotype.Controller;
 7 import org.springframework.ui.Model;
 8 import org.springframework.web.bind.annotation.RequestMapping;
 9
10 /**
11  * @author admin
12  *
13  */
14 @Controller
15 @RequestMapping("/thymeleaf")
16 public class ThymeleafController {
17
18     @RequestMapping("/hello")
19     public String helloThymeleaf(Model model){
20         model.addAttribute("name", "Thymeleaf");
21         return "tmf";
22     }
23
24 }
接下来启动项目,访问controller中的地址,浏览器端显示如下内容