一.AOP(Aspect Oriented Programing)面向切面编程
AOP的终极目标:让我们可以专心做事
下面通过一个例子来介绍AOP的具体使用
案例的要求:使用AOP实现日志记录系统 , 核心模块 和 增强 单独 开发 ,运行时再组装
首先定义接口和方法
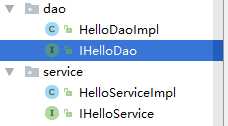
接口和实现类中的代码,我放在一起了,应该比较简单
package demo04.dao;

/**
 * Created by mycom on 2018/3/5.
 */
public interface IHelloDao {
    public void doSome();
}
package demo04.dao;

/**
 * Created by mycom on 2018/3/5.
 */
public class HelloDaoImpl implements IHelloDao {
    public void doSome() {
        System.out.println("已经成功加入到DB中了");
    }
}
package demo04.service;

/**
 * Created by mycom on 2018/3/5.
 */
public interface IHelloService {
    public void doSome();
}
package demo04.service;

import demo04.dao.IHelloDao;

/**
 * Created by mycom on 2018/3/5.
 */
public class HelloServiceImpl implements IHelloService {
    //创建一个Dao的对象
    IHelloDao dao;

    public IHelloDao getDao() {
        return dao;
    }

    public void setDao(IHelloDao dao) {
        this.dao = dao;
    }

    public void doSome() {
        dao.doSome();
    }
}
同样在resources下面也要有一个xml文件----applicationContext.xml
<!--返回的类型只能是实现类-->  这里需要注意一下  class的值只能是实现类的包
    <bean id="dao" class="demo04.dao.HelloDaoImpl">
    </bean>

    <bean id="service" class="demo04.service.HelloServiceImpl">
        <property name="dao" ref="dao"></property>
    </bean>
然后编写测试类进行测试
@Test
    public void t1(){
        ApplicationContext context=new ClassPathXmlApplicationContext("applicationContextAop.xml");
        //这里的返回值只能是接口
        IHelloService service =(IHelloService) context.getBean("service");
        service.doSome();
    }
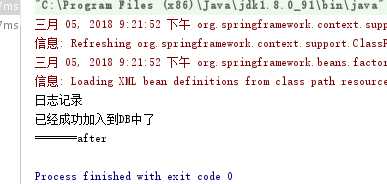
运行的结果

现在我们要在这句话出现之前,先记录一下日志,出现之后,再出现一句话
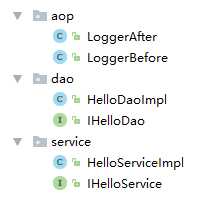
首先要创建一个新的包AOP包,并且在包下面写两个类
LoggerAfter是后置增强
LoggerBefore是前置增强
这两个类中的代码如下
package demo04.aop;

import org.springframework.aop.AfterReturningAdvice;

import java.lang.reflect.Method;

/**
 * Created by mycom on 2018/3/5.
 */
public class LoggerAfter implements AfterReturningAdvice {
    public void afterReturning(Object o, Method method, Object[] objects, Object o1) throws Throwable {
        System.out.println("=======after");
    }
}
package demo04.aop;

import org.springframework.aop.MethodBeforeAdvice;

import java.lang.reflect.Method;

/**
 * Created by mycom on 2018/3/5.
 */
public class LoggerBefore implements MethodBeforeAdvice {
    public void before(Method method, Object[] objects, Object o) throws Throwable {
        System.out.println("日志记录");
    }
}
在xml中配置,在配置xml是要给AOP添加一个约束
<?xml version="1.0" encoding="UTF-8"?>
<beans xmlns="http://www.springframework.org/schema/beans"
       xmlns:xsi="http://www.w3.org/2001/XMLSchema-instance" xmlns:aop="http://www.springframework.org/schema/aop"
       xsi:schemaLocation="http://www.springframework.org/schema/beans http://www.springframework.org/schema/beans/spring-beans.xsd http://www.springframework.org/schema/aop http://www.springframework.org/schema/aop/spring-aop.xsd">
<bean id="service" class="demo04.service.HelloServiceImpl">
        <property name="dao" ref="dao"></property>
    </bean>
    <!--前置-->
    <bean id="beforeAdvice" class="demo04.aop.LoggerBefore">
    </bean>
    <!--后置-->
    <bean id="afterAdvice" class="demo04.aop.LoggerAfter">
    </bean>
    <!--配置aop-->
    <aop:config>
        <!--切点-->
        <aop:pointcut id="mypoint" expression="execution(public void demo04.service.HelloServiceImpl.doSome())"></aop:pointcut>
        <!--<aop:pointcut id="mypoint" expression="execution(* *..service.*.*(..))"></aop:pointcut>-->
        <!--advice-ref:做什么样的配置,是前置还是后置
        pointcut-ref:锁定什么样的方法规则,那个方法需要被锁定
        -->
        <aop:advisor advice-ref="beforeAdvice" pointcut-ref="mypoint"></aop:advisor>
        <aop:advisor advice-ref="afterAdvice" pointcut-ref="mypoint"></aop:advisor>
    </aop:config>
测试类
import demo04.service.HelloServiceImpl;
import demo04.service.IHelloService;
import demo05.MyCollection;
import demo05.Student;
import org.junit.Test;
import org.springframework.context.ApplicationContext;
import org.springframework.context.support.ClassPathXmlApplicationContext;

/**
 * Created by mycom on 2018/3/3.
 */
public class Test20180305 {
    @Test
    public void t1(){
        ApplicationContext context=new ClassPathXmlApplicationContext("applicationContextAop.xml");
        //这里的返回值只能是接口
        IHelloService service =(IHelloService) context.getBean("service");
        service.doSome();

    }


}
在这里和要介绍两个单词的意思
advice :通知
advisor:顾问
顾问可以包装通知
execution(【modifiers-pattern?】 访问修饰符
ret-type-pattern 返回值类型
【declaring-type-pattern?】 全限定性类名
name-pattern(param-pattern) 方法名(参数名) 包名.类型名.方法名
【throws-pattern?】) 抛出异常类型
public void doLog(String log){
}
方法签名
切入点表达式要匹配的对象就是目标方法的方法名。所以,execution表达式中明显就是方法的签名。
注意:表达式中加[]的部分表示可省略部分,各部分间用空格分开。在其中可以使用以下符号:
符号 意义
* 0至多个任意字符
.. 用在方法参数中,表示任意多个参数
用在包名后,表示当前包及其子包路径
+ 用在类名后,表示当前类及其子类
用在接口后,表示当前接口及其实现类
案例:
execution(public * *(..)) 指定切入点为:任意公共方法
execution(* set*(..)) 指定切入点为:任何一个以"set"开始的方法
二.给属性注入值(四种)
1.setter方法注入(就是在bean节点下有property节点给里面的属性值赋值
<bean id="service" class="demo04.service.HelloServiceImpl">
        <property name="dao" ref="dao"></property>
    </bean>
2.构造注入
3.p命名空间注入(使用前要先要在Spring配置文件中引入p命名空间xmlns:p="http://www.springframework.org/schema/p")
这里的两种我写在一起了
首先写一个学生类,车类,MyCollection
package demo05;

/**
 * Created by mycom on 2018/3/5.
 */
public class Student {
    private String name;
    private Integer age;
    private Car car;

    public Student() {
    }

    public Student(String name, Integer age) {

        this.name = name;
        this.age = age;
    }

    public String getName() {
        return name;
    }

    public void setName(String name) {
        this.name = name;
    }

    public Integer getAge() {
        return age;
    }

    public void setAge(Integer age) {
        this.age = age;
    }

    public Car getCar() {
        return car;
    }

    public void setCar(Car car) {
        this.car = car;
    }
}
package demo05;

/**
 * Created by mycom on 2018/3/5.
 */
public class Car {
    private String color;
    private String brand;

    public String getBrand() {
        return brand;
    }

    public void setBrand(String brand) {
        this.brand = brand;
    }

    public String getColor() {

        return color;
    }

    public void setColor(String color) {
        this.color = color;
    }
}
在xml中的配置
<!--构造注入-->
    <!--<bean id="stu" class="demo05.Student">
        <constructor-arg index="0" value="小明"></constructor-arg>
        <constructor-arg index="1" value="12"></constructor-arg>
    </bean>-->
    <!--p命名空间注入-->
    <bean id="stu" class="demo05.Student" p:name="小明" p:age="12" p:car-ref="car"></bean>
最后编写测试类
以p命名空间注入为例进行测试
import demo04.service.HelloServiceImpl;
import demo04.service.IHelloService;
import demo05.MyCollection;
import demo05.Student;
import org.junit.Test;
import org.springframework.context.ApplicationContext;
import org.springframework.context.support.ClassPathXmlApplicationContext;

/**
 * Created by mycom on 2018/3/3.
 */
public class Test20180305 {
    @Test
    public void t1(){
        ApplicationContext context=new ClassPathXmlApplicationContext("applicationContextCon.xml");
Student service2 =(Student) context.getBean("stu");
System.out.println(service2.getName());
} }
4.集合注入
再写一个MyCollection类
package demo05;


import java.util.*;

/**
 * Created by mycom on 2018/3/5.
 */
public class MyCollection {
    private String[] array;
    private List<String> list;
    private Set<String> set;
    private Map<String,String> map;
    private Properties properties;

    public MyCollection() {
        System.out.println("创建对象===========");
    }

    public MyCollection(String[] array, List<String> list, Set<String> set, Map<String, String> map, Properties properties) {
        this.array = array;
        this.list = list;
        this.set = set;
        this.map = map;
        this.properties = properties;
    }

   @Override
    public String toString() {
        return "MyCollection{" +
                "array=" + Arrays.toString(array) +
                ", list=" + list +
                ", set=" + set +
                ", map=" + map +
                ", properties=" + properties +
                ‘}‘;
    }

    public String[] getArray() {
        return array;
    }

    public void setArray(String[] array) {
        this.array = array;
    }

    public List<String> getList() {
        return list;
    }

    public void setList(List<String> list) {
        this.list = list;
    }

    public Set<String> getSet() {
        return set;
    }

    public void setSet(Set<String> set) {
        this.set = set;
    }

    public Map<String, String> getMap() {
        return map;
    }

    public void setMap(Map<String, String> map) {
        this.map = map;
    }

    public Properties getProperties() {
        return properties;
    }

    public void setProperties(Properties properties) {
        this.properties = properties;
    }
}
<!--集合注入-->
    <bean id="collection" class="demo05.MyCollection" scope="prototype">
        <!--Array-->
        <property name="array">
            <array>
                <value>小明</value>
                <value>小兰</value>
            </array>
        </property>
        <!--list-->
        <property name="list">
            <list>
                <value>list1</value>
                <value>list2</value>
            </list>
        </property>
        <!--set-->
        <property name="set">
            <set>
                <value>set1</value>
                <value>set2</value>
            </set>
        </property>
        <!--map-->
        <property name="map">
            <map>
                <entry key="1">
                    <value>01</value>
                </entry>
                <entry key="2">
                    <value>02</value>
                </entry>
            </map>
        </property>
        <!--propreties-->
        <property name="properties">
            <props>
                <prop key="001">001</prop>
                <prop key="002">002</prop>
            </props>
        </property>
    </bean>
import demo04.service.HelloServiceImpl;
import demo04.service.IHelloService;
import demo05.MyCollection;
import demo05.Student;
import org.junit.Test;
import org.springframework.context.ApplicationContext;
import org.springframework.context.support.ClassPathXmlApplicationContext;

/**
 * Created by mycom on 2018/3/3.
 */
public class Test20180305 {
    @Test
    public void t1(){
        ApplicationContext context=new ClassPathXmlApplicationContext("applicationContextCon.xml");
       //返回的类型只能是接口
        MyCollection service =(MyCollection) context.getBean("collection");
        System.out.println(service);
       }


}
三.Spring中bean是单例的问题
单例:一个类在内存中只能有一个对象。
单利满足的三个条件:
1.构造私有
2.是有的静态变量,变量的类型就是当前类的类型
3.提供一个静态方法
在xml中配置实现单例还是多例的属性是scope
他的值有两个singleton 单例
prototype 多例
在上面的集合注入的例子中进行改动,并且如果MyCollection中有toString方法,也要注释掉,可以更直观的看到,如下

然后我们来编写测试方法进行测试
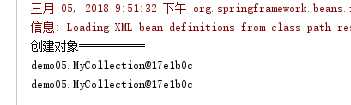
import demo04.service.HelloServiceImpl;
import demo04.service.IHelloService;
import demo05.MyCollection;
import demo05.Student;
import org.junit.Test;
import org.springframework.context.ApplicationContext;
import org.springframework.context.support.ClassPathXmlApplicationContext;

/**
 * Created by mycom on 2018/3/3.
 */
public class Test20180305 {
    @Test
    public void t1(){
        ApplicationContext context=new ClassPathXmlApplicationContext("applicationContextCon.xml");

        MyCollection service =(MyCollection) context.getBean("collection");
        System.out.println(service);
        MyCollection service2 =(MyCollection) context.getBean("collection");
        System.out.println(service2);

    }


}
运行结果
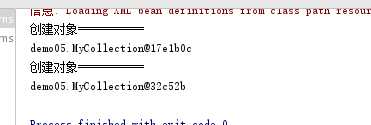
从运行结果来看,两次创建的对象的指针不同,创建的是两个对象,这是多例
线面再来看单例,将scope的属性值改为singleton
此时的运行结果如下
他只创建了依次对象,实现了单利