一、 简介
近来容器对企业来说已经不是什么陌生的概念,Kubernetes作为Google开源的容器运行平台,受到了大家的热捧。搭建一套完整的kubernetes平台,也成为试用这套平台必须迈过的坎儿。本教程搭建kubernetes1.5.2版本,安装还是相对比较方便的,通过yum源安装。但是在kubernetes1.6之后,安装就比较繁琐了,需要证书各种认证,这里暂时不深讨。 k8s(kubernetes简称)包含以下主要组件:
Kubernetes 集群中主要存在两种类型的节点,分别是 master 节点,以及 minion 节点。
Minion 节点是实际运行 Docker 容器的节点,负责和节点上运行的 Docker 进行交互,并且提供了代理功能。
Master 节点负责对外提供一系列管理集群的 API 接口,并且通过和 Minion 节点交互来实现对集群的操作管理。
apiserver:用户和 kubernetes 集群交互的入口,封装了核心对象的增删改查操作,提供了 RESTFul 风格的 API 接口,通过 etcd 来实现持久化并维护对象的一致性。
scheduler:负责集群资源的调度和管理,例如当有 pod 异常退出需要重新分配机器时,scheduler 通过一定的调度算法从而找到最合适的节点。
controller-manager:主要是用于保证 replicationController 定义的复制数量和实际运行的 pod 数量一致,另外还保证了从 service 到 pod 的映射关系总是最新的。
kubelet:运行在 minion 节点,负责和节点上的 Docker 交互,例如启停容器,监控运行状态等。
proxy:运行在 minion 节点,负责为 pod 提供代理功能,会定期从 etcd 获取 service 信息,并根据 service 信息通过修改 iptables 来实现流量转发(最初的版本是直接通过程序提供转发功能,效率较低。),将流量转发到要访问的 pod 所在的节点上去。
etcd:key-value键值存储数据库,用来存储kubernetes的信息的。
flannel:Flannel 是 CoreOS 团队针对 Kubernetes 设计的一个覆盖网络(Overlay Network)工具,需要另外下载部署。我们知道当我们启动 Docker 后会有一个用于和容器进行交互的 IP 地址,如果不去管理的话可能这个 IP 地址在各个机器上是一样的,并且仅限于在本机上进行通信,无法访问到其他机器上的 Docker 容器。Flannel 的目的就是为集群中的所有节点重新规划 IP 地址的使用规则,从而使得不同节点上的容器能够获得同属一个内网且不重复的 IP 地址,并让属于不同节点上的容器能够直接通过内网 IP 通信。
二、 部署规划
centos71 192.168.223.155 master节点
centos72 192.168.223.156 node节点
centos73 192.168.223.157 node节点
三、 安装前准备
本次安装使用vmvare建立的3台虚拟机,操作系统CentOS Linux release 7.2.1511 (Core)
3台主机均需要做以下操作:
关闭iptables:service iptables stop
chkconfig iptables off
关闭firewalld:
systemctl disable firewalld.service
systemctl stop firewalld.service
关闭selinux:
setenforce 0
修改配置文件vi /etc/selinux/config:
SELINUX=disabled
设置HOST文件:vi /etc/hosts:
192.168.223.155 centos71
192.168.223.156 centos72
192.168.223.157 centos73
四、 部署etcd
1、 yum安装etcd
[root@centos71 ~]# yum install -y etcd
2、 修改配置文件
[root@centos71 ~]# vi /etc/etcd/etcd.conf
# 修改以下红色部分
#[Member]
#ETCD_CORS=""
ETCD_DATA_DIR="/var/lib/etcd/default.etcd"
#ETCD_WAL_DIR=""
#ETCD_LISTEN_PEER_URLS="http://localhost:2380"
ETCD_LISTEN_CLIENT_URLS="http://0.0.0.0:2379,http://0.0.0.0:4001"
#ETCD_MAX_SNAPSHOTS="5"
#ETCD_MAX_WALS="5"
ETCD_NAME="master"
#ETCD_SNAPSHOT_COUNT="100000"
#ETCD_HEARTBEAT_INTERVAL="100"
#ETCD_ELECTION_TIMEOUT="1000"
#ETCD_QUOTA_BACKEND_BYTES="0"
#
#[Clustering]
#ETCD_INITIAL_ADVERTISE_PEER_URLS="http://localhost:2380"
ETCD_ADVERTISE_CLIENT_URLS="http://centos71:2379,http://centos71:4001"
#ETCD_DISCOVERY=""
#ETCD_DISCOVERY_FALLBACK="proxy"
#ETCD_DISCOVERY_PROXY=""
#ETCD_DISCOVERY_SRV=""
#ETCD_INITIAL_CLUSTER="default=http://localhost:2380"
#ETCD_INITIAL_CLUSTER_TOKEN="etcd-cluster"
#ETCD_INITIAL_CLUSTER_STATE="new"
#ETCD_STRICT_RECONFIG_CHECK="true"
#ETCD_ENABLE_V2="true"
#
#[Proxy]
#ETCD_PROXY="off"
#ETCD_PROXY_FAILURE_WAIT="5000"
#ETCD_PROXY_REFRESH_INTERVAL="30000"
#ETCD_PROXY_DIAL_TIMEOUT="1000"
#ETCD_PROXY_WRITE_TIMEOUT="5000"
#ETCD_PROXY_READ_TIMEOUT="0"
#
#[Security]
#ETCD_CERT_FILE=""
#ETCD_KEY_FILE=""
#ETCD_CLIENT_CERT_AUTH="false"
#ETCD_TRUSTED_CA_FILE=""
#ETCD_AUTO_TLS="false"
#ETCD_PEER_CERT_FILE=""
#ETCD_PEER_KEY_FILE=""
#ETCD_PEER_CLIENT_CERT_AUTH="false"
#ETCD_PEER_TRUSTED_CA_FILE=""
#ETCD_PEER_AUTO_TLS="false"
#
#[Logging]
#ETCD_DEBUG="false"
#ETCD_LOG_PACKAGE_LEVELS=""
#ETCD_LOG_OUTPUT="default"
#
#[Unsafe]
#ETCD_FORCE_NEW_CLUSTER="false"
#
#[Version]
#ETCD_VERSION="false"
#ETCD_AUTO_COMPACTION_RETENTION="0"
#
#[Profiling]
#ETCD_ENABLE_PPROF="false"
#ETCD_METRICS="basic"
#
#[Auth]
#ETCD_AUTH_TOKEN="simple"
3、 启动并验证
[root@centos71 ~]# systemctl enable etcd
[root@centos71 ~]# systemctl start etcd
[root@centos71 ~]# etcdctl set testdir/testkey0 10
10
[root@centos71 ~]# etcdctl get testdir/testkey0
10
[root@centos71 ~]# etcdctl -C http://centos71:4001 cluster-health
member 8e9e05c52164694d is healthy: got healthy result from http://centos71:2379
cluster is healthy
[root@centos71 ~]# etcdctl -C http://centos71:2379 cluster-health
member 8e9e05c52164694d is healthy: got healthy result from http://centos71:2379
cluster is healthy
# 验证正常,本教程搭建的etcd是单机模式,如需搭建集群模式,请参加其他教程。
五、 部署master
1、 安装docker
[root@centos71 ~]# yum install docker -y
配置Docker配置文件,使其允许从registry中拉取镜像
OPTIONS=‘--selinux-enabled --log-driver=journald --signature-verification=false‘
if [ -z "${DOCKER_CERT_PATH}" ]; then
DOCKER_CERT_PATH=/etc/docker
fi
OPTIONS=‘--insecure-registry registry:5000‘
[root@centos71 ~]# systemctl enable docker # 设置开机启动
[root@centos71 ~]# systemctl start docker # 启动
2、 安装kubernetes
[root@centos71 ~]# yum install kubernetes -y
3、 修改kubernetes配置文件
配置以下master节点需要运行的组件:
Kubernets API Server
Kubernets Controller Manager
Kubernets Scheduler
[root@centos71 ~]# vim /etc/kubernetes/apiserver
###
# kubernetes system config
#
# The following values are used to configure the kube-apiserver
#
# The address on the local server to listen to.
KUBE_API_ADDRESS="--insecure-bind-address=0.0.0.0"
# The port on the local server to listen on.
KUBE_API_PORT="--port=8080"
# Port minions listen on
# KUBELET_PORT="--kubelet-port=10250"
# Comma separated list of nodes in the etcd cluster
KUBE_ETCD_SERVERS="--etcd-servers=http://centos71:2379"
# Address range to use for services
KUBE_SERVICE_ADDRESSES="--service-cluster-ip-range=10.0.0.0/16"
# flannel网络段设置
# default admission control policies
#KUBE_ADMISSION_CONTROL="--admission-control=NamespaceLifecycle,NamespaceExists,LimitRanger,SecurityContextDeny,ServiceAccount,ResourceQuota"
KUBE_ADMISSION_CONTROL="--admission-control=NamespaceLifecycle,NamespaceExists,LimitRanger,SecurityContextDeny,ResourceQuota"
# 必须去掉ServiceAccount,否则出现验证错误
# Add your own!
KUBE_API_ARGS=""
[root@centos71 ~]# vim /etc/kubernetes/config
###
# kubernetes system config
#
# The following values are used to configure various aspects of all
# kubernetes services, including
#
# kube-apiserver.service
# kube-controller-manager.service
# kube-scheduler.service
# kubelet.service
# kube-proxy.service
# logging to stderr means we get it in the systemd journal
KUBE_LOGTOSTDERR="--logtostderr=true"
# journal message level, 0 is debug
KUBE_LOG_LEVEL="--v=0"
# Should this cluster be allowed to run privileged docker containers
KUBE_ALLOW_PRIV="--allow-privileged=false"
# How the controller-manager, scheduler, and proxy find the apiserver
KUBE_MASTER="--master=http://centos71:8080"
4、 启动服务
[root@centos71 ~]# systemctl enable kube-apiserver.service
[root@centos71 ~]# systemctl start kube-apiserver.service
[root@centos71 ~]# systemctl enable kube-controller-manager.service
[root@centos71 ~]# systemctl start kube-controller-manager.service
[root@centos71 ~]# systemctl enable kube-scheduler.service
[root@centos71 ~]# systemctl start kube-scheduler.service
六、 部署node
两个节点centos72和centos73均需执行,这里以centos72为例。
1、 安装docker
参见第五章第1节
2、 安装kubernetes
[root@centos72 ~]# yum install kubernetes -y
配置以下master节点需要运行的组件:
Kubelet
Kubernets Proxy
3、 修改kubernetes配置文件
[root@centos72 ~]# vim /etc/kubernetes/config
###
# kubernetes system config
#
# The following values are used to configure various aspects of all
# kubernetes services, including
#
# kube-apiserver.service
# kube-controller-manager.service
# kube-scheduler.service
# kubelet.service
# kube-proxy.service
# logging to stderr means we get it in the systemd journal
KUBE_LOGTOSTDERR="--logtostderr=true"
# journal message level, 0 is debug
KUBE_LOG_LEVEL="--v=0"
# Should this cluster be allowed to run privileged docker containers
KUBE_ALLOW_PRIV="--allow-privileged=false"
# How the controller-manager, scheduler, and proxy find the apiserver
KUBE_MASTER="--master=http://centos71:8080"
[root@centos72 ~]# vim /etc/kubernetes/kubelet
###
# kubernetes kubelet (minion) config
# The address for the info server to serve on (set to 0.0.0.0 or "" for all interfaces)
KUBELET_ADDRESS="--address=0.0.0.0"
# The port for the info server to serve on
# KUBELET_PORT="--port=10250"
# You may leave this blank to use the actual hostname
KUBELET_HOSTNAME="--hostname-override=centos72"
# location of the api-server
KUBELET_API_SERVER="--api-servers=http://centos71:8080"
# pod infrastructure container
KUBELET_POD_INFRA_CONTAINER="--pod-infra-container-image=registry.access.redhat.com/rhel7/pod-infrastructure:latest"
# Add your own!
KUBELET_ARGS=""
4、 启动服务
[root@centos72 ~]# systemctl enable kubelet.service
[root@centos72 ~]# systemctl start kubelet.service
[root@centos72 ~]# systemctl enable kube-proxy.service
[root@centos72 ~]# systemctl start kube-proxy.service
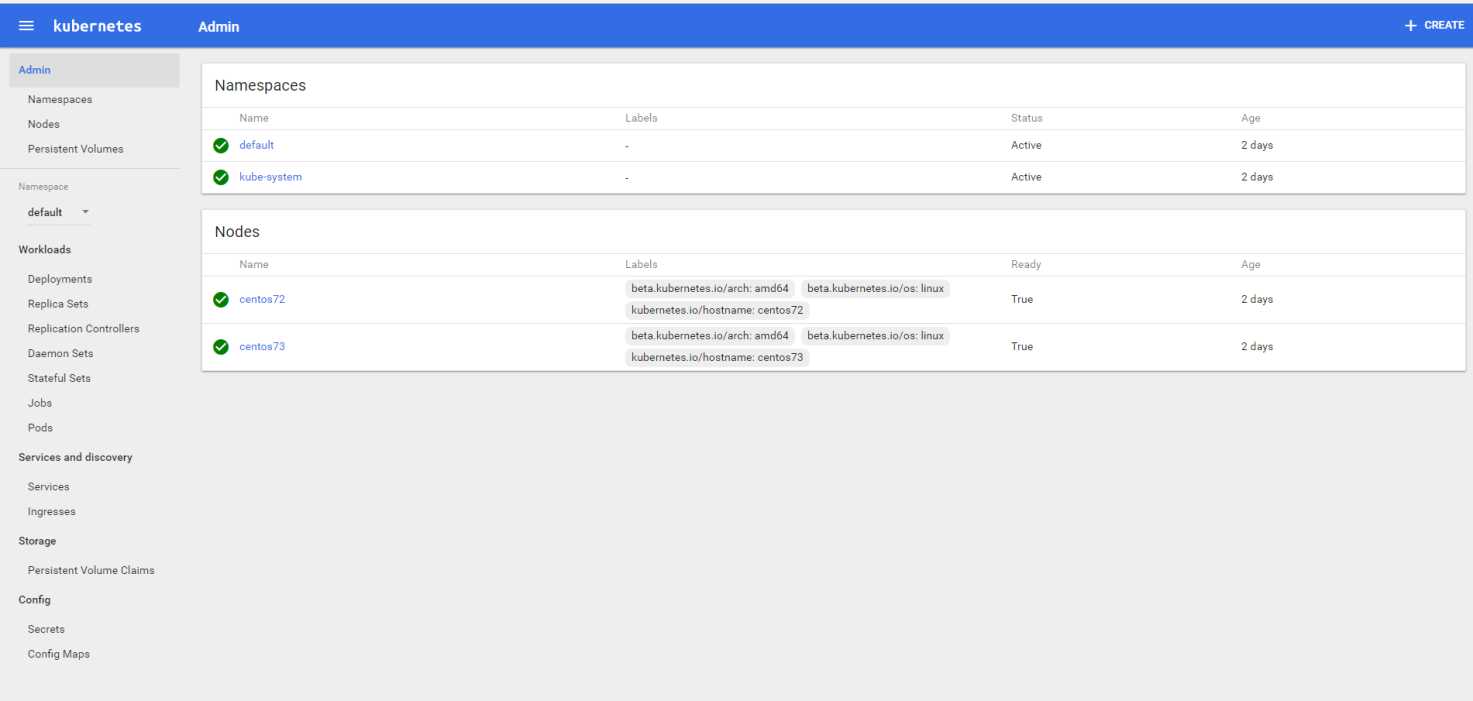
集群配置完成,在master节点centos71上查看集群节点及状态
[root@centos71 ~]# kubectl -s http://centos71:8080 get node
NAME STATUS AGE
centos72 Ready 2d
centos73 Ready 2d
或者
[root@centos71 ~]# kubectl get nodes
NAME STATUS AGE
centos72 Ready 2d
centos73 Ready 2d
至此,已经搭建了一个kubernetes集群,但目前该集群还不能很好的工作,请继续后续的步骤。
七、 创建覆盖网络-Flannel
在master与node节点都需要执行。
1、 安装Flannel
[root@centos71 ~]# yum install flannel -y
2、 配置Flannel
[root@centos71 ~]# vim /etc/sysconfig/flanneld
# Flanneld configuration options
# etcd url location. Point this to the server where etcd runs
FLANNEL_ETCD_ENDPOINTS="http://centos71:2379"
# etcd config key. This is the configuration key that flannel queries
# For address range assignment
FLANNEL_ETCD_PREFIX="/atomic.io/network"
# Any additional options that you want to pass
#FLANNEL_OPTIONS=""
3、 配置etcd中关于flannel的key
Flannel使用Etcd进行配置,来保证多个Flannel实例之间的配置一致性,所以需要在etcd上进行如下配置:(‘/atomic.io/network/config’这个key与上文/etc/sysconfig/flannel中的配置项FLANNEL_ETCD_PREFIX是相对应的,错误的话启动就会出错),网络也与master节点/etc/kubernetes/apiserver中配置的KUBE_SERVICE_ADDRESSES="--service-cluster-ip-range=10.0.0.0/16"保持一致。
[root@centos71 ~]# etcdctl mk /atomic.io/network/config ‘{ "Network": "10.0.0.0/16" }‘
{ "Network": "10.0.0.0/16" }
4、 启动Flannel
启动Flannel之后,需要依次重启docker、kubernetes。
在master节点执行:
systemctl enable flanneld.service
systemctl start flanneld.service
systemctl restart docker
systemctl restart kube-apiserver.service
systemctl restart kube-controller-manager.service
systemctl restart kube-scheduler.service
在node节点上执行:
systemctl enable flanneld.service
systemctl start flanneld.service
systemctl restart docker
systemctl restart kubelet.service
systemctl restart kube-proxy.service
八、 安装dashboard
Dashbord为我们提供了一个便捷的控制台,可以在一定程度上摆脱枯燥的命令行操作,可以用来管理Node,部署应用,性能监控等等。当然,喜欢自己开发自动化工具的人也可以通过kube的api,开发出更加高级的工具。
1、 编辑dashboard的yaml文件
首先在master上新建一个叫ube-system的namespace(有可能已自带)
[root@centos71 ~]# vim kube-namespace.yaml
{
"kind": "Namespace",
"apiVersion": "v1",
"metadata": {
"name": "kube-system"
}
}
[root@centos71 ~]# kubectl create -f kube-namespace.yaml
[root@centos71 ~]# vim kube-dashboard.yaml
# Copyright 2015 Google Inc. All Rights Reserved.
#
# Licensed under the Apache License, Version 2.0 (the "License");
# you may not use this file except in compliance with the License.
# You may obtain a copy of the License at
#
# http://www.apache.org/licenses/LICENSE-2.0
#
# Unless required by applicable law or agreed to in writing, software
# distributed under the License is distributed on an "AS IS" BASIS,
# WITHOUT WARRANTIES OR CONDITIONS OF ANY KIND, either express or implied.
# See the License for the specific language governing permissions and
# limitations under the License.
# Configuration to deploy release version of the Dashboard UI.
#
# Example usage: kubectl create -f <this_file>
kind: Deployment
apiVersion: extensions/v1beta1
metadata:
labels:
app: kubernetes-dashboard
version: v1.5.1
name: kubernetes-dashboard
namespace: kube-system
spec:
replicas: 1
selector:
matchLabels:
app: kubernetes-dashboard
template:
metadata:
labels:
app: kubernetes-dashboard
spec:
containers:
- name: kubernetes-dashboard
image: docker.io/rainf/kubernetes-dashboard-amd64
imagePullPolicy: Always
ports:
- containerPort: 9090
protocol: TCP
args:
# Uncomment the following line to manually specify Kubernetes API server Host
# If not specified, Dashboard will attempt to auto discover the API server and connect
# to it. Uncomment only if the default does not work.
- --apiserver-host=http://192.168.223.155:8080 ## 请修改为自己的kebu-apiserver
livenessProbe:
httpGet:
path: /
port: 9090
initialDelaySeconds: 30
timeoutSeconds: 30
---
kind: Service
apiVersion: v1
metadata:
labels:
app: kubernetes-dashboard
name: kubernetes-dashboard
namespace: kube-system
spec:
type: NodePort
ports:
- port: 80
targetPort: 9090
selector:
app: kubernetes-dashboard
2、 根据dashboard的yaml文件创建pod
[root@centos71 ~]# kubectl create -f kube-dashboard.yaml
deployment "kubernetes-dashboard" created
service "kubernetes-dashboard" created
3、 查看并验证pod
[root@centos71 ~]# kubectl get pods --namespace=kube-system
NAME READY STATUS RESTARTS AGE
kubernetes-dashboard-1472098125-942vp 0/1 ContainerCreating 0 5s
查看该容器的详细过程:
[root@centos71 ~]# skubectl describe pods kubernetes-dashboard-1472098125-942vp --namespace=kube-system
Name: kubernetes-dashboard-1472098125-xptk2
Namespace: kube-system
Node: centos73/192.168.223.157
Start Time: Mon, 12 Mar 2018 12:01:28 +0800
Labels: app=kubernetes-dashboard
pod-template-hash=1472098125
Status: Running
IP: 10.0.86.2
Controllers: ReplicaSet/kubernetes-dashboard-1472098125
Containers:
kubernetes-dashboard:
Container ID: docker://4938e3d24cb6524a47caad183724710e190a9ca907c1d10371c1279c95cb8a5a
Image: docker.io/rainf/kubernetes-dashboard-amd64
Image ID: docker-pullable://docker.io/rainf/kubernetes-dashboard-amd64@sha256:a7f45e6fe292abe69d92426aaca4ec62c0c62097c1aff6b8b12b8cc7a2225345
Port: 9090/TCP
Args:
--apiserver-host=http://192.168.223.155:8080
State: Running
Started: Mon, 12 Mar 2018 12:01:37 +0800
Ready: True
Restart Count: 0
Liveness: http-get http://:9090/ delay=30s timeout=30s period=10s #success=1 #failure=3
Volume Mounts: <none>
Environment Variables: <none>
Conditions:
Type Status
Initialized True
Ready True
PodScheduled True
No volumes.
QoS Class: BestEffort
Tolerations: <none>
Events:
FirstSeen LastSeen Count From SubObjectPath Type Reason Message
--------- -------- ----- ---- ------------- -------- ------ -------
16s 16s 1 {default-scheduler } Normal Scheduled Successfully assigned kubernetes-dashboard-1472098125-xptk2 to centos73
15s 15s 1 {kubelet centos73} spec.containers{kubernetes-dashboard} Normal Pulling pulling image "docker.io/rainf/kubernetes-dashboard-amd64"
16s 7s 2 {kubelet centos73} Warning MissingClusterDNS kubelet does not have ClusterDNS IP configured and cannot create Pod using "ClusterFirst" policy. Falling back to DNSDefault policy.
7s 7s 1 {kubelet centos73} spec.containers{kubernetes-dashboard} Normal Pulled Successfully pulled image "docker.io/rainf/kubernetes-dashboard-amd64"
7s 7s 1 {kubelet centos73} spec.containers{kubernetes-dashboard} Normal Created Created container with docker id 4938e3d24cb6; Security:[seccomp=unconfined]
7s 7s 1 {kubelet centos73} spec.containers{kubernetes-dashboard} Normal Started Started container with docker id 4938e3d24cb6
[root@centos71 ~]# kubectl get pods --namespace=kube-system
NAME READY STATUS RESTARTS AGE
kubernetes-dashboard-1472098125-xptk2 1/1 Running 0 18s
注:有可能会出现Error syncing pod, skipping: failed to "StartContainer" for "POD" with ImagePullBackOff: "Back-off pulling image \"registry.access.redhat.com/rhel7/pod-infrastructure:latest\""的错误。尝试运行docker pull registry.access.redhat.com/rhel7/pod-infrastructure:latest,提示redhat-ca.crt: no such file or directory。ls查看改文件是个软连接,链接目标是/etc/rhsm,查看有没有rpm -qa|grep rhsm,如果没有安装yum install *rhsm*,在每个节点都安装。
4、 访问dashboard
http://192.168.223.155:8080/ui