1:安装memcached等:http://www.runoob.com/memcached/window-install-memcached.html 引用的网上
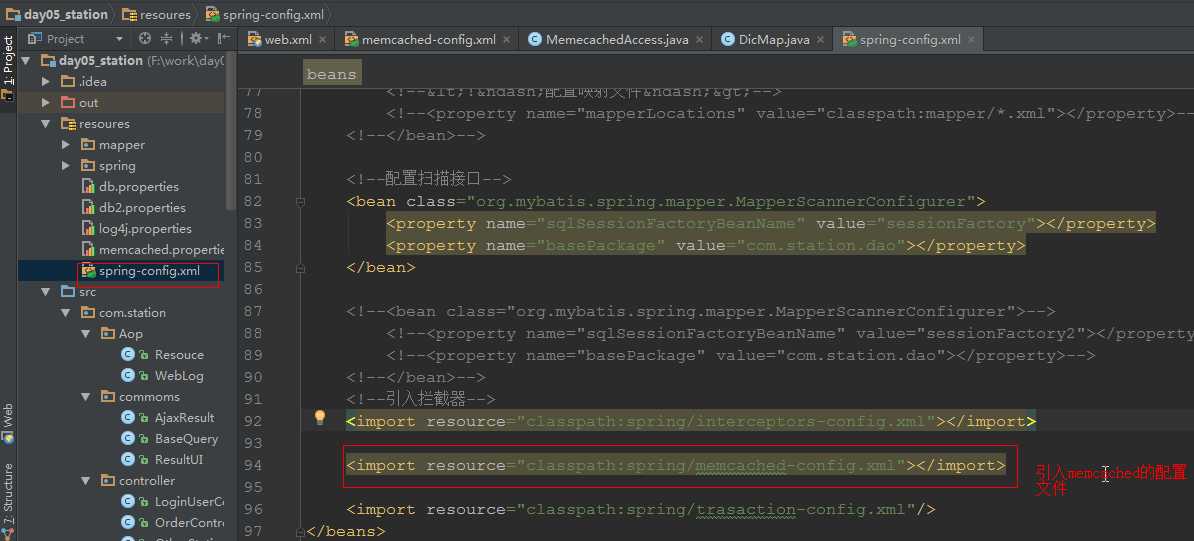
2:memcached与spring整合

<!--配置memcached-->
    <!--<context:property-placeholder location="classpath:memcached.properties"/>-->
    <bean id="memcachedClient" class="net.rubyeye.xmemcached.utils.XMemcachedClientFactoryBean">
        <property name="servers" value="127.0.0.1:11211"/>
        <property name="weights" value="1"/>
        <property name="sessionLocator">
            <bean class="net.rubyeye.xmemcached.impl.KetamaMemcachedSessionLocator" />
        </property>
        <property name="transcoder">
            <bean class="net.rubyeye.xmemcached.transcoders.SerializingTranscoder" />
        </property>
        <property name="bufferAllocator">
            <bean class="net.rubyeye.xmemcached.buffer.SimpleBufferAllocator" />
        </property>
    </bean>

    <bean id="memecachedAccess" class="com.station.util.MemecachedAccess">
        <property name="client" ref="memcachedClient"></property>
    </bean>

</beans>
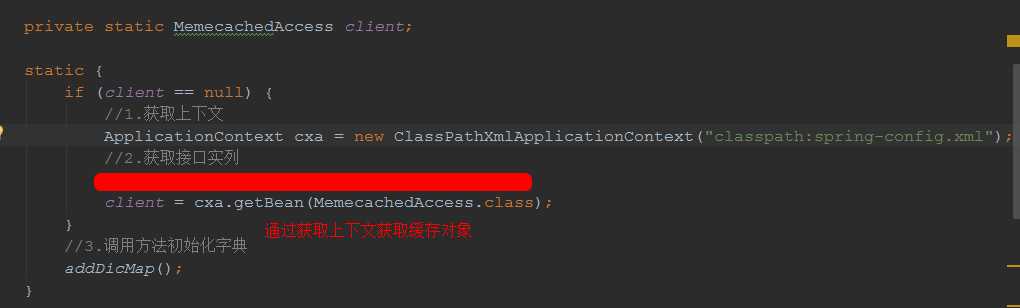
3:自己写的实现类
package com.station.util;

import net.rubyeye.xmemcached.MemcachedClient;

/**
 * Created by Administrator on 2018/1/3 0003.
 */
public class MemecachedAccess {

    private MemcachedClient client;

    public MemcachedClient getClient() {
        return client;
    }

    public void setClient(MemcachedClient client) {
        this.client = client;
    }

    //添加方法  带时间参数
    public boolean put(String key, Integer time, String value) {
        try {
            boolean add = client.add(key, time, value);
            return add;
        } catch (Exception e) {
            e.printStackTrace();
        }
        return false;
    }

    //添加方法
    public boolean put(String key, Object value) {
        try {
            boolean add = client.add(key, 1 * 60 * 60, value);
            return add;
        } catch (Exception e) {
            e.printStackTrace();
        }
        return false;
    }

    // 获取方法
    public String getValue(String key) {
        try {
            String value = client.get(key);
            return value;
        } catch (Exception e) {
            e.printStackTrace();
        }
        return null;
    }

    // 获取方法
    public Object getResouce(String key) {
        try {
            Object value = client.get(key);
            return value;
        } catch (Exception e) {
            e.printStackTrace();
        }
        return null;
    }

    //删除所有

    public void flushAll() {
        try {
            client.flushAll();
        } catch (Exception e) {
            e.printStackTrace();
        }
    }
}
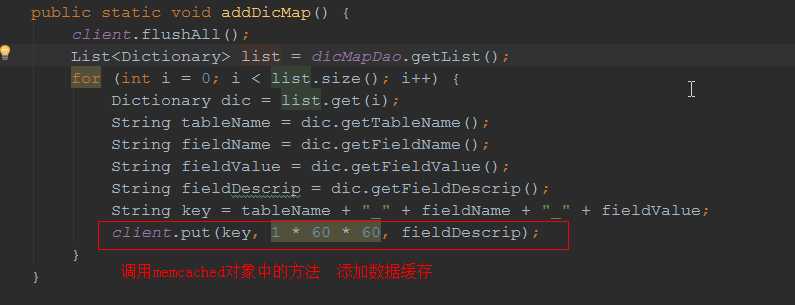
有什么不对的,请对指正!