标签:arch remove center pat 请求 user stop localhost port
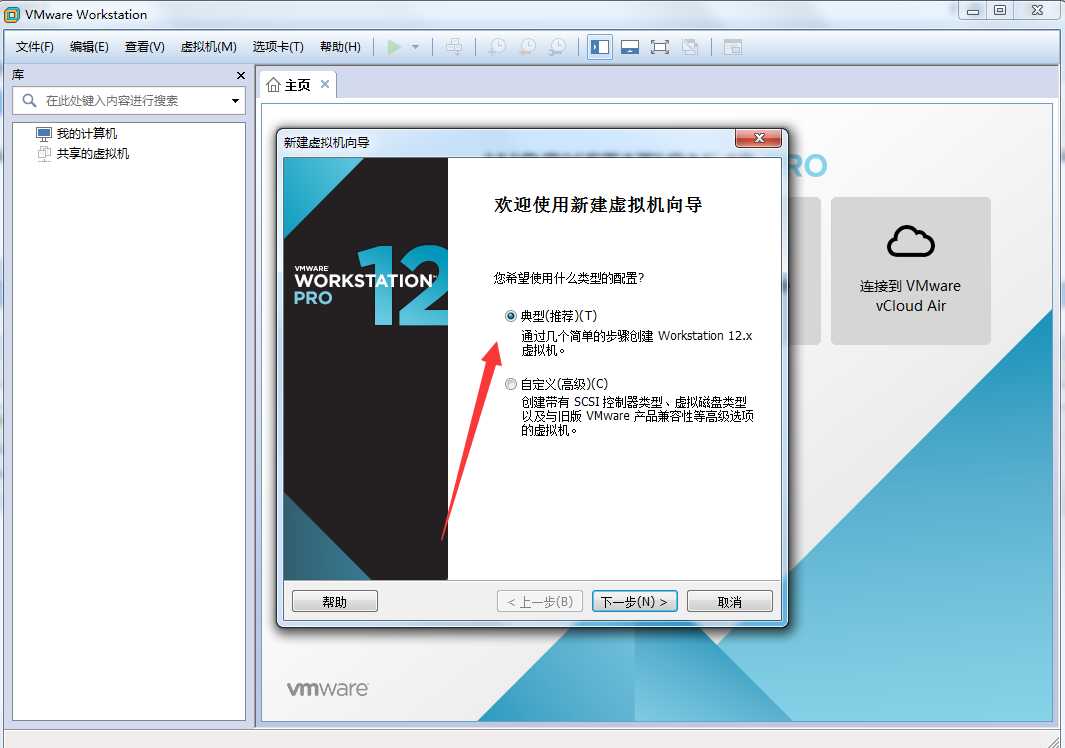
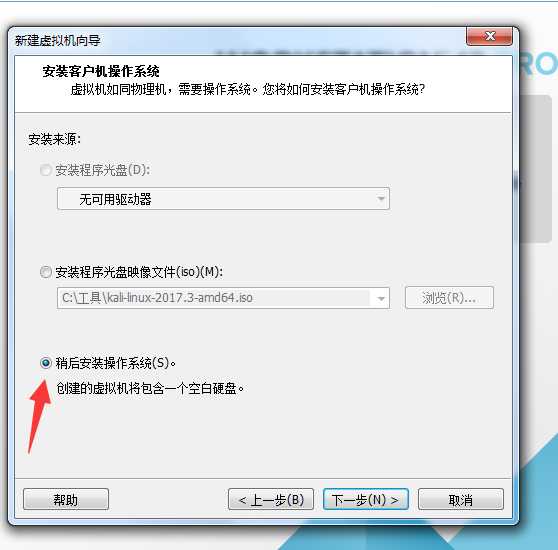
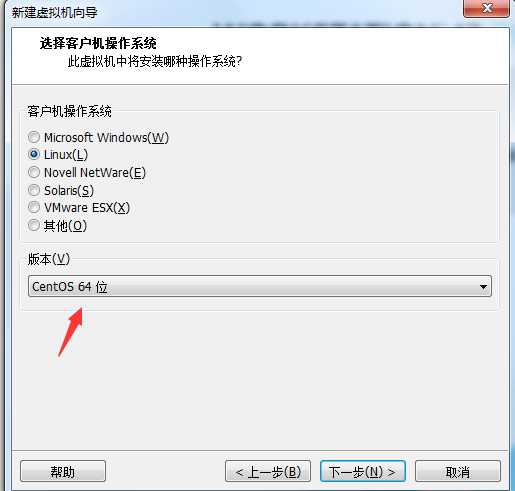
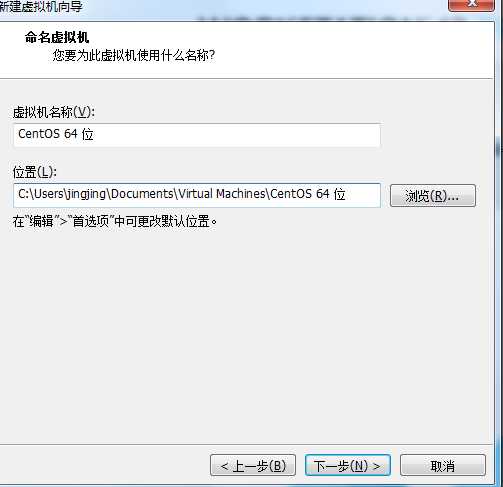
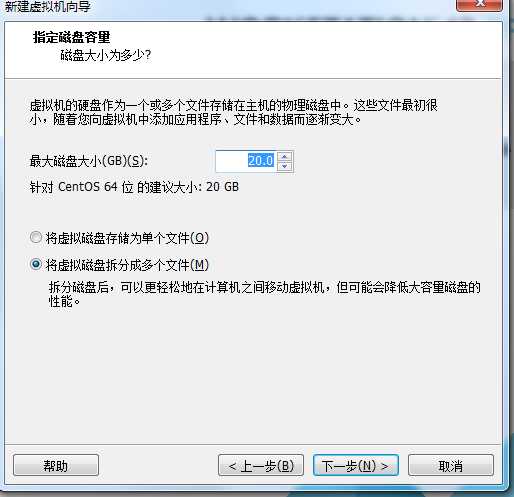
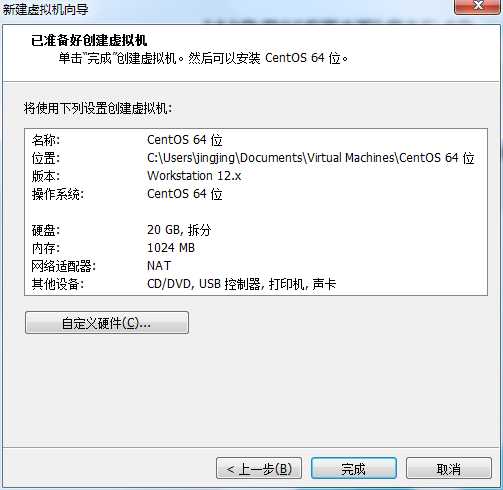
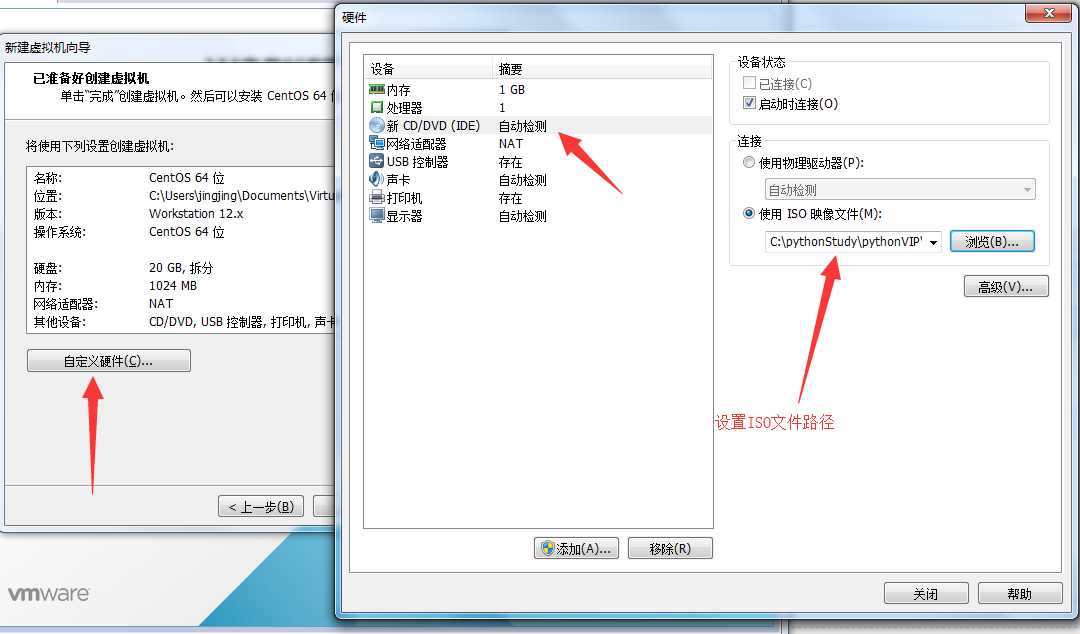
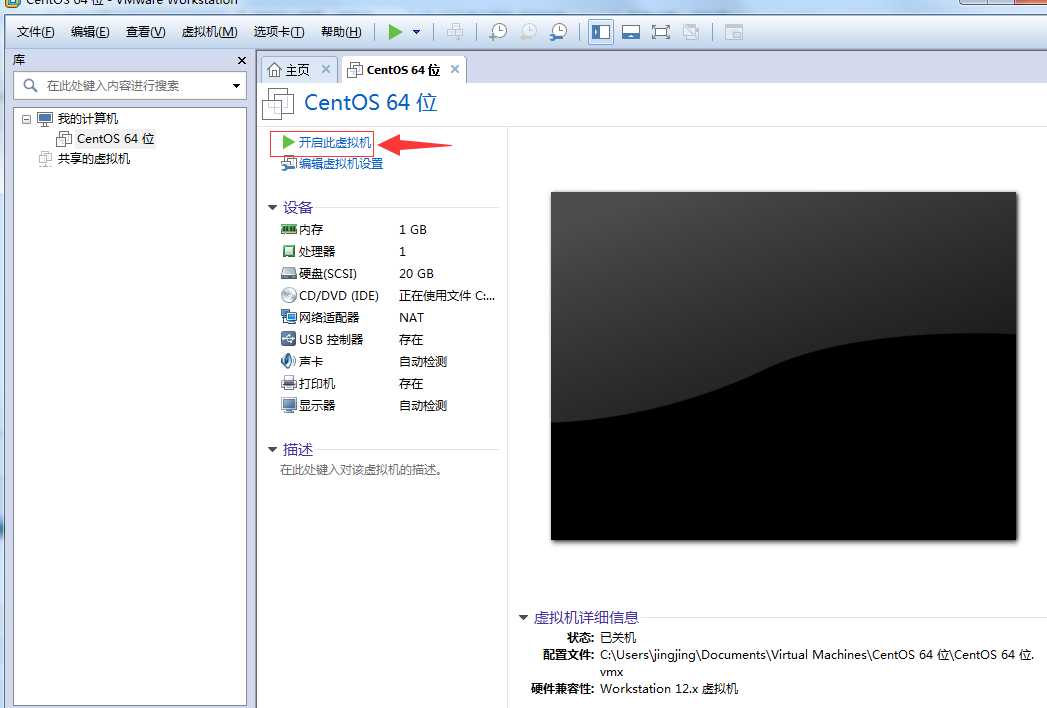
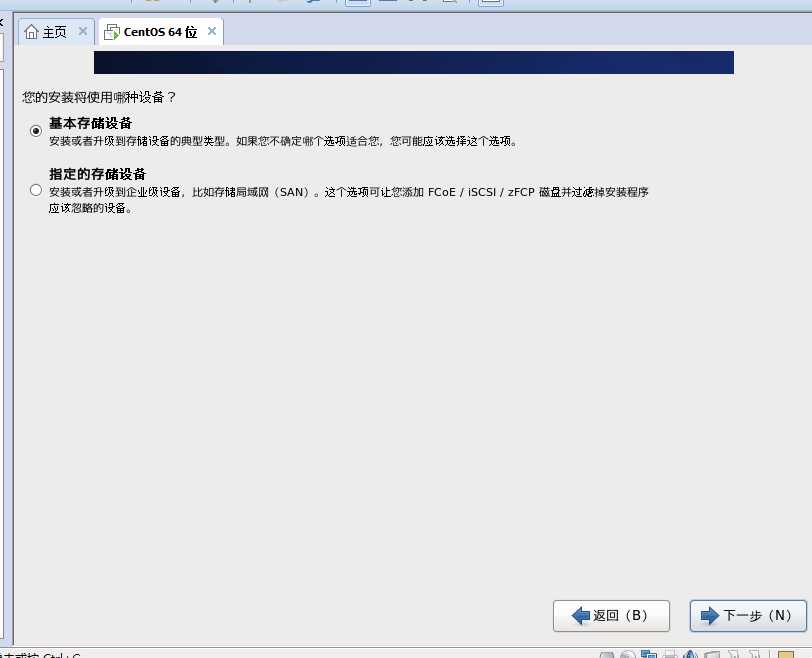
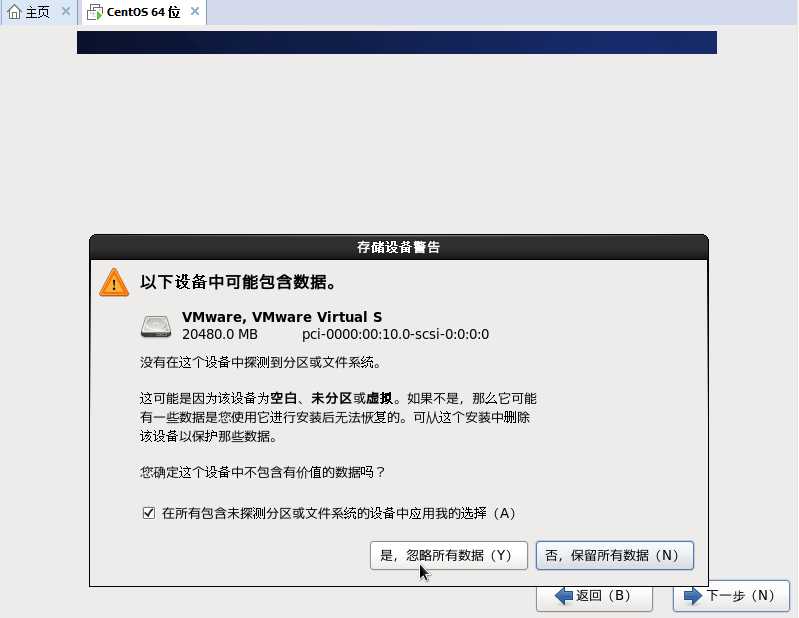
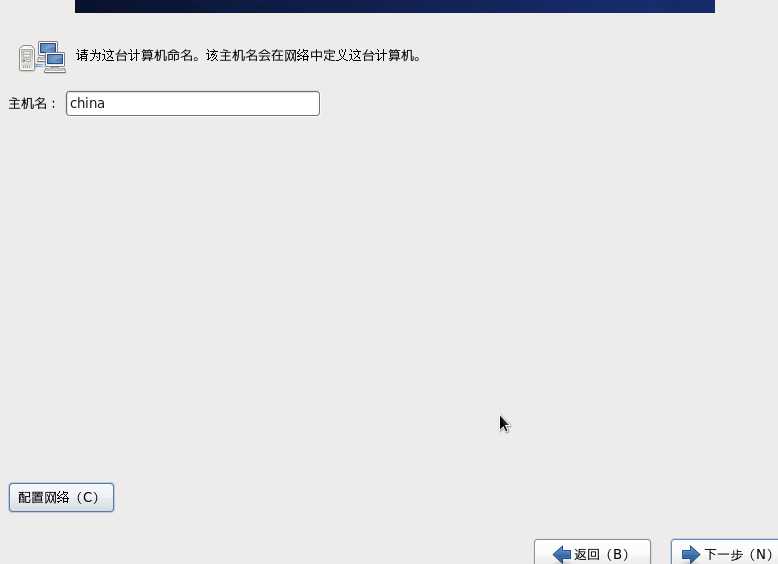

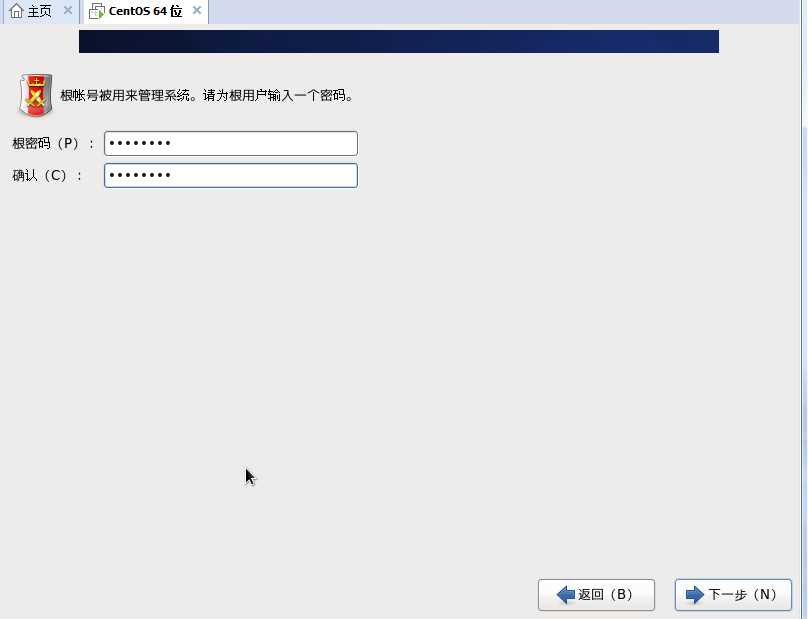
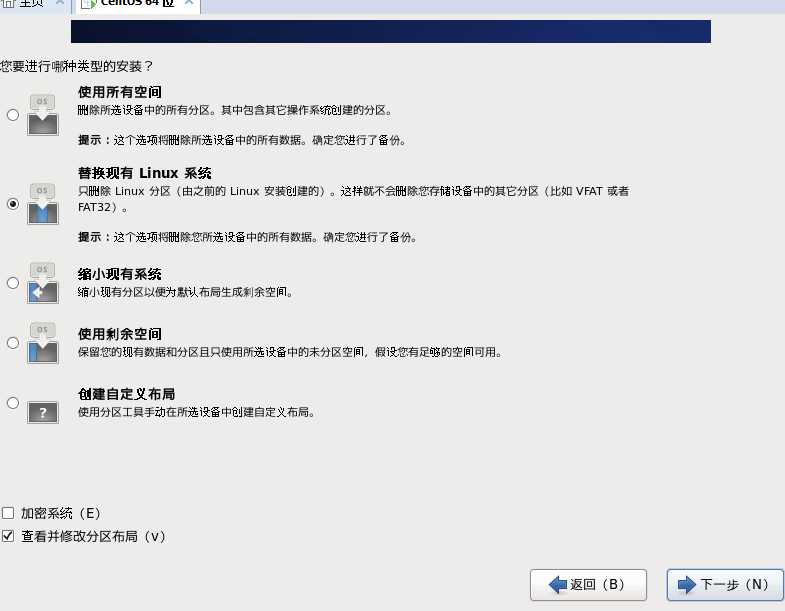
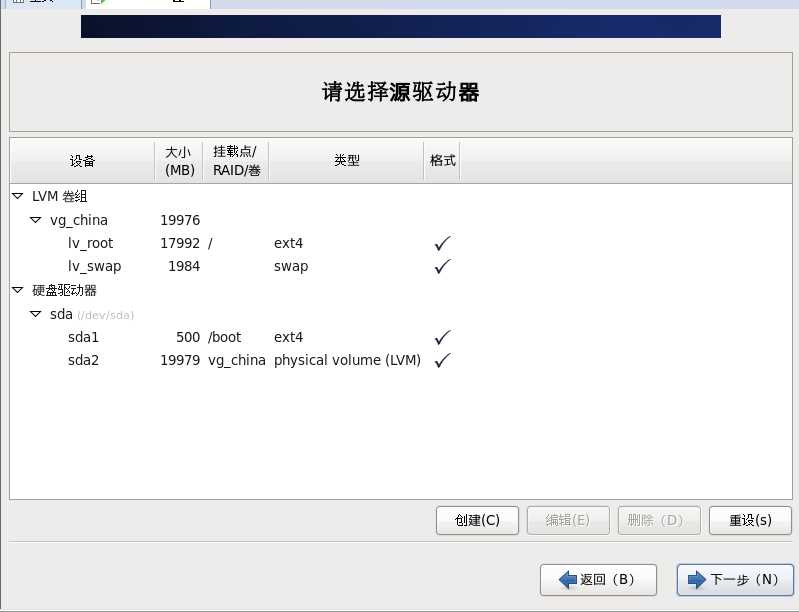
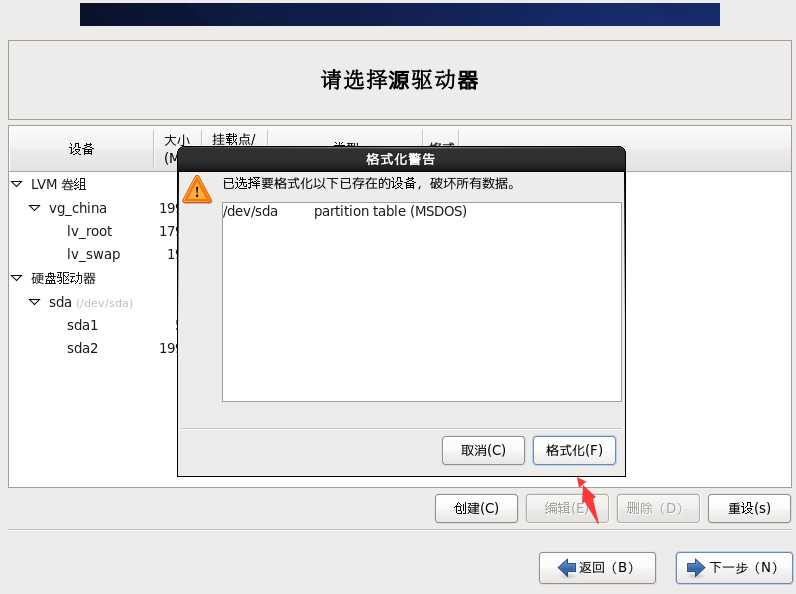
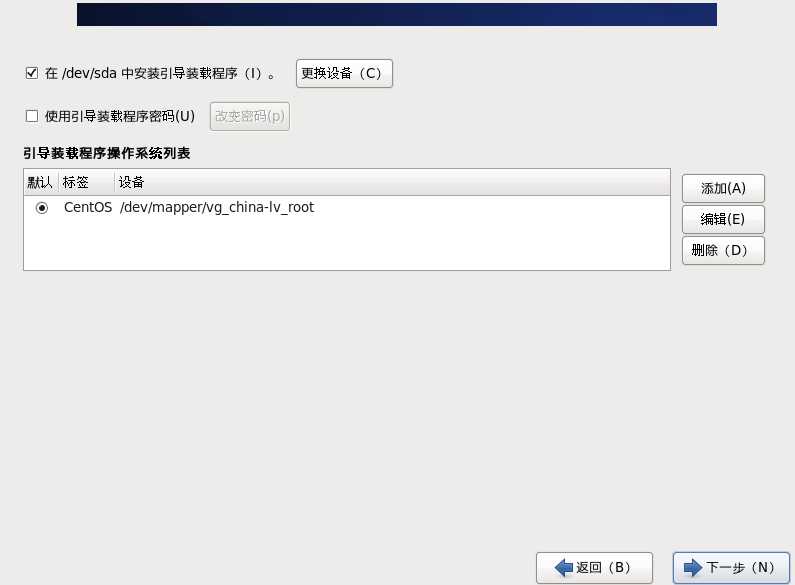
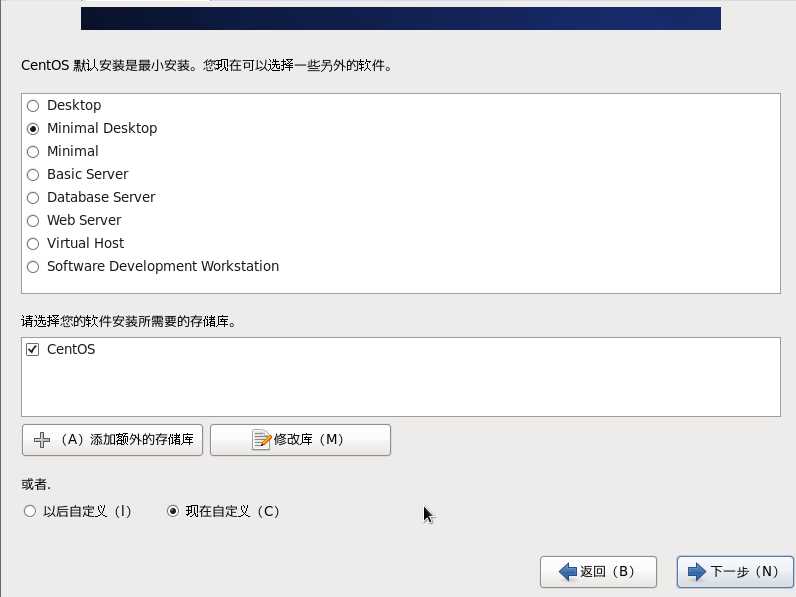
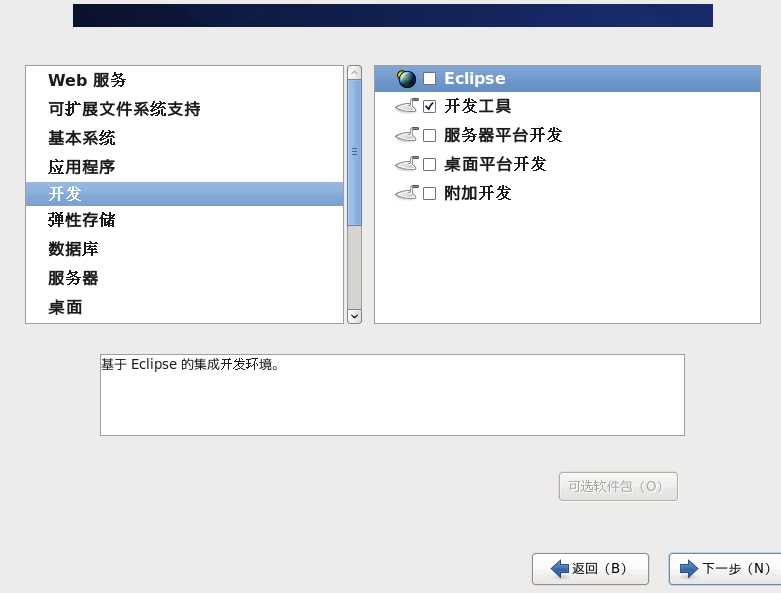
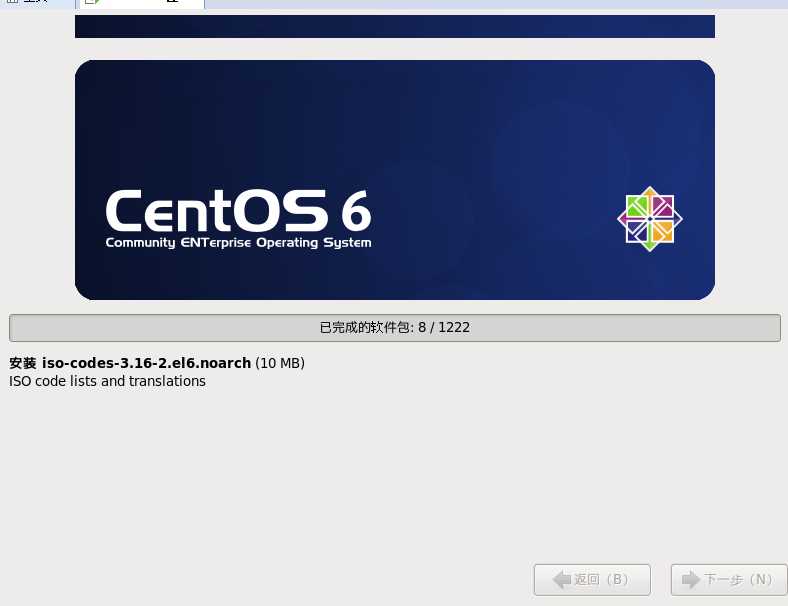


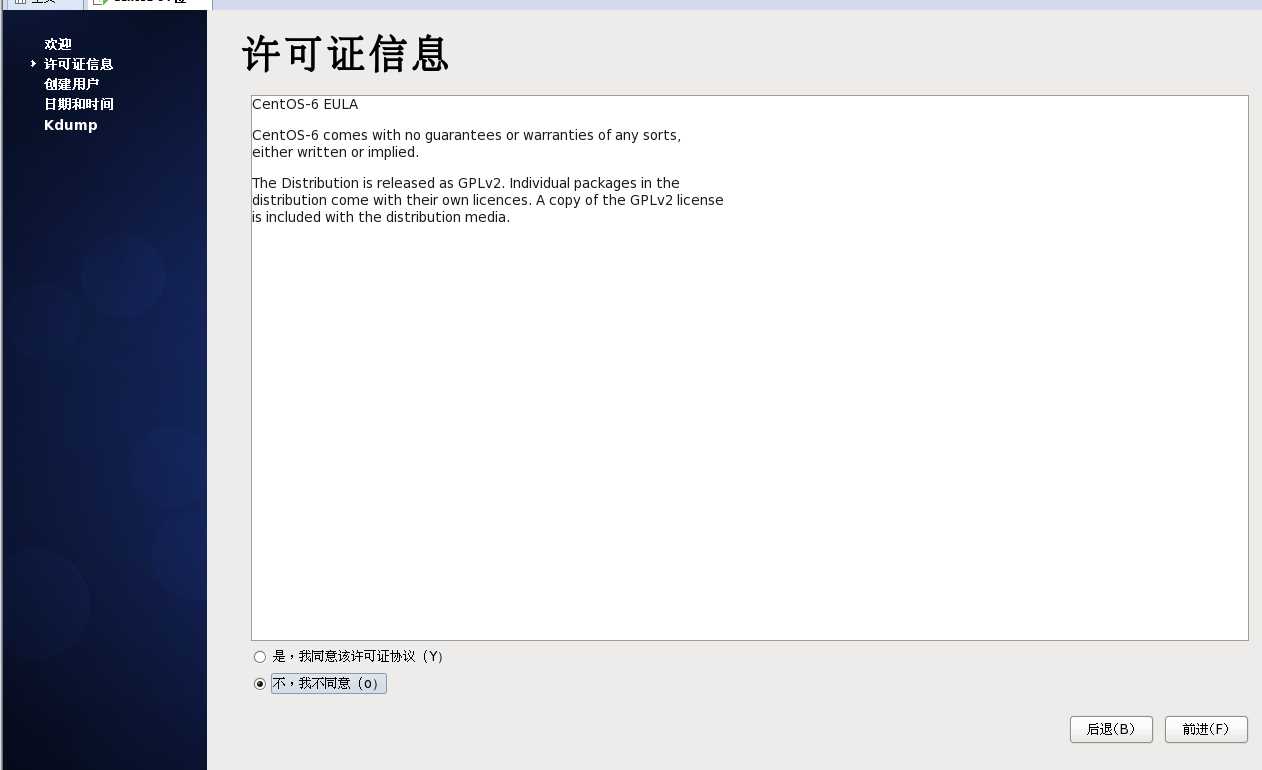
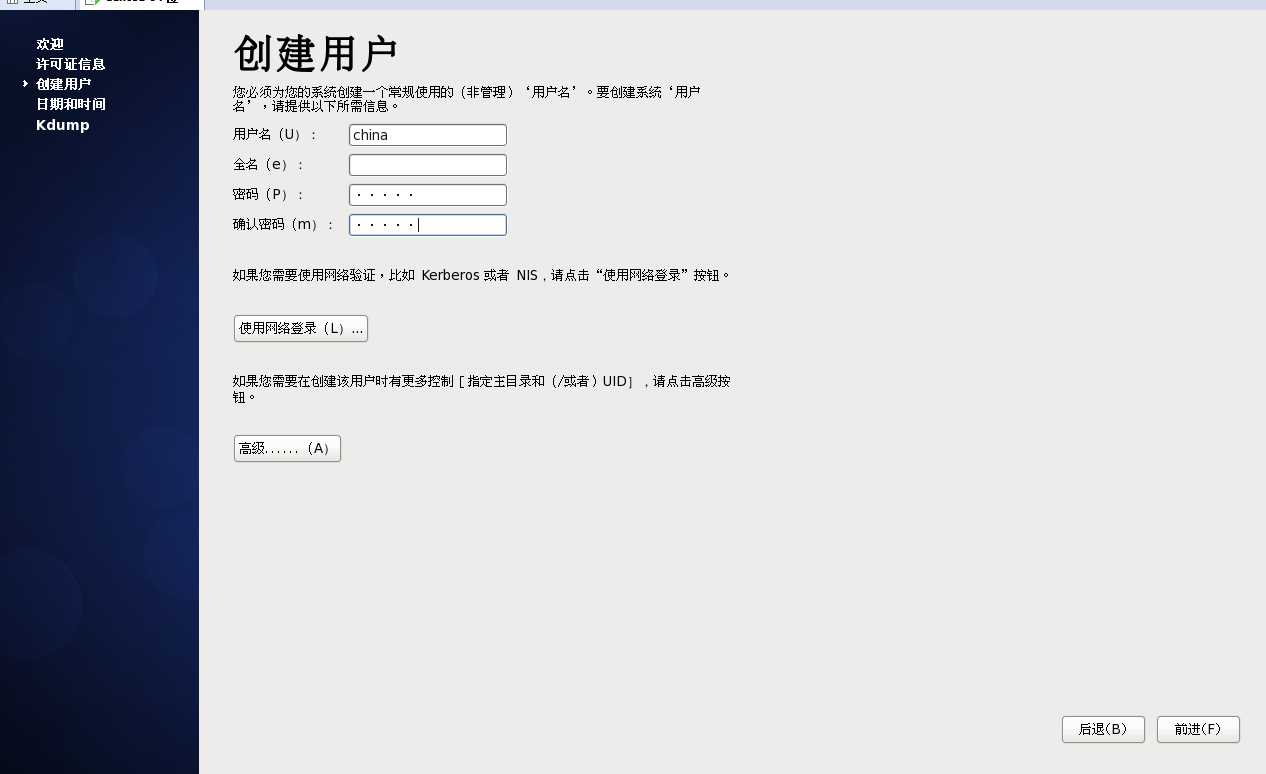
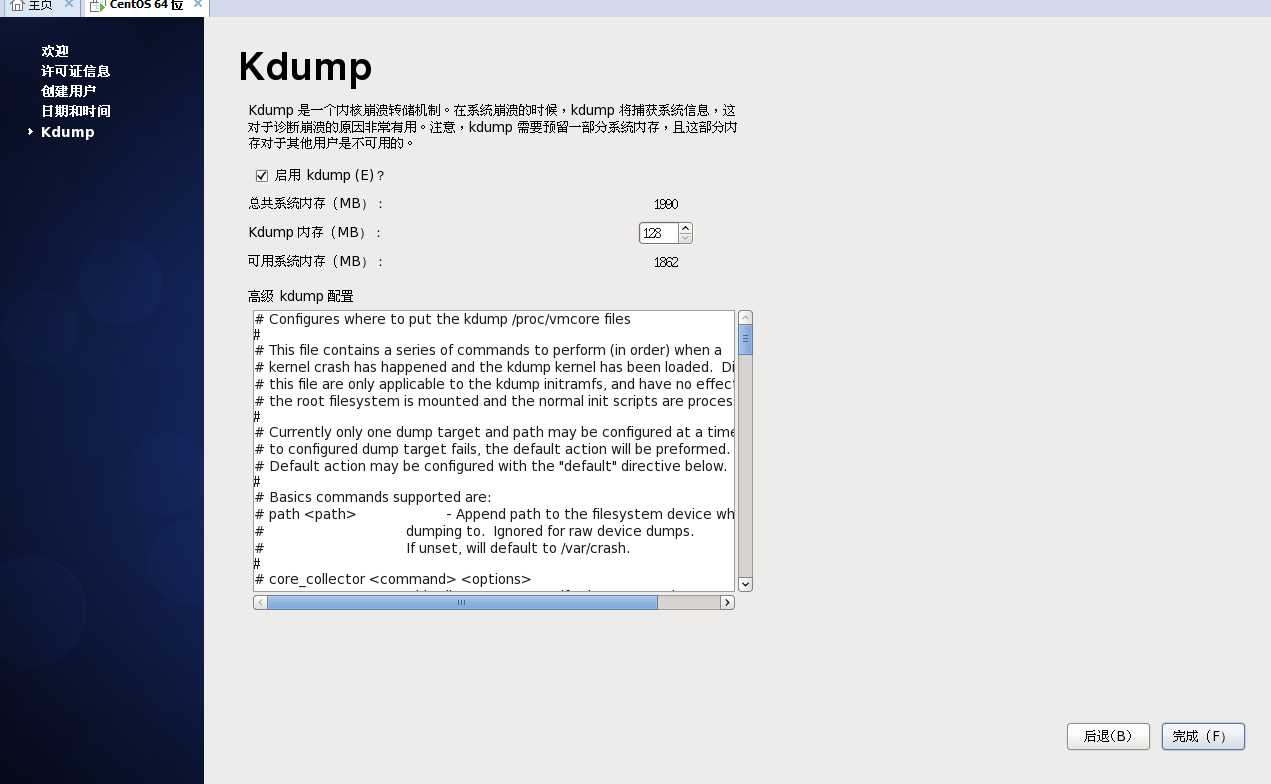
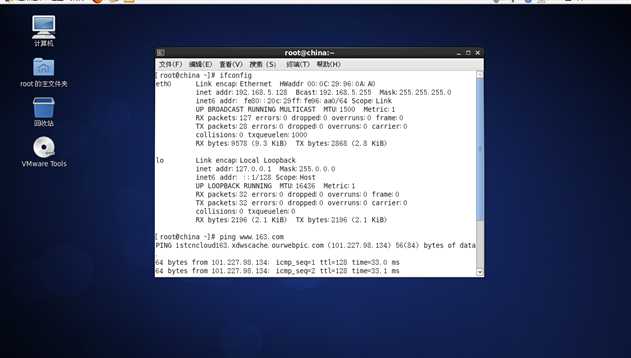
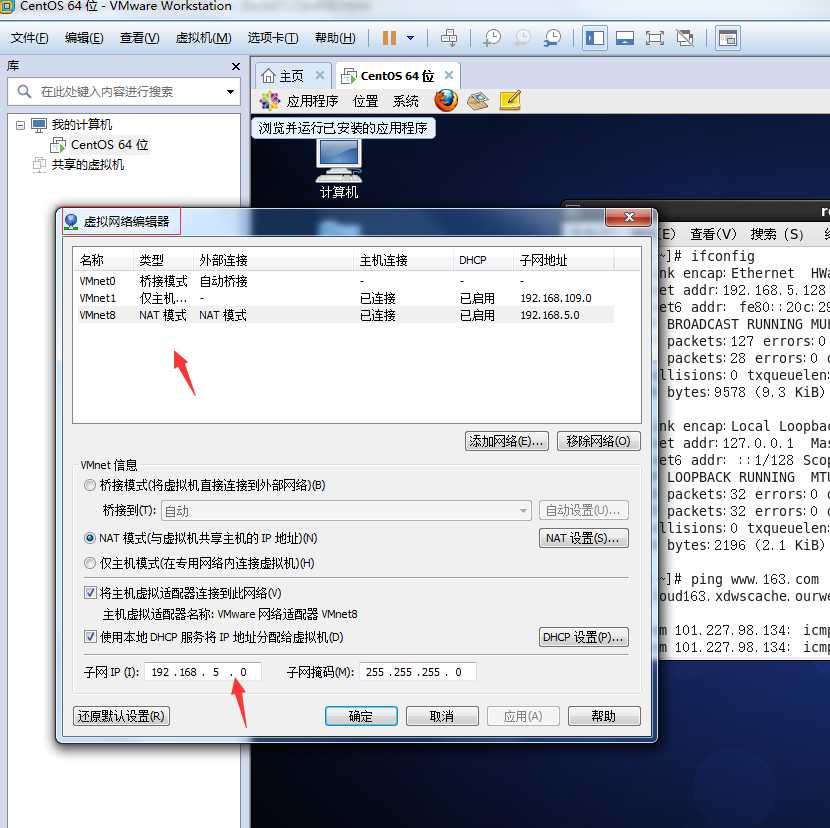
查看网络
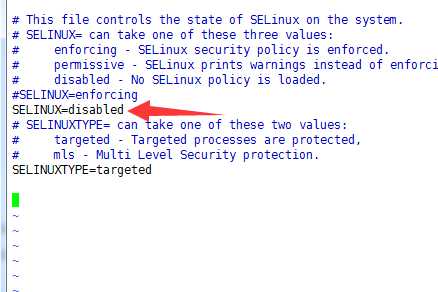
关闭selinux
[root@china ~]# vim /etc/selinux/config
关闭防火墙
关闭命令:  service iptables stop
永久关闭防火墙:chkconfig iptables off

两个命令同时运行,运行完成后查看防火墙关闭状态
service iptables status

永久改变IP地址
[root@china ~]# vi /etc/sysconfig/network-scripts/ifcfg-eth0
编辑网卡eth0的配置文件
编辑文件,保存
ONBOOT=yes
#在开机的的时候启动网络卡
NM_CONTROLLED=yes
BOOTPROTO=static
#使用固定IP
IPADDR=192.168.5.128
PREFIX=24
GATEWAY=192.168.5.2DNS1=192.168.5.2
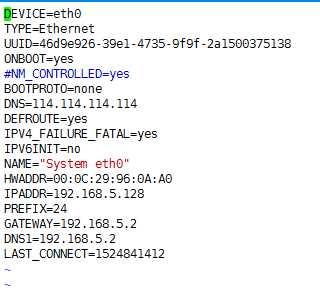
使用“service network restart”命令重新启动network服务,使配置文件生效。四个状态都必须是OK,否则说明设置有问题,需要重新修改设置

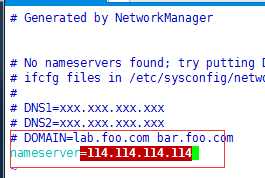
修改/etc/resolv.conf
nameserver=114.114.114.114
测试连接

第一步:备份你的原镜像文件,以免出错后可以恢复。
mv /etc/yum.repos.d/CentOS-Base.repo /etc/yum.repos.d/CentOS-Base.repo.backup
第二步:下载新的CentOS-Base.repo 到/etc/yum.repos.d/
wget -O /etc/yum.repos.d/CentOS-Base.repo http://mirrors.aliyun.com/repo/Centos-6.repo
第三步:运行yum makecache生成缓存
yum makecache
详细内容
[root@china ~]# mv /etc/yum.repos.d/CentOS-Base.repo /etc/yum.repos.d/CentOS-Base.repo.backup
[root@china ~]# wget -O /etc/yum.repos.d/CentOS-Base.repo http://mirrors.aliyun.com/repo/Centos-6.repo
--2018-04-27 23:15:49--  http://mirrors.aliyun.com/repo/Centos-6.repo
正在解析主机 mirrors.aliyun.com... 114.80.174.21, 101.226.181.252, 101.226.181.251, ...
正在连接 mirrors.aliyun.com|114.80.174.21|:80... 已连接。
已发出 HTTP 请求,正在等待回应... 200 OK
长度:2572 (2.5K) [application/octet-stream]
正在保存至: “/etc/yum.repos.d/CentOS-Base.repo”

100%[==============================================================================================================>] 2,572       --.-K/s   in 0.001s

2018-04-27 23:15:50 (3.13 MB/s) - 已保存 “/etc/yum.repos.d/CentOS-Base.repo” [2572/2572])

[root@china ~]# yum makecache
Loaded plugins: fastestmirror, refresh-packagekit, security
Loading mirror speeds from cached hostfile
 * base: mirrors.aliyun.com
 * extras: mirrors.aliyun.com
 * updates: mirrors.aliyun.com
base                                                                                                                             | 3.7 kB     00:00
base/filelists_db                                                                                                                | 6.4 MB     00:03
extras                                                                                                                           | 3.4 kB     00:00
extras/filelists_db                                                                                                              |  26 kB     00:00
extras/prestodelta                                                                                                               | 1.7 kB     00:00
extras/other_db                                                                                                                  |  32 kB     00:00
updates                                                                                                                          | 3.4 kB     00:00
updates/filelists_db                                                                                                             | 4.3 MB     00:02
updates/prestodelta                                                                                                              | 245 kB     00:00
updates/other_db                                                                                                                 | 100 MB     00:57
Metadata Cache Created
[root@china ~]# yum install -y libaio-devel
Loaded plugins: fastestmirror, refresh-packagekit, security
Loading mirror speeds from cached hostfile
 * base: mirrors.aliyun.com
 * extras: mirrors.aliyun.com
 * updates: mirrors.aliyun.com
Setting up Install Process
Package libaio-devel-0.3.107-10.el6.x86_64 already installed and latest version
安装
[root@china mysql]# tar -xzvf mysql-5.5.59-linux-glibc2.12-x86_64.tar.gz


#安装依赖包
yum install -y libaio-devel
#创建用户
useradd -s /sbin/nologin mysql
#创建数据目录
mkdir -p /data/mysql
#赋予权限
chown -R mysql:mysql /data/mysql
#移动到指定目录
mv mysql-5.5.59-linux-glibc2.12-x86_64 /usr/local/mysql
#因为系统有一个默认my.cnf,咱们给它改下名字
mv /etc/my.cnf /etc/my.cnf.default
#复制我们需要的my.cnf到指定目录
cp /usr/local/mysql/support-files/my-large.cnf /etc/my.cnf
#在support-files目录下有几个cnf,根据内存大小来选择
my-small.cnf (内存<=64M)
my-medium.cnf (内存128M)
my-large.cnf (内存512M)
my-huge.cnf (内存1G-2G)
my-innodb-heavy-4G.cnf (内存4GB)

#编辑我们复制过去的my.cnf,并且在[mysqld]的下一行那里插入以下内容
vi /etc/my.cnf

[mysqld]
basedir=/usr/local/mysql
datadir=/data/mysql
character-set-server=utf8

#添加环境变量,在末尾插入以下内容
vi /etc/profile

PATH=/usr/local/mysql/bin:$PATH
export PATH

#让刚才的修改生效
source /etc/profile
#复制启动脚本到指定目录
cp /usr/local/mysql/support-files/mysql.server /etc/init.d/mysqld

#准备工作都做完了,开始初始化数据库
/usr/local/mysql/scripts/mysql_install_db --basedir=/usr/local/mysql --datadir=/data/mysql --user=mysql

#启动数据库
service mysqld start
[root@china mysql]# service mysqld start
Starting MySQL.Logging to ‘/data/mysql/china.err‘.
.                                                          [确定]


#开机启动
chkconfig mysqld on

#初始化mysql的一些设置
mysql_secure_installation
#回车
Enter current password for root (enter for none):
#y,设置mysql的root密码
Setting the root password ensures that nobody can log into the MySQL
root user without the proper authorisation.

Set root password? [Y/n] y
New password:
Re-enter new password:
Password updated successfully!
Reloading privilege tables..
 ... Success!


By default, a MySQL installation has an anonymous user, allowing anyone
to log into MySQL without having to have a user account created for
them.  This is intended only for testing, and to make the installation
go a bit smoother.  You should remove them before moving into a
production environment.

Remove anonymous users? [Y/n] y
 ... Success!

Normally, root should only be allowed to connect from ‘localhost‘.  This
ensures that someone cannot guess at the root password from the network.

Disallow root login remotely? [Y/n] y
 ... Success!

By default, MySQL comes with a database named ‘test‘ that anyone can
access.  This is also intended only for testing, and should be removed
before moving into a production environment.

Remove test database and access to it? [Y/n] y
 - Dropping test database...
 ... Success!
 - Removing privileges on test database...
 ... Success!

Reloading the privilege tables will ensure that all changes made so far
will take effect immediately.

Reload privilege tables now? [Y/n] y
 ... Success!

Cleaning up...


All done!  If you‘ve completed all of the above steps, your MySQL
installation should now be secure.

Thanks for using MySQL!
#重启mysql
[root@china mysql]# service mysqld restart
Shutting down MySQL.                                       [确定]
Starting MySQL..                                           [确定]
#查看mysql进程
[root@china mysql]# ps -ef|grep mysql
root       9966      1  0 23:38 pts/0    00:00:00 /bin/sh /usr/local/mysql/bin/mysqld_safe --datadir=/data/mysql --pid-file=/data/mysql/china.pid
mysql     10290   9966  0 23:38 pts/0    00:00:00 /usr/local/mysql/bin/mysqld --basedir=/usr/local/mysql --datadir=/data/mysql --plugin-dir=/usr/local/mysql/lib/plugin --user=mysql --log-error=china.err --pid-file=/data/mysql/china.pid --socket=/tmp/mysql.sock --port=3306
root      10315   7503  0 23:38 pts/0    00:00:00 grep mysql
登录mysql,查看数据库信息,并创建用户
#登录mysql
[root@china mysql]# mysql -u root -p

Welcome to the MySQL monitor.  Commands end with ; or \g.
Your MySQL connection id is 1
Server version: 5.5.59-log MySQL Community Server (GPL)

Copyright (c) 2000, 2018, Oracle and/or its affiliates. All rights reserved.

Oracle is a registered trademark of Oracle Corporation and/or its
affiliates. Other names may be trademarks of their respective
owners.

Type ‘help;‘ or ‘\h‘ for help. Type ‘\c‘ to clear the current input statement.

mysql> show databases;
+--------------------+
| Database           |
+--------------------+
| information_schema |
| mysql              |
| performance_schema |
+--------------------+
3 rows in set (0.00 sec)

mysql> create database testmysql
    -> ;
Query OK, 1 row affected (0.00 sec)

mysql>
mysql> use testmysql


mysql> create table test1( `id` int auto_increment,  `name` varchar(30) not null, grade int, primary key (`id`));
Query OK, 0 rows affected (0.01 sec)

mysql> SHOW CREATE TABLE `test1` \G
*************************** 1. row ***************************
       Table: test1
Create Table: CREATE TABLE `test1` (
  `id` int(11) NOT NULL AUTO_INCREMENT,
  `name` varchar(30) NOT NULL,
  `grade` int(11) DEFAULT NULL,
  PRIMARY KEY (`id`)
) ENGINE=InnoDB DEFAULT CHARSET=utf8
1 row in set (0.00 sec)

mysql> desc test1
    -> ;
+-------+-------------+------+-----+---------+----------------+
| Field | Type        | Null | Key | Default | Extra          |
+-------+-------------+------+-----+---------+----------------+
| id    | int(11)     | NO   | PRI | NULL    | auto_increment |
| name  | varchar(30) | NO   |     | NULL    |                |
| grade | int(11)     | YES  |     | NULL    |                |
+-------+-------------+------+-----+---------+----------------+
3 rows in set (0.00 sec)

#创建用户
mysql> CREATE USER ‘yycenter‘@‘%‘ IDENTIFIED BY ‘qwe123‘;
#给用户赋予权限
mysql> GRANT ALL  ON *.* TO ‘yycenter‘@‘%‘;
#使更改立即生效
mysql> FLUSH PRIVILEGES;
#退出
mysql> \q

mysql> CREATE USER ‘yycenter‘@‘%‘ IDENTIFIED BY ‘qwe123‘;
Query OK, 0 rows affected (0.00 sec)

mysql> GRANT ALL  ON *.* TO ‘yycenter‘@‘%‘;
Query OK, 0 rows affected (0.00 sec)

mysql> flush privileges;
Query OK, 0 rows affected (0.00 sec)


mysql> use mysql
Database changed
mysql> select host,user,password from user;
+-----------+----------+-------------------------------------------+
| host      | user     | password                                  |
+-----------+----------+-------------------------------------------+
| localhost | root     | *F861720E101148897B0F5239DB926E756B1C28B3 |
| 127.0.0.1 | root     | *F861720E101148897B0F5239DB926E756B1C28B3 |
| ::1       | root     | *F861720E101148897B0F5239DB926E756B1C28B3 |
| %         | yycenter | *8DCDD69CE7D121DE8013062AEAEB2A148910D50E |
+-----------+----------+-------------------------------------------+
4 rows in set (0.00 sec)
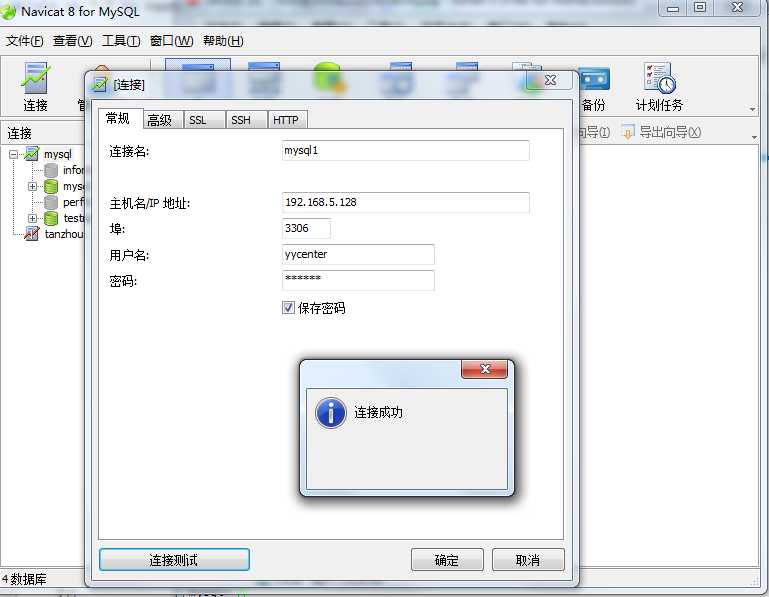
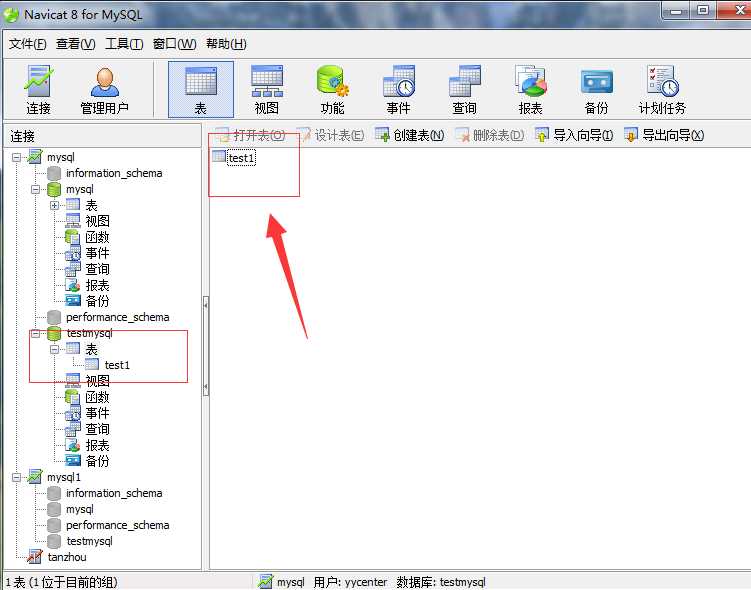
设置Navicat连接mysql
标签:arch remove center pat 请求 user stop localhost port
原文地址:https://www.cnblogs.com/xiao-apple36/p/8964640.html