标签:extend 联网 des 开发 stop 自己 浏览器信息 info 安全性
1.主题:
简单爬取简书中的专题‘’@IT·互联网“中的文章,爬取信息之后通过jieba分词生成词云并且进行分析;
2.实现过程:
第一步:打开简书并进入到@IT-互联网专题
网页链接:https://www.jianshu.com/c/V2CqjW?utm_medium=index-collections&utm_source=desktop

通过观察,我们可以发现网页中的文章并没有分页,而是通过下拉滚动条js生成下一页
我们可以进入开发者工具观察得知,每次拉到网页的最后都会多一条请求,仔细观察它们之间是存在着一定的规律的


它们都是https://www.jianshu.com/c/V2CqjW?order_by=added_at&page={}这样的格式,改变的值只是page中的数字,是否这就是我们所需要的页码呢,可以通过访问途中链接验证。
现在我们已经取得所需要的链接,便可写出循环的代码,
但是我们并不知道具体有多少页,这时,我们通过观察网页以及网页源码,可以发现

在专题下面有收录了多少篇文章的字样,即我们只需要获取到共有多少篇文章再除以每页多少篇文章即可得出总页数。分析源码可以轻松找到

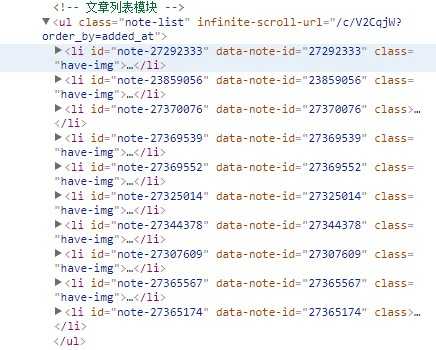
然后我们就可以写出以下代码来获取它的页数
注意,由于网页的安全性问题,直接使用requests,get(url)是无法获取到简书网页的源码的,所以我们要加上浏览器信息
获取方法

接着,编写代码
headers = {
        ‘User-Agent‘: ‘Mozilla/5.0 (Windows NT 6.1; Win64; x64) AppleWebKit/537.36 (KHTML, like Gecko) Chrome/65.0.3325.181 Safari/537.36‘
    }
def getPageN():
    url = ‘https://www.jianshu.com/c/V2CqjW?utm_medium=index-collections&utm_source=desktop‘
    resp = requests.get(url, headers=headers)
    html_content = resp.text  # 得到网页内容
    soup = BeautifulSoup(html_content, ‘lxml‘)  # 开始解析
    info = soup.select(‘.info‘)[0].text
    pagenumber=int(info[info.find(‘收录了‘):].split()[0].lstrip(‘收录了‘).rstrip(‘篇文章‘))
    a = len(soup.find_all(‘a‘, class_=‘title‘))
    page = pagenumber//a+1
    return page
第二步:取出一个文章列表页的全部文章
观察网页源码可知道每篇文章的具体链接是

最后通过循环获得所有文章的链接
def getListPage(pageUrl):
    res = requests.get(pageUrl,headers=headers)
    html_content = res.text
    soup = BeautifulSoup(html_content, ‘lxml‘)

    newslist = []
    for i in range(len(soup.find_all(‘a‘, class_=‘title‘))):
        Url = soup.find_all(‘a‘, class_=‘title‘)[i].attrs[‘href‘]
        newsUrl = "https://www.jianshu.com" + Url
        newslist.append(getNewsDetail(newsUrl))

    return(newslist)
第三步:获得一篇文章的全部内容,并进行分析
def getNewsDetail(newsUrl):   #一篇文章的全部内容
    resd = requests.get(newsUrl,headers=headers)
    html_content = resd.text
    soupd = BeautifulSoup(html_content, ‘lxml‘)

    news = {}
    news[‘标题‘] = soupd.select(‘.title‘)[0].text
    news[‘作者‘] = soupd.select(‘.name‘)[0].text
    news[‘时间‘] = datetime.strptime(soupd.select(‘.publish-time‘)[0].text.rstrip(‘*‘), ‘%Y.%m.%d %H:%M‘)
    news[‘字数‘] = soupd.select(‘.wordage‘)[0].text.lstrip(‘字数 ‘)
    # news[‘内容‘] = soupd.select(‘.show-content-free‘)[0].text.strip()
    news[‘链接‘] = newsUrl
    content= soupd.select(‘.show-content-free‘)[0].text.strip()
    writeNewsDetail(content)
    return(news)
到这里,基本的爬取工作已经完成了
3.把数据保存成文本:
def writeNewsDetail(content):
    f = open(‘content.txt‘,‘a‘,encoding=‘utf-8‘)
    f.write(content)
    f.close()
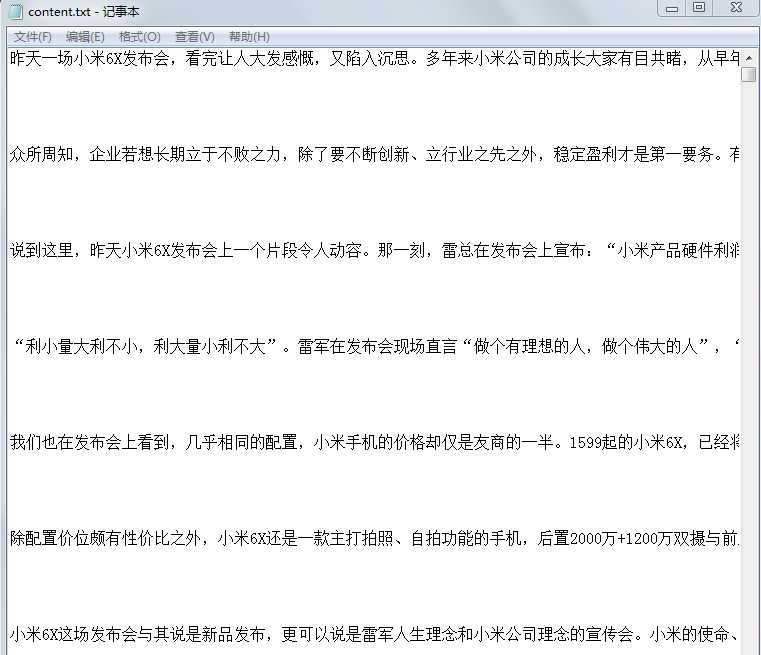
以及生成excel表格
import pandas
df = pandas.DataFrame(newstotal)
df.to_excel(‘简书数据.xlsx‘)
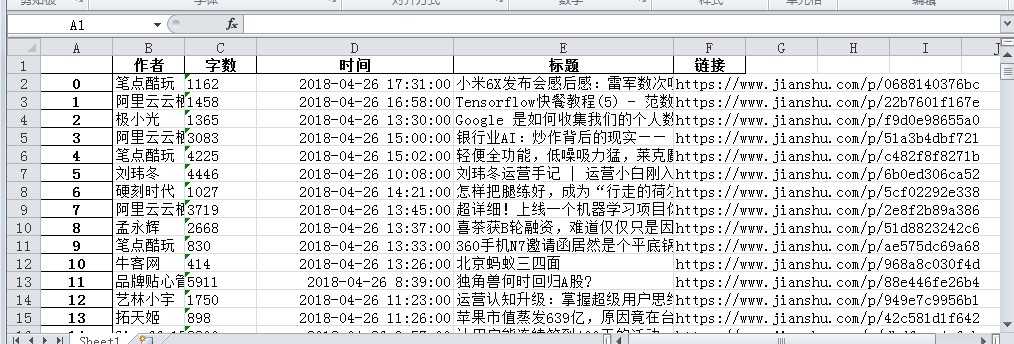
4.生成词云:
file = codecs.open(‘content.txt‘, ‘r‘, ‘utf-8‘)
image=np.array(Image.open(‘ditu.jpg‘))
font=r‘C:\Windows\Fonts\AdobeHeitiStd-Regular.otf‘
word=file.read()
#去掉英文,保留中文
resultword=re.sub("[A-Za-z0-9\[\`\~\!\@\#\$\^\&\*\(\)\=\|\{\}\‘\:\;\‘\,\[\]\.\<\>\/\?\~\!\@\#\\\&\*\%]", "",word)
wordlist_after_jieba = jieba.cut(resultword, cut_all = True)

wl_space_split = " ".join(wordlist_after_jieba)

# 设置停用词
stopwords = set(STOPWORDS)
stopwords.add("一个")
my_wordcloud = WordCloud(font_path=font,mask=image,stopwords=stopwords,background_color=‘white‘,max_words = 2000,max_font_size = 100,random_state=50).generate(wl_space_split)
#根据图片生成词云
iamge_colors = ImageColorGenerator(image)
#my_wordcloud.recolor(color_func = iamge_colors)
#显示生成的词云
plt.imshow(my_wordcloud)
plt.axis("off")
plt.show()
#保存生成的图片,当关闭图片时才会生效,中断程序不会保存
my_wordcloud.to_file(‘result.jpg‘)
生成的词云图片:
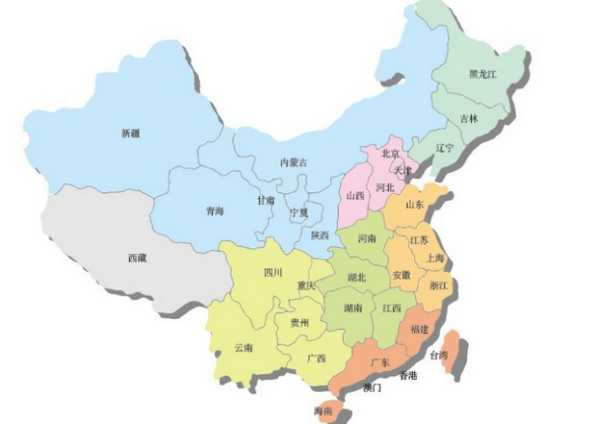

5.遇到的问题:
1、文章总页数只能爬取到200页,再继续爬取下去出现的只是重复的数据,没有找到解决办法,但是对于练习而言,两百页的数据也足够了。
2、安装词云遇到的问题
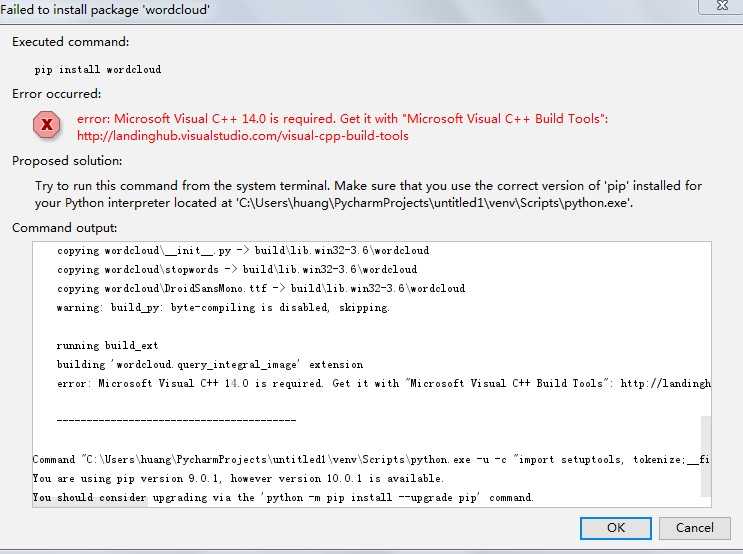
解决办法:
通过阅读其他博客寻找到的解决办法
在https://www.lfd.uci.edu/~gohlke/pythonlibs/#wordcloud 中下载对应python版本和window 32/64位版本
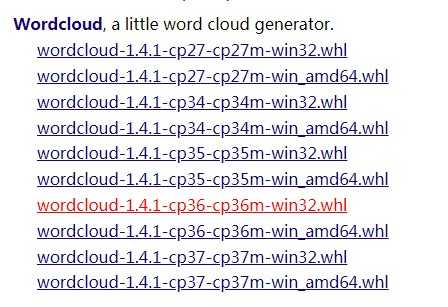
因为我电脑的python版本是3.6,32位系统,所以下载 wordcloud?1.4.1?cp36?cp36m?win32.whl文件并把文件放在D盘
cmd命令行进入对应wordcloud安装路径,我是放在F盘,所以进入D:输入 pip install wordcloud?1.4.1?cp36?cp36m?win32.whl 即可成功导入
最后,手动为pycharm添加lib,手动找到wordCloud安装路径,复制到C:\User\ - \PycharmProjects\**\verv\lib 中即可,(**表示自己创建的项目名字)

6.完整代码:
import re
import requests
import pandas
from bs4 import BeautifulSoup
from datetime import datetime
import jieba
import matplotlib.pyplot as plt
from wordcloud import WordCloud, STOPWORDS, ImageColorGenerator
import codecs
import numpy as np
from PIL import Image

headers = {
        ‘User-Agent‘: ‘Mozilla/5.0 (Windows NT 6.1; Win64; x64) AppleWebKit/537.36 (KHTML, like Gecko) Chrome/65.0.3325.181 Safari/537.36‘
    }

def writeNewsDetail(content):
    f = open(‘content.txt‘,‘a‘,encoding=‘utf-8‘)
    f.write(content)
    f.close()

def getNewsDetail(newsUrl):   #一篇文章的全部内容
    resd = requests.get(newsUrl,headers=headers)
    html_content = resd.text
    soupd = BeautifulSoup(html_content, ‘lxml‘)

    news = {}
    news[‘标题‘] = soupd.select(‘.title‘)[0].text
    news[‘作者‘] = soupd.select(‘.name‘)[0].text
    news[‘时间‘] = datetime.strptime(soupd.select(‘.publish-time‘)[0].text.rstrip(‘*‘), ‘%Y.%m.%d %H:%M‘)
    news[‘字数‘] = soupd.select(‘.wordage‘)[0].text.lstrip(‘字数 ‘)
    # news[‘内容‘] = soupd.select(‘.show-content-free‘)[0].text.strip()
    news[‘链接‘] = newsUrl
    content= soupd.select(‘.show-content-free‘)[0].text.strip()
    writeNewsDetail(content)
    return(news)

def getListPage(pageUrl):
    res = requests.get(pageUrl,headers=headers)
    html_content = res.text
    soup = BeautifulSoup(html_content, ‘lxml‘)

    newslist = []
    for i in range(len(soup.find_all(‘a‘, class_=‘title‘))):
        Url = soup.find_all(‘a‘, class_=‘title‘)[i].attrs[‘href‘]
        newsUrl = "https://www.jianshu.com" + Url
        newslist.append(getNewsDetail(newsUrl))

    return(newslist)


def getPageN():
    url = ‘https://www.jianshu.com/c/V2CqjW?utm_medium=index-collections&utm_source=desktop‘
    resp = requests.get(url, headers=headers)
    html_content = resp.text  # 得到网页内容
    soup = BeautifulSoup(html_content, ‘lxml‘)  # 开始解析
    info = soup.select(‘.info‘)[0].text
    pagenumber=int(info[info.find(‘收录了‘):].split()[0].lstrip(‘收录了‘).rstrip(‘篇文章‘))
    a = len(soup.find_all(‘a‘, class_=‘title‘))
    page = pagenumber//a+1
    return page

newstotal = []
firstPageUrl=‘https://www.jianshu.com/c/V2CqjW?utm_medium=index-collections&utm_source=desktop‘
newstotal.extend(getListPage(firstPageUrl))
for i in range(2,201):
    listPageUrl=‘https://www.jianshu.com/c/V2CqjW?order_by=added_at&page={}‘.format(i)
    newstotal.extend(getListPage(listPageUrl))

df = pandas.DataFrame(newstotal)
df.to_excel(‘简书数据.xlsx‘)

file = codecs.open(‘content.txt‘, ‘r‘, ‘utf-8‘)
image=np.array(Image.open(‘ditu.jpg‘))
font=r‘C:\Windows\Fonts\AdobeHeitiStd-Regular.otf‘
word=file.read()
#去掉英文,保留中文
resultword=re.sub("[A-Za-z0-9\[\`\~\!\@\#\$\^\&\*\(\)\=\|\{\}\‘\:\;\‘\,\[\]\.\<\>\/\?\~\!\@\#\\\&\*\%]", "",word)
wordlist_after_jieba = jieba.cut(resultword, cut_all = True)

wl_space_split = " ".join(wordlist_after_jieba)

# 设置停用词
stopwords = set(STOPWORDS)
stopwords.add("一个")
my_wordcloud = WordCloud(font_path=font,mask=image,stopwords=stopwords,background_color=‘white‘,max_words = 2000,max_font_size = 100,random_state=50).generate(wl_space_split)
#根据图片生成词云
iamge_colors = ImageColorGenerator(image)
#my_wordcloud.recolor(color_func = iamge_colors)
#显示生成的词云
plt.imshow(my_wordcloud)
plt.axis("off")
plt.show()
#保存生成的图片,当关闭图片时才会生效,中断程序不会保存
my_wordcloud.to_file(‘result.jpg‘)
7.数据分析与结论:
通过对爬取的数据分析可以发现:产品、用户、数据、信息、分析、平台、市场、服务、应用、价值、内容等关键词尤为重要。
这些关键词也是互联网行业中值得注意的,例如通过数据信息等分析人们的需求等,是当今互联网行业中重要的一环,
所以通过爬虫获取信息进行有效分析也显得尤为重要。
标签:extend 联网 des 开发 stop 自己 浏览器信息 info 安全性
原文地址:https://www.cnblogs.com/h228/p/8971986.html