标签:方法 开始 exce IV star nal adp auto current
一、join介绍
Thead.join()函数在使用后,会挂起调用线程,直到被调用线程结束执行,调用线程才会继续执行。源码中调用join后,方法会一直检测要join()的线程是否存活(isAlive()方法),直到线程执行完成后,调用线程的this.notifyAll()方法,才会回到刚刚挂起的主程序。基本操作如下:
public class Worker extends Thread {

    // 工作者名
    private String name;
    // 工作时间
    private long time;

    public Worker(String name, long time) {
        this.name = name;
        this.time = time;
    }

    @Override
    public void run() {
        // TODO 自动生成的方法存根
        try {
            System.out.println(name + "开始工作");
     Thread.sleep(time);
            System.out.println(name + "工作完成,耗费时间=" + time);
        } catch (InterruptedException e) {
            // TODO 自动生成的 catch 块
            e.printStackTrace();
        }
    }

}

public static void main(String[] args) throws InterruptedException {
        // TODO Auto-generated method stub
        Worker worker0 = new Worker("worker0", (long) (Math.random() * 1000));
        Worker worker1 = new Worker("worker1", (long) (Math.random() * 1000 + 1000));
        Worker worker2 = new Worker("worker2", (long) (Math.random() * 1000 + 2000));

        worker1.start();
        worker0.start();

        worker1.join();
        worker0.join();
        System.out.println("准备工作就绪");

        worker2.start();
    }
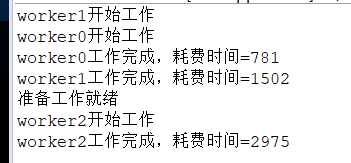
结果如下:

二、join方式代码实现
有了上面的介绍很容易想到,三个线程顺序输出,让他们依次join(),按顺序等待执行就好了,代码如下:
public static void main(String[] args) {
        final Thread t1 = new Thread(new Runnable() {
            public void run() {
                System.out.println(Thread.currentThread().getName() + " run 1");
            }
        }, "T1");
        final Thread t2 = new Thread(new Runnable() {
            public void run() {

                try {
                    t1.join();
                    System.out.println(Thread.currentThread().getName() + " run 2");
                } catch (InterruptedException e) {
                    e.printStackTrace();
                }
            }
        }, "T2");
        final Thread t3 = new Thread(new Runnable() {
            public void run() {
                try {
                    t2.join();
                    System.out.println(Thread.currentThread().getName() + " run 3");
                } catch (InterruptedException e) {
                    e.printStackTrace();
                }
            }
        }, "T3");

        t1.start();
        t2.start();
        t3.start();

        //方法二
        // ExecutorService executor = Executors.newSingleThreadExecutor();
        // executor.submit(t1);
        // executor.submit(t2);
        // executor.submit(t3);
        // executor.shutdown();
    }
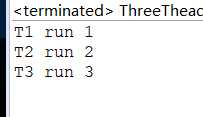
效果如图:

三、既然是多线程,自然也可以用加锁的方式实现,直接上代码:
package com.concurrency;

import java.util.concurrent.locks.Lock;
import java.util.concurrent.locks.ReentrantLock;

public class ThreeTheadPrintByOrder2_Lock {

    public static void main(String[] args) {
        new ThreadA().start();
        new ThreadB().start();
        new ThreadC().start();
    }

    private static Lock lock = new ReentrantLock();
    private static int state = 0;

    static class ThreadA extends Thread {
        @Override
        public void run() {
            for (int i = 0; i < 10;) {
                lock.lock();
                if (state % 3 == 0) {
                    System.out.println(Thread.currentThread().getName() + " A");
                    state++;
                    i++;
                }
                lock.unlock();
            }
        }
    }

    static class ThreadB extends Thread {
        @Override
        public void run() {
            for (int i = 0; i < 10;) {
                lock.lock();
                if (state % 3 == 1) {
                    System.out.println(Thread.currentThread().getName() + " B");
                    state++;
                    i++;
                }
                lock.unlock();
            }
        }
    }

    static class ThreadC extends Thread {
        @Override
        public void run() {
            for (int i = 0; i < 10;) {
                lock.lock();
                if (state % 3 == 2) {
                    System.out.println(Thread.currentThread().getName() + " C");
                    state++;
                    i++;
                }
                lock.unlock();
            }
        }
    }

}
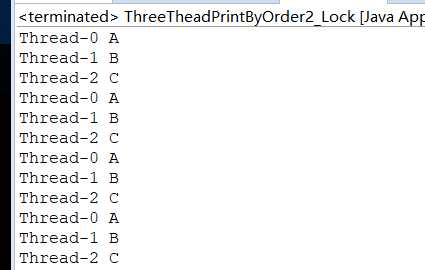
效果如下:

标签:方法 开始 exce IV star nal adp auto current
原文地址:https://www.cnblogs.com/lyInfo/p/9130094.html