标签:线程池 port 学习 encoder 网络编程 lse ddr vector writer
netty是基于javaNio模型的网络编程框架。很多框架底层也是用netty实现的 比如dubbo
与NIO的区别
1.简化了API的使用。基于事件驱动。只需要在对应的事件写相应的业务就行了。
2.上层封装多种协议的实现 webSoket,http。同时修复了NIO的bug(内存泄漏 nio buffer构造函数私有无法扩展问题)
Server代码
package com.liqiang.nettyTest2;

import java.net.InetSocketAddress;
import java.util.List;
import java.util.Vector;

import io.netty.bootstrap.Bootstrap;
import io.netty.bootstrap.ServerBootstrap;
import io.netty.channel.ChannelFuture;
import io.netty.channel.ChannelHandlerContext;
import io.netty.channel.ChannelInitializer;
import io.netty.channel.ChannelOption;
import io.netty.channel.EventLoopGroup;
import io.netty.channel.nio.NioEventLoopGroup;
import io.netty.channel.socket.SocketChannel;
import io.netty.channel.socket.nio.NioServerSocketChannel;
import io.netty.channel.socket.nio.NioSocketChannel;
import io.netty.handler.codec.string.StringDecoder;
import io.netty.handler.codec.string.StringEncoder;

public class Server {
 private int port;//监听端口
 private Vector<ChannelHandlerContext> clients;//保存在线客户端信息
 public Server(int port) {
     clients=new Vector<ChannelHandlerContext>();
     this.port=port;
 }
 //广播
 public void sendAll(String msg) {
     clients.forEach(c->{
         c.writeAndFlush(msg);
     });
 }
 public void addClient(ChannelHandlerContext client) {
     clients.add(client);
 }
 public void start() {
     /**
      * NioEventLoopGroup 内部维护一个线程池
      * 如果构造函数没有指定线程池数量 则默认为系统core*2
      */
     EventLoopGroup acceptor=new NioEventLoopGroup();//acceptor负责监客户端连接请求
     EventLoopGroup worker=new NioEventLoopGroup();//worker负责io读写(监听注册channel的 read/writer事件)

     ServerBootstrap bootstrap=new ServerBootstrap();
     bootstrap.group(acceptor,worker)
     .channel(NioServerSocketChannel.class)
     .localAddress(new InetSocketAddress(port))
     .childHandler(new ServerChannelInitializer(this)).option(ChannelOption.SO_BACKLOG, 128)
      .childOption(ChannelOption.SO_KEEPALIVE, true);
     try {
        ChannelFuture channelFuture= bootstrap.bind(port).sync();

        System.out.println("服务器已启动");
        //将阻塞 直到服务器端关闭或者手动调用
       // channelFuture.channel().closeFuture().sync();
        //释放资源
        //acceptor.shutdownGracefully();
        //worker.shutdownGracefully();
    } catch (InterruptedException e) {
        // TODO Auto-generated catch block
        e.printStackTrace();
    }
 }

}
ServerChannelInitializer实现
package com.liqiang.nettyTest2;

import io.netty.channel.ChannelInitializer;
import io.netty.channel.socket.SocketChannel;
import io.netty.handler.codec.string.StringDecoder;
import io.netty.handler.codec.string.StringEncoder;

public class ServerChannelInitializer extends ChannelInitializer<SocketChannel> {

    private Server server;
    public ServerChannelInitializer(Server server) {
        this.server=server;
    }
    @Override
    protected void initChannel(SocketChannel channel) throws Exception {
        // TODO Auto-generated method stub
        channel.pipeline()
        .addLast("decoder",new StringDecoder())//接收到数据 自动将将buffer转换为String 避免自己再转
        .addLast("encoder",new StringEncoder())//发送数据 可以直接发送String 框架内部转换为buffer传输
        .addLast(new ServerHandle(server));
    }

}
decoder和ecoder都是和ServerHandle间接继承了ChannelInboundHandlerAdapter
表示addLast可以注册多个管道 相当于责任链模式的变种 pipeline注册的Handle都会根据顺序被执行
ServerHandle实现
package com.liqiang.nettyTest2;

import io.netty.channel.ChannelHandlerContext;
import io.netty.channel.ChannelInboundHandlerAdapter;

public class ServerHandle extends ChannelInboundHandlerAdapter {

    private Server server;
      public ServerHandle(Server server) {
        // TODO Auto-generated constructor stub
          this.server=server;
    }
    // 建立连接时回调
    @Override
    public void channelActive(ChannelHandlerContext ctx) throws Exception {
        // TODO Auto-generated method stub
        System.out.println("有客户端建立连接了");
        server.addClient(ctx);
        //ctx.fireChannelActive();//pipeline可以注册多个handle  这里可以理解为是否通知下一个Handle继续处理
    }

    //接收到客户端发送消息时回调
    @Override
    public void channelRead(ChannelHandlerContext ctx, Object msg) throws Exception {
        // TODO Auto-generated method stub
       System.out.println("server接收到客户端发送信息:"+msg.toString());
       //ctx.fireChannelRead(msg);pipeline可以注册多个handle  这里可以理解为是否通知下一个Handle继续处理
    }
    //通信过程中发生异常回调
    @Override
    public void exceptionCaught(ChannelHandlerContext ctx, Throwable cause) throws Exception {
        // TODO Auto-generated method stub
        //super.exceptionCaught(ctx, cause);
        ctx.close();//发生异常关闭通信通道
        cause.printStackTrace();//打印错误信息
        //ctx.fireExceptionCaught(cause);pipeline可以注册多个handle  这里可以理解为是否通知下一个Handle继续处理
    }
}
package com.liqiang.nettyTest2;

import io.netty.bootstrap.Bootstrap;
import io.netty.channel.ChannelFuture;
import io.netty.channel.ChannelHandlerContext;
import io.netty.channel.ChannelInitializer;
import io.netty.channel.ChannelOption;
import io.netty.channel.EventLoopGroup;
import io.netty.channel.nio.NioEventLoopGroup;
import io.netty.channel.socket.SocketChannel;
import io.netty.channel.socket.nio.NioSocketChannel;
import io.netty.handler.codec.string.StringDecoder;
import io.netty.handler.codec.string.StringEncoder;
import io.netty.util.concurrent.EventExecutorGroup;

public class Client {
    private String ip;// ip
    private int port;// 端口
    private boolean isConnection = false;
    private ChannelHandlerContext serverChannel;//服务器端的通信通道

    public Client(String ip, int port) {
        this.ip = ip;
        this.port = port;
    }

    // 与服务器建立连接
    public void connection() {
        EventLoopGroup group = new NioEventLoopGroup();// 服务器监听服务器发送信息
        Bootstrap bootstrap = new Bootstrap();
        bootstrap.group(group).channel(NioSocketChannel.class)
           .option(ChannelOption.TCP_NODELAY, true)
                .handler(new ClientChannelInitializer(this));
        try {
            ChannelFuture channelFuture = bootstrap.connect(ip, port).sync();
            // System.out.println(channelFuture.isSuccess());
            // 监听是否连接成功
            while (!isConnection) {
                Thread.sleep(1000);

            }

            // channelFuture.channel().closeFuture().sync(); 断开连接才会往下执行
        } catch (InterruptedException e) {
            // TODO Auto-generated catch block
            System.out.println("连接服务器失败");
        }
    }

    public boolean isConnection() {
        return isConnection;
    }

    public void setConnection(boolean isConnection) {
        this.isConnection = isConnection;
    }

    public void sendMsg(String msg) {
        serverChannel.writeAndFlush(msg);
    }

    public ChannelHandlerContext getServerChannel() {
        return serverChannel;
    }

    public void setServerChannel(ChannelHandlerContext serverChannel) {
        this.serverChannel = serverChannel;
    }

}
ClientChannelInitializer
package com.liqiang.nettyTest2;

import io.netty.channel.ChannelInitializer;
import io.netty.channel.socket.SocketChannel;
import io.netty.handler.codec.string.StringDecoder;
import io.netty.handler.codec.string.StringEncoder;

public class ClientChannelInitializer extends ChannelInitializer<SocketChannel> {

    private Client client;
    public  ClientChannelInitializer(Client client) {
        // TODO Auto-generated constructor stub
        this.client=client;
    }
    @Override
    protected void initChannel(SocketChannel socketChannel) throws Exception {
        // TODO Auto-generated method stub
        socketChannel.pipeline()
        .addLast("decoder",new StringDecoder())//注册String编码器和解码器 会在发送数据和接收数据通过编码器和解码器转换为String
        .addLast("encoder",new StringEncoder())
        .addLast(new ClientHandle(client));//注册处理器

    }
}
ClientHandle
package com.liqiang.nettyTest2;

import io.netty.channel.ChannelHandlerAdapter;
import io.netty.channel.ChannelHandlerContext;
import io.netty.channel.ChannelInboundHandlerAdapter;
import io.netty.handler.codec.http.cors.CorsHandler;

public class ClientHandle extends ChannelInboundHandlerAdapter {

    Client client;
    public  ClientHandle(Client client) {
        // TODO Auto-generated constructor stub
       this.client=client;
    }

    //建立连接时回调
    @Override
    public void channelActive(ChannelHandlerContext ctx) throws Exception {
        // TODO Auto-generated method stub
        //System.out.println("与服务器建立连接成功");
        client.setServerChannel(ctx);
        client.setConnection(true);
        //ctx.fireChannelActive();//如果注册多个handle 下一个handel的事件需要触发需要调用这个方法

    }
    //读取服务器发送信息时回调
    @Override
    public void channelRead(ChannelHandlerContext ctx, Object msg) throws Exception {
        // TODO Auto-generated method stub
        System.out.println(msg.toString());
    }

    //发生异常时回调
    @Override
    public void exceptionCaught(ChannelHandlerContext ctx, Throwable cause) throws Exception {
        // TODO Auto-generated method stub
        cause.printStackTrace();//打印异常
        ctx.close();//关闭连接
    }
}
测试
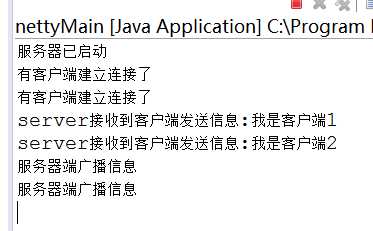
package com.liqiang.nettyTest2;

public class nettyMain {
    public static void main(String[] args) {
        new Thread(new Runnable() {

            @Override
            public void run() {
                // TODO Auto-generated method stub
                Server server = new Server(8081);
                server.start();
                try {
                    Thread.sleep(5000);//5秒后测试服务器端广播功能
                    server.sendAll("服务器端广播信息");
                } catch (InterruptedException e) {
                    // TODO Auto-generated catch block
                    e.printStackTrace();
                }
            }
        }).start();
        new Thread(new Runnable() {

            @Override
            public void run() {
                // TODO Auto-generated method stub
                Client client1=new Client("127.0.0.1", 8081);
                client1.connection();
                client1.sendMsg("我是客户端1");

                Client client2=new Client("127.0.0.1", 8081);
                client2.connection();
                client2.sendMsg("我是客户端2");
            }
        }).start();
    }
}
输出
通过netty可以轻松实现点对点 一对多 广播等功能 但是对于netty的学习不应止与此
标签:线程池 port 学习 encoder 网络编程 lse ddr vector writer
原文地址:https://www.cnblogs.com/LQBlog/p/9141545.html