标签:password strong serve 分享图片 mys 用户和组 var server 防火墙
本篇博客主要记录如何部署一台MySQL数据库服务器。这里仅仅是MySQL数据库的基本安装和配置。
本篇博客以kvm虚拟机node15作为MySQL数据库服务器。
在前面的博客中,已经约定将虚拟机console的目录/mnt/data/db,作为全局数据库服务的持久化存储目录
(笔记内链:《虚拟机console基础环境部署——工作目录准备.md》,博客园地址:https://www.cnblogs.com/liwanliangblog/p/9193891.html )
mkdir node15_mysql_dataexportfs -r,重新加载配置生效;通过exportfs或者showmount -e localhost查看是否生效service nfs restart,重启服务生效;通过exportfs或者showmount -e localhost查看是否生效虚拟机node15中,执行命令:rpm -qa | egrep "nfs-utils|rpcbind",查看是否安装了NFS的环境;如果没有安装,执行命令:yum -y install nfs-utils rpcbind
虚拟机node15中,执行命令:yum -y install mysql mysql-client mysql-server;执行完成,会安装依赖包perl-DBI和perl-DBD-MySQL
安装完成后,先不要启动mysqld服务,进行下面的操作:
挂载虚拟机console共享的目录,执行命令:mount -t nfs 192.168.10.8:/mnt/data/db/node15_mysql_data /var/lib/mysql
因为/mnt/data/db/node15_mysql_data的属主是root,当其通过NFS挂载到node15时,因为有NFS的no_root_squash选项,因此在node15也是root用户的
在虚拟机console上,修改/mnt/data/db/node15_mysql_data属主为mysql即可
注:在执行service mysqld start时报错,报错解决方式见
完成上述配置之后,便可以通过service mysqld start开启服务,并进行以后的操作
grant all privileges on *.* to ‘root‘@‘localhost‘ identified by ‘liwanliang‘;,授权root本地可以密码访问; grant all privileges on *.* to ‘root‘@‘127.0.0.1‘ identified by ‘liwanliang‘;,授权root本地可以密码访问; grant all privileges on *.* to ‘root‘@‘192.168.80.8‘ identified by ‘liwanliang‘;,授权root可以从虚拟机console使用密码访问; grant all privileges on *.* to ‘root‘@‘192.168.80.15‘ identified by ‘liwanliang‘;,授权root可以从虚拟机node15使用密码访问; select user,password,host from mysql.user;,查看当前可以无密码访问的授权,并进行删除; delete from mysql.user where user=‘‘ and host=‘localhost‘; delete from mysql.user where user=‘root‘ and host=‘node15‘; delete from mysql.user where user=‘‘ and host=‘node15‘;配置MySQL默认存储引擎
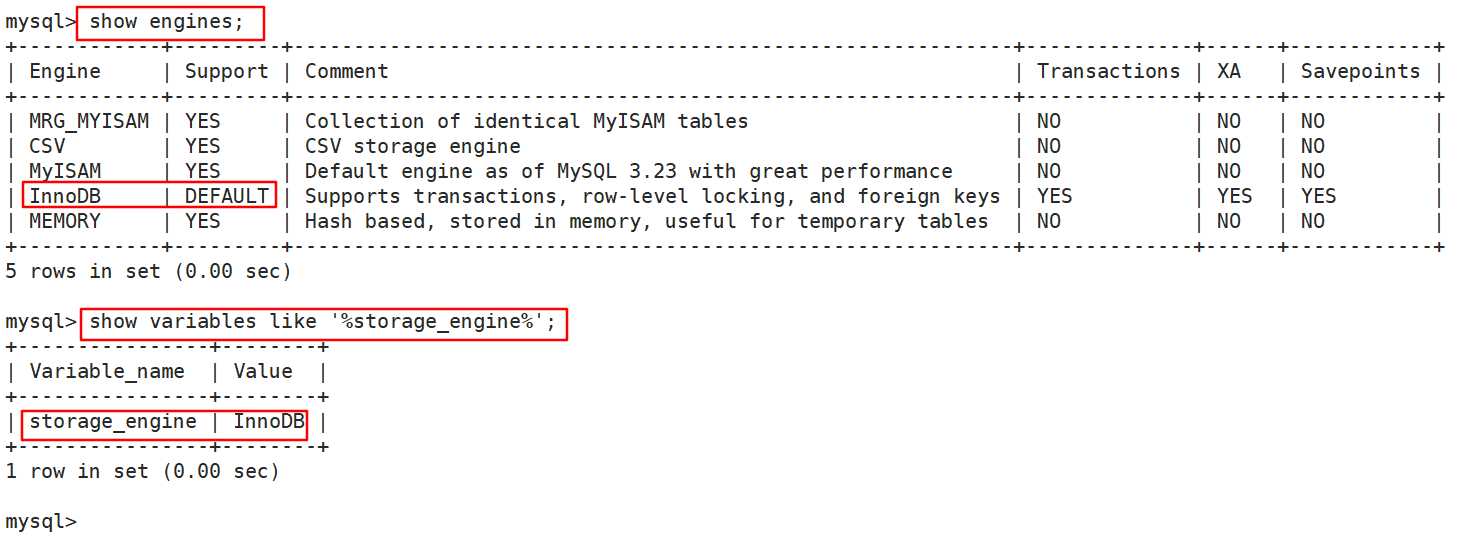
查看当前存储引擎,如下图,显示为M有ISAM为默认存储引擎


从上述的查询中,能够看到MySQL当前默认的存储引擎是MyISAM,本系列博客中,需要将默认存储引擎改为InnoDB。操作如下:

再次重复上面的查询,可以看到存储引擎已经修改,如下图:
配置MySQL的存储目录
略。本篇博客并没有将存储目录修改,只想将其他目录挂载到该目录下。
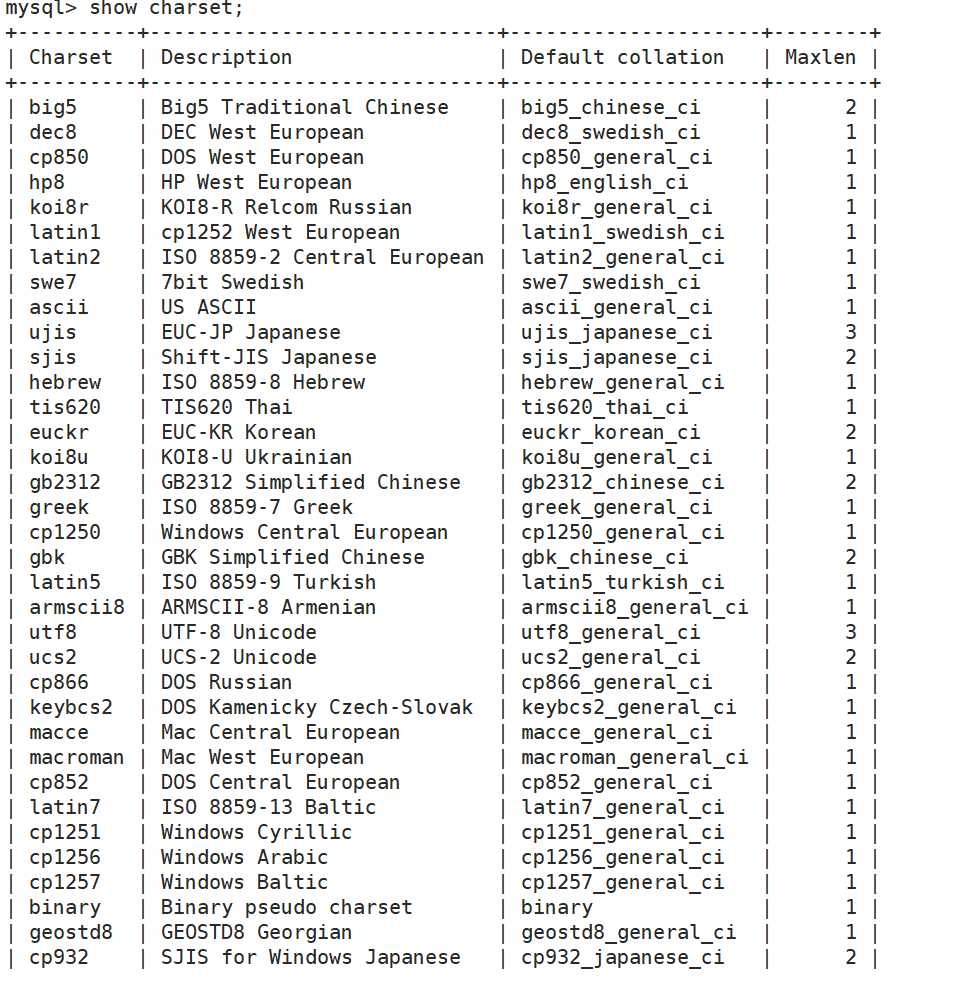
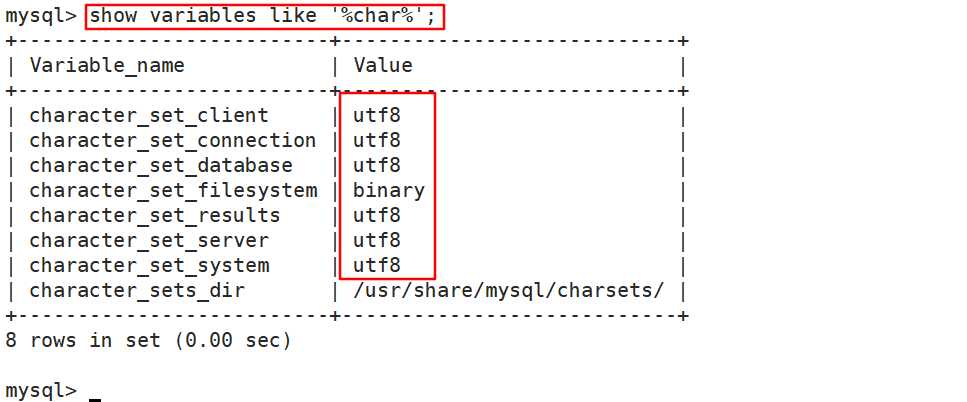
show varibales like ‘%char%‘;查询当前数据库支持和默认采用的字符集 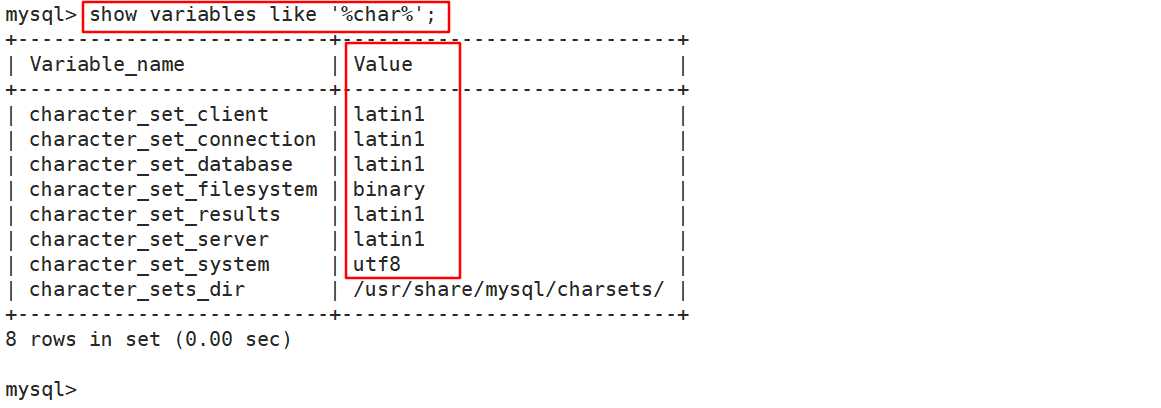
service msyqld restart重启服务 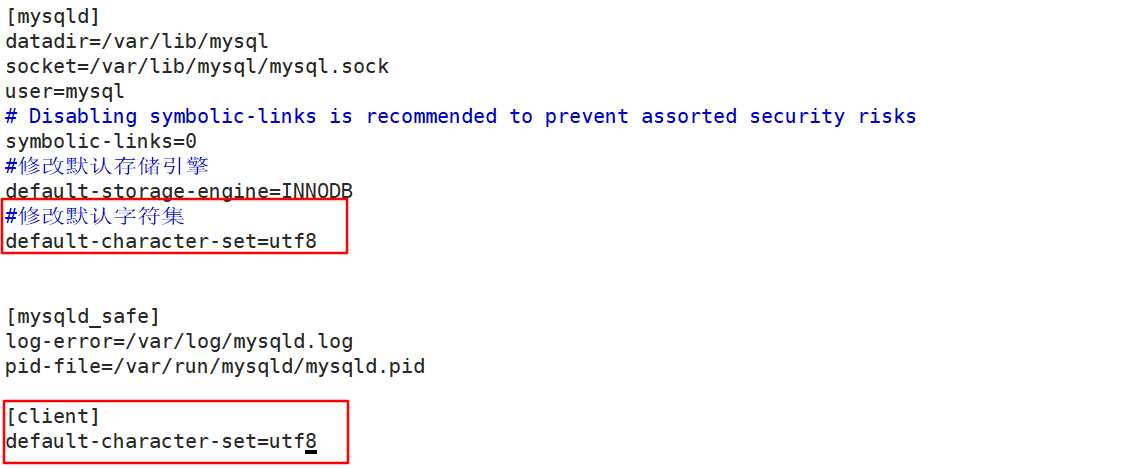
在挂载完成NFS,修改目录属性之后,第一次执行service mysqld start报错,报错如下:
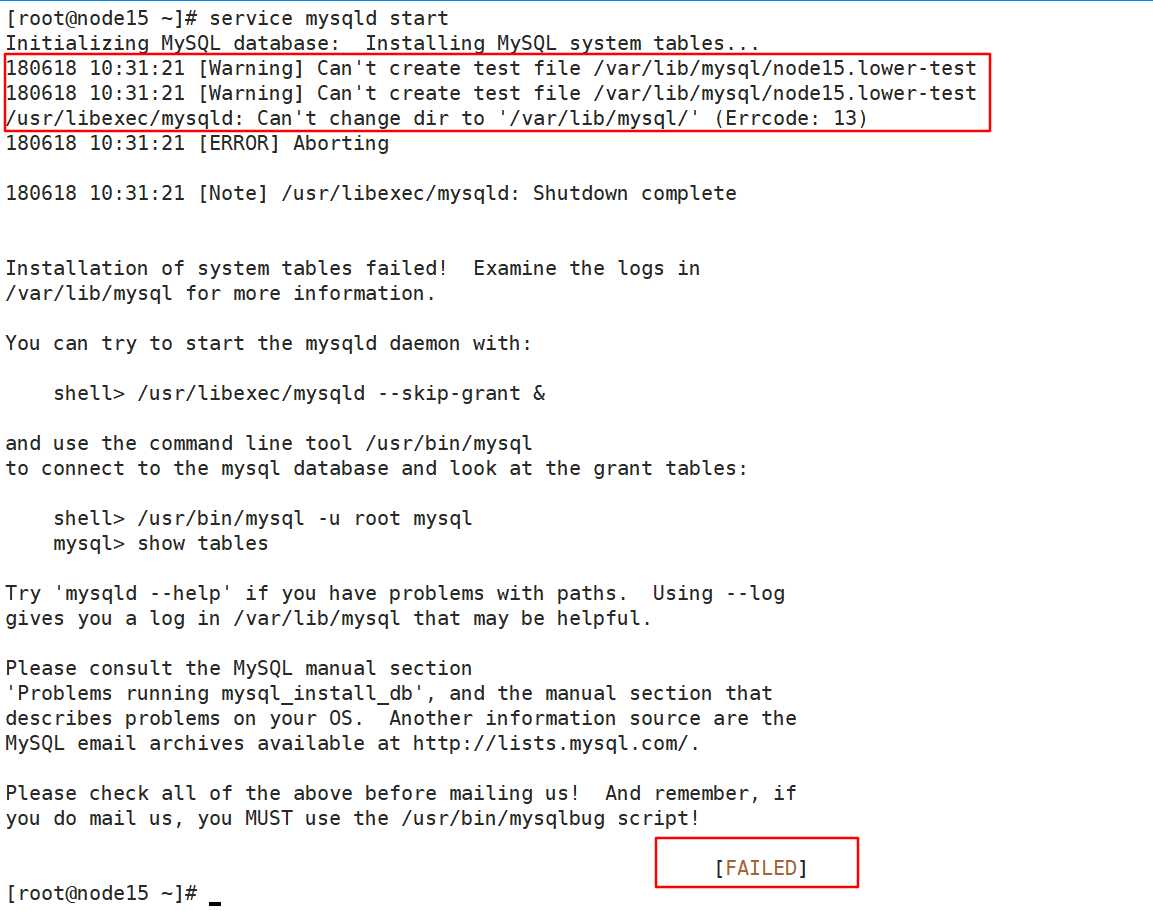
【解决方式】:执行service iptables stop关闭防火墙;执行setenforce 0关闭selinux
继续执行service mysql start,依然启动失败,查看日志/var/log/mysqld.log
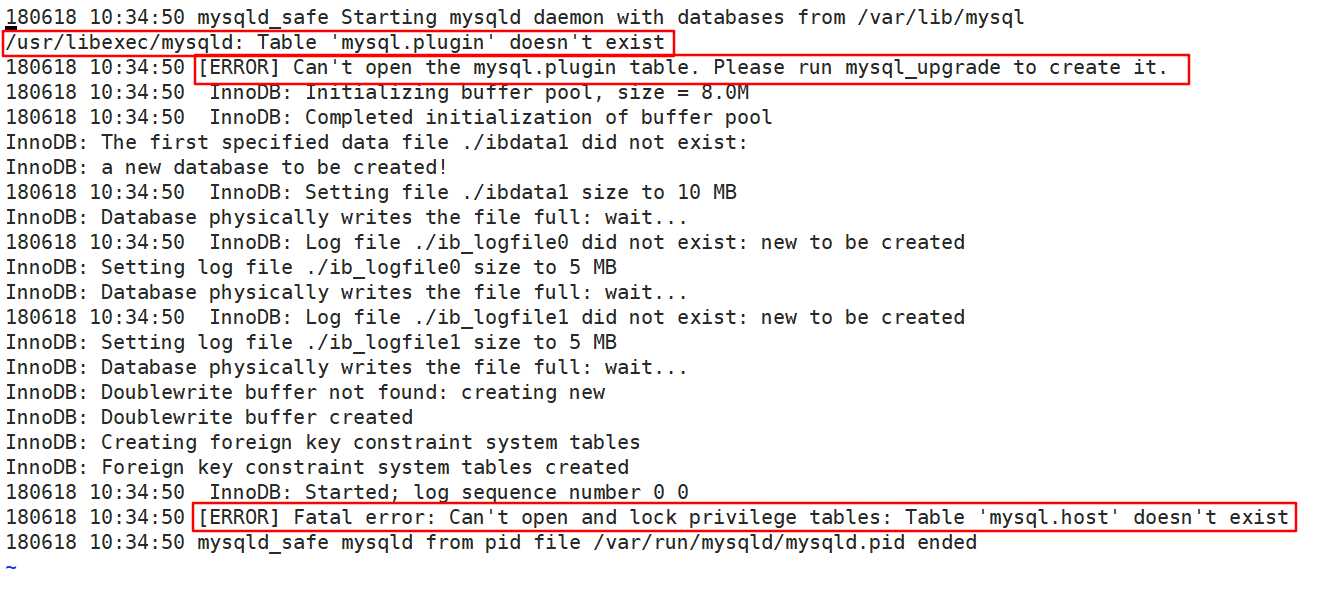
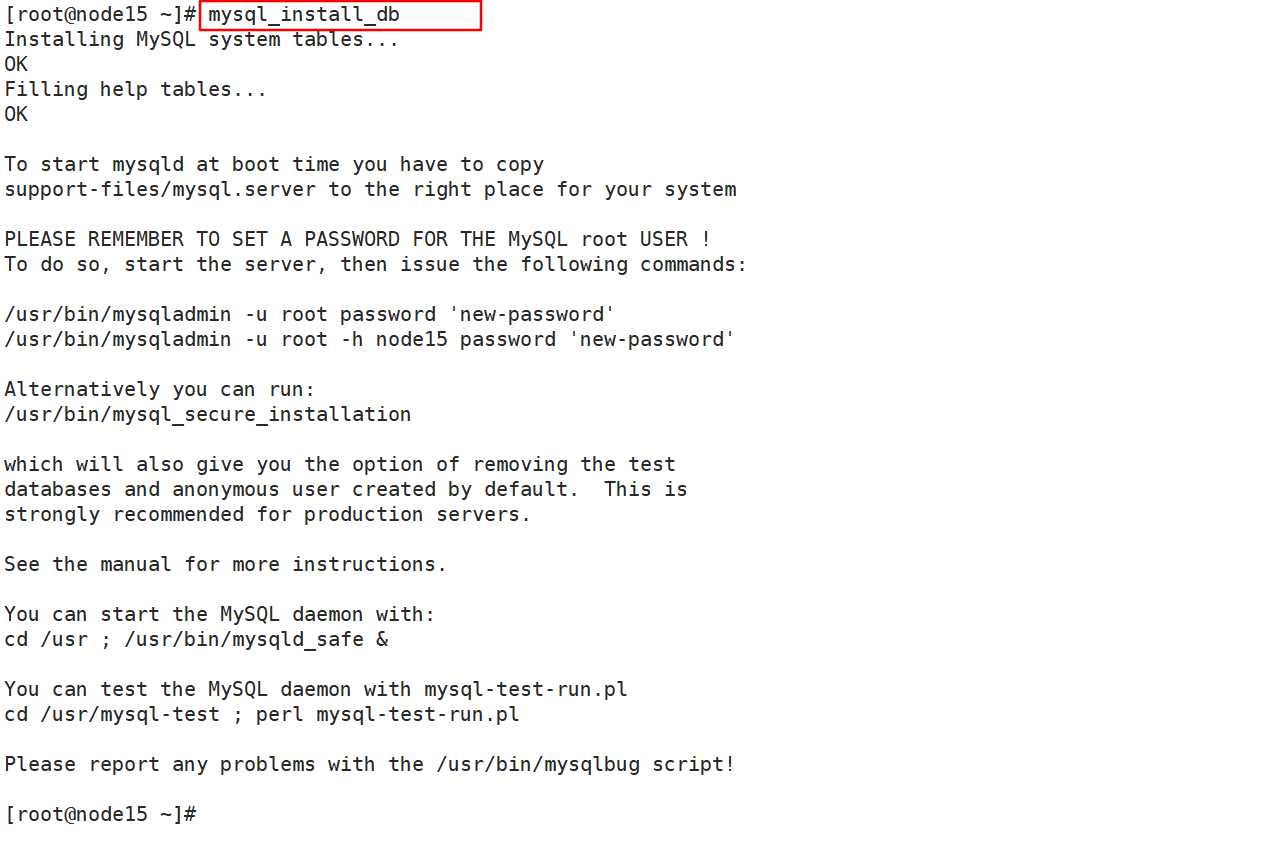
【解决方式】:执行mysql_install_db,然后执行service mysqld restart成功,如下图:
标签:password strong serve 分享图片 mys 用户和组 var server 防火墙
原文地址:https://www.cnblogs.com/liwanliangblog/p/9194704.html