标签:ash form content 浏览器 关系 hover overflow margin 代码
高大上网站-CSS3总结1-图片2D处理以及BUG修复
一,前言:
现在的前端UI相对JS来说,重视并不够。
但是CSS3提供的新特性,将现在的网站赤裸裸的划分为两类:一类还在写着老旧样式,或者通过bootstrap来蹭点CSS3动画。另一类,是用CSS3写着各种特效的网站。
也许国内还感觉不是很明显。但是在国外的网站真的很明显能看出来这些。也许很多时候,国内大部分公司都不愿意将时间和精力放在这上面。另外,愿意这样写的前端工程师也偏少。(你能指望一个实习生写这个?)
但是,这里我要说但是了。
一个好的CSS3样式完全值得公司去花费这样的时间和精力。因为公司网站是公司的脸面,尤其是IT公司。一个酷炫的页面能让你的用户和合作方立马感受到你公司那种状态,那种光靠文字很难表达的状态。
我这里给一些国外的网站,你可以试着去看一看:
https://trampolinepark.com/
http://xmas.evs.com/2018/
趁着这两天有时间,我也需要将自己的CSS3从理论转化为实际的应用。
二,代码:
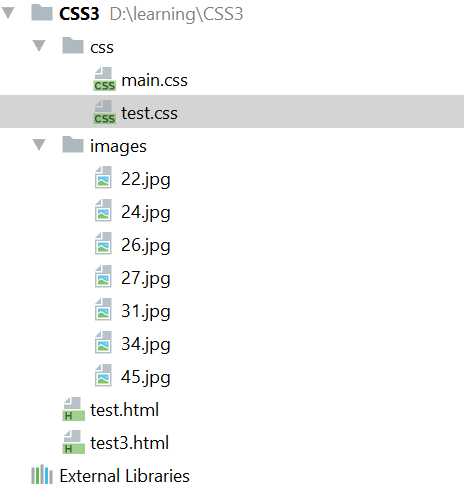
1.文件目录:

2.HTML代码:
<!DOCTYPE html>
<html lang="en">
<head>
    <meta charset="UTF-8">
    <title>Test2</title>
    <link rel="stylesheet" href="./css/main.css">

</head>
<body>
    <!--title-->
    <!--<header></header>-->
    <div class="imagearea">
        <figure class="style1">
            <img src="./images/22.jpg" alt="" width="800px" height="400px">
            <figcaption>
                <p>图片标题22</p>
                <p>图片注解1</p>
                <p>图片注解2</p>
                <p>图片注解3</p>
            </figcaption>
        </figure>
        <figure class="style1">
            <img src="./images/31.jpg" alt="" width="800px" height="400px">
            <figcaption>
                <p>图片标题31</p>
                <p>图片注解1</p>
                <p>图片注解2</p>
                <p>图片注解3</p>
            </figcaption>
        </figure>
        <figure class="style1">
            <img src="./images/26.jpg" alt="" width="800px" height="400px">
            <figcaption>
                <p>图片标题26</p>
                <p>图片注解1</p>
                <p>图片注解2</p>
                <p>图片注解3</p>
            </figcaption>
        </figure>
        <figure class="style2">
            <img src="./images/27.jpg" alt="" width="700px" height="400px">
            <figcaption>
                <h2>图片标题45</h2>
                <p>图片注解1</p>
                <p>图片注解2</p>
                <div></div>
            </figcaption>
        </figure>
        <figure class="style2">
            <img src="./images/34.jpg" alt="" width="700px" height="400px">
            <figcaption>
                <h2>图片标题45</h2>
                <p>图片注解1</p>
                <p>图片注解2</p>
                <div></div>
            </figcaption>
        </figure>
        <figure class="style2">
            <img src="./images/45.jpg" alt="" width="700px" height="400px">
            <figcaption>
                <h2>图片标题45</h2>
                <p>图片注解1</p>
                <p>图片注解2</p>
                <div></div>
            </figcaption>
        </figure>

    </div>
</body>
</html>
3.CSS3代码:
/*整体样式区*/
*{
    margin  : 0;
    padding : 0;
}


/*图片展览区域—-公共样式*/
div.imagearea figure{
    position : relative;
    overflow : hidden;
    float    : left;
}
div.imagearea figure figcaption{
    position : absolute;
    top      : 0;
    left     : 0;
    padding  : 20px;
    color    : white;
}


/*图片展览区--公共动画属性*/
div.imagearea figure img{
    transition : all .35s;
}
div.imagearea figure figcaption p, div, h1, h2, h3, h4, strong, content{
    transition : all 0.35s;
}


/*图片展览区--自适应样式更改*/
@media screen and (max-width : 600px){
    div.imagearea figure{ width : 100%; }
}
@media screen and (min-width : 601px) and (max-width : 1000px){
    div.imagearea figure{ width : 50%; }
}
@media screen and (min-width : 1001px){
    div.imagearea figure{ width : 33.333%; }
}


/*图片展览区--自定义样式动画1*/
div.imagearea figure.style1 figcaption p:nth-of-type(1){ transition-delay : 0.05s; }
div.imagearea figure.style1 figcaption p:nth-of-type(2){ transition-delay : 0.1s; }
div.imagearea figure.style1 figcaption p:nth-of-type(3){ transition-delay : 0.15s; }
div.imagearea figure.style1 figcaption p:nth-of-type(4){ transition-delay : 0.2s; }
div.imagearea figure.style1{
    background : #2F0000;
}
div.imagearea figure.style1 img{
    opacity   : 0.8;
    transform : translate(-150px, 0);
}
div.imagearea figure.style1 figcaption p{
    margin     : 5px;
    text-align : center;
    color      : gray;
    background : lavender;
    transform  : translate(-150px, 0);
}
div.imagearea figure.style1:hover img{
    transform : translate(-50px, 0);
    opacity   : 0.5;
}
div.imagearea figure.style1:hover figcaption p{
    transform : translate(0, 0);
}


/*图片展览区--自定义动画2*/

div.imagearea figure.style2{
    background : #001700;
}
div.imagearea figure.style2 figcaption{
    width  : 100%;
    height : 100%;
}
div.imagearea figure.style2 figcaption h2{
    margin-top:20%;
    margin-left:25%;
    transform:skew(90deg);
}
div.imagearea figure.style2 figcaption p{
    margin-top:2%;
    margin-left:25%;
    transform:translate(0,50px);
    opacity: 0;
}
div.imagearea figure.style2 figcaption div{
    border : 2px solid white;
    height : 60%;
    width  : 60%;
    position: absolute;
    top:20%;
    left:20%;
    transform:translate(0,-400px) rotate(-180deg);
}
div.imagearea figure.style2:hover figcaption div{
    transform: translate(0,0) rotate(0);
}
div.imagearea figure.style2:hover img{
    opacity: 0.5;
    transform: scale(1.1);
}
div.imagearea figure.style2:hover figcaption p{
    transform:translate(0,0);
    opacity: 1;
}
div.imagearea figure.style2:hover figcaption h2{
    transform:skew(0);
}
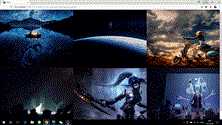
三,效果:

四,Github:
源码地址:https://github.com/cureking/CSS3_learning
五,BUG:
我操作的电脑分辨率是1920*1080,HTML文件中我图片的宽度设置原先是700px.
在谷歌浏览器上会出现第四个图片移至第一个图片时,可能出现卡住的情况,页面刷新无效,必须重新打开。但是在IE浏览器上没有这样的问题。
一开始,我也一脸懵逼。
直到我想起我电脑分辨率后,计算了图片在偏移后的剩余量,才发现是图片宽度不足的问题。这是十分巧合的。
另外,由于是我自己弄,所以图片没有标准话,只能自己简单地加工一下。
(由于时间关系,不再赘述。只提一下。)
标签:ash form content 浏览器 关系 hover overflow margin 代码
原文地址:https://www.cnblogs.com/Tiancheng-Duan/p/9116650.html