标签:word check ott innertext window 标签 pad date() 临时
本文介绍几个Dom操作的几个常用的案例。虽然现在各种web框架层出不穷,也很方便。但是了解最基本的实现方法对我们开发还是有很大的帮助的:
1.图片滚动案例
1.1 效果如下:

1.2 代码如下:

<!DOCTYPE html>
<html lang="en">
<head>
    <meta charset="UTF-8">
    <title>Title</title>
    <style>
        .wrap{
            width:300px;
            height:335px;
            border:3px solid #b0b0b0;
            position: relative;
            overflow: hidden;
            margin:100px auto;
        }

        img{
            position: absolute;
            top: 0;
            left:22px;
        }

        /*两个span一个在div的左一个在div的右*/
        .wrap .left{
            height:100%;
            width:150px;
            position: absolute;
            left:0;
        }

        .wrap .right{
            height:100%;
            width:150px;
            position: absolute;
            right:0;

        }

    </style>


</head>
<body>
    <div class="wrap" id="box">
        <img src="2.jpg" id="naruto">
        <span class="left" id="pic_left"></span>
        <span class="right" id="pic_right"></span>
    </div>


    <script>

    var left = document.getElementById(‘pic_left‘);
    var right = document.getElementById(‘pic_right‘);
    var img = document.getElementById(‘naruto‘);

    var count = 0;
    var time = null;

    //鼠标移入的时候动作
    left.onmouseover = function () {
        time = setInterval(function () {
           count -= 2;
           count >= -100 ? img.style.left = count + ‘px‘:clearInterval(time);
        },30)

    };

    right.onmouseover = function () {
        time = setInterval(function () {
            count += 2;
            count < 0 ? img.style.left = count + ‘px‘:clearInterval(time);
        },30)

    }


    </script>


</body>
</html>
2.选项卡案例
2.1 效果如下:
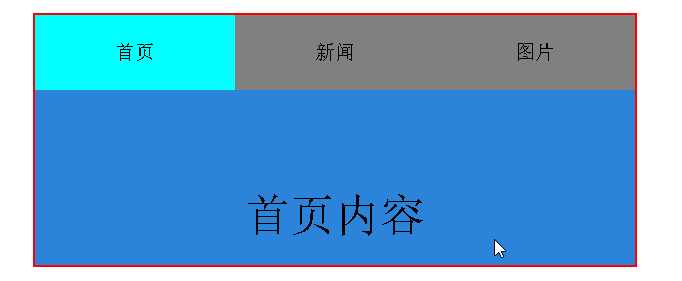
2.2 代码如下:

<!DOCTYPE html>
<html lang="en">
<head>
    <meta charset="UTF-8">
    <title>Title</title>
    <style>
        *{padding:0;margin:0;}

        ul{list-style:none;}

        #tab{
            width:480px;
            margin-top:55px;
            margin-left:auto;
            margin-right:auto;
            border:2px red solid;
        }

        /*ul下的li的属性*/
        ul li{
            float: left;
            width:160px;
            height:60px;
            line-height: 60px;
            text-align: center;
            background-color:grey;
        }

        /*ul下的li里的a的属性*/
        ul li a{
            text-decoration: none;
            color:black;
        }

        /*li的active属性*/
        li.active{
            background-color: aqua;
        }

        p{
            display:none;
            height:200px;
            text-align: center;
            line-height:200px;
            background-color: #2b84da;
        }

        p.active{
            display:block;
            font-size:36px;
        }

    </style>

</head>
<body>

    <div id="tab">
        <ul>
            <li class="active"><a href="#">首页</a></li>
            <li><a href="#">新闻</a></li>
            <li><a href="#">图片</a></li>
        </ul>

        <p class="active">首页内容</p>
        <p>新闻内容</p>
        <p>图片内容</p>
    </div>


    <script>
        var tab_li = document.getElementsByTagName(‘li‘);
        var tab_content = document.getElementsByTagName(‘p‘);

        for(var i=0;i<tab_li.length;i++){
            //保存变量i的临时值
            tab_li[i].index = i;
            tab_li[i].onclick = function () {
                for(var j=0;j<tab_li.length;j++){
                    tab_li[j].className = ‘‘;
                    tab_content[j].className = ‘‘;
                }
                this.className = ‘active‘;
                tab_content[this.index].className = ‘active‘;
            }
        }


    </script>

</body>
</html>
3.简易留言板
3.1 效果如下:
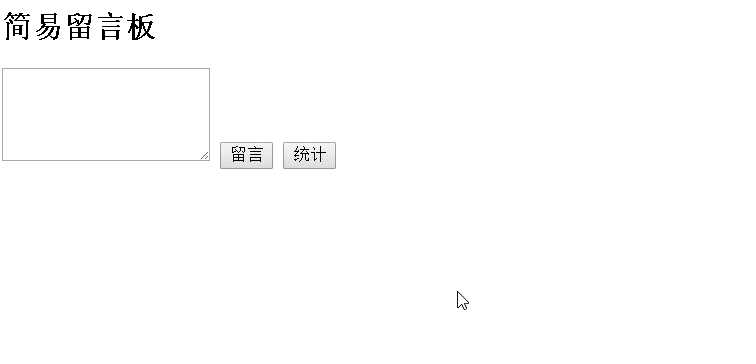
3.2 代码如下:

<!DOCTYPE html> <html lang="en"> <head> <meta charset="UTF-8"> <title>简易留言板</title> <style> a{ cursor: pointer; } a:hover{ color:red; background-color: orange; } </style> </head> <body> <div> <p> <h2>简易留言板</h2> </p> </div> <!--留言显示的div--> <div id="box"> </div> <!--操作区--> <div> <textarea id="msg" style="height: 69px;"></textarea> <input id="words" type="button" value="留言" /> <input id="count" type="button" value="统计" onclick="counter();" /> </div> <script> //取值 var msg = document.getElementById(‘msg‘); //开始时在显示区创建新的ul var ul = document.createElement(‘ul‘); var box = document.getElementById(‘box‘); box.appendChild(ul); //点击留言的操作 var words = document.getElementById(‘words‘); //全局变量count count = 0; //点击留言的事件~~~~~~~~~~~~~~~~~~~~~~~ words.onclick = function () { //找到textarea的值 message = msg.value; // 新建一个li var li = document.createElement(‘li‘); ////往li里添加内容——注意这里是innerHTML!!! li.innerHTML = msg.value + ‘<span> <a>X</a></span>‘; //判断后加入到ul var lis = document.getElementsByTagName(‘li‘); if (lis.length === 0) { ul.appendChild(li); count++; } else { ul.insertBefore(li, lis[0]); count++; } //输入完毕后将textarea的值设置成空 msg.value = ‘‘; //点击X对a标签进行操作~~~注意要写在“留言”的onclick事件里! var spans = document.getElementsByTagName(‘span‘); for(var i=0;i<spans.length;i++){ spans[i].onclick = function () { //this代表spans[i] ul.removeChild(this.parentNode); count--; } } }; //计数的函数 function counter() { alert(‘一共发布了‘+count+‘条留言~‘); } </script> </body> </html>
4.点击有惊喜
4.1 效果如下:
4.2 代码如下:

<!DOCTYPE html>
<html lang="en">
<head>
    <meta charset="UTF-8">
    <title>点击有惊喜</title>
    <style>
        .pla{
            background-color: #4331ff;
            height:333px;
            width:333px;
            margin-top: 55px;
            margin-left: 40%;
            text-align: center;
            line-height: 333px;
            font-size:33px;
            color:white;
        }
    </style>

</head>
<body>

    <div class="pla">
        点击有惊喜!
    </div>


    <script>
        var obj = document.getElementsByClassName(‘pla‘)[0];
        console.log(obj);
        var a = 0;
        obj.onclick = function () {
            a++;
            if(a%4===1){
                this.style.background = ‘green‘;
                this.innerText = ‘请继续~‘;
                this.style.color = ‘black‘;
            }
            else if(a%4===2){
                this.style.background = ‘orange‘;
                this.innerText = ‘惊喜马上来!‘;
                this.style.color = ‘white‘;
            }
            else if(a%4===3){
                this.style.background = ‘white‘;
                this.innerText = ‘哈哈!逗你玩儿呢!‘;
                this.style.color = ‘black‘;
            }
            else{
                this.style.background = ‘#4331ff‘;
                this.innerText = ‘点击有惊喜!‘;
                this.style.color = ‘white‘;
            }

        }


    </script>
</body>


</html>
5.匀速运动
5.1 效果如下:
5.2 代码如下:

<!DOCTYPE html>
<html lang="en">
<head>
    <meta charset="UTF-8">
    <title>Title</title>
    <style>
        /**{*/
            /*padding:0;*/
            /*margin:0;*/
        /*}*/

        .box{
            width:100px;
            height:100px;
            background-color: #2b84da;
            position:absolute;
            left:0;

        }


    </style>


</head>
<body>
    <input id="btn" type="button" value="动起来" />
    <br><br>
    <div id="box1" class="box" ></div>


    <script>
        var btn = document.getElementById(‘btn‘);
        var box = document.getElementById(‘box1‘);

        var count = 0;
        var time = null;

        btn.onclick = function () {
            time = setInterval(function () {
                count += 10;
                if(count>200){
                    clearInterval(time);
                    box.style.display = ‘none‘;
                }
                //移动靠改变left的值
                box.style.left = count + ‘px‘;

            },100)
        }

    </script>

</body>
</html>
6. 5秒后关闭广告
6.1 效果如下:
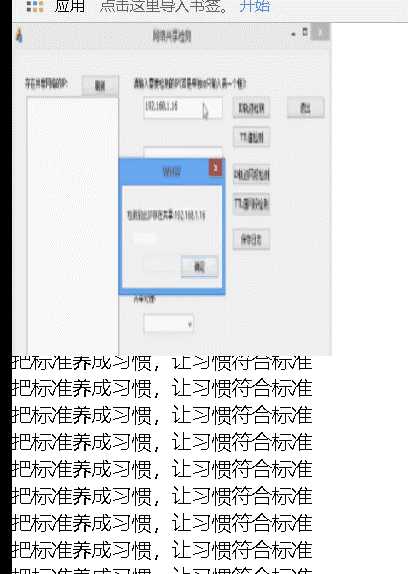
6.2 代码如下:

<!DOCTYPE html>
<html lang="en">
<head>
    <meta charset="UTF-8">
    <title>Title</title>
    <style>
        *{padding: 0;margin:0;}

        img{
            height:266px;
            width:256px;
            position: fixed;
            left:0;
            top:0;
        }

        ul{
            list-style-type:none;
        }
    </style>


</head>
<body>

    <img src="1.png" id="img">
    <ul>
        <li>把标准养成习惯,让习惯符合标准</li>
        <li>把标准养成习惯,让习惯符合标准</li>
        <li>把标准养成习惯,让习惯符合标准</li>
        <li>把标准养成习惯,让习惯符合标准</li>
        <li>把标准养成习惯,让习惯符合标准</li>
        <li>把标准养成习惯,让习惯符合标准</li>
        <li>把标准养成习惯,让习惯符合标准</li>
        <li>把标准养成习惯,让习惯符合标准</li>
        <li>把标准养成习惯,让习惯符合标准</li>
        <li>把标准养成习惯,让习惯符合标准</li>
        <li>把标准养成习惯,让习惯符合标准</li>
        <li>把标准养成习惯,让习惯符合标准</li>
        <li>把标准养成习惯,让习惯符合标准</li>
        <li>把标准养成习惯,让习惯符合标准</li>
        <li>把标准养成习惯,让习惯符合标准</li>
        <li>把标准养成习惯,让习惯符合标准</li>
        <li>把标准养成习惯,让习惯符合标准</li>
        <li>把标准养成习惯,让习惯符合标准</li>
        <li>把标准养成习惯,让习惯符合标准</li>
        <li>把标准养成习惯,让习惯符合标准</li>
        <li>把标准养成习惯,让习惯符合标准</li>
        <li>把标准养成习惯,让习惯符合标准</li>
        <li>把标准养成习惯,让习惯符合标准</li>
        <li>把标准养成习惯,让习惯符合标准</li>
        <li>把标准养成习惯,让习惯符合标准</li>
        <li>把标准养成习惯,让习惯符合标准</li>
        <li>把标准养成习惯,让习惯符合标准</li>
        <li>把标准养成习惯,让习惯符合标准</li>
        <li>把标准养成习惯,让习惯符合标准</li>
        <li>把标准养成习惯,让习惯符合标准</li>
        <li>把标准养成习惯,让习惯符合标准</li>
        <li>把标准养成习惯,让习惯符合标准</li>
        <li>把标准养成习惯,让习惯符合标准</li>
        <li>把标准养成习惯,让习惯符合标准</li>
    </ul>


    <script>
        window.onload = function () {
            var img = document.getElementById(‘img‘);

            setTimeout(function () {
                img.style.display = ‘none‘;
            },3000);

        }

    </script>

</body>
</html>
7.左侧菜单
7.1 效果如下:
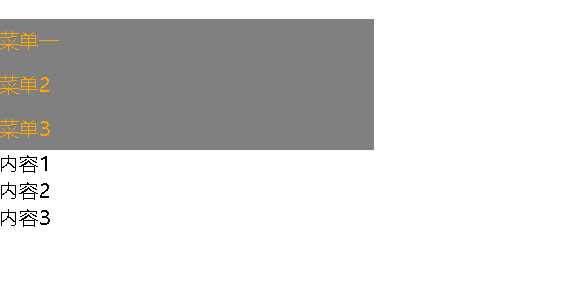
7.2 代码如下:

<!DOCTYPE html>
<html lang="en">
<head>
    <meta charset="UTF-8">
    <title>Title</title>
    <style>

        .hide{
            display:none;
        }

        .item .header{
            height:35px;
            background:grey;
            color: orange;
            line-height: 35px;
        }


    </style>

</head>
<body>
    <div style="height:48px"></div>

    <div style="width: 300px;">
        <div class="item">
            <div id="i1" class="header" onclick="ChangeMenu(‘i1‘)">菜单一</div>
            <div class="content">
                <div>内容一</div>
                <div>内容二</div>
                <div>内容三</div>
            </div>
        </div>
        <div class="item">
            <div id="i2" class="header" onclick="ChangeMenu(‘i2‘)">菜单2</div>
            <div class="content hide">
                <div>内容1</div>
                <div>内容2</div>
                <div>内容3</div>
            </div>
        </div>
        <div class="item">
            <div id="i3" class="header" onclick="ChangeMenu(‘i3‘)">菜单3</div>
            <div class="content hide">
                <div>内容1</div>
                <div>内容2</div>
                <div>内容3</div>
            </div>
        </div>
    </div>

    <script>
        function ChangeMenu(nid) {
            var current_header = document.getElementById(nid);
            var item_list = current_header.parentElement.parentElement.children;
            for(var i=0;i<item_list.length;i++){
                current_item = item_list[i];
                current_item.children[1].classList.add(‘hide‘);
            }
            //当前的兄弟的下一个div去掉hide
            current_header.nextElementSibling.classList.remove(‘hide‘);
        }


    </script>


</body>
</html>
8. 全选反选取消操作的Dom实现
8.1 效果如下:
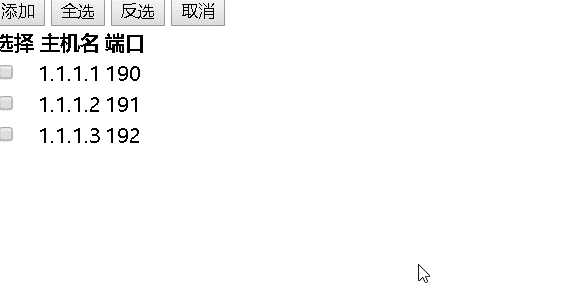
8.2 代码如下:

<!DOCTYPE html>
<html lang="en">
<head>
    <meta charset="UTF-8">
    <title>Title</title>

</head>
<body style="margin: 0 auto">
    <div >
        <input type="button" value="添加" >
        <input type="button" value="全选" onclick="selectall()">
        <input type="button" value="反选" onclick="non_select()">
        <input type="button" value="取消" onclick="cancle()">
        <table>
            <thead>
                <tr>
                    <th>选择</th>
                    <th>主机名</th>
                    <th>端口</th>
                </tr>
            </thead>
            <tbody id="tb">
                <tr>
                    <td><input type="checkbox" /></td>
                    <td>1.1.1.1</td>
                    <td>190</td>
                </tr>
                <tr>
                    <td><input type="checkbox" /></td>
                    <td>1.1.1.2</td>
                    <td>191</td>
                </tr>
                <tr>
                    <td><input type="checkbox" /></td>
                    <td>1.1.1.3</td>
                    <td>192</td>
                </tr>
            </tbody>
        </table>
    </div>


    <script>
        function selectall() {
            var tbody = document.getElementById("tb");
            //获取所有的tr
            var tr_list = tbody.children;
            for (var i=0;i<tr_list.length;i++){
                //循环所有tr找到当前tr
                var current_tr = tr_list[i];
                //找到tr的第一个孩子的第一个孩子,就是checkbox的input
                var checkbox = current_tr.children[0].children[0];
                checkbox.checked = true;
            }

        }

        function cancle() {
            var tbody = document.getElementById("tb");
            var tr_list = tbody.children;
            for (var i = 0; i < tr_list.length; i++) {
                var current_tr = tr_list[i];
                var checkbox = current_tr.children[0].children[0];
                checkbox.checked = false;
            }
        }

        function non_select() {
            var tbody = document.getElementById("tb");
            var tr_list = tbody.children;
            for(var i=0;i<tr_list.length;i++){
                var current_tr = tr_list[i];
                var checkbox = current_tr.children[0].children[0];
                if(checkbox.checked){
                    checkbox.checked = false;
                }
                else {
                    checkbox.checked = true;
                }
            }

        }


    </script>

</body>
</html>
9.模态对话框——这个用的比较多
9.1 效果如下:
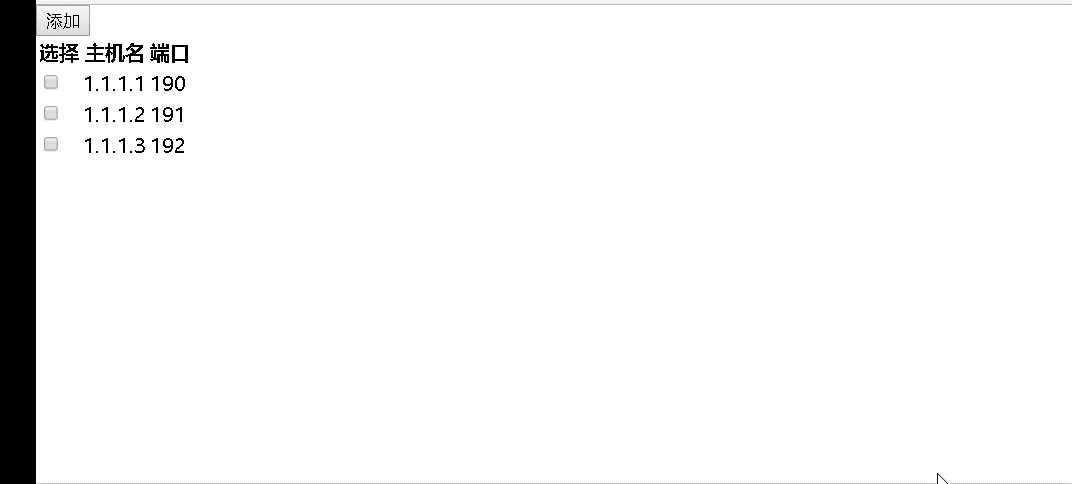
9.2 代码如下:

<!DOCTYPE html>
<html lang="en">
<head>
    <meta charset="UTF-8">
    <title>Title</title>
    <style>

        .hide{
            display: none;
        }

        .c1{
            position: fixed;
            left:0;
            top:0;
            right:0;
            bottom:0;
            background-color: grey;
            opacity:0.7;
            z-index: 9;
        }

        .c2{
            width:500px;
            height:400px;
            background-color: white;
            position: fixed;
            left:50%;
            top:50%;
            margin-left: -250px;
            margin-top: -200px;
            z-index: 10;
        }


    </style>

</head>
<body style="margin: 0 auto">
    <div >
        <input type="button" value="添加" onclick="show()">
        <table>
            <thead>
                <tr>
                    <th>选择</th>
                    <th>主机名</th>
                    <th>端口</th>
                </tr>
            </thead>
            <tbody>
                <tr>
                    <td><input type="checkbox" /></td>
                    <td>1.1.1.1</td>
                    <td>190</td>
                </tr>
                <tr>
                    <td><input type="checkbox" /></td>
                    <td>1.1.1.2</td>
                    <td>191</td>
                </tr>
                <tr>
                    <td><input type="checkbox" /></td>
                    <td>1.1.1.3</td>
                    <td>192</td>
                </tr>


            </tbody>


        </table>

    </div>

    <!--第二层的遮罩层开始-->
    <div id="i1" class="c1 hide"></div>
    <!--第二层的遮罩层结束-->
    <!--弹出框开始-->
    <div id="i2" class="c2 hide">
        <p><input type="text"></p>
        <p><input type="text"></p>
        <p>
            <input type="button" value="确定">
            <input type="button" value="取消" onclick="hide()">

        </p>
    </div>
    <!--弹出框结束-->


    <script>
        function show() {
            document.getElementById("i1").classList.remove(‘hide‘);
            document.getElementById("i2").classList.remove(‘hide‘);

        }

        function hide() {
            document.getElementById("i1").classList.add(‘hide‘);
            document.getElementById("i2").classList.add(‘hide‘);
        }

    </script>

</body>
</html>
10.Dom获取当前时间
10.1 效果如下:

10.2 代码如下:

<!DOCTYPE html>
<html lang="en">
<head>
    <meta charset="UTF-8">
    <title>Title</title>
</head>
<body>
    <script>

        setInterval(function () {

        var date = new Date();
        var y = date.getFullYear();
        var m = date.getMonth();
        var d = date.getDate();
        var h = date.getHours();
        var min = date.getMinutes();
        var s = date.getSeconds();
        document.body.innerHTML = ‘今天是‘+ y +‘年‘ + num(m+1)+ ‘月‘ + num(d) + ‘日‘ + num(h) + ‘:‘ + num(min) + ‘:‘ + num(s);
        },1000);

        function num(n) {
            if(n<10){
                return ‘0‘ + n;
            }
            else {
                return n;
            }
        }

    </script>

</body>
</html>
11.输入框案例
11.1 效果如下:
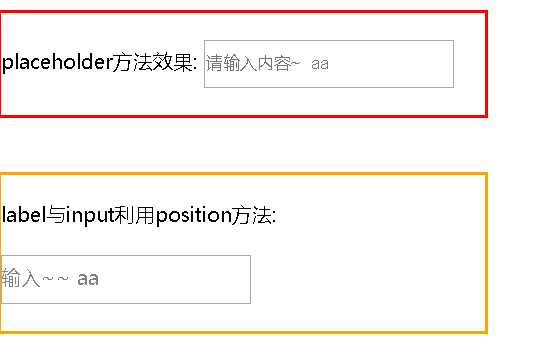
11.2 代码如下:

<!DOCTYPE html>
<html lang="en">
<head>
    <meta charset="UTF-8">
    <title>Title</title>
    <style>
        /**{padding:0;margin:0;}*/
        .w_div{
           border:2px orange solid;width:388px;
            position: relative;
        }

        #msg{
            position: absolute;
            left:0;
            top:72px;
            color:grey;
        }


    </style>


</head>
<body>
    <div style="border: 2px red solid;width:388px;">
        <br>
        <label>placeholder方法效果:</label>
        <input style="height: 33px;width:196px;" type="text" placeholder="请输入内容~  aa">
         <br><br>
    </div>
    <br><br>

    <div class="w_div" >
        <br>
        <label>label与input利用position方法:</label>
        <br><br>
        <input style="height:33px;width:196px" type="text" id="text" />
        <lable for="txt" id="msg">输入~~  aa</lable>
        <br><br>
    </div>


    <script>
        var text = document.getElementById(‘text‘);
        var msg = document.getElementById(‘msg‘);
        //检测用户输入表单的时候
        text.oninput = function () {
            if(this.value === ‘‘){
               msg.style.display = ‘block‘;
            }
            else
            {
                msg.style.display = ‘none‘;
            }
        }


    </script>

</body>
</html>
12.文字动态变化
12.1 效果如下:

12.2 代码如下:

<!DOCTYPE html>
<html lang="en">
<head>
    <meta charset="UTF-8">
    <title>Title</title>
</head>
<body>
    <div id="i1" style="background-color: aqua">欢迎欢迎莅临指导</div>


    <script>
        function func1() {

        //根据id获取指定标签的内容,定义局部变量接收
        var tag = document.getElementById("i1");
        //获取标签内部的字符串
        var content = tag.innerText;

        var f = content.charAt(0);
        var l = content.substring(1,content.length);

        var new_content = l+f;
       tag.innerText = new_content;

        }


       setInterval(‘func1()‘,500)

    </script>


</body>
</html>
标签:word check ott innertext window 标签 pad date() 临时
原文地址:https://www.cnblogs.com/paulwhw/p/9219219.html