标签:demo 注入 mil sof 环境 spring容器 lan 必须 tom
1.spring-bean的创建方式:
//User.java
public class User {
	private String Uname;
	private Integer age;
	public User() {
		System.out.println("User对象空参构造....");
	}
	public String getUname() {
		return Uname;
	}
	public void setUname(String uname) {
		Uname = uname;
	}
	public Integer getAge() {
		return age;
	}
	public void setAge(Integer age) {
		this.age = age;
	}
}
//UserFactory.java
package com.spring.b_create;

import com.spring.bean.User;

public class UserFactory {
	//手动创建
	public static User createUser() {
		System.out.println("静态工厂创建User");
		return new User();
	}
	public User createUser2() {
		System.out.println("实例工厂创建User");
		return new User();
	}
}
1>创建方式一:【空参构造方式】

2>创建方式二:【静态工厂创建方式】

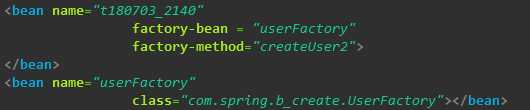
3>创建方式三:【动态工厂创建方式】
测试类代码:
package com.spring.b_create;

import org.junit.jupiter.api.Test;
import org.springframework.context.ApplicationContext;
import org.springframework.context.support.ClassPathXmlApplicationContext;

import com.spring.bean.User;

public class Demo1 {
//------------------------创建方式一:空参构造------------------
	@Test
	public void fun1() {
		ApplicationContext ac = new ClassPathXmlApplicationContext("com/spring/b_create/applicationContext.xml");
		User user = (User)ac.getBean("t180703_2122");
		System.out.println(user);
	}
//-----------------------创建方式二:静态工厂----------------------
	@Test
	public void fun2() {
		ApplicationContext ac = new ClassPathXmlApplicationContext("com/spring/b_create/applicationContext.xml");
		User user = (User)ac.getBean("t180703_2134");
		System.out.println(user);
	}
//----------------------创建方式三:动态工厂创建方式--------------------
	@Test
	public void fun3() {
		ApplicationContext ac = new ClassPathXmlApplicationContext("com/spring/b_create/applicationContext.xml");
		User user = (User)ac.getBean("t180703_2140");
		System.out.println(user);
	}
}
2.bean元素进阶:
1>scope属性:
singleton(默认值):单例对象,被标识为单例的对象,在spring容器中只存在一个实例。
prototype:多例原型,被标识为多例对象,每次再获得才会被创建,并且每次创建都是新的对象。整合struts2时,ActionBean必须配置配置为多例。
request:web环境下,对象与request的生命周期一致。
session:web环境下,对象与session的生命周期一致。
2>生命周期属性:
配置一个方法作为生命周期初始化方法,spring会在对象创建之后立即调用。
init-method()
配置一个方法作为生命周期的销毁方法,spring容器在关闭前并销毁所有容器对象之前调用。
destroy-method()
配置如下:
<bean name="t180704_1940" class="com/spring/bean/User" init-method="init" destroy-method="destory"></bean>
在//User.java中添加如下代码:
     public void init() {
		System.out.println("我是初始化.....................");
	}
	public void destroy() {
		System.out.println("我是结束.....................");
	}
3>spring的分模块配置:
<!-- spring模块化配置 -->
	<import resource="com/spring/c_scope/applicationContext.xml"/>
3.spring属性注入:
1>set方法注入
2>构造函数注入
3>p名称空间注入
4>spel注入
//User.java
package com.spring.bean;
/**
 * 		创建一个对象
 * @author taoyulong
 *
 */
public class User {
	private String Uname;
	private Integer age;
	private Car car;


	public User(String uname, Integer age, Car car) {
		System.out.println("(String uname, Integer age, Car car)");
		Uname = uname;
		this.age = age;
		this.car = car;
	}

	public User(Integer age,String uname,  Car car) {
		System.out.println("(String uname, Integer age, Car car)");
		Uname = uname;
		this.age = age;
		this.car = car;
	}
	public User(Integer uname,Integer age,  Car car) {
		System.out.println("Integer uname,Integer age,  Car car");
		Uname = uname+"";
		this.age = age;
		this.car = car;
	}
	public Car getCar() {
		return car;
	}
	public void setCar(Car car) {
		this.car = car;
	}
	public User() {
		System.out.println("User对象空参构造....");
	}
	public String getUname() {
		return Uname;
	}
	public void setUname(String uname) {
		Uname = uname;
	}
	public Integer getAge() {
		return age;
	}
	public void setAge(Integer age) {
		this.age = age;
	}
	@Override
	public String toString() {
		return "User [Uname=" + Uname + ", age=" + age + ", car=" + car + "]";
	}

	public void init() {
		System.out.println("我是初始化.....................");
	}
	public void destroy() {
		System.out.println("我是结束.....................");
	}
}
//Car.java
package com.spring.bean;

public class Car {
	private String name;
	private String color;
	public String getName() {
		return name;
	}
	public void setName(String name) {
		this.name = name;
	}
	public String getColor() {
		return color;
	}
	public void setColor(String color) {
		this.color = color;
	}
	@Override
	public String toString() {
		return "Car [name=" + name + ", color=" + color + "]";
	}

}
//applicationContext.xml
<?xml version="1.0" encoding="UTF-8"?>
<beans xmlns:xsi="http://www.w3.org/2001/XMLSchema-instance" xmlns="http://www.springframework.org/schema/beans" xsi:schemaLocation="http://www.springframework.org/schema/beans http://www.springframework.org/schema/beans/spring-beans-4.2.xsd ">

	<!-- set方式注入 :-->
	<bean name="t180704_2030" class="com.spring.bean.User">
		<!-- 值类型注入 -->
		<!-- 给User对象中名为name的属性注入值为 tom -->
		<property name="Uname" value="tom"></property>
		<property name="age" value="18"></property>
		<!-- 引用类型注入 -->
		<!-- 为Car属性注入下方配置的car对象 -->
		<property name="car" ref="t180704_2040"></property>
	</bean>

	<!-- 将Car对象配置到容器中 -->
	<bean name="t180704_2040" class="com.spring.bean.Car">
		<property name="name" value="玛莎拉蒂"></property>
		<property name="color" value="蓝色"></property>

	</bean>
<!-- ============================================================== -->
	<!-- 构造函数注入 -->
	<!--
		index:指定构造器中重载元素的顺序
		type:指定传参的类型
	 -->
	<bean name="t180704_2050" class="com.spring.bean.User">
		<constructor-arg name="uname" value="11" index="0" type="java.lang.Integer"></constructor-arg>
		<constructor-arg name="age" value="32" index="1"></constructor-arg>
		<constructor-arg name="car" ref="t180704_2040" index="2"></constructor-arg>
	</bean>
</beans>
4.spring复杂类型注入:
//CollectionBean.java
package com.spring.e_injection;

import java.util.Arrays;
import java.util.List;
import java.util.Map;
import java.util.Properties;


/**
 * 复杂类型注入
 * @author taoyulong
 *
 */
public class CollectionBean {
	private Object[] arr;//数组注入
	private List list;//list注入
	private Map map;//map类型注入
	private Properties pro;//properties注入


	public Object[] getArr() {
		return arr;
	}
	public void setArr(Object[] arr) {
		this.arr = arr;
	}
	public List getList() {
		return list;
	}
	public void setList(List list) {
		this.list = list;
	}
	public Map getMap() {
		return map;
	}
	public void setMap(Map map) {
		this.map = map;
	}
	public Properties getPro() {
		return pro;
	}
	public void setPro(Properties pro) {
		this.pro = pro;
	}
	@Override
	public String toString() {
		return "CollectionBean [arr=" + Arrays.toString(arr) + ", list=" + list + ", map=" + map + ", pro=" + pro + "]";
	}


}
//applicationContext.xml
<?xml version="1.0" encoding="UTF-8"?>
<beans xmlns:xsi="http://www.w3.org/2001/XMLSchema-instance" xmlns="http://www.springframework.org/schema/beans" xsi:schemaLocation="http://www.springframework.org/schema/beans http://www.springframework.org/schema/beans/spring-beans-4.2.xsd ">

<!-- 复杂类型注入 -->
<!-- array注入 -->
	<bean name="cb" class="com.spring.e_injection.CollectionBean">
		<!-- 如果数组中只准备注入一个值(对象),直接使用value和ref即可 -->
		<!-- <property name="arr" value="tom"></property> -->

		<!-- 多个元素 -->
		<property name="arr">
			<array>
				<value>tom</value>
				<value>jerry</value>
				<!-- 若注入对象 -->
				<!-- ref bean="对象类名" -->
			</array>
		</property>


<!-- list注入 -->
	<!-- 如果list中只准备注入一个值(对象),直接使用value和ref即可 -->
	<!-- <property name="list" value="jack"></property> -->
	<!-- 多个元素 -->
	<property name="list">
		<list>
			<value>jack</value>
			<value>rose</value>
			<!-- 若注入对象 -->
			<!-- ref bean="对象类名" -->
		</list>
	</property>

<!-- map类型注入 -->
	<property name="map">
		<map>
			<entry key="name" value="zhangsan"></entry>
			<entry key="age" value="18"></entry>
			<!-- 对象 -->
			<!-- <entry key="对象名" value-ref="连接对象名"></entry> -->
		</map>

	</property>
<!-- property注入 -->
	<property name="pro">
		<props>
			<prop key="url">http://192.168.1.1</prop>
			<prop key="urlName">内网</prop>
		</props>
	</property>


	</bean>


</beans>
//Demo.java
package com.spring.e_injection;

import org.junit.Test;
import org.springframework.context.ApplicationContext;
import org.springframework.context.support.ClassPathXmlApplicationContext;

public class Demo {


	@Test
	public void fun() {
		ApplicationContext as = new ClassPathXmlApplicationContext("com/spring/e_injection/applicationContext.xml");
		CollectionBean user = (CollectionBean)as.getBean("cb");
		System.out.println(user);
	}
}
标签:demo 注入 mil sof 环境 spring容器 lan 必须 tom
原文地址:https://www.cnblogs.com/Terlong/p/9265393.html