标签:navicat rhel var for load 密码 tar 安装过程 postgresq
CentOS 下面安装 Postgresql. 的简要学习记录
1. 卸载CentOS上面自带的postgresql版本
rpm -e $(rpm -qa|grep postgre)
2. postgresql的官网查找最新的rpm版本包
网址
https://download.postgresql.org/pub/repos/yum/10/redhat/rhel-7-x86_64/

确定最新版本的rpm包的路径为:;

https://download.postgresql.org/pub/repos/yum/10/redhat/rhel-7-x86_64/pgdg-centos10-10-2.noarch.rpm
3. 安装该包
rpm -ivh https://download.postgresql.org/pub/repos/yum/10/redhat/rhel-7-x86_64/pgdg-centos10-10-2.noarch.rpm
4. 安装postgresql 客户端以及服务器端
yum install -y postgresql10
yum install -y postgresql10-server
5. 初始化数据库
cd /usr/pgsql-10/bin
执行命令
./postgresql-10-setup initdb
执行效果为

6. 启动数据库
systemctl enable postgresql-10
systemctl start postgresql-10
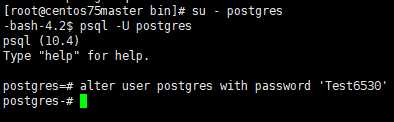
7. 切换设置用户密码
su - postgres  切换到PGSQL的用户

psql -U postgres 登录数据库

ALTER USER postgres WITH PASSWORD ‘Test6530‘  设置密码

\q  退出数据库
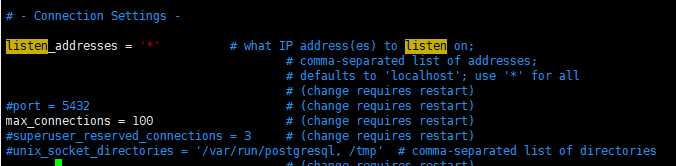
8. 关闭防火墙以及修改远程访问等地方
开启远程访问 vim /var/lib/pgsql/10/data/postgresql.conf 将linsten_addresses 修改为 listen_addresses = ‘*‘ # what IP address(es) to listen on; 修改信任远程连接
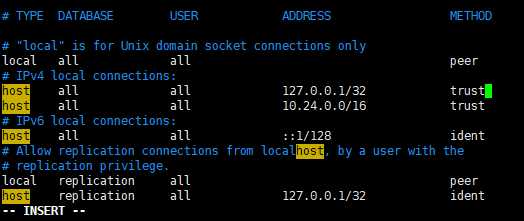
vim /var/lib/pqsql/10/data/pg_hba.conf
增加内容为
# "local" is for Unix domain socket connections only
local all all peer
# IPv4 local connections:
host all all 127.0.0.1/32 trust
host all all 10.24.0.0/16 trust
修改新增红色部分
信任远程连接部分
9. 重新启动 pgsql
systemctl restart postgresql-10
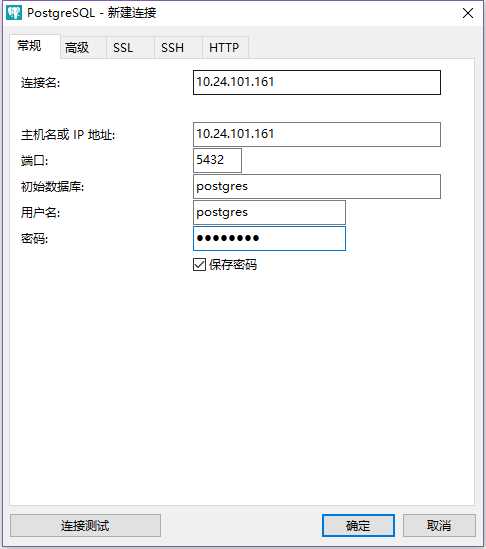
10. 使用navicatsql 进行连接
新建postgresql连接
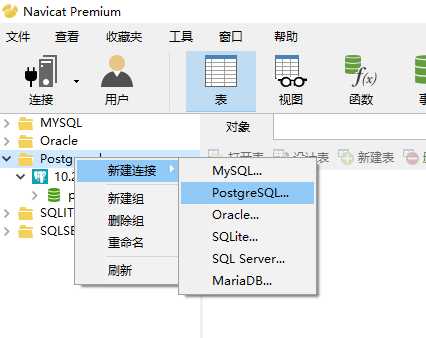
新建连接信息为
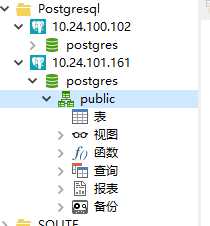
连接测试成功 打开的效果为
Postgresql 简单安装过程. Study From https://www.cnblogs.com/stulzq/p/7766409.html
标签:navicat rhel var for load 密码 tar 安装过程 postgresq
原文地址:https://www.cnblogs.com/jinanxiaolaohu/p/9274867.html