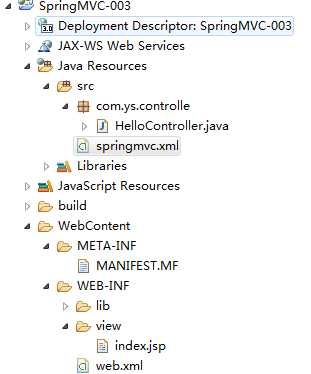
3、编写 Handler
package com.ys.controller;

import org.springframework.stereotype.Controller;
import org.springframework.web.bind.annotation.RequestMapping;
import org.springframework.web.servlet.ModelAndView;

//注意@Controller注解和@RequestMapping注解的用法
//使用@Controller注解表示这个类是一个Handler
@Controller
public class HelloController {

    //@RequestMapping注解括号里面的表示访问的URL
    @RequestMapping("hello")
    public ModelAndView hello(){
        ModelAndView modelView = new ModelAndView();
        //类似于 request.setAttribute()
        modelView.addObject("name","张三");
        //配置返回的视图名,由于我们在springmvc.xml中配置了前缀和后缀,这里直接写视图名就好
        modelView.setViewName("index");
        //modelView.setViewName("/WEB-INF/view/index.jsp");
        return modelView;
    }

}
4、编写 视图 index.jsp
<%@ page language="java" contentType="text/html; charset=UTF-8"
    pageEncoding="UTF-8"%>
<!DOCTYPE html PUBLIC "-//W3C//DTD HTML 4.01 Transitional//EN" "http://www.w3.org/TR/html4/loose.dtd">
<html>
<head>
<meta http-equiv="Content-Type" content="text/html; charset=UTF-8">
<title>Insert title here</title>
</head>
<body>
hello:${name}
</body>
</html>
5、在浏览器中输入:http://localhost:8080/SpringMVC-003/hello

