标签:通过 fse lang ace art 互调 spl -name x2-a
一、什么是webservice?有什么用?
webservice是一种跨平台、跨语言的一种远程调用技术。其主要用于不同系统中的相互调用。
二、webservice的技术特点
1、XML:XML是webservice传递信息的载体。
2、SOAP:通过HTTP协议发送请求和接收结果时,发送的请求内容和结果内容都采用XML格式封装,并增加了一些特定的HTTP消息头,以说明HTTP消息的内容格式,这些特定的HTTP消息头和XML内容格式就是SOAP协议。
3、WSDL:Web Service Description Language, Web Service描述语言。它用XML的格式描述了WebService有哪些方法、参数类型、访问路径等等。
三、webservice实践
1、使用JDK来开发webservice
①服务端编写
public interface WebService {

    int addUp(int a, int b);

    int minus(int a, int b);

}

@javax.jws.WebService
public class WebServiceImpl implements WebService {


    @Override
    public int addUp(int a, int b) {
        return a + b;
    }

    @Override
    public int minus(int a, int b) {
        return  a - b;
    }

}

//使用监听器来进行发布,这样就可以在项目启动的时候就可以将webservice服务发布出来
@WebListener
public class WebServiceListener implements ServletContextListener {

    public void contextInitialized(ServletContextEvent arg0)  {
        String address = "http://127.0.0.1:9999/ws/webservice";
        Endpoint.publish(address, new WebServiceImpl());
        System.out.println("发布webservice服务成功。。。。。");
    }

    @Override
    public void contextDestroyed(ServletContextEvent arg0) {

    }

}
②客户端编写的两种方式:
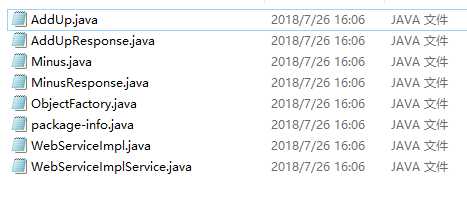
Ⅰ、使用 wsimport -s f:\ http://127.0.0.1:9999/ws/webservice?wsdl来生成客户端代码

public class test {

    public static void main(String[] args) {
        WebServiceImplService ws = new WebServiceImplService();
        WebServiceImpl wsImpl = ws.getWebServiceImplPort();
        int addUp = wsImpl.addUp(1, 2);
        int minus = wsImpl.minus(0, 1);
        System.out.println(addUp);
        System.out.println(minus);
    }

}
Ⅱ、使用eclispe直接新建websercice client

public class test {

    public static void main(String[] args) {
        WebServiceImplProxy proxy = new WebServiceImplProxy();
        try {
            int addUp = proxy.addUp(1, 1);
            int minus = proxy.minus(2, 1);
            System.out.println(addUp);
            System.out.println(minus);
        } catch (RemoteException e) {
            e.printStackTrace();
        }

    }

}
2.使用spring 构建webservice服务端(不用webservice框架)
<!-- webservice配置 -->
    <bean class="org.springframework.remoting.jaxws.SimpleJaxWsServiceExporter">
        <property name="baseAddress" value="http://127.0.0.1:8888/ws/"/>
    </bean>
@Component
@WebService(serviceName="UserInfoWebService")
public class UserInfoWebService {

    @Autowired
    private UserMapper userMapper;

    @WebMethod
    public User getUserInfoById(Integer id) {
        User user = userMapper.selectByPrimaryKey(id);
        return user;
    }

}
四、spring 集成cxf
0.引入cxf相关的jar包
<dependency>
        <groupId>org.apache.cxf</groupId>
        <artifactId>cxf-rt-frontend-jaxws</artifactId>
        <version>3.1.8</version>
    </dependency>
    <dependency>
        <groupId>org.apache.cxf</groupId>
        <artifactId>cxf-rt-transports-http</artifactId>
        <version>3.1.8</version>
    </dependency>
    <dependency>
        <groupId>org.codehaus.woodstox</groupId>
        <artifactId>stax2-api</artifactId>
        <version>3.1.4</version>
    </dependency>
1.web.xml中,增加如下配置
<!-- spring 加载配置文件 -->
   <listener>
    <listener-class>org.springframework.web.context.ContextLoaderListener</listener-class>
   </listener>
   <context-param>
    <param-name>contextConfigLocation</param-name>
    <param-value>
        classpath:applicationContext.xml,
        classpath:application-cxf.xml
    </param-value>
   </context-param>


   <!-- cxf webservices -->
    <servlet>
        <description>CXF Endpoint</description>
        <display-name>cxf</display-name>
        <servlet-name>cxf</servlet-name>
        <servlet-class>org.apache.cxf.transport.servlet.CXFServlet</servlet-class>
        <load-on-startup>2</load-on-startup>
    </servlet>
    <servlet-mapping>
        <servlet-name>cxf</servlet-name>
        <url-pattern>/ws/*</url-pattern>
    </servlet-mapping>
2.新建application-cxf.xml配置文件
<?xml version="1.0" encoding="UTF-8"?>
<beans xmlns="http://www.springframework.org/schema/beans"
    xmlns:xsi="http://www.w3.org/2001/XMLSchema-instance"
    xmlns:soap="http://cxf.apache.org/bindings/soap"
    xmlns:jaxws="http://cxf.apache.org/jaxws"
    xsi:schemaLocation="http://www.springframework.org/schema/beans
    http://www.springframework.org/schema/beans/spring-beans.xsd
    http://cxf.apache.org/bindings/soap
    http://cxf.apache.org/schemas/configuration/soap.xsd
    http://cxf.apache.org/jaxws
    http://cxf.apache.org/schemas/jaxws.xsd">

    <import resource="classpath:META-INF/cxf/cxf.xml" />
    <import resource="classpath:META-INF/cxf/cxf-servlet.xml" />

    <!--  Cxf WebService 服务端示例 -->
    <jaxws:endpoint id="DemoWebservice" implementor="com.myproject.webservice.impl.UserInfoWebServiceImpl"  address="/UserInfoWebService"/>
</beans>
3.业务代码
@WebService
public class UserInfoWebServiceImpl{

    @Autowired
    private UserMapper userMapper;

    public String getUserInfoById(@WebParam(name="id")Integer id) {
        User user = userMapper.selectByPrimaryKey(id);
        return user.toString();
    }

}
这样基于cxf和spring集成的webservice就完成了,http://localhost:8080/zmyproject/ws/UserInfoWebService?wsdl
4.cxf客户端调用webservice
application-cxf.xml
<!--  Cxf WebService 客户端调用-->
    <jaxws:client id="arithmeticWebServiceClient" serviceClass="com.myproject.webservice.client.ArithmeticWebServiceClient" address="http://127.0.0.1:9999/ws/webservice?wsdl"></jaxws:client>
//这个要和wsdl文件中的targetNamespace以及name对应
//创建这个接口来和webservice服务对应,接口名不限,但是方法名和参数一定要和webservice
@WebService(targetNamespace = "http://server.webservice/", name = "WebServiceImplService")
public interface ArithmeticWebServiceClient {

    int addUp(int a, int b);

    int minus(int a, int b);

}
@RequestMapping(value="/add", method=RequestMethod.POST)
    public Result add(HttpServletRequest request) throws ServiceException{
        Result result = new Result();
        Map<String, Object> params = HttpRequestUtil.initParameters(request);
        result.setData(userService.add(params));
        return result;
    }
@Override
    public int add(Map<String, Object> params) {
        int a = Integer.parseInt(params.get("a").toString());
        int b = Integer.parseInt(params.get("b").toString());
        int result = arithmeticWebServiceClient.addUp(a, b);
        return result;
    }
标签:通过 fse lang ace art 互调 spl -name x2-a
原文地址:https://www.cnblogs.com/kyleinjava/p/9371760.html