标签:path return 设定 copy window option normal 文件夹路径 第一个
在开发项目的过程当中,生产环境与调试环境的配置肯定是不一样的。拿个最简单的例子来说,比如连接字符串这种东西,调试环境肯定是不能连接生产数据库的。在之前的话,这种情况只能说是你 COPY 两个同名的配置文件来进行处理。然后你在本地就使用本地的配置,生产环境就使用生产环境的配置文件,十分麻烦。
而 ASP .NET CORE 支持利用环境变量来动态配置 JSON 文件,下面就来看一下吧。
首先在你的 ASP .NET CORE 项目当中添加一个 appsettings.json 文件,内容如下:
{
  "ConnectionString": {
    "Default": "Normal Database"
  }
}
之后再继续添加一个 appsettings.Development.json,之后在你的解决方案管理器就会看到下面这种情况。
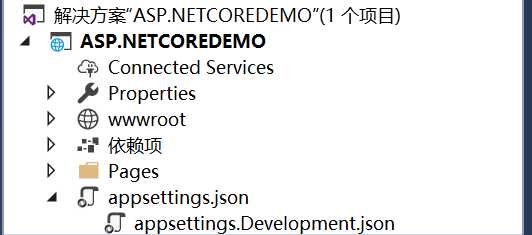
更改其内容如下:
{
  "ConnectionString": {
    "Default": "Development Database"
  }
}
之后呢,我们继续添加一个生产环境的配置文件,名字叫做 appsettings.Production.json ,更改其内容如下:
{
  "ConnectionString": {
    "Default": "Production Database"
  }
}
最后我们的文件应该如下图:
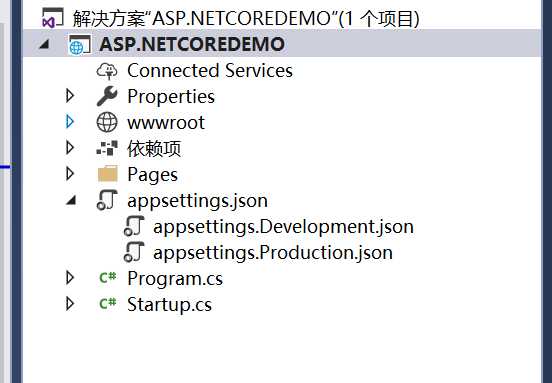
以上就是我们的准备工作,我们准备了两个环境的配置文件以及一个默认情况的配置文件,下面我就就来看看如何应用环境变量来达到我们想要的效果。
在项目调试的时候,我们可以通过右键项目属性,跳转到调试可以看到一个环境变量的设定,通过更改 ASPNETCORE_ENVIRONMENT 的值来切换不同环境。
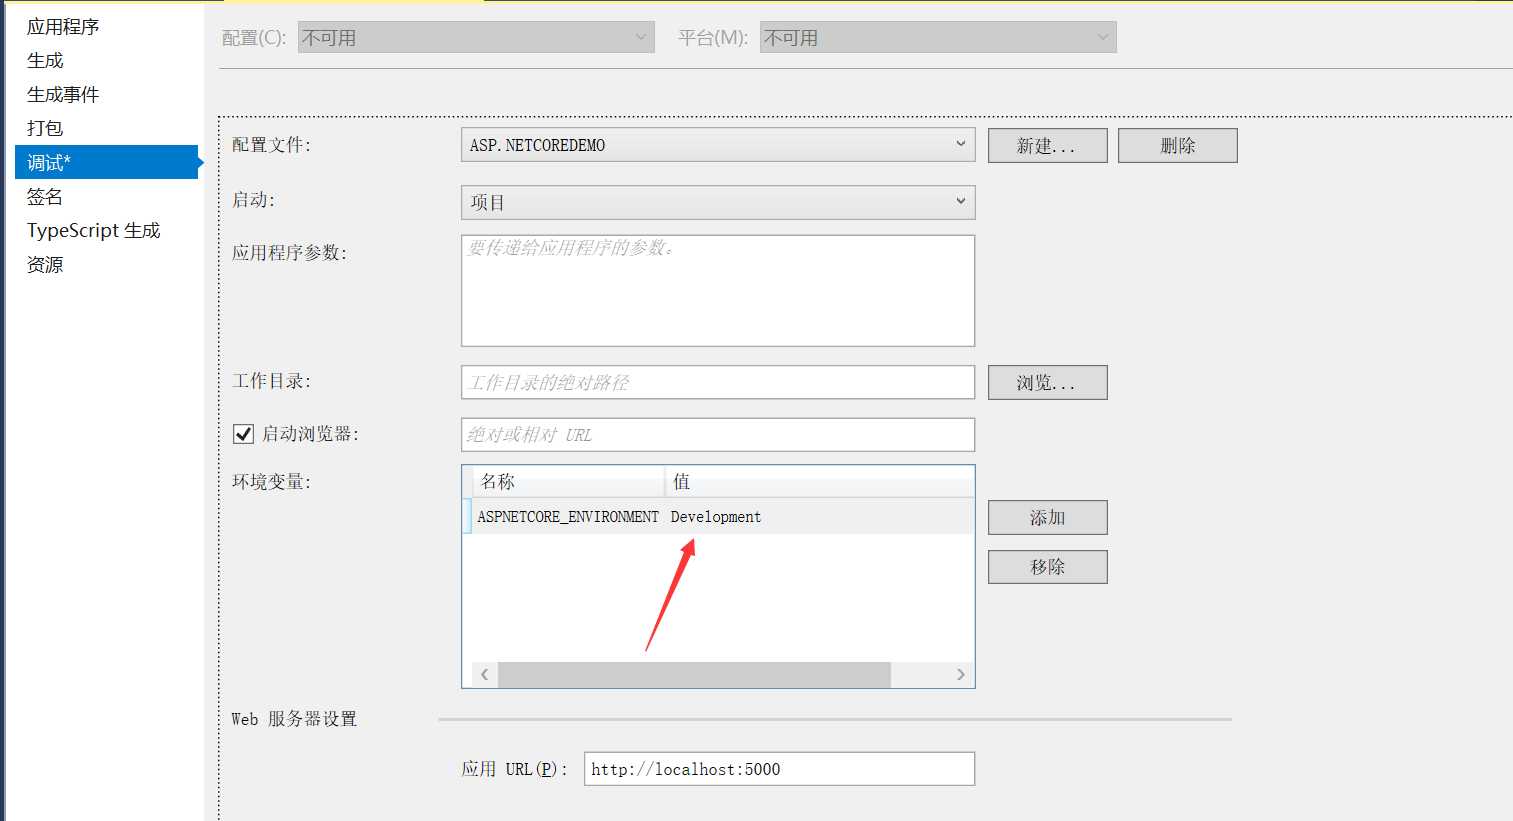
可以看到目前我们处于 Development 也就是开发环境,那么按照我们的设想,就应该读取 appsettings.Development.json 的文件数据了。
新建一个 AppConfigure 静态类,他的内部有一个字典,用于缓存不同环境不同路径的 IConfigurationRoot 配置。
public static class AppConfigure
{
    // 缓存字典
    private static readonly ConcurrentDictionary<string, IConfigurationRoot> _cacheDict;

    static AppConfigure()
    {
        _cacheDict = new ConcurrentDictionary<string, IConfigurationRoot>();
    }

    // 传入 JSON 文件夹路径与当前的环境变量值
    public static IConfigurationRoot GetConfigurationRoot(string jsonDir, string environmentName = null)
    {
        // 设置缓存的 KEY
        var cacheKey = $"{jsonDir}#{environmentName}";

        // 添加默认的 JSON 配置
        var builder = new ConfigurationBuilder().SetBasePath(jsonDir).AddJsonFile("appsettings.json", optional: true, reloadOnChange: true);

        // 根据环境变量添加相应的 JSON 配置文件
        if (!string.IsNullOrEmpty(environmentName))
        {
            builder = builder.AddJsonFile($"appsettings.{environmentName}.json", optional: true, reloadOnChange: true);
        }

        // 返回构建成功的 IConfigurationRoot 对象
        return builder.Build();
    }
}
用法的话也很简单:
public Startup(IHostingEnvironment env)
{
    var configurationRoot = AppConfigure.GetConfigurationRoot(env.ContentRootPath, env.EnvironmentName);
    Console.WriteLine(configurationRoot["ConnectionString:Default"]);
}测试的话直接更改环境变量就可以看到效果了,更改其值为 Production。
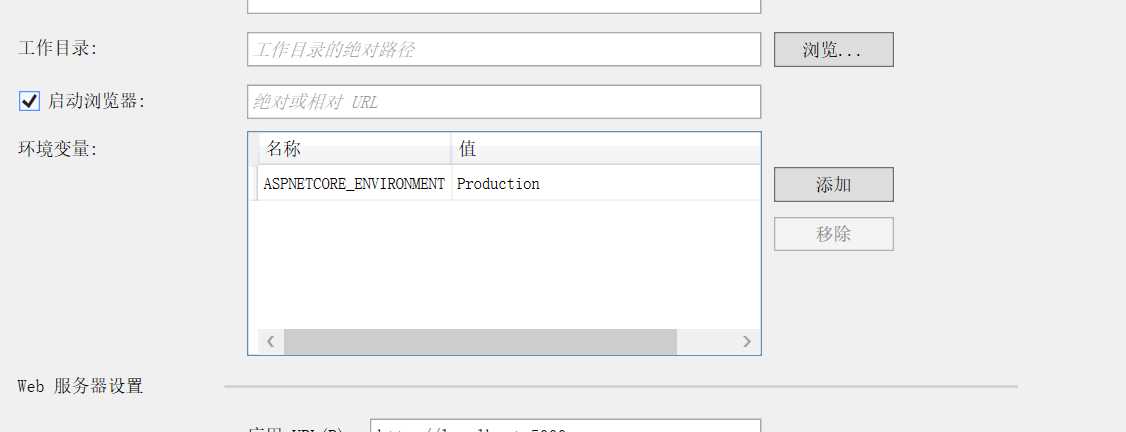
现在我们来运行,并且添加一个监视变量。

看样子它现在读取的就是我们的生产环境的数据了。
其实吧,也不用这么麻烦,在 Startup.cs 通过构造注入得到的 IConfiguration 就是按照 GetConfigurationRoot() 这个方法来进行构建的,你直接使用 Configuration/ConfigurationRoot 的索引器就可以访问到与环境变量相应的 JSON 文件了。
可能你还不太理解,明明在 GetConfigurationRoot() 方法里面使用 AddJsonFile() 方法只是添加了两次个 Provider ,为什么在使用索引器访问 JSON 配置的时候就是使用的当前环境的 JSON 文件呢?
我其实以为最开始 .NET CORE 对于 IConfiguration 的索引器实现就是读取了当前环境变量,然后根据这个环境变量去匹配对应的 Provider 取得值。
最后翻阅了 .NET CORE 的源代码之后发现是我想错了,其实他就是单纯的翻转了一下 Providers 的集合,然后取的第一个元素。
// Copyright (c) .NET Foundation. All rights reserved.
// Licensed under the Apache License, Version 2.0. See License.txt in the project root for license information.

using System;
using System.Collections.Generic;
using System.Linq;
using System.Threading;
using Microsoft.Extensions.Primitives;

namespace Microsoft.Extensions.Configuration
{
    public class ConfigurationRoot : IConfigurationRoot
    {
        private IList<IConfigurationProvider> _providers;
        private ConfigurationReloadToken _changeToken = new ConfigurationReloadToken();

        // 初始化 ConfigurationRoot 的时候传入配置提供者
        public ConfigurationRoot(IList<IConfigurationProvider> providers)
        {
            if (providers == null)
            {
                throw new ArgumentNullException(nameof(providers));
            }

            _providers = providers;
            foreach (var p in providers)
            {
                p.Load();
                ChangeToken.OnChange(() => p.GetReloadToken(), () => RaiseChanged());
            }
        }

        public IEnumerable<IConfigurationProvider> Providers => _providers;


        public string this[string key]
        {
            get
            {
                // 反转 Providers ,之后遍历
                foreach (var provider in _providers.Reverse())
                {
                    string value;

                   // 如果拿到了值,直接返回,不再遍历
                    if (provider.TryGet(key, out value))
                    {
                        return value;
                    }
                }

                return null;
            }

            set
            {
                if (!_providers.Any())
                {
                    throw new InvalidOperationException(Resources.Error_NoSources);
                }

                foreach (var provider in _providers)
                {
                    provider.Set(key, value);
                }
            }
        }
    }

    // ... 省略了的代码
}
回到第三节所写的代码,可以看到我们首先添加的是 appsettings.json 然后再根据环境变量添加的 $"appsettings.{environmentName}.json" ,所以反转之后取得的肯定就是带环境变量的配置文件咯。
直接右键计算机手动添加环境变量。
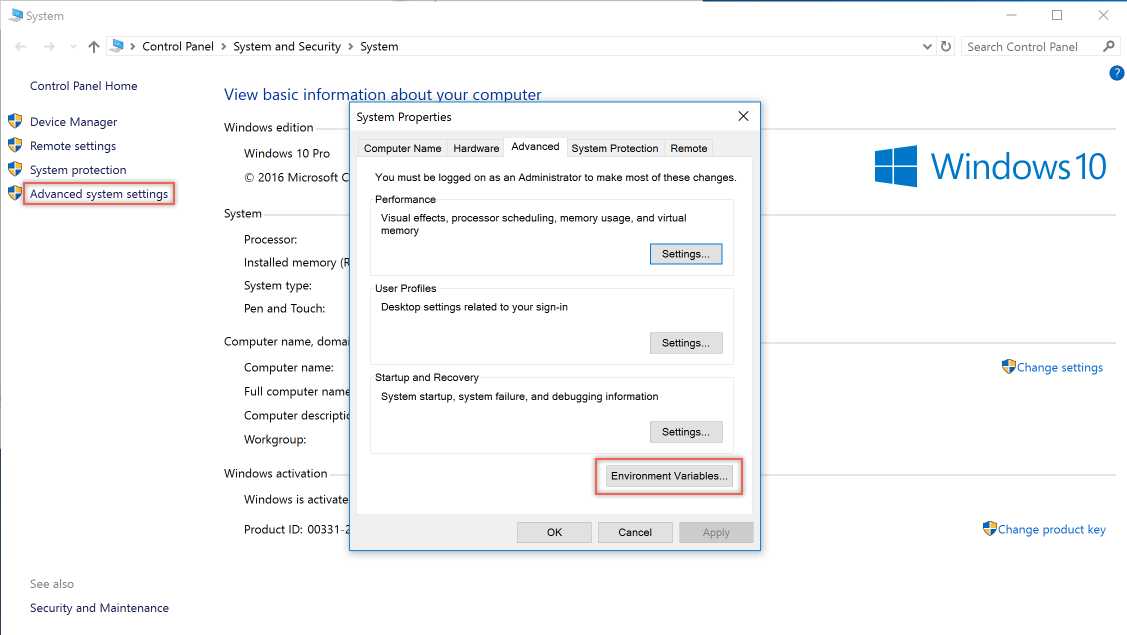

使用 export 命令直接进行环境变量设置。
export ASPNETCORE_ENVIRONMEN='Production'Docker 配置最为简单,直接在启动容器的时候加上 -e 参数即可,例如:
docker run -d -e ASPNETCORE_ENVIRONMEN=Production --name testContainer testImageASP .NET CORE 根据环境变量支持多个 appsettings.json
标签:path return 设定 copy window option normal 文件夹路径 第一个
原文地址:https://www.cnblogs.com/myzony/p/9418858.html