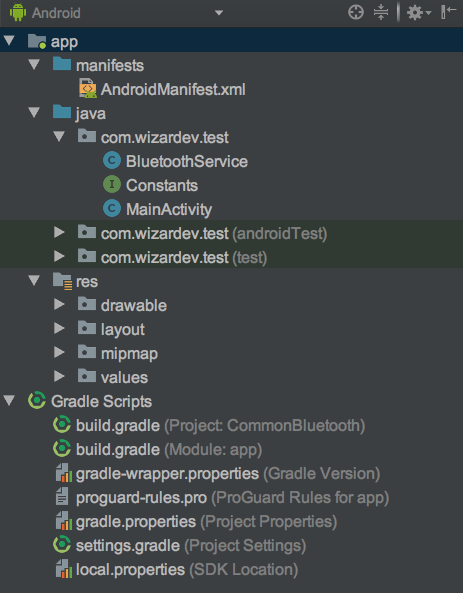
标签:record http stream 实现 catch serve mes 提示 官方
前言:最近,新换了一家公司,公司的软件需要通过蓝牙与硬件进行通讯,于是趁此机会将Android蓝牙详细的了解了一下。本篇内容是基于普通蓝牙。
??Android系统已经为我们提供了操作蓝牙的API,我们只要通过这些API便可以操控蓝牙,实现打开蓝牙设备,搜索周围蓝牙设备,与已连接的设备进行数据传输等操作。
??阅读本文后你将会有一下收获
??要在应用中使用蓝牙功能,必须声明蓝牙权限 BLUETOOTH。您需要此权限才能执行任何蓝牙通信,例如请求连接、接受连接和传输数据等。设置权限的代码如下
<uses-permission android:name="android.permission.BLUETOOTH" />在打开手机蓝牙之前首先判断手机是否支持蓝牙,判断是否支持蓝牙的代码如下
 BluetoothAdapter mBluetoothAdapter = BluetoothAdapter.getDefaultAdapter();
        if (mBluetoothAdapter == null) {
            Toast.makeText(this,"当前设备不支持蓝牙!",Toast.LENGTH_SHORT).show();
}解释一下BluetoothAdapter的作用
BluetoothAdapter代表本地设备蓝牙适配器,BluetoothAdapter可让您执行基本的蓝牙任务,如启动设备发现,查询绑定(配对)设备列表,使用已知的MAC地址实例化 BluetoothDevice,并创建 BluetoothServerSocket以侦听来自其他设备的连接请求,并开始扫描蓝牙LE设备。
如果设备支持蓝牙,则进行打开蓝牙的操作
??调用 BluetoothAdapter的isEnabled() 方法来检查当前是否已启用蓝牙。 如果此方法返回 false,则表示蓝牙处于停用状态。想要启用蓝牙,则需要设置Intent的Action为ACTION_REQUEST_ENABLE ,然后通过startActivityForResult()来启动蓝牙。具体的代码如下
 if (!mBluetoothAdapter.isEnabled()) {
                Intent enableBtIntent = new Intent(BluetoothAdapter.ACTION_REQUEST_ENABLE);
                startActivityForResult(enableBtIntent, REQUEST_ENABLE_BT);
            }
这段代码执行完后,手机则会弹出是否允许开启蓝牙的提示框,如下图
当用户点击“拒绝”或则“允许”的时候 Activity 将会在 onActivityResult() 回调中收到结果代码。
??当成功开启蓝牙时 Activity 将会在 onActivityResult() 回调中收到 RESULT_OK 结果代码。 如果由于某个错误(或用户响应“拒绝”)而没有启用蓝牙,则结果代码为 RESULT_CANCELED。我们便可以重写 onActivityResult()方法来判断蓝牙是否已经成功开启。
??在搜索设备之前,我们应该先查找已经进行配对的设备,如果目标设备已经进行过配对,则不需要进行设备搜索。因为,执行设备发现对于蓝牙适配器而言是一个非常繁重的操作过程,并且会消耗大量资源。可以通过BluetoothAdapter的getBondedDevices()方法来查询已经配对的设备,具体代码如下
 private void checkAlreadyConnect() {
     //获取已经配对的集合
        Set<BluetoothDevice> pairedDevices = mBluetoothAdapter.getBondedDevices();
        if (pairedDevices.size() > 0) {
            for (BluetoothDevice device : pairedDevices) {
                mArrayAdapter.add(device.getName() + "\n" + device.getAddress());
            }
            mArrayAdapter.notifyDataSetChanged();
        }
}??要搜索周围的设备,只需调用BluetoothAdapter 的startDiscovery()方法即可。
注:搜索设备是在异步进程中,通常会有12秒的时间来进行查询扫描,之后对每台发现的设备进行页面扫描,以检索其蓝牙名称。
调用startDiscovery()方法的时候还需要新增如下权限
<uses-permission android:name="android.permission.BLUETOOTH_ADMIN" />在发现设备后系统会进行ACTION_FOUND的广播,因此,我们需要一个广播接收者来接收广播,以下代码为发现设备后如何注册来处理广播
 // 新建一个 BroadcastReceiver来接收ACTION_FOUND广播
    private final BroadcastReceiver mReceiver = new BroadcastReceiver() {
        public void onReceive(Context context, Intent intent) {
            String action = intent.getAction();
            // 发现设备
            if (BluetoothDevice.ACTION_FOUND.equals(action)) {
                //获得 BluetoothDevice
                BluetoothDevice device = intent.getParcelableExtra(BluetoothDevice.EXTRA_DEVICE);
                //向mArrayAdapter中添加设备信息
                mSearchAdapter.add(device.getName() + "\n" + device.getAddress());
                mSearchAdapter.notifyDataSetChanged();
            }
        }
    };
    //设置IntentFilter
IntentFilter filter = new IntentFilter(BluetoothDevice.ACTION_FOUND);注意:执行设备发现对于蓝牙适配器而言是一个非常繁重的操作过程,并且会消耗大量资源。 在找到要连接的设备后,确保始终使用
cancelDiscovery()停止发现,然后再尝试连接。不应该在处于连接状态时执行发现操作。
??Android 设备默认处于不可检测到状态。 用户可通过系统设置将设备设为在有限的时间内处于可检测到状态,或者,应用可请求用户在不离开应用的同时启用可检测性。
??如果您希望将本地设备设为可被其他设备检测到,请使用 ACTION_REQUEST_DISCOVERABLE 操作 Intent 调用 startActivityForResult(Intent, int)。 这将通过系统设置发出启用可检测到模式的请求(无需停止您的应用)。 默认情况下,设备将变为可检测到并持续 120 秒钟。 您可以通过添加EXTRA_DISCOVERABLE_DURATION Intent Extra 来定义不同的持续时间。 应用可以设置的最大持续时间为 3600 秒,值为 0 则表示设备始终可检测到。 任何小于 0 或大于 3600 的值都会自动设为 120 秒。 例如,以下片段会将持续时间设为 300 秒:
Intent discoverableIntent = new
Intent(BluetoothAdapter.ACTION_REQUEST_DISCOVERABLE);
discoverableIntent.putExtra(BluetoothAdapter.EXTRA_DISCOVERABLE_DURATION, 300);
startActivity(discoverableIntent);??引用官方的文档
要在两台设备上的应用之间创建连接,必须同时实现服务器端和客户端机制,因为其中一台设备必须开放服务器套接字,而另一台设备必须发起连接(使用服务器设备的 MAC 地址发起连接)。 当服务器和客户端在同一 RFCOMM 通道上分别拥有已连接的
BluetoothSocket时,二者将被视为彼此连接。
由上面的引用可知,要想创建两个应用之间的连接,必须同时实现服务器端和客户端机制,下面,分别介绍怎样实现为服务器端和客户端机制。
当您需要连接两台设备时,其中一台设备必须通过保持开放的
BluetoothServerSocket来充当服务器。 服务器套接字的用途是侦听传入的连接请求,并在接受一个请求后提供已连接的BluetoothSocket。 从BluetoothServerSocket获取BluetoothSocket后,可以(并且应该)舍弃BluetoothServerSocket,除非您需要接受更多连接。
下面是作为服务端的代码
private class AcceptThread extends Thread {
        private final BluetoothServerSocket mmServerSocket;

        public AcceptThread() {
            BluetoothServerSocket tmp = null;
            try {

                tmp = mAdapter.listenUsingRfcommWithServiceRecord(NAME,
                        MY_UUID);

            } catch (IOException e) {

            }
            mmServerSocket = tmp;
            mState = STATE_LISTEN;
        }

        public void run() {
            setName("AcceptThread");

            BluetoothSocket socket = null;

            while (mState != STATE_CONNECTED) {
                try {
                    socket = mmServerSocket.accept();
                } catch (IOException e) {
                    break;
                }

                if (socket != null) {
                    synchronized (BluetoothService.this) {
                        switch (mState) {
                            case STATE_LISTEN:
                            case STATE_CONNECTING:
                                connected(socket, socket.getRemoteDevice());
                                break;
                            case STATE_NONE:
                            case STATE_CONNECTED:
                                try {
                                    socket.close();
                                } catch (IOException e) {

                                }
                                break;
                        }
                    }
                }
            }

        }

        public void cancel() {
            try {
                mmServerSocket.close();
            } catch (IOException e) {
            }
        }
    }
这里解释一下,为什么要新开一个线程来作为服务端,因为通过调用 accept()这是一个阻塞调用。
注意:mAdapter.listenUsingRfcommWithServiceRecord(NAME,MY_UUID);中的MY_UUID必须与客服端连接时的UUID一致。
总结一下作为服务端的步骤:
listenUsingRfcommWithServiceRecord(String, UUID) 获取 BluetoothServerSocket。accept() 开始侦听连接请求。close()关闭。??先看下作为客户端的代码
 private class ConnectThread extends Thread {
        private final BluetoothSocket mmSocket;
        private final BluetoothDevice mmDevice;

        public ConnectThread(BluetoothDevice device) {
            mmDevice = device;
            BluetoothSocket tmp = null;

            try {
                tmp = device.createRfcommSocketToServiceRecord(
                        MY_UUID);
            } catch (IOException e) {

            }
            mmSocket = tmp;
            mState = STATE_CONNECTING;
        }

        public void run() {
            setName("ConnectThread");
            mAdapter.cancelDiscovery();
            try {
                mmSocket.connect();
            } catch (IOException e) {
                try {
                    mmSocket.close();
                } catch (IOException e2) {
                }
                return;
            }
            synchronized (BluetoothService.this) {
                mConnectThread = null;
            }

            connected(mmSocket, mmDevice);
        }

        public void cancel() {
            try {
                mmSocket.close();
            } catch (IOException e) {

            }
        }
    }
这里有一点需要注意,也是官方文档中强调的
注:在调用
connect()时,应始终确保设备未在执行设备发现。 如果正在进行发现操作,则会大幅降低连接尝试的速度,并增加连接失败的可能性。
因此,在进行连接之前必须调用mAdapter.cancelDiscovery();来关闭查找设备。这里总结一下作为客户端的步骤:
BluetoothDevice,通过调用 createRfcommSocketToServiceRecord(UUID) 获取 BluetoothSocket。(这里的UUID必须与服务端的保持一致)connect() 发起连接。??如果两台设备之前尚未配对,则在连接过程中,Android 框架会自动向用户显示配对请求通知或对话框,如下图所示。
进行配对之后就可以进行通信及数据的传输了。
??通过上面的几步,这时已经可以实现设备之间的连接了。下面说一下设备之间的通信。
??其实在两台设备连接成功后,每台设备都会有一个已连接的 BluetoothSocket。我们则可以利用 BluetoothSocket,来进行数据的传输。看代码
 private class ConnectedThread extends Thread {
        private final BluetoothSocket mmSocket;
        private final InputStream mmInStream;
        private final OutputStream mmOutStream;

        public ConnectedThread(BluetoothSocket socket) {

            mmSocket = socket;
            InputStream tmpIn = null;
            OutputStream tmpOut = null;

            // 获取BluetoothSocket的input and output streams
            try {
                tmpIn = socket.getInputStream();
                tmpOut = socket.getOutputStream();
            } catch (IOException e) {
                Log.e(TAG, "temp sockets not created", e);
            }

            mmInStream = tmpIn;
            mmOutStream = tmpOut;
            mState = STATE_CONNECTED;
        }

        public void run() {
            Log.i(TAG, "BEGIN mConnectedThread");
            byte[] buffer = new byte[1024];
            int bytes;

            while (mState == STATE_CONNECTED) {
                try {
                    bytes = mmInStream.read(buffer);
                    Log.d(TAG, "已经连接");
                    mHandler.obtainMessage(Constants.MESSAGE_READ, bytes, -1, buffer)
                            .sendToTarget();
                } catch (IOException e) {
                    Log.e(TAG, "disconnected", e);
                    break;
                }
            }
        }

        //写数据
        public void write(byte[] buffer) {
            try {
                mmOutStream.write(buffer);
        //发送消息到主线程
              mHandler.obtainMessage(Constants.MESSAGE_WRITE, -1, -1, buffer)
                        .sendToTarget();
            } catch (IOException e) {
                Log.e(TAG, "Exception during write", e);
            }
        }

        public void cancel() {
            try {
                mmSocket.close();
            } catch (IOException e) {
                Log.e(TAG, "close() of connect socket failed", e);
            }
        }
}从上面代码中可以看到,首先是通过BluetoothSocket来拿到InputStream和OutputStream,然后利用read,write方法来读取和写入数据。

??本文的内容是基于普通蓝牙进行描述的,主要讲解了怎样操作蓝牙及进行设备间的通讯。不过现在好多都是在BLE蓝牙设备间进行通讯了,当然,我也会针对BLE蓝牙设备在写一篇文章,本文就是为后面的BLE蓝牙讲解做准备的。
转载请注明出处:www.wizardev.com
Android蓝牙
注:本文著作权归作者,由demo大师代发,拒绝转载,转载需要作者授权
标签:record http stream 实现 catch serve mes 提示 官方
原文地址:https://www.cnblogs.com/demodashi/p/9436608.html