标签:android style blog http color io os 使用 ar
android访问相机使用的是Camera.open 来返回一个Camera对象,设置好显示的视图后,调用Camera的预览功能函数 startPreview,停止预览函数是 stopPreview!
activity_mail.xml布局
<LinearLayout xmlns:android="http://schemas.android.com/apk/res/android"
    xmlns:tools="http://schemas.android.com/tools"
    android:id="@+id/LinearLayout1"
    android:layout_width="match_parent"
    android:layout_height="match_parent"
    android:orientation="vertical"
    tools:context="com.ssln.camera.MainActivity" >

    <VideoView
        android:id="@+id/videoView1"
        android:layout_width="match_parent"
        android:layout_height="300dp" />

    <LinearLayout
        android:layout_width="match_parent"
        android:layout_height="wrap_content" >

        <Button
            android:id="@+id/button1"
            android:layout_width="wrap_content"
            android:layout_height="wrap_content"
            android:text="打开" />

        <Button
            android:id="@+id/button2"
            android:layout_width="wrap_content"
            android:layout_height="wrap_content"
            android:text="关闭" />

    </LinearLayout>

</LinearLayout>
MainActivity.java
package com.ssln.camera;

import java.io.IOException;

import android.app.Activity;
import android.hardware.Camera;
import android.os.Bundle;
import android.view.SurfaceHolder;
import android.view.View;
import android.view.View.OnClickListener;
import android.widget.Button;
import android.widget.VideoView;

public class MainActivity extends Activity implements OnClickListener {

    private Camera myCamra; // 相机
    private VideoView video; // 显示
    private Button btnOpen, btnClose;
    private boolean isPreview=false;    //是否预览
    private SurfaceHolder holder;
    @Override
    protected void onCreate(Bundle savedInstanceState) {
        super.onCreate(savedInstanceState);
        setContentView(R.layout.activity_main);

        video = (VideoView) findViewById(R.id.videoView1);
        btnOpen = (Button) findViewById(R.id.button1);
        btnClose = (Button) findViewById(R.id.button2);
        btnOpen.setOnClickListener(this);
        btnClose.setOnClickListener(this);
        holder=video.getHolder();
    }

    @Override
    public void onClick(View v) {
        if (v == btnOpen) {
            initCamera();
        } else if (v == btnClose) {
            if(myCamra!=null && isPreview){
                myCamra.stopPreview();//停止预览
                myCamra.release();      //释放资源
                myCamra=null;
                isPreview=false;
            }
        }

    }

    /**
     * 初始化相机
     */
    private void initCamera(){
        if(!isPreview)
        {
            myCamra=Camera.open();    //打开相机设备
        }
        if(myCamra!=null && !isPreview)
        {
            try {
                myCamra.setPreviewDisplay(holder);
                myCamra.startPreview();//开始预览
            } catch (IOException e) {
                e.printStackTrace();
            }
            isPreview=true;
        }

    }
}
访问相机是需要权限的,记得加上
<?xml version="1.0" encoding="utf-8"?>
<manifest xmlns:android="http://schemas.android.com/apk/res/android"
    package="com.ssln.camera"
    android:versionCode="1"
    android:versionName="1.0" >

    <uses-sdk
        android:minSdkVersion="8"
        android:targetSdkVersion="21" />
    <!-- 相机访问权限 -->
    <uses-permission android:name="android.permission.CAMERA"/>
<!-- 加下下面两句,否则会出现 Fail to connect to camera service. 错误 -->
<uses-feature android:name="android.hardware.camera" />
<uses-feature android:name="android.hardware.camera.autofocus" />
    <application
        android:allowBackup="true"
        android:icon="@drawable/ic_launcher"
        android:label="@string/app_name"
        android:theme="@style/AppTheme" >
        <activity
            android:name=".MainActivity"
            android:label="@string/app_name" >
            <intent-filter>
                <action android:name="android.intent.action.MAIN" />

                <category android:name="android.intent.category.LAUNCHER" />
            </intent-filter>
        </activity>
    </application>

</manifest>
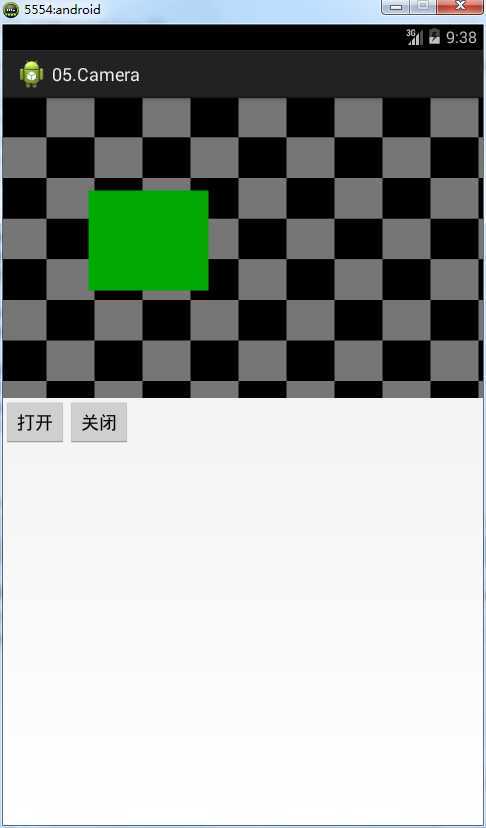
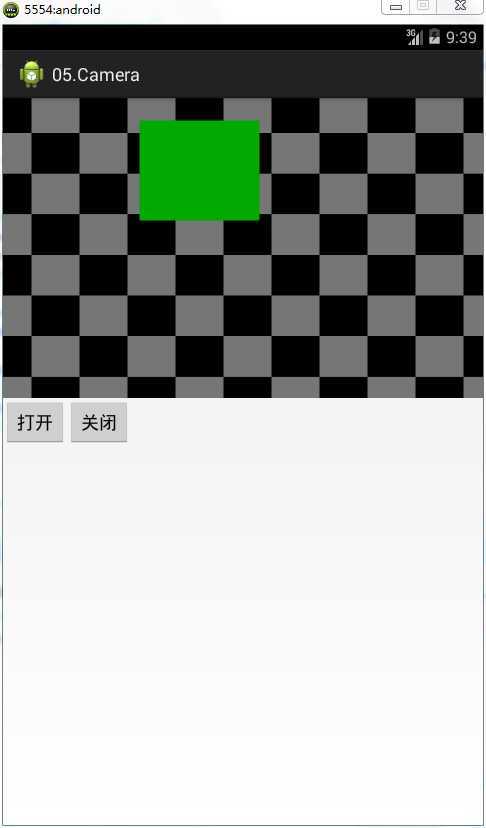
效果预览


标签:android style blog http color io os 使用 ar
原文地址:http://www.cnblogs.com/alwaysfirst/p/4006420.html