标签:注意 nump 回调 三方 arc 提示 相对 wxpython cas
OpenCV是开源的跨平台计算机视觉库,提供了Python等语言的接口,实现了图像处理和计算机视觉方面的很多通用算法。
opencv中内置了基于Viola-Jones目标检测框架的Harr分类器,只需要载入一个配置文件(haarcascade_frontalface_alt.xml)就能直接调用detectObject去完成检测过程,同时也支持其他特征的检测(如鼻子、嘴巴等)。
本程序用wxPython开发GUI界面,利用OpenCv实现一个简易的猫脸识别、人脸识别器。
本程序的运行效果如下:
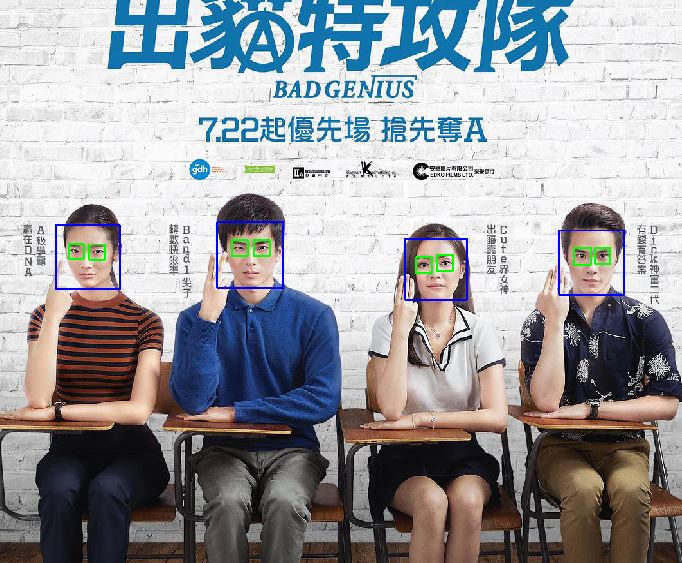
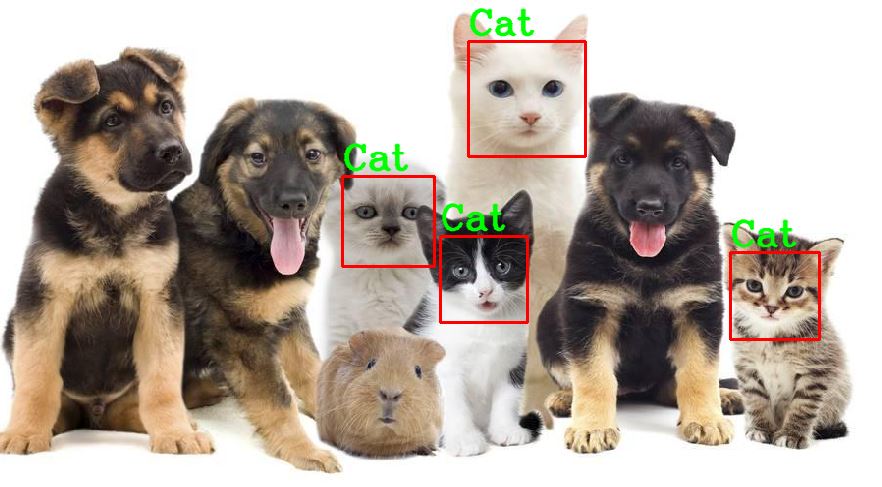
1.安装必要的第三方库:
     pip install numpy
     pip install wxPython
安装PIL,在以下地址下载PIL库进行安装:
http://effbot.org/media/downloads/PIL-1.1.7.win32-py2.7.exe
(或在http://effbot.org/downloads/ 中找到与你操作系统及python版本相对应
版本的PIL)
安装OpenCv,建议在以下地址下载相应的版本进行安装:
https://www.lfd.uci.edu/~gohlke/pythonlibs/#opencv
如下载了opencv_python-3.1.0-cp27-none-win32.whl;
输入:
pip install opencv_python-3.1.0-cp27-none-win32.whl即可完成安装。
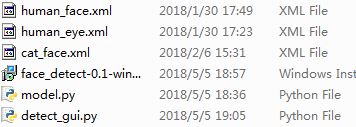
整体的项目结构十分简单,一共两个脚本文件,一个是GUI界面脚本(detect_gui.py),
一个是检测器脚本(model.py);另有三个已经训练好的分类器文件,分别是检测人脸的
human_face.xml,检测人眼的human_eye.xml,检测猫脸的eye_face.xml 文件。
还有一个“face_detect-0.1-win32.msi”是根据本脚本进行编译后的可执行程序。
如下:
import cv2human_face = cv2.CascadeClassifier(r‘human_face.xml‘)
human_eye = cv2.CascadeClassifier(r‘human_eye.xml‘)
cat_face = cv2.CascadeClassifier(r‘cat_face.xml‘)编写model.py中的相关类及函数,
用cv2.imread()函数读入图像后,需要通过cv2.cvtColor(img, cv2.COLOR_BGR2GRAY)
函数将图像转为灰度格式。
首先用人脸分类器检出人脸区域,再在人脸区域中用人眼分类器检出人眼区域,
同时绘制矩形框选出目标区域。
详细代码如下:
class Faces(object):
def human_face(self,fileName):
"""人脸、人眼检测"""
img = cv2.imread(fileName)
gray = cv2.cvtColor(img, cv2.COLOR_BGR2GRAY)
faces = human_face.detectMultiScale(gray, scaleFactor = 1.2, minNeighbors = 3, minSize = (32, 32))
    """在目标区域绘制矩形"""
     for (x,y,w,h) in faces:
         img = cv2.rectangle(img,(x,y),(x+w,y+h),(255,0,0),2)
         roi_gray = gray[y:y+h, x:x+w]
         roi_color = img[y:y+h, x:x+w]
         eyes = human_eye.detectMultiScale(roi_gray)
         for (ex,ey,ew,eh) in eyes:
             cv2.rectangle(roi_color,(ex,ey),(ex+ew,ey+eh),(0,255,0),2)
     return img
同理写出检测猫脸的函数:
    def cat_face(self,fileName):
        """猫脸检测"""
        img = cv2.imread(fileName)
        gray = cv2.cvtColor(img, cv2.COLOR_BGR2GRAY)
        faces = cat_face.detectMultiScale(gray,scaleFactor= 1.02,
                                             minNeighbors=9,
                                             minSize=(70, 70),
                                             flags=cv2.CASCADE_SCALE_IMAGE)
        for (x, y, w, h) in faces:
            cv2.rectangle(img, (x, y), (x+w, y+h), (0, 0, 255), 2)
            cv2.putText(img,‘Cat‘,(x,y-7), 3, 1.2, (0, 255, 0), 2, cv2.LINE_AA)
        return img
4.在detect_gui.py中编写用户界面:
导入相关的库,从我们model.py中导入Faces类:
import wx
import os
import cv2
from collections import namedtuple
import  wx.lib.rcsizer  as rcs
from PIL import Image
from model import Faces
编写界面:
class MainWindow(wx.Frame):
    def __init__(self,parent,title):
        wx.Frame.__init__(self,parent,title=title,size=(600,-1))
        Size = namedtuple("Size",[‘x‘,‘y‘])
        s = Size(100,50)

        self.human = None
        self.cat = None

        """创建输入框"""
        self.in1 = wx.TextCtrl(self,-1,size = (2*s.x,s.y))
        self.in2 = wx.TextCtrl(self,-1,size = (2*s.x,s.y))

        """创建按钮"""
        b1 = wx.Button(self,-1,‘human image‘)
        b2 = wx.Button(self, -1, "run")
        b3 = wx.Button(self,-1,‘cat image‘)
        b4 = wx.Button(self,-1,‘run‘)

        """设置输入框的提示信息"""
        self.in1.SetToolTipString(‘choose a human image‘)
        self.in2.SetToolTipString(‘choose a cat image‘)

        """界面布局"""
        self.sizer0 = rcs.RowColSizer()
        self.sizer0.Add(b1,row = 1,col = 1)
        self.sizer0.Add(self.in1,row = 1,col = 2)
        self.sizer0.Add(b2,row = 1,col = 3)
        self.sizer0.Add(b3,row = 2,col = 1)
        self.sizer0.Add(self.in2,row = 2,col = 2)
        self.sizer0.Add(b4,row = 2,col = 3)

        """绑定回调函数"""
        self.Bind(wx.EVT_BUTTON, self.img_read, b1)
        self.Bind(wx.EVT_BUTTON, self.human_face, b2)
        self.Bind(wx.EVT_BUTTON, self.img_read_cat, b3)
        self.Bind(wx.EVT_BUTTON, self.cat_face, b4)

        self.SetSizer(self.sizer0)
        self.SetAutoLayout(1)
        self.sizer0.Fit(self)
        self.CreateStatusBar()
        self.Show(True)
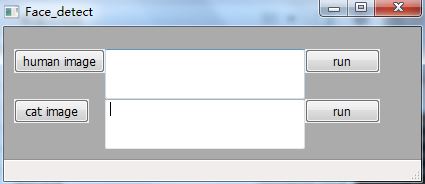
界面如下:
编写控件的回调函数:
    def img_read(self,evt):
        """read and show image"""
        self.human = None
        self.human = self.choose_file()
        if self.human is None:
            pass
        else:
            self.in1.Clear()
            self.in1.write(self.human)
            im = Image.open(self.human)
            im.show()

    def img_read_cat(self,evt):
        """read and show image"""
        self.cat = None
        self.cat = self.choose_file()
        if self.cat is None:
            pass
        else:
            self.in2.Clear()
            self.in2.write(self.cat)
            im = Image.open(self.cat)
            im.show()

    def human_face(self,evt):
        if self.human is None:
            self.raise_msg(u‘plaese choose an image first.‘)
            return None
        else:
            face = Faces()
            img = face.human_face(self.human)
            self.imgs_show(img,‘Human face detect‘)

    def cat_face(self,evt):
        if self.cat is None:
            self.raise_msg(u‘plaese choose an image first.‘)
            return None
        else:
            face = Faces()
            img = face.cat_face(self.cat)
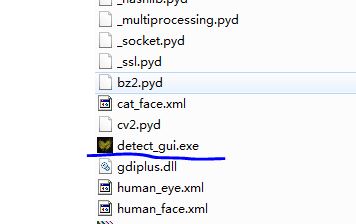
self.imgs_show(img,‘Cat face Detect‘) 项目文件中的“face_detect-0.1-win32.msi”是根据本脚本进行编译打包后、
可以在windows系统下独立运行的安装程序,双击该文件即可安装软件,
安装完成后,点击安装路径下的“detect_gui.exe”即可运行本软件
(即使目标PC没有安装OpenCv或Python)
如下图所示:
Python 实现的猫脸识别、人脸识别器。
注:本文著作权归作者,由demo大师代发,拒绝转载,转载需要作者授权
标签:注意 nump 回调 三方 arc 提示 相对 wxpython cas
原文地址:https://www.cnblogs.com/demodashi/p/9437763.html