标签:filter 回调 手写 tor pre string sel data none
k-近邻(kNN, k-NearestNeighbor)算法是一种基本分类与回归方法,
通俗点来说,就是给定一个训练数据集,对新的输入实例,在训练数据集中找到与该实例最邻近的 k 个实例,这 k 个实例的多数属于某个类,就把该输入实例分为这个类。
python 第三方库scikit-learn(sklearn)提供了knn的分类器。
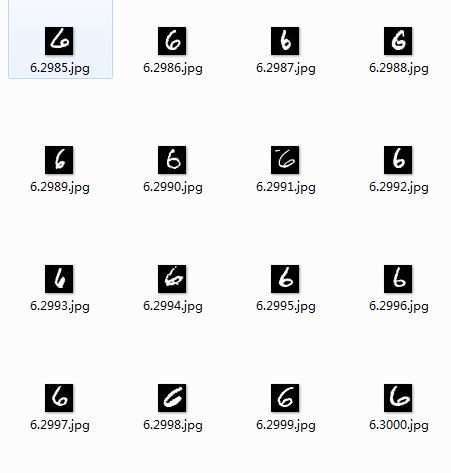
MNIST手写数字数据库(Mixed National Institute of Standards and Technology database)包含
70000张手写数字图片。这些数字是通过美国国家统计局的员工和美国高校的学生收集的。每张图片
都是28x28的灰度图。
用mnist数据集训练出一个knn分类器,对新输入的手写数字进行识别。
1.安装必要的第三方库:
pip install scikit-learn
pip install numpy
pip install wxPython
安装PIL,在以下地址下载PIL库进行安装:
http://effbot.org/media/downloads/PIL-1.1.7.win32-py2.7.exe
(或在http://effbot.org/downloads/ 中找到与你操作系统及python版本相对应
版本的PIL)
2.下载mnist数据集:
可以从以下地址下载mnist数据集。
http://yann.lecun.com/exdb/mnist/
如下:

整体的项目结构十分简单,一共两个脚本文件,一个是GUI界面脚本(digit_gui.py),
一个是分类器脚本(model.py)。
如下:

1. 在model.py中导入相关的库:
import numpy as np
import os
from PIL import Image
import random
from sklearn.neighbors import KNeighborsClassifier as knn
from sklearn.externals import joblib
2. 编写model.py中的相关函数,
将图片转为向量:
def img2vec(fname):
    ‘‘‘将jpg等格式的图片转为向量‘‘‘
    im = Image.open(fname).convert(‘L‘)
    im = im.resize((28,28))
    tmp = np.array(im)
    vec = tmp.ravel()
    return vec
随机抽取1000张图片作为训练集:
def split_data(paths):
    ‘‘‘随机抽取1000张图片作为训练集‘‘‘
    fn_list = os.llistdir(paths)
    X = []
    y = []
    d0 = random.sample(fn_list,1000)
    for i,name in enumerate(d0):
        y.append(name[0])
        X.append(img2vec(name))
        dataset = np.array([X,y])
    return X,y
构建分类器:
def knn_clf(X_train,label):
    ‘‘‘构建分类器‘‘‘
    clf = knn()
    clf.fit(X_train,label)
    return clf
保存模型:
def save_model(model,output_name):
    ‘‘‘保存模型‘‘‘
    joblib.dump(model,ouotput_name)
3. 训练模型:
X_train,y_label = split_data(file_path)
clf = knn_clf(X_train,y_label)
save_model(clf,‘mnist_knn1000.m‘)
4. 在digit_gui.py中编写用户界面:
导入相关的库:
import wx
from collections import namedtuple
from PIL import Image
import os
import model
编写界面:
class MainWindow(wx.Frame):
    def __init__(self,parent,title):
        wx.Frame.__init__(self,parent,title=title,size=(600,-1))
        static_font = wx.Font(12, wx.SWISS, wx.NORMAL, wx.NORMAL)

        Size = namedtuple("Size",[‘x‘,‘y‘])
        s = Size(100,50)
        sm = Size(100,25)

        self.fileName = None
        self.model = model

        b_labels = [u‘open‘,u‘run‘]

        TipString = [u‘选择图片‘, u‘识别数字‘]

        funcs = [self.choose_file,self.run]

        ‘‘‘create input area‘‘‘
        self.in1 = wx.TextCtrl(self,-1,size = (2*s.x,3*s.y))
        self.out1 = wx.TextCtrl(self,-1,size = (s.x,3*s.y))

        ‘‘‘create button‘‘‘
        self.sizer0 = wx.FlexGridSizer(rows=1, hgap=4, vgap=2)
        self.sizer0.Add(self.in1)

        buttons = []
        for i,label in enumerate(b_labels):
            b = wx.Button(self, id = i,label = label,size = (1.5*s.x,s.y))
            buttons.append(b)
            self.sizer0.Add(b)

        self.sizer0.Add(self.out1)

        ‘‘‘set the color and size of labels and buttons‘‘‘
        for i,button in enumerate(buttons):
            button.SetForegroundColour(‘red‘)
            button.SetFont(static_font)
            button.SetToolTipString(TipString[i])
            button.Bind(wx.EVT_BUTTON,funcs[i])

        ‘‘‘layout‘‘‘
        self.SetSizer(self.sizer0)
        self.SetAutoLayout(1)
        self.sizer0.Fit(self)

        self.CreateStatusBar()
        self.Show(True)
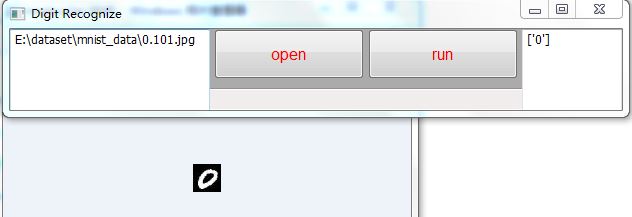
界面如下:

编写控件的回调函数:
    def run(self,evt):
        if self.fileName is None:
            self.raise_msg(u‘请选择一幅图片‘)
            return None
        else:
            model_path = os.path.join(origin_path,‘mnist_knn1000.m‘)
            clf = model.load_model(model_path)
            ans = model.tester(self.fileName,clf)
            self.out1.Clear()
            self.out1.write(str(ans))

    def choose_file(self,evt):
        ‘‘‘choose img‘‘‘
        dlg = wx.FileDialog(
            self, message="Choose a file",
            defaultDir=os.getcwd(),
            defaultFile="",
            wildcard=wildcard,
            style=wx.OPEN | wx.MULTIPLE | wx.CHANGE_DIR
            )
        if dlg.ShowModal() == wx.ID_OK:
            paths = dlg.GetPaths()
            dlg.Destroy()
            self.in1.Clear()
            self.in1.write(paths[0])
            self.fileName = paths[0]
            im = Image.open(self.fileName)
            im.show()
        else:
            return None

标签:filter 回调 手写 tor pre string sel data none
原文地址:https://www.cnblogs.com/demodashi/p/9452947.html