标签:\n main list apach linux中 查看端口 dir man firefox
httpd访问控制
生成共享文件
vim var/www/html/cq/index.html
编辑配置文件
vim /etc/httpd/conf/httpd.conf
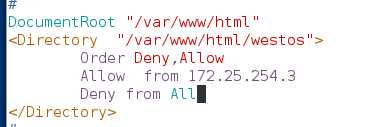
<Directory "/var/www/html/cq">
Order Deny,ALLOW ##读取顺序
Allow from 172.25.254.4 ##设置允许172。25.254.3登入
Deny from All ##设置拒绝所有人
</Directory>
systemctl restart httpd

cd /etc/httpd/conf
ls
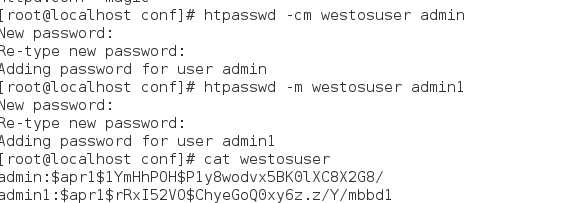
htpasswd -cm cquser admin 创建访问用户
htpasswd -m cquser admin1 再次创建
vim /etc/httpd/conf/httpd.conf
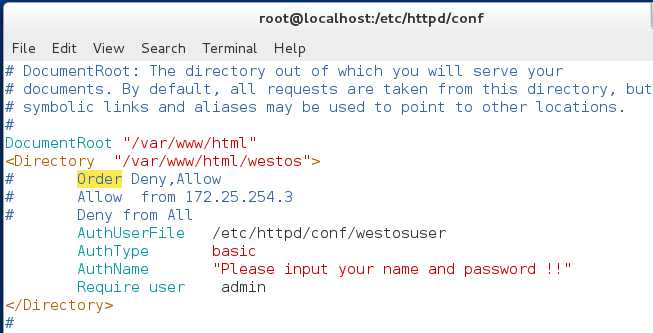
<Directory "/var/www/html/cq">
AuthUserFile /etc/httpd/conf/cquser
AuthType basic
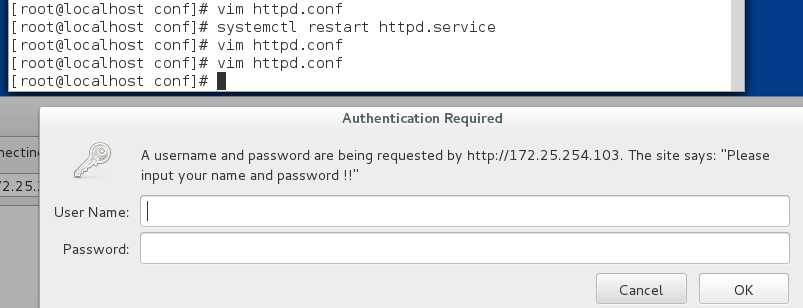
AuthName "please input your name and password!"
Require user admin
</Directory>
##apach的虚拟主机功能
注释掉之前的配置
创建文件
mkdir /var/www/virtual/news/html
mkdir /var/www/virtual/music/html
vim /var/www/virtual/news/html/index.html
vim /var/www/virtual/music/html/index.html

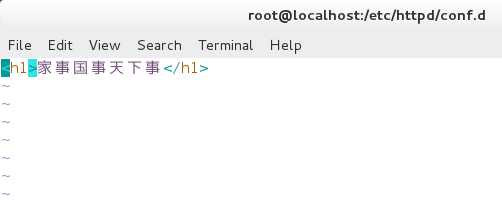
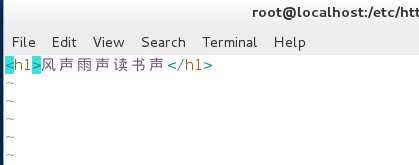
cd /etc/httpd/conf.d/
vim a_default.conf

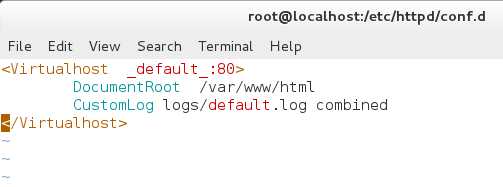
vim news.conf
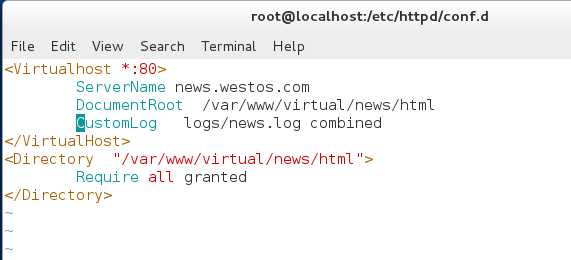
vim music.conf
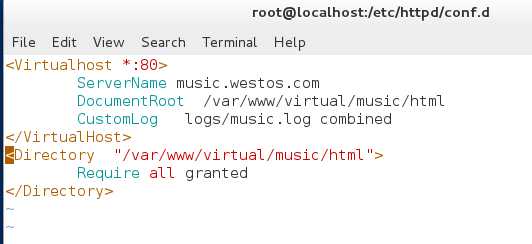

当这些配置完成之后,需要在浏览器一端设置本地域名解析。
vim /etc/hosts
172.25.254.103 www.westos.com av.westos.com cctv.default.com
测试:


##php cgi 的安装
yum install php -y
vim /var/www/html/index.php
<?php
phpinfo(); php的测试页
?>

测试:172.25.254.103/index.php
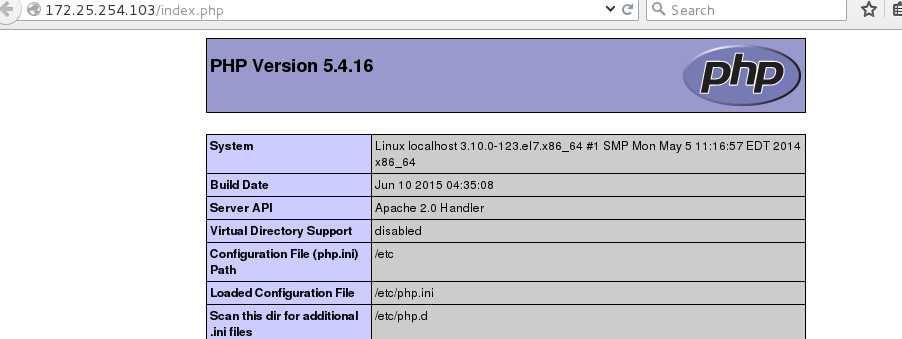
cgi
yum install httpd-manual -y
mkdir /var/www/html/cgi
vim /var/www/html/cgi/index.cgi
#!/usr/bin/perl
print "Content-type: text/html\n\n";
print ‘date‘;
chmod 755 index.cgi

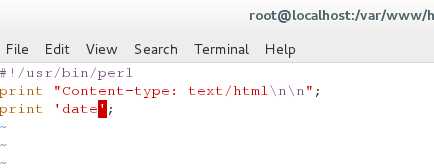
然而此时访问却只能访问裸露的代码
此时需要配置 vim /etc/httpd/conf.d/a_default.conf
在manual页上复制
<Directory "/var/www/html/cgi">
Options +ExecCGI
AddHandler cgi-script .cgi
</Directory>
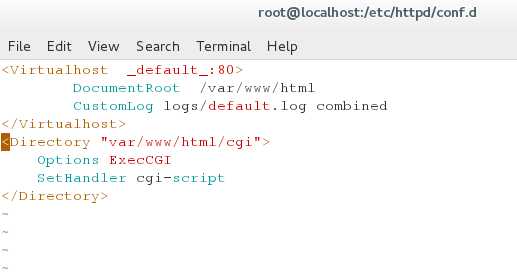
systemctl restart httpd
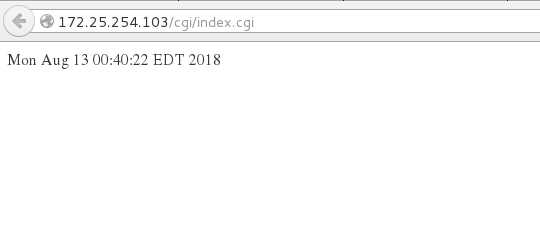
###########################################################
https
yum install mod_ssl -y
yum install crypto-utils -y
genkey www.westos.com 生成证书
vim ssl.conf
crtl+z fg 1 复制锁和钥匙存的目录到这个配置文件里
systemctl restart httpd

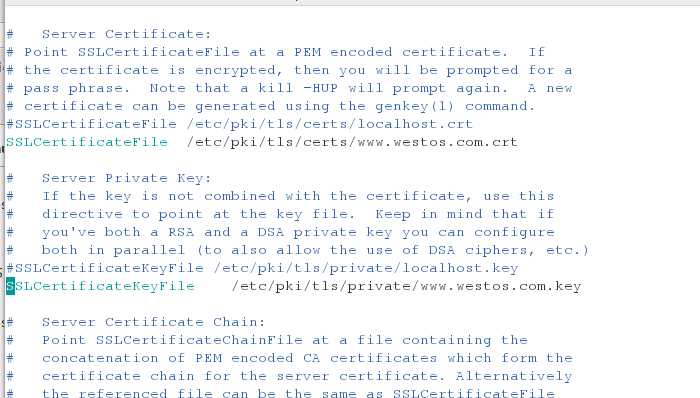
此时访问 https://www.westos.com
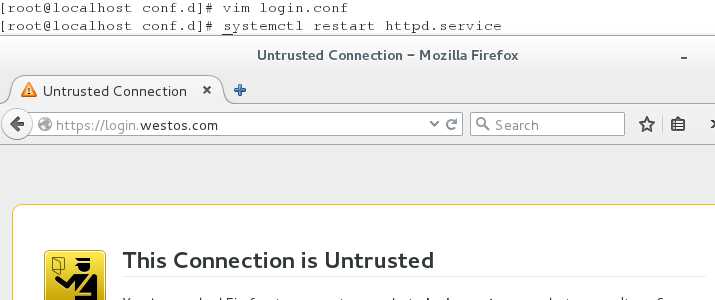
#################################################################
实现自动加锁
cd /etc/httpd/conf.d/
cp news.conf login.conf
vim login.conf
:%s/news/login 将所有的news换成login
mkdir -p /var/www/virtual/login/html 创建目录
vim /var/www/virtual/login/html/index.html 编写文件
vim /etc/httpd.conf/login.conf
vim /etc//httpd/conf.d/ssl.conf
复制钥匙复制锁
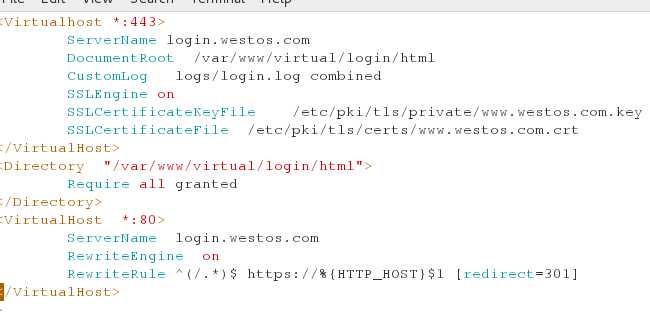
systemctl restart httpd
测试;
访问 login.westos.com 注:测试机若没有解析请添加解析 vim/etc/hosts :login.westos.com
结果自动切换到https
##################################################################3
squid
首先在虚拟机上安装squid
yum install squid -y
配置好虚拟机的网关和dns
开启squid
systemctl start squid
netstat -antlupe | grep squid 查看端口
vim /etc/squid/squid.conf
56 http_access allow all
62 取消注释
systemctl restart squid
之后可以通过虚拟机让真机上网
######################################################
squid的缓存
设备
reset的desktop
安装 squid
vim /etc/squid/squid.conf
http_access allow all
# Squid normally listens to port 3128
http_port 80 vhost vport
cache_peer 172.25.254.104 parent 80 0 proxy-only round-robin originserver name=web1
cache_peer 172.25.254.103 parent 80 0 proxy-only round-robin originserver name=web2
cache_peer_domain web1 web2 www.westos.com
# Uncomment and adjust the following to add a disk cache directory.
cache_dir ufs /var/spool/squid 100 16 256
systemctl restart squid
vim /etc/hosts
www.westos.com 172.25.254.204
测试:在虚拟机上firefox
www.westos.com
Linux中apache服务
标签:\n main list apach linux中 查看端口 dir man firefox
原文地址:https://www.cnblogs.com/zhengyipengyou/p/9478428.html


