标签:context nbsp 问题 ima manage spring 图片 dock ctr
上一篇文章,简单记录了一下缓存的使用方法,这篇文章将把我们熟悉的redis整合进来。
那么如何去整合呢?首先需要下载和安装,为了使用方便,也可以做环境变量的配置。
下载和安装的方法,之前有介绍,在docker中的使用,这里不做相关介绍,有想在windows环境下使用的,自己搜一下如何windows安装使用redis吧~(看这里也可以)
正题: SpringBoot对应(自带)RedisClient是不同的
SpringBoot1.5.x版本 -> jedis
SpringBoot2.x版本 - > lettuce (本文以2.x为例)
启动redis服务,并打开管理客户端。其中默认的端口号,可以通过修改config来实现。

按照如图所示的步骤,链接本地的redis,如果你是在远程服务器安装的,ip记得填写服务器的。
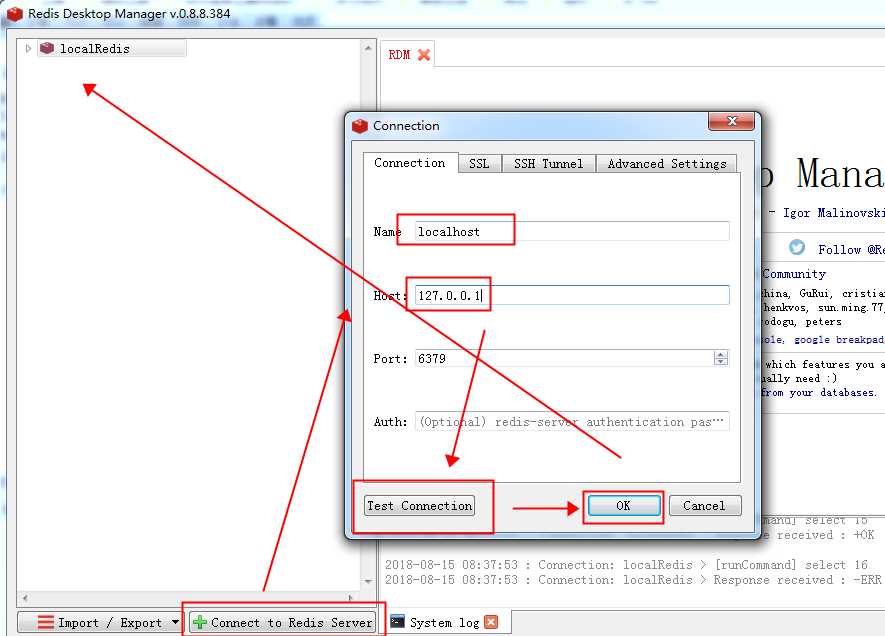
选中我们做好的链接,右键打开console或者ctrl+T,打开控制台,我们来测试一下命令是否可用~
在控制台输入命令,看一下(Redis命令点击查看)
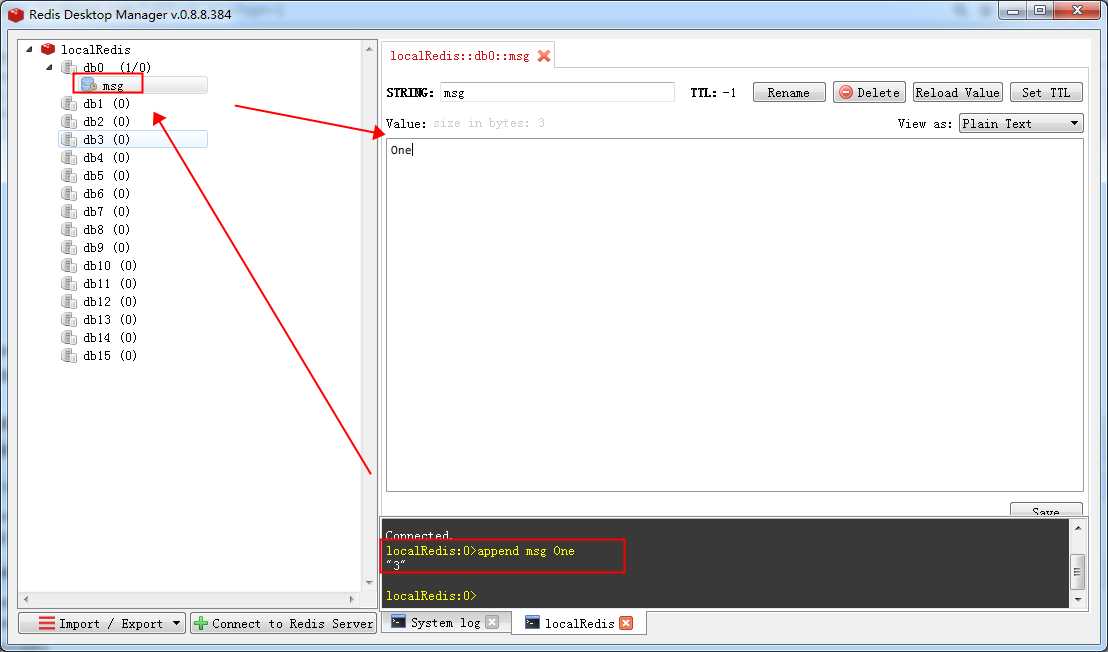
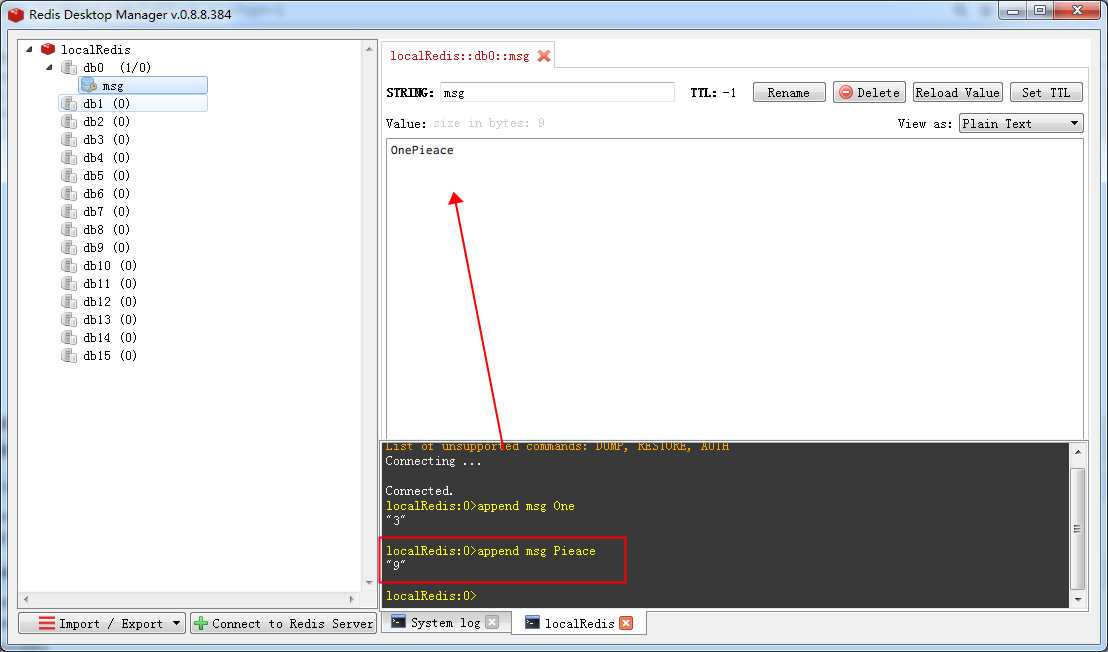
继续输入命令,可以看到字符串会相应的做拼接,这就是追加key值的命令的作用。其他命令,自己可以去试一下~
接下来,我们将这个redis整合到SpringBoot中来,首先,在pom.xml中添加
        <dependency>
            <groupId>org.springframework.boot</groupId>
            <artifactId>spring-boot-starter-data-redis</artifactId>
        </dependency>
1.配置redis:到配置文件中添加:(如果是远程服务器,自己替换IP)
spring.redis.host=127.0.0.1
添加好以后我们来测试一下,首先,为了存取数据到redis中,添加如下的代码,我们接着看这两个如何使用。
    @Autowired
    StringRedisTemplate stringRedisTemplate;    // k-v都是字符串

    @Autowired
    RedisTemplate redisTemplate;    // k-v都是对象
先看字符串的,跟之前在console中输入命令一样的作用,执行测试后,检查下redis中,确实有生成的msg,说明我们的关联和操作是成功的。
stringRedisTemplate.opsForValue().append("msg", "Hello"); //append中添加的是两个字符串,也就是上边的k-v字符串操作
所以,你该明白第二个k-v是对象的意思了吧?继续测试方法中这样写:(我们将查询的这个对象存到缓存中)
        Employee empById = employeeMapper.getEmpById(1);
        redisTemplate.opsForValue().set("emp-01", empById);
来看结果:(Cannot serialize表示无法序列化,这里先看下如何处理,稍后来说为什么以及如何优化)

我们将bean.Employee的类这样写,就可以保证基本的序列化: implements Serializable
public class Employee implements Serializable {xxxx}
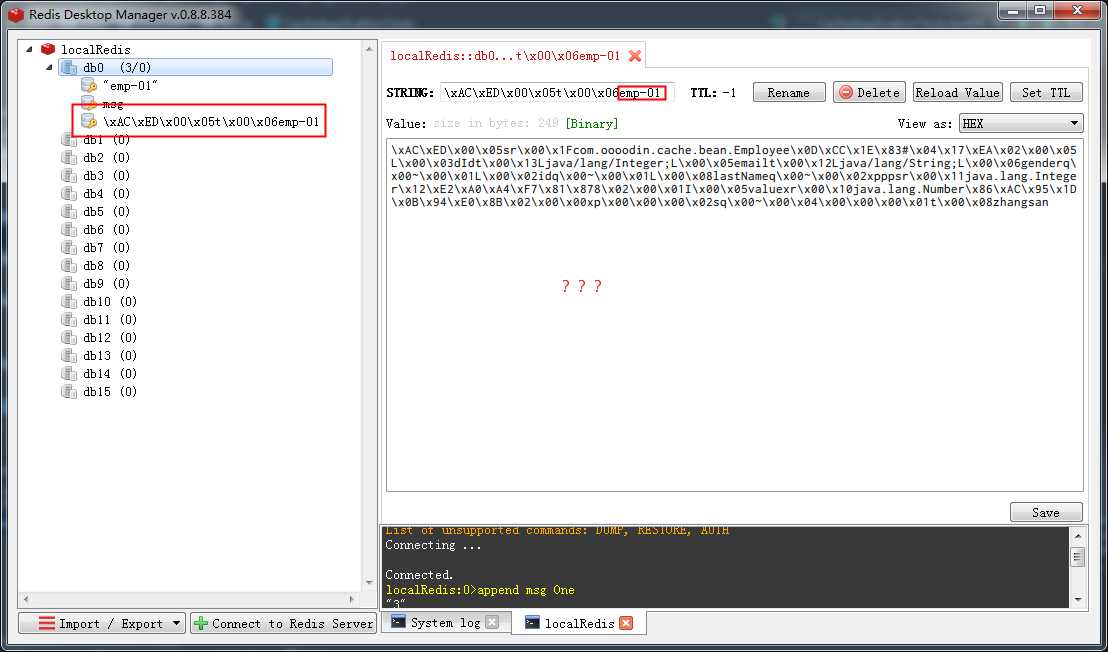
再次运行,查看结果:(运行成功了,可这一堆乱码一样的是什么呢?)
其实默认的序列化是JDK的,我们需要自己优化一下,比如编程json的序列化。
来看如何优化呢,我们需要自己创建一个redis的配置,来序列化我们自己想要的json格式(其实就是把RedisAutoConfiguration中的方法拿出来稍微的修改一下)
注意,我把主程序中的@EnableCaching,放到这里了,主程序那里就不用写了?后边我们再来实验一下
import org.springframework.cache.annotation.EnableCaching;
import org.springframework.context.annotation.Bean;
import org.springframework.context.annotation.Configuration;
import org.springframework.data.redis.cache.RedisCacheConfiguration;
import org.springframework.data.redis.cache.RedisCacheManager;
import org.springframework.data.redis.cache.RedisCacheWriter;
import org.springframework.data.redis.connection.RedisConnectionFactory;
import org.springframework.data.redis.serializer.GenericJackson2JsonRedisSerializer;
import org.springframework.data.redis.serializer.RedisSerializationContext;

import java.time.Duration;

@Configuration
@EnableCaching
public class MyRedisConfig {

    @Bean
    public RedisCacheManager empCacheManager(RedisConnectionFactory redisConnectionFactory) {
        RedisCacheConfiguration redisCacheConfiguration = RedisCacheConfiguration.defaultCacheConfig()
                .entryTtl(Duration.ofHours(1))  // 设置缓存有效期一小时
                .serializeValuesWith(RedisSerializationContext.SerializationPair.fromSerializer(
                        new GenericJackson2JsonRedisSerializer())); // 设置json格式序列化
        return RedisCacheManager
                .builder(RedisCacheWriter.nonLockingRedisCacheWriter(redisConnectionFactory))
                .cacheDefaults(redisCacheConfiguration).build();
    }

}
然后使用我们自己建立的template方法,做一个测试,看下结果:(注解证明木有问题)
        Employee empById = employeeMapper.getEmpById(1);
        employeeRedisTemplate.opsForValue().set("emp-01", empById);
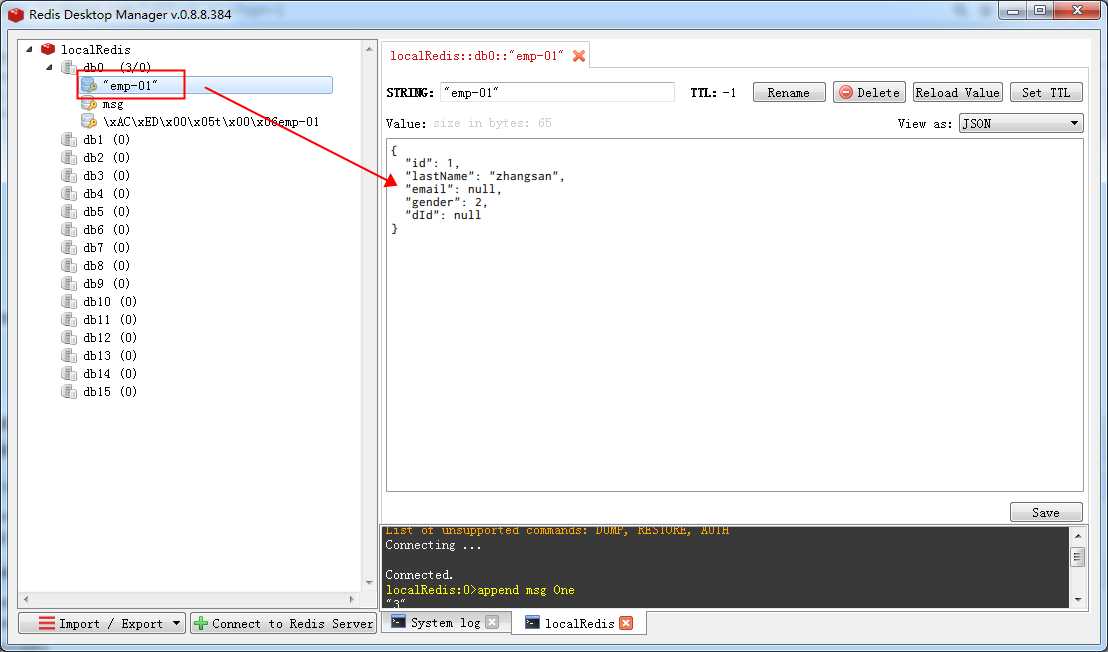
是不是看起来舒服多了。
当然,如果我们针对不同的情况做不同的书写有时候也是必要的,所以也可以这样写:(new那一行,看下变化,你就知道了~),但记住,如果你有多个个性配置的时候要加入注解@Primary,这个可以让该bean作为默认的主缓存管理器来使用,不然会报错滴~
    @Bean
    public RedisCacheManager empCacheManager(RedisConnectionFactory redisConnectionFactory) {
        RedisCacheConfiguration redisCacheConfiguration = RedisCacheConfiguration.defaultCacheConfig()
                .entryTtl(Duration.ofHours(1))  // 设置缓存有效期一小时
                .serializeValuesWith(RedisSerializationContext.SerializationPair.fromSerializer(
                        new Jackson2JsonRedisSerializer<Employee>(Employee.class))); // 设置json格式序列化
        return RedisCacheManager
                .builder(RedisCacheWriter.nonLockingRedisCacheWriter(redisConnectionFactory))
                .cacheDefaults(redisCacheConfiguration).build();
    }
如上,redis的简单使用就说这些,后边我可能还会把文章扩展一下,具体说说怎么使用,尽请关注~
标签:context nbsp 问题 ima manage spring 图片 dock ctr
原文地址:https://www.cnblogs.com/iceb/p/9479976.html