标签:案例 窗口 oob image 下载 sar 操作方法 删除 博客
今天准备用angular+mvc创建一个项目,发现上次研究关于angular的东西全忘记了,突然想起上次我事后补了一篇博客的,看了一下也没太回忆起来细节。
无奈,重新研究一边,这次是一边实践一边记录的,希望再过段时间我再来看的时候,希望能有帮助。我想记录博客目的也在于此。利于温故。
你们要是觉得有用点个赞,没用勿喷,谢谢!
1.创建MVC项目
2.创建angular项目
2.1首先安装angular环境
下载安装node.js和npm,下载地址:https://nodejs.org/en/download/(控制台窗口中运行命令 node -v 和 npm -v 显示版本号安装成功)
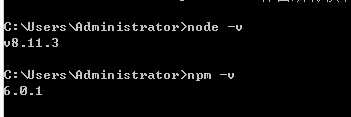
安装全局typescript,安装命令:

npm install -g @angular/cli (测试是否安装成功 ng -v)
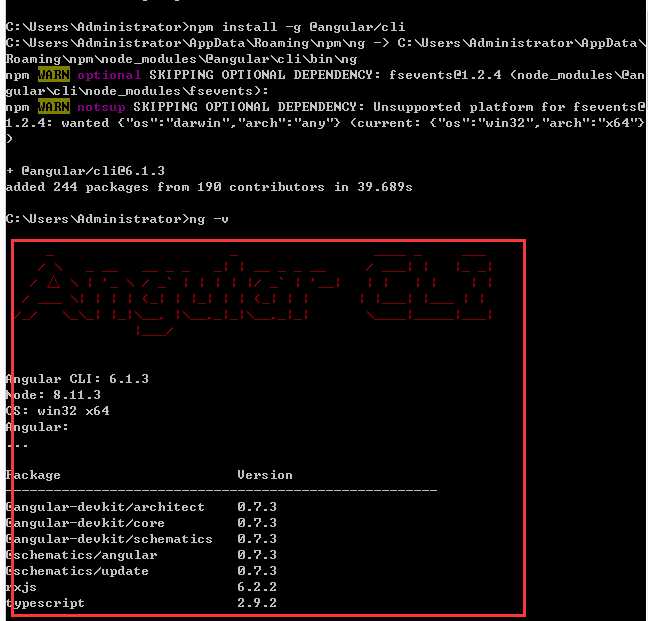
如果之前安装过angular但是不能用,重新安装之前执行如下操作,卸载angular,卸载命令:npm uninstall -g @angular/cli ,清缓存命令:npm cache clean
如果执行了上述指令还是没用的话,建议执行玩命令,把npm文件下的node_modules\@angular文件夹删除,再试试

创建Angular项目运行指令 ng new 项目名称 (例:ng new app1)

项目创建成功,生成运行,执行如下指令:ng serve -open

3.MVC+Angular 项目搭建成功,如图红框右击还原程序包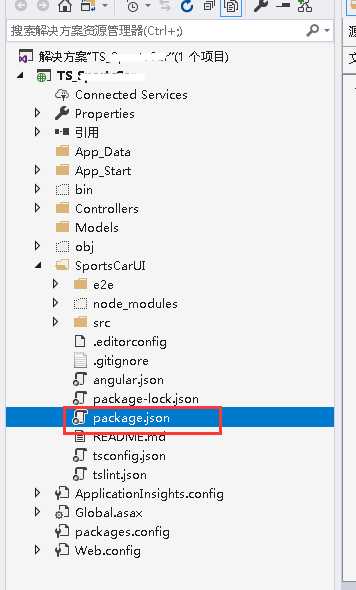
3.1删除多余文件。不用文件。你如果不确定删除那些,建议参照官方实例地址:https://www.angular.cn/guide/setup
我的操作方法,把官方事例中的non-essential-files.txt文件放到我本地项目,在用命令执行他
for /f %i in (non-essential-files.txt) do del %i /F /S /Q
rd .git /s /q
rd e2e /s /q
3.2最终项目结构如图,除了mvc还有红框angular相关
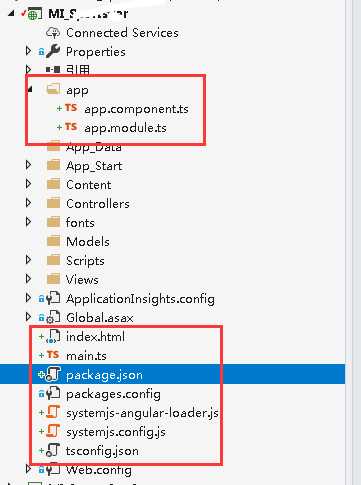
4.vs直接运行效果展示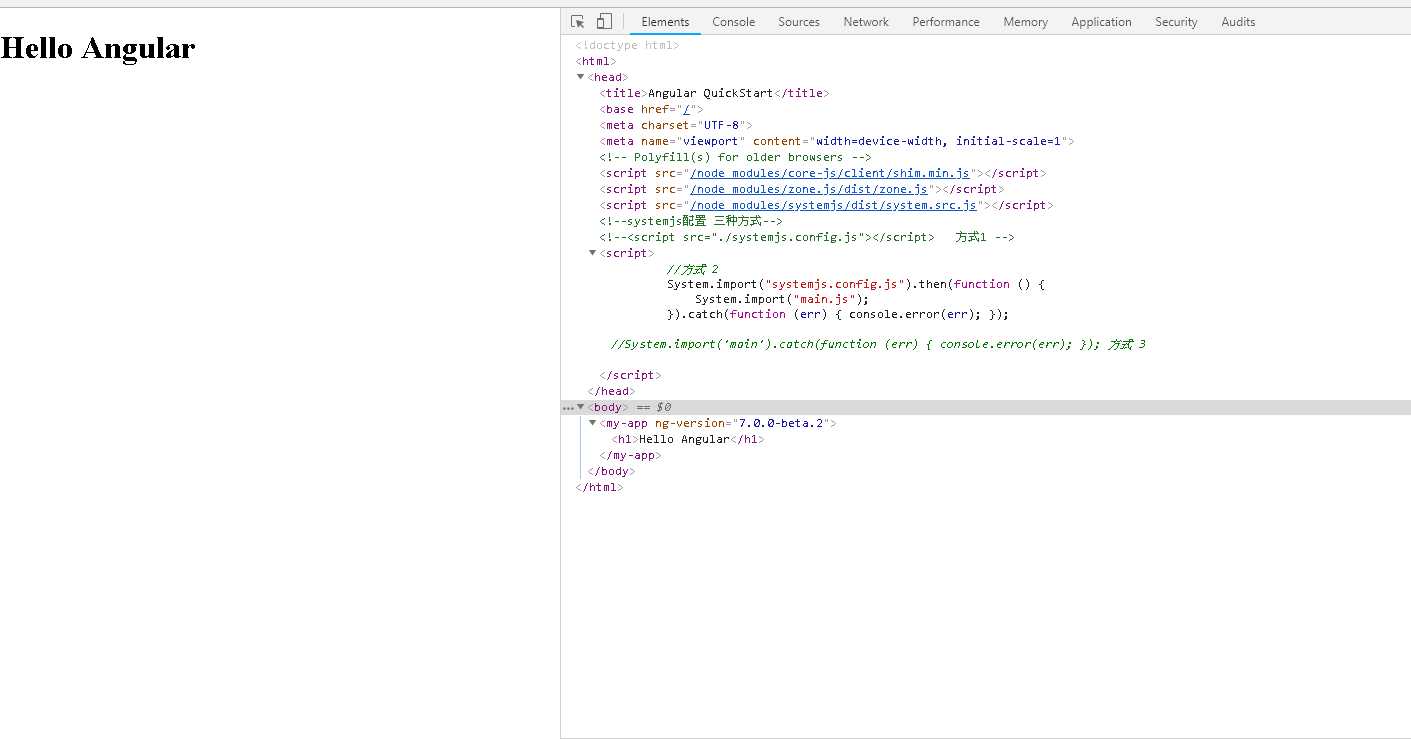
总结:之前我们我们的开发方式是,angular每次都要通过命令生成使用,这种方式的好处直接在VS中即可生成使用,提升开发速度。
注意点:按照官方案例可能会报错,如图
解决方法:systemjs.config.js中配置rxjs的路径就好(下文仅供参考)
/**
 * System configuration for Angular samples
 * Adjust as necessary for your application needs.
 */
(function (global) {
    System.config({
        paths: {
            // paths serve as alias
            ‘npm:‘: ‘node_modules/‘
        },
        // map tells the System loader where to look for things
        map: {
            // our app is within the app folder
            ‘app‘: ‘app‘,

            // angular bundles
            ‘@angular/core‘: ‘npm:@angular/core/bundles/core.umd.js‘,
            ‘@angular/common‘: ‘npm:@angular/common/bundles/common.umd.js‘,
            ‘@angular/compiler‘: ‘npm:@angular/compiler/bundles/compiler.umd.js‘,
            ‘@angular/platform-browser‘: ‘npm:@angular/platform-browser/bundles/platform-browser.umd.js‘,
            ‘@angular/platform-browser-dynamic‘: ‘npm:@angular/platform-browser-dynamic/bundles/platform-browser-dynamic.umd.js‘,
            ‘@angular/http‘: ‘npm:@angular/http/bundles/http.umd.js‘,
            ‘@angular/router‘: ‘npm:@angular/router/bundles/router.umd.js‘,
            ‘@angular/forms‘: ‘npm:@angular/forms/bundles/forms.umd.js‘,

            // other libraries
            ‘rxjs‘: ‘npm:rxjs‘,
            ‘angular-in-memory-web-api‘: ‘npm:angular-in-memory-web-api/bundles/in-memory-web-api.umd.js‘
        },
        // packages tells the System loader how to load when no filename and/or no extension
        packages: {
            app: {
                defaultExtension: ‘js‘,
                meta: {
                    ‘./*.js‘: {
                        loader: ‘systemjs-angular-loader.js‘
                    }
                }
            },
            ‘rxjs‘: { main: ‘index.js‘, defaultExtension: ‘js‘ },
            ‘rxjs/ajax‘: { main: ‘index.js‘, defaultExtension: ‘js‘ },
            ‘rxjs/operators‘: { main: ‘index.js‘, defaultExtension: ‘js‘ },
            ‘rxjs/testing‘: { main: ‘index.js‘, defaultExtension: ‘js‘ },
            ‘rxjs/webSocket‘: { main: ‘index.js‘, defaultExtension: ‘js‘ },
        }
    });
})(this);
相关资料导航:
http://www.runoob.com/angularjs2/angularjs2-typescript-setup.html
https://www.angular.cn/guide/setup
https://www.youtube.com/watch?v=rbHSTJBhJ44
https://www.angular.cn/guide/visual-studio-2015
还没完呢
最后的反思:上述只是一个项目搭建的流程,很多深层次原理的东西还是不懂,慢慢在学习和实践中总结。
(确实不会写博客,感觉像流水账,哈哈)
标签:案例 窗口 oob image 下载 sar 操作方法 删除 博客
原文地址:https://www.cnblogs.com/isWhile/p/9482218.html