标签:图片上传 stat 配置 格式 export span wrapper 上传 方法
elementUI提供了照片墙上传的功能,我们直接拿来用。
以下是实现代码:
<template>
  <div style="padding: 50px;">
    <el-form class="form-wrapper padding" ref="addForm" :model="addForm" :rules="addRules" label-width="110px">
      <el-form-item label="活动图片:" prop="photo">
        <el-upload
          :action="base"
          multiple
          accept="image/png, image/jpeg"
          list-type="picture-card"
          :before-upload="beforeUploadPicture"
          :on-preview="handlePictureCardPreview"
          :on-progress="uploadProgress"
          :on-remove="handleRemove"
          :on-success="uploadSuccess"
          :on-error="uploadError"
          :show-file-list="true">
          <i class="el-icon-plus"></i>
        </el-upload>
      </el-form-item>
      <el-form-item>
        <el-button type="primary" @click="addEnsure">保存</el-button>
      </el-form-item>
    </el-form>
    <el-dialog class="preview-modal" :visible.sync="imgVisible" append-to-body>
      <img width="100%" :src="dialogImageUrl" alt="photo">
    </el-dialog>
  </div>
</template>
<script type="text/ecmascript-6">
  import base from ‘api/env‘  // 配置了图片上传接口地址的js文件
  export default {
    data() {
      return {
        addForm: {
          photo: ‘‘  // 活动图片
        },
        addRules: { // 表单验证规则
          photo: [{required: true, message: ‘请上传活动图片‘, trigger: ‘blur‘}]
        },
        uploadComplete: true, // 图片上传完成状态
        base: base.imgURL + ‘upload/img‘,
        imgVisible: false, // 上传图片预览
        dialogImageUrl: ‘‘ // 图片预览地址
      }
    },
    created() {
      this.initForm();
    },
    methods: {
      initForm() {
        if(this.$refs.addForm){
          this.$refs.addForm.resetFields();
        }
      },
      // 上传图片前调用方法
      beforeUploadPicture(file) {
        if(file.size > 10*1024*1024){
          this.$message.error("上传图片不能大于10M");
          return false;
        }
      },
      // 上传图片时调用
      uploadProgress(event,file, fileList){
        this.uploadComplete = false;
        if(event && event.percent === 100){
          this.uploadComplete = true;
        }
      },
      // 上传图片成功
      uploadSuccess(res, file, fileList) {
        this.fileChange(fileList);
      },
      // 上传图片出错
      uploadError(err, file, fileList) {
        this.$message.error("上传出错");
      },
      // 移除图片
      handleRemove(file, fileList) {
        this.fileChange(fileList);
      },
      // 设置photo值
      fileChange(fileList) {
        let temp_str = ‘‘;
        if(fileList.length > 0){
          for(let i=0; i<fileList.length; i++){
            if(fileList[i].response){
              if(fileList[i].response.code === 0){
                if(i===0){
                  temp_str += fileList[i].response.data;
                } else {
                  // 最终photo的格式是所有已上传的图片的url拼接的字符串(逗号隔开)
                  temp_str += ‘,‘ + fileList[i].response.data;
                }
              }
            }
          }
        }
        this.addForm.photo = temp_str;
      },
      // 图片预览
      handlePictureCardPreview(file) {
        this.dialogImageUrl = file.url;
        this.imgVisible = true;
      },
      // 确认添加
      addEnsure(){
        if(!this.uploadComplete){
          this.$message.error("图片正在上传,请稍等");
          return;
        }
        this.$refs.addForm.validate((valid) => {
          if(valid){
            let params = {
              photo: this.addForm.photo,
            };
           console.info(params);
            // 调用接口...

          } else {
            this.$message.error("请填写所有必填项");
          }
        });
      }
    }
  }
</script>
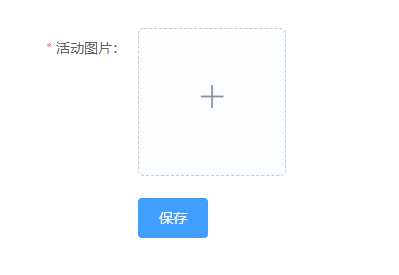
效果图:

<template>
  <div style="padding: 50px;">
    <el-form class="form-wrapper padding" ref="editForm" :model="editForm" :rules="editRules" label-width="110px">
      <el-form-item label="活动图片:" prop="photo">
        <el-upload
          :action="base"
          multiple
          accept="image/png, image/jpeg"
          list-type="picture-card"
          :on-preview="handlePictureCardPreview"
          :on-remove="handleRemove"
          :on-progress="uploadProgress"
          :on-success="uploadSuccess"
          :on-error="uploadError"
          :file-list="editFiles"
          :show-file-list="true">
          <i class="el-icon-plus"></i>
        </el-upload>
      </el-form-item>
      <el-form-item>
        <el-button type="primary" @click="editEnsure">保存</el-button>
      </el-form-item>
    </el-form>
    <el-dialog class="preview-modal" :visible.sync="imgVisible" append-to-body>
      <img width="100%" :src="dialogImageUrl" alt="photo">
    </el-dialog>
  </div>
</template>
<script type="text/ecmascript-6">
  import base from ‘api/env‘ // 配置了图片上传接口地址的js文件
  export default {
    data() {
      return {
        editForm: { // 编辑表单
          photo: ‘‘  // 活动图片
        },
        editRules: { // 表单验证规则
          photo: [{required: true, message: ‘请上传活动图片‘, trigger: ‘blur‘}]
        },
        editFiles: [],// 编辑时已上传图片初始化
        uploadComplete: true,
        base: base.imgURL + ‘upload/img‘,
        imgVisible: false, // 上传图片预览
        dialogImageUrl: ‘‘ // 图片预览地址
      }
    },
    created() {
      this.initInfo();
    },
    methods: {
      // 编辑
      initInfo() {
        this.editForm = {
          id: 1,
          photo: ‘‘
        };
        // 这里photo应从服务器获取,存储的是数组,请按照相应格式获取图片url(这里直接给值)
        let temp = [
          {id: 123, photo: ‘http://img4.imgtn.bdimg.com/it/u=2011641246,1136238184&fm=27&gp=0.jpg‘},
          {id: 124, photo: ‘http://img2.imgtn.bdimg.com/it/u=302701032,2300144492&fm=27&gp=0.jpg‘}
        ];
        if(temp.length > 0){
          for(let t=0; t<temp.length; t++){
            //通过[{name: ‘name‘, url: ‘url地址‘}]格式初始化照片墙
            this.editFiles.push({name: ‘name‘ + temp[t].id, url: temp[t].photo});
            if(t===0){
              this.editForm.photo += temp[t].photo
            } else {
              // 最终photo的格式是所有已上传的图片的url拼接的字符串(逗号隔开),根据实际需要修改格式
              this.editForm.photo += ‘,‘ + temp[t].photo;
            }
          }
        }
        this.editVisible = true;
      },
      // 确认修改
      editEnsure() {
        if(!this.uploadComplete){
          this.$message.error("图片正在上传,请稍等");
          return;
        }
        console.info(this.editForm.photo);
        // 调用接口...
      },
      // 上传图片前调用方法
      beforeUploadPicture(file) {
        if(file.size > 10*1024*1024){
          this.$message.error("上传图片不能大于10M");
          return false;
        }
      },
      // 上传图片时调用
      uploadProgress(event,file, fileList){
        this.uploadComplete = false;
        if(event && event.percent === 100){
          this.uploadComplete = true;
        }
      },
      // 上传图片成功
      uploadSuccess(res, file, fileList) {
        this.fileChange(fileList);
      },
      // 上传图片出错
      uploadError(err, file, fileList) {
        this.$message.error("上传出错");
      },
      // 移除图片
      handleRemove(file, fileList) {
        this.fileChange(fileList);
      },
      // 设置photo值
      fileChange(fileList) {
        let temp_str = ‘‘;
        if(fileList.length > 0){
          for(let i=0; i<fileList.length; i++){
            if(fileList[i].response){
              if(fileList[i].response.code === 0){
                if(i===0){
                  temp_str += fileList[i].response.data;
                } else {
                  temp_str += ‘,‘ + fileList[i].response.data;
                }
              }
            } else if(fileList[i].status && fileList[i].status === ‘success‘){
              if(i===0){
                temp_str += fileList[i].url;
              } else {
                temp_str += ‘,‘ + fileList[i].url;
              }
            }
          }
        }
        this.editForm.photo = temp_str;
      },
      // 图片预览
      handlePictureCardPreview(file) {
        this.dialogImageUrl = file.url;
        this.imgVisible = true;
      }
    }
  }
</script>

接下来就可以继续愉快地上传图片啦。
标签:图片上传 stat 配置 格式 export span wrapper 上传 方法
原文地址:https://www.cnblogs.com/yeqrblog/p/9525939.html