标签:需要 修改密码 apr mod 启动 name 启动脚本 child wget
环境说明| IP | 系统 | 需要安装的程序 |
|---|---|---|
| 192.168.24.188 | centos7 | NGINX MYSQL PHP APACHE |
关闭防火墙以SELINUX
[root@linfan ~]# systemctl stop firewalld
[root@linfan ~]# systemctl disable firewalld
[root@linfan ~]# sed -ri ‘s/(SELINUX=).*/\1disabled/g‘ /etc/selinux/config
[root@linfan ~]# setenforce 0创建系统用户
[root@linfan ~]# groupadd -r nginx
[root@linfan ~]# useradd -r -M -s /sbin/nologin -g nginx nginx
配置yum源
[root@linfan ~]# cd /etc/yum.repos.d/
[root@linfan yum.repos.d]# wget http://mirrors.163.com/.help/CentOS7-Base-163.repo
[root@linfan yum.repos.d]# sed -i ‘s/\$releasever/7/g‘ /etc/yum.repos.d/CentOS7-Base-163.repo
[root@linfan yum.repos.d]# sed -i ‘s/^enabled=.*/enabled=1/g‘ /etc/yum.repos.d/CentOS7-Base-163.repo
[root@linfan yum.repos.d]# yum -y install epel-release
安装依赖环境
[root@linfan ~]# yum -y install pcre-devel openssl openssl-devel gd-devel

[root@linfan ~]# yum -y groups mark install ‘Development Tools‘
Loaded plugins: fastestmirror
There is no installed groups file.
Maybe run: yum groups mark convert (see man yum)
Loading mirror speeds from cached hostfile
 * epel: mirrors.aliyun.com
Marked install: Development Tools
创建日志存放目录
[root@linfan ~]# mkdir -p /var/log/nginx
[root@linfan ~]# chown -R nginx.nginx /var/log/nginx
下载nginx
[root@linfan ~]# cd /usr/src/
[root@linfan src]# wget http://nginx.org/download/nginx-1.14.0.tar.gz
--2018-08-24 13:26:36--  http://nginx.org/download/nginx-1.14.0.tar.gz
Resolving nginx.org (nginx.org)... 95.211.80.227, 206.251.255.63, 2606:7100:1:69::3f, ...
Connecting to nginx.org (nginx.org)|95.211.80.227|:80... connected.
HTTP request sent, awaiting response... 302 Found
Location: http://64.123.28.133/files/21490000000827F6/nginx.org/download/nginx-1.14.0.tar.gz [following]
--2018-08-24 13:26:36--  http://64.123.28.133/files/21490000000827F6/nginx.org/download/nginx-1.14.0.tar.gz
Connecting to 64.123.28.133:80... connected.
HTTP request sent, awaiting response... 200 OK
Length: 1016272 (992K) [application/octet-stream]
Saving to: ‘nginx-1.14.0.tar.gz’

100%[================================================================================>] 1,016,272   --.-K/s   in 0.1s

2018-08-24 13:26:36 (8.10 MB/s) - ‘nginx-1.14.0.tar.gz’ saved [1016272/1016272]
编译安装
root@linfan src]# ls
debug  kernels  nginx-1.14.0.tar.gz
[root@linfan src]# tar xf nginx-1.14.0.tar.gz
[root@linfan src]# cd nginx-1.14.0
[root@linfan nginx-1.14.0]# ./configure > --prefix=/usr/local/nginx > --user=nginx > --group=nginx > --with-debug > --with-http_ssl_module > --with-http_realip_module >  --with-http_image_filter_module > --with-http_gunzip_module > --with-http_gzip_static_module > --with-http_stub_status_module > --http-log-path=/var/log/nginx/access.log > --error-log-path=/var/log/nginx/error.log

[root@linfan nginx-1.14.0]# make -j $(grep ‘processor‘ /proc/cpuinfo | wc -l) && make install
配置变量环境
[root@linfan ~]# echo ‘export PATH=/usr/local/nginx/sbin:$PATH‘ > /etc/profile.d/nginx.sh
[root@linfan ~]# . /etc/profile.d/nginx.sh
启动nginx
[root@linfan ~]# nginx
[root@linfan ~]# ss -antl
State      Recv-Q Send-Q                Local Address:Port                               Peer Address:Port
LISTEN     0      128                               *:80                                            *:*
LISTEN     0      128                               *:22                                            *:*
LISTEN     0      100                       127.0.0.1:25                                            *:*
LISTEN     0      128                              :::22                                           :::*
LISTEN 0 100 ::1:25 :::* 安装依赖包
[root@linfan ~]# yum -y install ncurses-devel openssl-devel openssl cmake mariadb-devel创建用户和组
[root@linfan ~]# groupadd -r -g 306 mysql
[root@linfan ~]# useradd -M -s /sbin/nologin -g 306 -u 306 mysql
下载二进制格式的mysql软件包
[root@linfan ~]# cd /usr/src/
[root@linfan src]# wget https://downloads.mysql.com/archives/get/file/mysql-5.7.22-linux-glibc2.12-x86_64.tar.gz
解压软件至/usr/local/
[root@linfan src]# ls
apr-1.6.3          apr-util-1.6.1          debug    mysql-5.7.22-linux-glibc2.12-x86_64.tar.gz
apr-1.6.3.tar.bz2  apr-util-1.6.1.tar.bz2  kernels
[root@linfan src]# tar xf mysql-5.7.22-linux-glibc2.12-x86_64.tar.gz -C /usr/local/
[root@linfan src]# ls  /usr/local/
apache  apr-util  etc    include  lib64    mysql-5.7.22-linux-glibc2.12-x86_64  share
apr     bin       games  lib      libexec  sbin                                 src
[root@linfan src]# cd  /usr/local/
[root@linfan local]# ln -sv mysql-5.7.22-linux-glibc2.12-x86_64/ mysql
‘mysql’ -> ‘mysql-5.7.22-linux-glibc2.12-x86_64/’
[root@linfan local]# ll
total 0
drwxr-xr-x. 13 root root 152 Aug 17 12:46 apache
drwxr-xr-x.  6 root root  58 Aug 17 12:35 apr
drwxr-xr-x.  5 root root  43 Aug 17 12:40 apr-util
drwxr-xr-x.  2 root root   6 Nov  5  2016 bin
drwxr-xr-x.  2 root root   6 Nov  5  2016 etc
drwxr-xr-x.  2 root root   6 Nov  5  2016 games
drwxr-xr-x.  2 root root   6 Nov  5  2016 include
drwxr-xr-x.  2 root root   6 Nov  5  2016 lib
drwxr-xr-x.  2 root root   6 Nov  5  2016 lib64
drwxr-xr-x.  2 root root   6 Nov  5  2016 libexec
lrwxrwxrwx.  1 root root  36 Aug 17 13:54 mysql -> mysql-5.7.22-linux-glibc2.12-x86_64/
drwxr-xr-x.  9 root root 129 Aug 17 13:30 mysql-5.7.22-linux-glibc2.12-x86_64
drwxr-xr-x.  2 root root   6 Nov  5  2016 sbin
drwxr-xr-x.  5 root root  49 Jul 11 15:44 share
drwxr-xr-x.  2 root root   6 Nov  5  2016 src
修改目录/usr/locaal/mysql的属主属组
[root@linfan ~]# chown -R mysql.mysql /usr/local/mysql
[root@linfan ~]# ll /usr/local/mysql -d
lrwxrwxrwx. 1 mysql mysql 36 Aug 17 13:54 /usr/local/mysql -> mysql-5.7.22-linux-glibc2.12-x86_64/
添加环境变量
[root@linfan ~]# ls /usr/local/mysql
bin  COPYING  docs  include  lib  man  README  share  support-files
[root@linfan ~]# echo ‘export PATH=/usr/local/mysql/bin:$PATH‘ > /etc/profile.d/mysql.sh
[root@linfan ~]# . /etc/profile.d/mysql.sh
[root@linfan ~]# echo $PATH
/usr/local/mysql/bin:/usr/local/apache/bin:/usr/local/sbin:/usr/local/bin:/usr/sbin:/usr/bin:/root/bin
建立数据存放目录
[root@linfan ~]# cd /usr/local/mysql
[root@linfan mysql]# mkdir /opt/data
[root@linfan mysql]# chown -R mysql.mysql /opt/data/
[root@linfan mysql]# ll /opt/
total 0
drwxr-xr-x. 2 mysql mysql   6 Aug 17 14:05 data
drwxr-xr-x. 8 root  root  220 Jul 18 17:09 lin.d
初始化数据库
[root@linfan mysql]# /usr/local/mysql/bin/mysqld --initialize --user=mysql --datadir=/opt/data/
2018-08-17T06:08:33.347313Z 0 [Warning] TIMESTAMP with implicit DEFAULT value is deprecated. Please use --explicit_defaults_for_timestamp server option (see documentation for more details).
2018-08-17T06:08:33.873415Z 0 [Warning] InnoDB: New log files created, LSN=45790
2018-08-17T06:08:33.953310Z 0 [Warning] InnoDB: Creating foreign key constraint system tables.
2018-08-17T06:08:34.016549Z 0 [Warning] No existing UUID has been found, so we assume that this is the first time that this server has been started. Generating a new UUID: f8e46285-a1e3-11e8-b6bf-000c29c9d4ed.
2018-08-17T06:08:34.019542Z 0 [Warning] Gtid table is not ready to be used. Table ‘mysql.gtid_executed‘ cannot be opened.
2018-08-17T06:08:34.023380Z 1 [Note] A temporary password is generated for root@localhost: B<HiGFoc.8yZ
//这个命令的最后会生成一个临时密码,此处密码是B<HiGFoc.8yZ
配置mysql
[root@linfan ~]# ln -sv /usr/local/mysql/include/ /usr/local/include/mysql
‘/usr/local/include/mysql’ -> ‘/usr/local/mysql/include/’
[root@linfan ~]# echo ‘/usr/local/mysql/lib‘ > /etc/ld.so.conf.d/mysql.conf
[root@linfan ~]# ldconfig -v
生成配置文件
[root@linfan ~]# cat > /etc/my.cnf <<EOF
> [mysqld]
> basedir = /usr/local/mysql
> datadir = /opt/data
> socket = /tmp/mysql.sock
> port = 3306
> pid-file = /opt/data/mysql.pid
> user = mysql
> skip-name-resolve
> EOF
配置服务启动脚本
[root@linfan ~]# cp -a /usr/local/mysql/support-files/mysql.server /etc/init.d/mysqld
[root@linfan ~]# sed -ri ‘s#^(basedir=).*#\1/usr/local/mysql#g‘ /etc/init.d/mysqld
[root@linfan ~]# sed -ri ‘s#^(datadir=).*#\1/opt/data#g‘ /etc/init.d/mysqld
启动mysql
[root@linfan ~]# service mysqld start
Starting MySQL.Logging to ‘/opt/data/linfan.err‘.
 SUCCESS!
[root@linfan ~]# ps -ef|grep mysql
root      52200      1  0 14:25 pts/1    00:00:00 /bin/sh /usr/local/mysql/bin/mysqld_safe --datadir=/opt/data --pid-file=/opt/data/mysql.pid
mysql     52378  52200  4 14:25 pts/1    00:00:00 /usr/local/mysql/bin/mysqld --basedir=/usr/local/mysql --datadir=/opt/data --plugin-dir=/usr/local/mysql/lib/plugin --user=mysql --log-error=linfan.err --pid-file=/opt/data/mysql.pid --socket=/tmp/mysql.sock --port=3306
root      52408   2998  0 14:25 pts/1    00:00:00 grep --color=auto mysql
[root@linfan ~]# ss -antl
State      Recv-Q Send-Q                Local Address:Port                               Peer Address:Port
LISTEN     0      128                               *:22                                            *:*
LISTEN     0      100                       127.0.0.1:25                                            *:*
LISTEN     0      128                              :::80                                           :::*
LISTEN     0      128                              :::22                                           :::*
LISTEN     0      100                             ::1:25                                           :::*
LISTEN     0      80                               :::3306                                         :::*
修改密码
使用临时密码修改
[root@linfan ~]# mysql -uroot -p
Enter password:
Welcome to the MySQL monitor.  Commands end with ; or \g.
Your MySQL connection id is 2
Server version: 5.7.22

Copyright (c) 2000, 2018, Oracle and/or its affiliates. All rights reserved.

Oracle is a registered trademark of Oracle Corporation and/or its
affiliates. Other names may be trademarks of their respective
owners.

Type ‘help;‘ or ‘\h‘ for help. Type ‘\c‘ to clear the current input statement.

mysql> set password = password(‘linfan123‘);
Query OK, 0 rows affected, 1 warning (0.00 sec)

mysql> quit
Bye安装依赖包
[root@linfan ~]# yum -y install libxml2 libxml2-devel openssl openssl-devel bzip2 bzip2-devel libcurl libcurl-devel libjpeg libjpeg-devel libpng libpng-devel freetype freetype-devel gmp gmp-devel libmcrypt libmcrypt-devel readline readline-devel libxslt libxslt-devel mhash mhash-devel 下载php
[root@linfan ~]# cd /usr/src/
[root@linfan src]# wget http://cn.php.net/distributions/php-7.2.8.tar.xz
编译安装php
[root@linfan ~]#ls
[root@linfan ~]#tar xf php-7.2.8.tar.xz
[root@linfan ~]#cd php-7.2.8
[root@linfan php-7.2.8]# ./configure --prefix=/usr/local/php7 --with-curl --with-freetype-dir --with-gd --with-gettext --with-iconv-dir --with-kerberos --with-libdir=lib64 --with-libxml-dir=/usr --with-mysqli=/usr/local/mysql/bin/mysql_config --with-openssl --with-pcre-regex --with-pdo-mysql --with-pdo-sqlite --with-pear --with-jpeg-dir --with-png-dir --with-xmlrpc --with-xsl --with-zlib --with-config-file-path=/etc --with-config-file-scan-dir=/etc/php.d --with-bz2 --enable-fpm --enable-bcmath --enable-libxml --enable-inline-optimization --enable-mbregex --enable-mbstring --enable-mbstring --enable-opcache --enable-pcntl --enable-shmop --enable-soap --enable-sockets --enable-sysvsem --enable-xml --enable-zip

[root@linfan php-7.2.8]# make -j $(cat /proc/cpuinfo |grep processor|wc -l)
[root@linfan php-7.2.8]# make install
安装后配置
[root@linfan ~]# echo ‘export PATH=/usr/local/php7/bin:$PATH‘ > /etc/profile.d/php7.sh
[root@linfan ~]# source /etc/profile.d/php7.sh
[root@linfan ~]# which php
/usr/local/php7/bin/php
[root@linfan ~]# php -v
PHP 7.2.8 (cli) (built: Aug 17 2018 16:27:08) ( NTS )
Copyright (c) 1997-2018 The PHP Group
Zend Engine v3.2.0, Copyright (c) 1998-2018 Zend Technologies
配置php-fpm
[root@linfan php-7.2.8]# cp php.ini-production /etc/php.ini
[root@linfan php-7.2.8]# cp sapi/fpm/init.d.php-fpm /etc/init.d/php-fpm
[root@linfan php-7.2.8]# chmod +x /etc/rc.d/init.d/php-fpm
[root@linfan php-7.2.8]# cp /usr/local/php7/etc/php-fpm.conf.default /usr/local/php7/etc/php-fpm.conf
[root@linfan php-7.2.8]# cp /usr/local/php7/etc/php-fpm.d/www.conf.default /usr/local/php7/etc/php-fpm.d/www.conf
编辑php-fpm的配置文件(/usr/local/php7/etc/php-fpm.conf)
配置fpm的相关选项为你所需要的值:
[root@linfan ~]# vi /usr/local/php7/etc/php-fpm.conf
...
...
pm.max_children = 50 //最多同时50个进程提供50个并发服务
pm.start_servers = 5 //启动时启动5个进程
pm.min_spare_servers = 2 //最小空闲进程数
pm.max_spare_servers = 8  //最大空闲进程数
[root@linfan ~]# tail /usr/local/php7/etc/php-fpm.conf
; files from a glob(3) pattern. This directive can be used everywhere in the
; file.
; Relative path can also be used. They will be prefixed by:
;  - the global prefix if it‘s been set (-p argument)
;  - /usr/local/php7 otherwise
include=/usr/local/php7/etc/php-fpm.d/*.conf
pm.max_children = 50
pm.start_servers = 5
pm.min_spare_servers = 2
pm.max_spare_servers = 8
启动php-fpm
[root@linfan ~]# service php-fpm start
Starting php-fpm  done
[root@linfan ~]# ss -antl
State      Recv-Q Send-Q                Local Address:Port                               Peer Address:Port
LISTEN     0      128                               *:22                                            *:*
LISTEN     0      100                       127.0.0.1:25                                            *:*
LISTEN     0      128                       127.0.0.1:9000                                          *:*
LISTEN     0      128                              :::80                                           :::*
LISTEN     0      128                              :::22                                           :::*
LISTEN     0      100                             ::1:25                                           :::*
LISTEN     0      80                               :::3306                                         :::*
[root@linfan ~]# ps -ef|grep php
root      91842      1  0 16:41 ?        00:00:00 php-fpm: master process (/usr/local/php7/etc/php-fpm.conf)
nobody    91843  91842  0 16:41 ?        00:00:00 php-fpm: pool www
nobody    91844  91842  0 16:41 ?        00:00:00 php-fpm: pool www
nobody    91845  91842  0 16:41 ?        00:00:00 php-fpm: pool www
nobody    91846  91842  0 16:41 ?        00:00:00 php-fpm: pool www
nobody    91847  91842  0 16:41 ?        00:00:00 php-fpm: pool www
root 91850 75645 0 16:41 pts/2 00:00:00 grep --color=auto php创建apache服务的用户和组
[root@linfan ~]# groupadd -r apache
[root@linfan ~]# useradd -r -M -s /sbin/nologin -g apache apache
安装依赖包
[root@linfan ~]# yum -y install openssl-devel pcre-devel expat-devel libtool
下载和安装apr以及apr-util
[root@linfan ~]# cd /usr/src/
[root@linfan src]# wget http://mirrors.shu.edu.cn/apache//apr/apr-1.6.3.tar.bz2
[root@linfan src]# wget http://mirrors.shu.edu.cn/apache//apr/apr-util-1.6.1.tar.bz2
[root@linfan src]# ls
apr-1.6.3.tar.bz2  apr-util-1.6.1.tar.bz2  debug  kernels
[root@linfan src]# tar xf apr-1.6.3.tar.bz2
[root@linfan src]# tar xf apr-util-1.6.1.tar.bz2
[root@linfan src]# ls
apr-1.6.3  apr-1.6.3.tar.bz2  apr-util-1.6.1  apr-util-1.6.1.tar.bz2  debug  kernels
[root@linfan src]# cd apr-1.6.3
[root@linfan apr-1.6.3]# vi configure
    cfgfile=${ofile}T
    trap "$RM \"$cfgfile\"; exit 1" 1 2 15
    $RM "$cfgfile" //将此行加上注释或删除此行

root@linfan apr-1.6.3]# ./configure --prefix=/usr/local/apr
[root@linfan apr-1.6.3]# make -j && make install

[root@linfan apr-util-1.6.1]# cd /usr/src/apr-util-1.6.1
[root@linfan apr-util-1.6.1]# ./configure --prefix=/usr/local/apr-util --with-apr=/usr/local/apr
[root@linfan apr-util-1.6.1]# make -j && make install
编译安装httpd
[root@linfan ~]# wget http://mirror.bit.edu.cn/apache//httpd/httpd-2.4.34.tar.bz2
[root@linfan ~]# ls
[root@linfan ~]# tar xf httpd-2.4.34.tar.bz2
[root@linfan ~]# cd httpd-2.4.34
[root@linfan httpd-2.4.34]# ./configure --prefix=/usr/local/apache \ //网站发布存放的目录
> --sysconfdir=/etc/httpd24 \    //httpd编译安装的主配置文件
> --enable-so > --enable-ssl > --enable-cgi > --enable-rewrite > --with-zlib > --with-pcre > --with-apr=/usr/local/apr > --with-apr-util=/usr/local/apr-util/ > --enable-modules=most > --enable-mpms-shared=all > --with-mpm=prefork
[root@linfan ~]# make -j && make install
安装后配置
[root@linfan ~]# echo ‘PATH=/usr/local/apache/bin:$PATH‘ > /etc/profile.d/httpd.sh
[root@linfan ~]# source /etc/profile.d/httpd.sh
[root@linfan ~]# ln -s /usr/local/apache/include/ /usr/include/httpd
[root@linfan ~]# echo ‘MANPATH /usr/local/apache/man‘ >> /etc/man.config
取消 ServerName前面的注释
[root@linfan ~]# sed -i ‘/#ServerName/s/#//g‘ /etc/httpd24/httpd.conf因为apache与nginx的端口都是80,为了防止端口冲突,在此需要修改端口 改成了8080
[root@linfan ~]# vim /etc/httpd24/httpd.conf
...
...
#Listen 12.34.56.78:8080
Listen 8080
//搜索80更改为8080
启动apache
[root@linfan ~]# apachectl start

[root@linfan ~]# ss -natl
State      Recv-Q Send-Q                Local Address:Port                               Peer Address:Port
LISTEN     0      128                               *:80                                            *:*
LISTEN     0      128                               *:22                                            *:*
LISTEN     0      100                       127.0.0.1:25                                            *:*
LISTEN     0      128                       127.0.0.1:9000                                          *:*
LISTEN     0      128                              :::8080                                         :::*
LISTEN     0      128                              :::22                                           :::*
LISTEN     0      100                             ::1:25                                           :::*
LISTEN 0 80 :::3306 :::*编辑nginx配置文件/usr/local/nginx/conf/nginx.conf,主要修改nginx的server {}配置块中的内容,修改location块,追加index.php让nginx服务器默认支持index.php为首页:
[root@linfan ~]# vim /usr/local/nginx/conf/nginx.conf
...
...
  server {
        listen       80;
        server_name  localhost;

        #charset koi8-r;

        #access_log  logs/host.access.log  main;

        location / {
            root   html;
            index  index.html index.htm//在此处添加 index.php;
        }
然后配置.php请求被传送到后端的php-fpm模块,默认情况下php配置块是被注释的,此时去掉注释并修改为以下内容:
[root@linfan ~]# vim /usr/local/nginx/conf/nginx.conf

...
...

        # proxy the PHP scripts to Apache listening on 127.0.0.1:80
        #
        location ~ \.php$ {
           root           html;
        fastcgi_pass   127.0.0.1:9000;
        fastcgi_index  index.php;
        fastcgi_param  SCRIPT_FILENAME  $document_root$fastcgi_script_name;
        include        fastcgi_params;
        }
        //搜索找到\.php$ 在{}里面添加以上内容

        这里面很多都是默认的,root是配置php程序放置的根目录,主要修改的就是fastcgi_param中的/scripts为$document_root
编辑完成后保存重新加载nginx
[root@linfan ~]# nginx -s reload
[root@linfan ~]# ps -ef |grep nginx
root       5511      1  0 13:49 ?        00:00:00 nginx: master process nginx
nginx      5527   5511  0 14:00 ?        00:00:00 nginx: worker process
root 5545 2453 0 14:01 pts/0 00:00:00 grep --color=auto nginx`在nginx下的html目录下创建test.php文件并打印配置php
root@linfan ~]# cd /usr/local/nginx
[root@linfan nginx]# ls
client_body_temp  conf  fastcgi_temp  html  logs  proxy_temp  sbin  scgi_temp  uwsgi_temp
[root@linfan nginx]# cd html
[root@linfan html]# touch test.php
[root@linfan html]# cat > test.php << EOF
> <?php
> phpinfo();
> ?>
> EOF
打开浏览器输入 192.168.24.188/test.php进行访问,看到输出页面,说明nginx和php都配置成功了
在apache httpd 2.4以后已经专门有一个模块针对FastCGI的实现,此模块为mod_proxy_fcgi.so,它其实是作为mod_proxy.so模块的扩展,因此,这两个模块都要加载,编辑httpd.conf文件,取消一下两行的注释:
启用httpd的相关模块
[root@linfan ~]# sed -i ‘/proxy_module/s/#//g‘ /etc/httpd24/httpd.conf
[root@linfan ~]# sed -i ‘/proxy_fcgi_module/s/#//g‘ /etc/httpd24/httpd.conf 在需要使用fcgi的虚拟主机中添加类似如下两行
ProxyRequests Off  //关闭正向代理
ProxyPassMatch ^/(.*\.php)$ fcgi://127.0.0.1:9000/PATH/TO/DOCUMENT_ROOT/$1
例如
ProxyPassMatch ^/(.*\.php)$ fcgi://127.0.0.1:9000/var/www/html/idfsoft.com/
  $1
在配置文件的最后加入以下内容
[root@linfan ~]# vim /etc/httpd24/httpd.conf
<VirtualHost 192.168.24.168:8080>
   ServerName www.doudou.com
   DocumentRoot "/usr/local/apache/htdocs/doudou.com"
   ProxyRequests Off
   ProxyPassMatch ^/(.*\.php)$ fcgi://127.0.0.1:9000/usr/local/apache/htdo
cs/doudou.com/$1
   <Directory "/usr/local/apache/htdocs/doudou.com">
        Options none
        AllowOverride none
        Require all granted
   </Directory>
</VirtualHost>
搜索AddType,添加以下内容
[root@linfan ~]# vim /etc/httpd24/httpd.conf
# If the AddEncoding directives above are commented-out, then you
    # probably should define those extensions to indicate media types:
    #
    AddType application/x-compress .Z
    AddType application/x-gzip .gz .tgz
    AddType application/x-httpd-php .php //添加此行
    AddType application/x-httpd-php-source .phps   //添加此行

[root@linfan ~]# sed -i ‘/    DirectoryIndex/s/index.html/index.php index.html/g‘ /etc/httpd24/httpd.conf
创建虚拟主机目录并生成php测试页面
[root@linfan ~]# mkdir /usr/local/apache/htdocs/doudou.com
[root@linfan ~]# cat > /usr/local/apache/htdocs/doudou.com/index.php <<EOF
<?php
phpinfo();
?>
EOF
[root@linfan ~]#  chown -R apache.apache /usr/local/apache/htdocs/
[root@linfan ~]# ll /usr/local/apache/htdocs/ -d
drwxr-xr-x. 3 apache apache 42 Aug 17 17:35 /usr/local/apache/htdocs/
重启apache服务
[root@linfan ~]# apachectl stop

[root@linfan ~]# ss -natl
State      Recv-Q Send-Q                Local Address:Port                               Peer Address:Port
LISTEN     0      128                               *:80                                            *:*
LISTEN     0      128                               *:22                                            *:*
LISTEN     0      100                       127.0.0.1:25                                            *:*
LISTEN     0      128                       127.0.0.1:9000                                          *:*
LISTEN     0      128                              :::8080                                         :::*
LISTEN     0      128                              :::22                                           :::*
LISTEN     0      100                             ::1:25                                           :::*
LISTEN     0      80                               :::3306                                         :::*
1.修改/etc/hosts文件,添加域名与IP的映射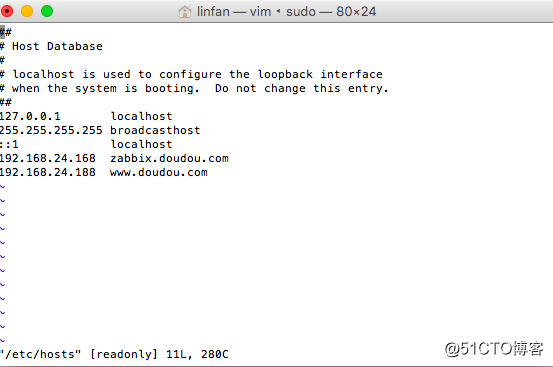
2.在浏览器上使用域名访问,如图所示,实验成功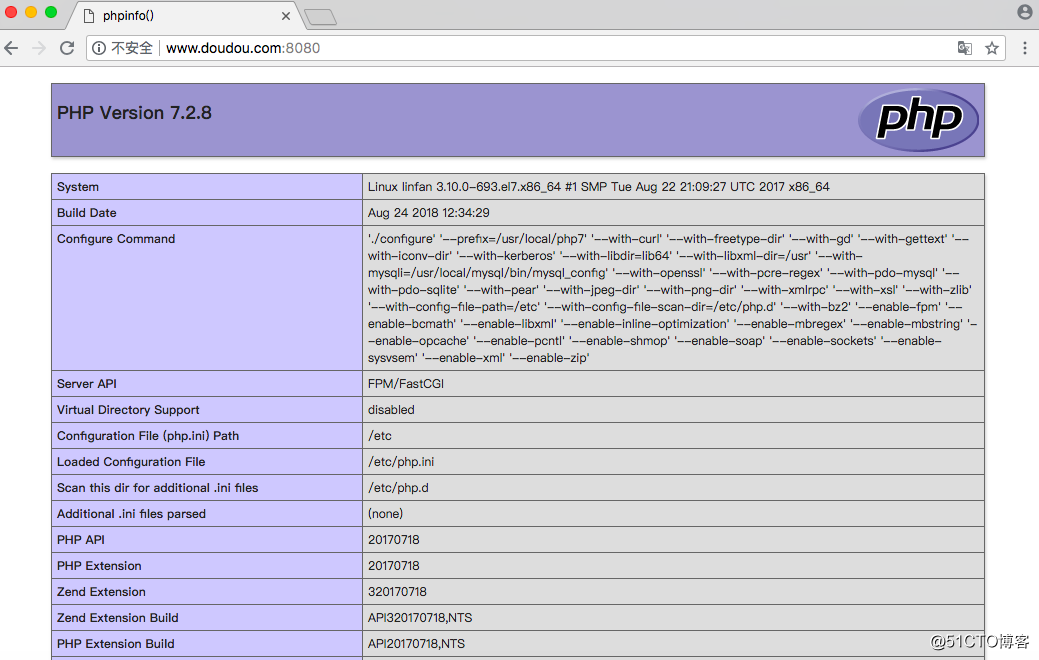
标签:需要 修改密码 apr mod 启动 name 启动脚本 child wget
原文地址:http://blog.51cto.com/13858192/2163987