标签:const 研究 uri 安装 先行者 ngui git 功能 失败
Ubuntu 16.04(ECS),OpenSSL 1.0.2g 1 Mar 2016,Nginx 1.10.3 (Ubuntu),
浏览器:Chrome 67,Firefox 61,Edge 40,IE 11
序言
孤之前从来没有建立过HTTPS网站,感觉很高级、很难,虽然也读过不少博文、资料,十年前在大学时,也使用过OpenSSL操作过建立证书,但后来都忘记了。
前同事说建立HTTPS网站很容易的,当时自己是不信的,并发生了一些争论,在此表示歉意。
由于自己搭建了网站,提供了注册、登录功能,因此,有安全方面的考虑。前两日研究了前端加密、Base64编码等方案(crypto-js),但都无法很好地保证用户数据安全。
最付出不少精时后,最终决定将网站升级为HTTPS网站,本文记录了试验过程中的关键步骤——两步:
1.自建CA并签名Server证书
2.配置Nginx服务器
自建CA并并签名Server证书
本步骤完全参考了自建CA并签名server证书实现https by Andy____Li,只是对一些文件名、配置参数进行了修改。
注意:在执行此步骤之前,请确保Linux操作系统上安装了OpenSSL。
可以分为下面的小步骤(拷贝了参考链接中的命令):
1.自建CA
生成CA私匙
openssl genrsa -out icatchtek.key 2048
执行结果:提示创建成功,可又提示unable to什么的,为什么?还需要dig,
Generating RSA private key, 2048 bit long modulus
................+++
...........................................................................................+++
unable to write ‘random state‘
e is 65537 (0x10001)
生成CA证书请求
openssl req -new -key icatchtek.key -out icatchtek.csr
PS:证书请求是对签名的请求,需要使用私钥进行签名
此命令输入后,需要填写信息。
生成CA根证书
openssl x509 -req -in icatchtek.csr -extensions v3_ca -signkey icatchtek.key -out icatchtek.crt
PS:证书是自签名或CA签名过的凭据,用来进行身份认证
执行结果:
Signature ok
subject=/C=CN/ST=Guangdong/L=Shenzhen/OU=.../CN=.../emailAddress=xxxx@example.com
Getting Private key
unable to write ‘random state‘
2.自建server端证书
生成server私匙
openssl genrsa -out smarthome_server.key 2048
结果同上。
生成server证书请求
openssl req -new -key smarthome_server.key -out smarthome_server.csr
结果同上,需输入参数。
生成server证书:下面命令的紫色部分就是上面建立的一系列文件,不用弄错了。
生成server证书,需要一份配置文件,可参阅:vi openssl.cnf
openssl x509 -days 365 -req -in smarthome_server.csr -extensions v3_req -CAkey icatchtek.key -CA icatchtek.crt -CAcreateserial -out smarthome_server.crt -extfile openssl.cnf
关于生产Server证书这一步,孤是直接拷贝了参考链接中的内容,并进行了修改。关于此文件怎么写,孤是不太熟悉的,还需要看更多资料,比如参考链接中的OpenSSL主配置文件openssl.cnf。
下面是自己的open.cnf(私密信息没有)(在参考链接中,[req]下面的几个section是有缩进的,不知道为什么):
[req]
distinguished_name = req_distinguished_name
req_extensions = v3_req

[req_distinguished_name]
countryName = Country Name (2 letter code)
countryName_default = CN
stateOrProvinceName = Guangdong
stateOrProvinceName_default = Guangdong
localityName = Shenzhen
localityName_default = Shenzhen
organizationalUnitName  = ...
organizationalUnitName_default  = ...
commonName = ...
commonName_max  = 64

[ v3_req ]
# Extensions to add to a certificate request
basicConstraints = CA:FALSE
keyUsage = nonRepudiation, digitalSignature, keyEncipherment
subjectAltName = @alt_names

[alt_names]
IP.1 = xxx.xxx.xxx.xxx
DNS.1 = www.example.com
说明,上面的每一步都会在 执行命令的 当前目录下 建立相应的文件!下面是孤试验过程中建立的:
$ ls
ben_server.crt ben_server.key icatchtek.csr icatchtek.srl
ben_server.csr icatchtek.crt icatchtek.key openssl.cnf
配置Nginx服务器
按照参考链接的说法,是在server 块内 listen 端口后添加下面的语句:
ssl on;
ssl_certificate /home/ubuntu/webvideo/nginx/conf/smarthome_server.crt;
ssl_certificate_key /home/ubuntu/webvideo/nginx/conf/smarthome_server.key;
注意,*.crt、*.key文件的路径需要更改,孤是将它们放在/etc/nginx/conf.d/ca里面的。
作为Nginx新手,孤的Nginx配置文件中只有一个Server的,端口是80。可HTTPS网站的默认端口不是443吗?
修改前的Nginx配置文件:
server {
	listen 80 default_server;
	listen [::]:80 default_server;

	# SSL configuration
	#
	# listen 443 ssl default_server;
	# listen [::]:443 ssl default_server;
	#
	# Note: You should disable gzip for SSL traffic.
	# See: https://bugs.debian.org/773332
	#
	# Read up on ssl_ciphers to ensure a secure configuration.
	# See: https://bugs.debian.org/765782
	#
	# Self signed certs generated by the ssl-cert package
	# Don‘t use them in a production server!
	#
	# include snippets/snakeoil.conf;
修改后的配置文件:
server {
	listen 80 default_server;
	listen [::]:80 default_server;

	# SSL configuration
	#
	listen 443 ssl default_server;
	listen [::]:443 ssl default_server;

	ssl on;
	ssl_certificate      /etc/nginx/conf.d/ca/smarthome_server.crt;
	ssl_certificate_key  /etc/nginx/conf.d/ca/smarthome_server.key;

	#
	# Note: You should disable gzip for SSL traffic.
	# See: https://bugs.debian.org/773332
分别访问http、https对应的网页,http的访问失败了、但https访问成功:原因是,只有一个服务器,可自己监听了两个端口,还需要结合nginx的rewrite技术,将http请求转到对应的https请求。
最后,建立了两个Server:一个sever监听80端口、一个监听443端口,前者http链接被rewrite到后者的链接,配置文件如下:
80端口后面没有default_server了——不知道自己为何如此配置;在只有一个server时,其server_name为_,现在有两个了,怎么配置呢?能否相同?
server {
        listen 80;
        listen [::]:80;

        rewrite ^(.*)$ https://$host$1 permanent;
}

server {
        # SSL configuration
        #
        listen 443 ssl default_server;
        listen [::]:443 ssl default_server;

        ssl on;
        ssl_certificate /etc/nginx/conf.d/ca/ben_server.crt;
        ssl_certificate_key /etc/nginx/conf.d/ca/ben_server.key;
上面的配置完毕后,就可以通过http、https访问网站了,不过,http的是转向了https,所以,页面最后看到的是https。
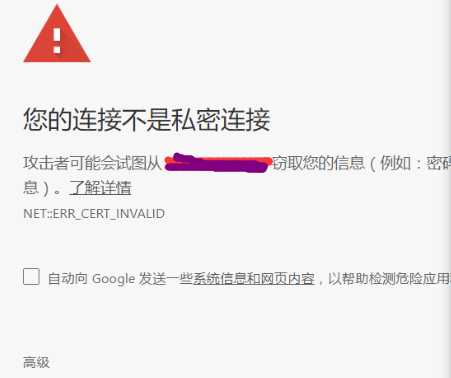
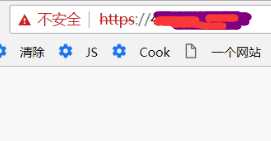
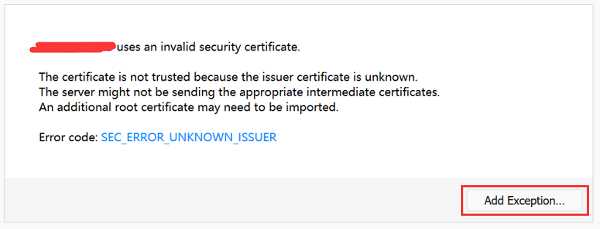
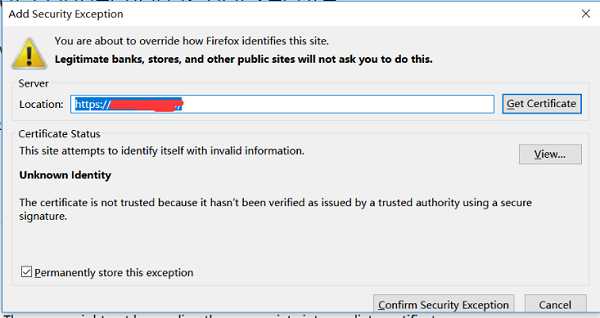
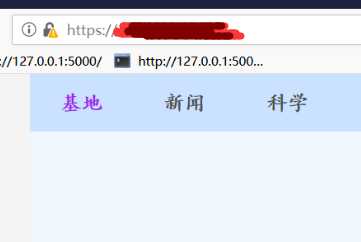
但是,因为浏览器有证书安全校验的机制,因此,不是所有浏览器都可以成功打开页面,测试结果是,只有Firefox在设置后可以打开页面,其它几种浏览器都失败了。
-Chrome浏览器

-Firefox浏览器:最终访问成功。

IE浏览器:

网页不能访问,原因是浏览器认为 颁发证书的CA 不安全。参考链接说把自己的CA根证书加入到浏览器。
在尝试过后,发现问题并没有解决——Chrome、IE都试了试,不行啊!怀疑和自己建立证书的过程有关系,也可能和最新版本的浏览器的安全机制升级有关系,更可能的是前者。
而且,如上面所讲,自己在建立key是出现了unable to write ‘random state‘错误!后面可以解决此问题后再做尝试,继续dig。
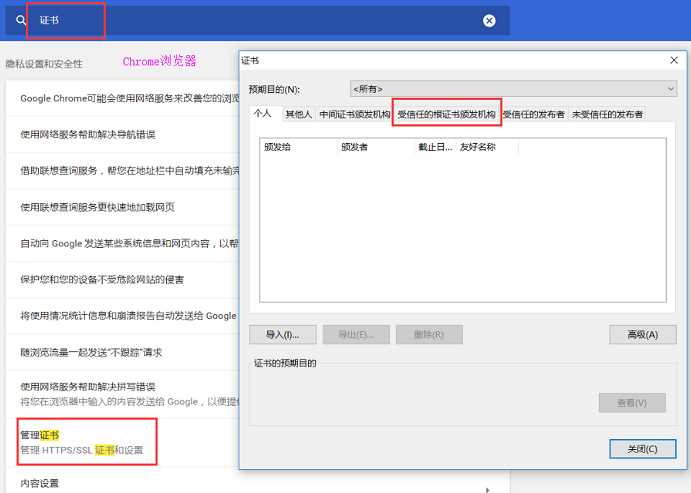
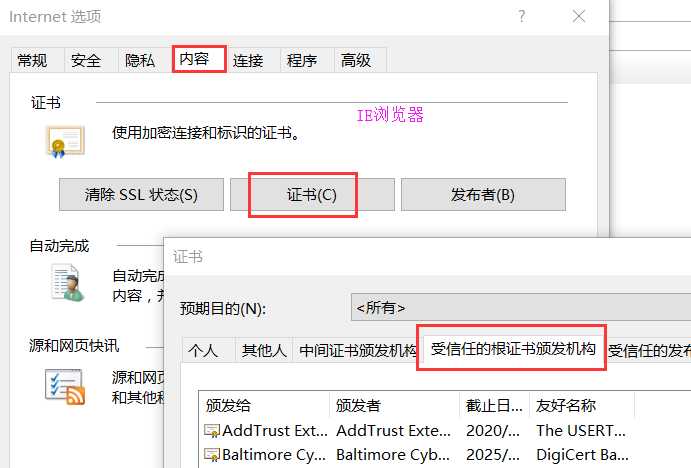
怎么导入呢?Chrome的设置-搜索“证书”,IE、Edge的Internet选项:其实两者配置的是一个东西,其属于操作系统。
后记
总算知道怎么让自己的网站变为HTTPS的了,自建的证书既然无法正常使用,那么,去申请证书吧——知道一个免费申请的机构,当然,付费的就很多了。
Nginx配置不熟悉;
虽然本文用OpenSSL做了一些操作,可是,为何这么做呢?官方文档在哪里呢?配置文件怎么写呢?现在只能踩着先行者的脚步往前走,感谢!
路漫漫啊,
参考链接
自建CA并签名server证书实现https by Andy____Li
OpenSSL主配置文件openssl.cnf by 园友 我为什么坚持写博客
标签:const 研究 uri 安装 先行者 ngui git 功能 失败
原文地址:https://www.cnblogs.com/luo630/p/9534734.html