标签:padding rip name fine pre 直接 文件 基础 大小
在一些网站上经常看到有控制网页肤色和字体大小的功能,接下来,我们将用两个例子来实现这两个功能。
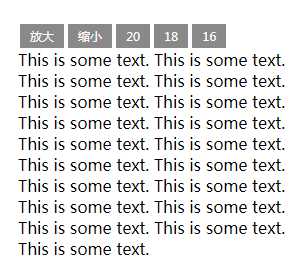
首先我们在网页中添加一些被控制大小的文字和字体控制的按钮。
<!DOCTYPE>
<html>
<head>
<meta http-equiv="Content-Type" content="text/html; charset=utf-8" />
<title></title>
 <script src="../scripts/jquery-1.3.1.js" type="text/javascript"></script>
</head>
<body>
<div class="msg">
    <div class="msg_caption">
        <span class="bigger" >放大</span>
        <span class="smaller" >缩小</span>
        <span >20</span>
        <span >18</span>
        <span >16</span>
    </div>
    <div>
        <p id="para">
        This is some text. This is some text. This is some text. This is some text. This
        is some text. This is some text. This is some text. This is some text. This is some
        text. This is some text. This is some text. This is some text. This is some text.
        This is some text. This is some text. This is some text. This is some text. This
        is some text. This is some text.
        </p>
    </div>
</div>
</body>
</html>
有两种控制字体大小的方式:在当前字体大小的基础上放大或缩小,直接选择字号进行控制。
首先是第一种,需要获取当前文字的字体大小,获取的值是带单位的数值,我们在进行放大缩小操作时,需要进行加减运算,所以需要用parseInt()方法去掉单位再进行运算,运算后的值需要加上单位后再赋值给需要控制的文字,但是需要注意的是,无限放大和缩小并不合适,所以在操作时,需要给一个最大和最小字体。
第二种方式就比较简单了,直接通过点击获取字体大小的数值,然后加上单位就可以进行赋值添加样式了。
<script type="text/javascript">
    $(function(){
        $("span").click(function(){
            var thisEle = $("#para").css("font-size");
            var textFontSize = parseFloat(thisEle , 10);
            var unit = thisEle.slice(-2); //获取单位
            var cName = $(this).attr("class");
            if(cName == "bigger"){
                   if( textFontSize <= 22 ){
                        textFontSize += 2;
                    }
            }else if(cName == "smaller"){
                   if( textFontSize >= 12  ){
                        textFontSize -= 2;
                    }
            }else{
                textFontSize = $(this).text();
            }
            $("#para").css("font-size",  textFontSize + unit);
        });
    });
  </script>
网页换肤的原理是通过调用不同的样式表文件来实现不同皮肤的切换,并且需要将换好的皮肤记入Cookie中,这样用户下次访问时,就可以显示用户自定义的皮肤了。
首先设置HTML结构:
<!DOCTYPE>
<html>
<head>
    <title></title>
    <meta http-equiv="Content-Type" content="text/html; charset=utf-8" />
    <link href="css/default.css" rel="stylesheet" type="text/css" />
    <script src="../scripts/jquery-1.3.1.js" type="text/javascript"></script>
</head>
<body>
    <ul id="skin">
        <li id="skin_0" title="灰色" class="selected">灰色</li>
        <li id="skin_1" title="紫色">紫色</li>
        <li id="skin_2" title="红色">红色</li>
        <li id="skin_3" title="天蓝色">天蓝色</li>
        <li id="skin_4" title="橙色">橙色</li>
        <li id="skin_5" title="淡绿色">淡绿色</li>
    </ul>

    <div id="div_side_0">
        <div id="news">
            <h1 class="title">时事新闻</h1>
        </div>
    </div>

    <div id="div_side_1">
        <div id="game">
            <h1 class="title">娱乐新闻</h1>
        </div>
    </div>
</body>
</html>
其中基础样式为:
*{
    margin:0px;
    padding:0px;
}
body {
    font-family: Verdana, Arial, Helvetica, sans-serif;
    font-size: 12px;
}
#div_side_0,#div_side_1
{
    float:left;
    width:120px;
    height:450px;
    }
#skin
{
    margin:10px;
    padding:5px;
    width:210px;
    padding-right:0px;
    list-style:none;
    border: 1px solid #CCCCCC;
    overflow:hidden;
    }
#skin li{
    float:left;
    margin-right:5px;
    width:15px;
    height:15px;
    text-indent:-999px;
    overflow:hidden;
    display:block;
    cursor:pointer;
    background-image:url(theme.gif);
}
#skin_0{
    background-position:0px 0px;
}
#skin_1{
    background-position:15px 0px;
}
#skin_2{
    background-position:35px 0px;
}
#skin_3{
    background-position:55px 0px;
}
#skin_4{
    background-position:75px 0px;
}
#skin_5{
    background-position:95px 0px;
}
#skin_0.selected{
    background-position:0px 15px !important;
}
#skin_1.selected{
    background-position:15px 15px !important;
}
#skin_2.selected{
    background-position:35px 15px !important;
}
#skin_3.selected{
    background-position:55px 15px !important;
}
#skin_4.selected{
    background-position:75px 15px !important;
}
#skin_5.selected{
    background-position:95px 15px !important;
}
.title
{
    cursor:pointer;}
h1{
   margin:10px;
   padding:10px 20px;
   width:60px;
   color:#ffffff;
   font-size:14px;
}
a:link {
    text-decoration: none;
    color: #333333;
}
a:visited {
    color: #333333;
    text-decoration: none;
}
a:hover {
    color: #000000;
    text-decoration: underline;
}
然后根据HTML代码预定义几套换肤用的样式,分别有灰色、紫色、红色等,在本次的实例中为了简化,只是进行简单的背景替换,所以在这些样式文件中只有对于的背景颜色:
在初始化的时候,默认选择灰色,后期将通过更改样式表链接来更换颜色,所以,我们需要为添加背景色的样式表链接添加一个id,方便后期修改。
<link href="css/skin_0.css" rel="stylesheet" type="text/css" id="cssfile" />
网页的初始化效果如下: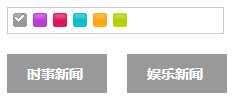
接下来,将通过点击皮肤选择按钮来实现换肤。
首先,选中颜色后,为当前点击的元素添加选中样式。
var $li =$("#skin li");
$li.click(function(){
      $("#"+this.id).addClass("selected")
              .siblings().removeClass("selected");
})
其次,设置网页的皮肤颜色。
$(function(){
    var $li =$("#skin li");
    $li.click(function(){
          $("#"+this.id).addClass("selected")
                 .siblings().removeClass("selected");
          $("#cssfile").attr("href","css/"+this.id+".css");
    })
})
此时,简易版的换肤就实现了,但是,当用户刷新网页或者关闭浏览器后,皮肤又会被初始化,因此,我们需要将当前选择的皮肤进行保存。
这里,我们需要进入jQuery的cookie插件
jQuery.cookie = function(name, value, options) {
    if (typeof value != ‘undefined‘) { // name and value given, set cookie
        options = options || {};
        if (value === null) {
            value = ‘‘;
            options.expires = -1;
        }
        var expires = ‘‘;
        if (options.expires && (typeof options.expires == ‘number‘ || options.expires.toUTCString)) {
            var date;
            if (typeof options.expires == ‘number‘) {
                date = new Date();
                date.setTime(date.getTime() + (options.expires * 24 * 60 * 60 * 1000));
            } else {
                date = options.expires;
            }
            expires = ‘; expires=‘ + date.toUTCString(); // use expires attribute, max-age is not supported by IE
        }
        // CAUTION: Needed to parenthesize options.path and options.domain
        // in the following expressions, otherwise they evaluate to undefined
        // in the packed version for some reason...
        var path = options.path ? ‘; path=‘ + (options.path) : ‘‘;
        var domain = options.domain ? ‘; domain=‘ + (options.domain) : ‘‘;
        var secure = options.secure ? ‘; secure‘ : ‘‘;
        document.cookie = [name, ‘=‘, encodeURIComponent(value), expires, path, domain, secure].join(‘‘);
    } else { // only name given, get cookie
        var cookieValue = null;
        if (document.cookie && document.cookie != ‘‘) {
            var cookies = document.cookie.split(‘;‘);
            for (var i = 0; i < cookies.length; i++) {
                var cookie = jQuery.trim(cookies[i]);
                // Does this cookie string begin with the name we want?
                if (cookie.substring(0, name.length + 1) == (name + ‘=‘)) {
                    cookieValue = decodeURIComponent(cookie.substring(name.length + 1));
                    break;
                }
            }
        }
        return cookieValue;
    }
};
然后将当前的皮肤保存进cookie,保存后,就可以通过cookie来获取当前的皮肤了,如果cookie存在,则将当前皮肤设置为cookie记录的值,这样,当用户刷新网页后,仍然是当前选择的皮肤。
完整代码如下:
<!DOCTYPE>
<html>
<head>
    <title></title>
    <meta http-equiv="Content-Type" content="text/html; charset=utf-8" />
    <link href="css/default.css" rel="stylesheet" type="text/css" />
    <link href="css/skin_0.css" rel="stylesheet" type="text/css" id="cssfile" />
    <script src="../scripts/jquery-1.3.1.js" type="text/javascript"></script>
    <script src="js/jquery.cookie.js" type="text/javascript"></script>
    <script type="text/javascript">
        $(function(){
            var $li =$("#skin li");
            $li.click(function(){
                $("#"+this.id).addClass("selected")
                            .siblings().removeClass("selected");
                $("#cssfile").attr("href","css/"+ (this.id) +".css"); //设置不同肤色
                $.cookie( "MyCssSkin" ,  this.id , { path: ‘/‘, expires: 10 });//存入cookie
            });
            var cookie_skin = $.cookie( "MyCssSkin");  //获取cookie
            if (cookie_skin) {
                //如果存在cookie
                    $("#"+cookie_skin).addClass("selected")
                                      .siblings().removeClass("selected");
                    $("#cssfile").attr("href","css/"+ cookie_skin +".css");
                    $.cookie( "MyCssSkin" ,  cookie_skin  , { path: ‘/‘, expires: 10 });
            }
        })
    </script>
</head>
<body>
    <ul id="skin">
        <li id="skin_0" title="灰色" class="selected">灰色</li>
        <li id="skin_1" title="紫色">紫色</li>
        <li id="skin_2" title="红色">红色</li>
        <li id="skin_3" title="天蓝色">天蓝色</li>
        <li id="skin_4" title="橙色">橙色</li>
        <li id="skin_5" title="淡绿色">淡绿色</li>
    </ul>

    <div id="div_side_0">
        <div id="news">
            <h1 class="title">时事新闻</h1>
        </div>
    </div>

    <div id="div_side_1">
        <div id="game">
            <h1 class="title">娱乐新闻</h1>
        </div>
    </div>

</body>
</html>
标签:padding rip name fine pre 直接 文件 基础 大小
原文地址:https://www.cnblogs.com/yuyujuan/p/9535591.html