标签:服务 配置 time 第四篇 entity set 注解 size sch
1:在pom文件引入mybatis-spring-boot-starter的依赖:
1 <dependency>
2        <groupId>org.mybatis.spring.boot</groupId>
3        <artifactId>mybatis-spring-boot-starter<artifactId>
4        <version>1.3.0</version>
5 </dependency>
2:引入数据库连接依赖:
 1 <dependency>
 2        <groupId>mysql</groupId>
 3        <artifactId>mysql-connector-java</artifactId>
 4        <scope>runtime</scope>
 5 </dependency>
 6 <dependency>
 7        <groupId>com.alibaba</groupId>
 8        <artifactId>druid</artifactId>
 9        <version>1.0.29</version>
10 </dependency>
application.properties配置文件中引入数据源:
1 spring.datasource.type=com.alibaba.druid.pool.DruidDataSource
2 spring.datasource.url=jdbc:mysql://127.0.0.1:3306/school?characterEncoding=utf-8
3 spring.datasource.username=root
4 spring.datasource.password=123456
5 spring.datasource.driver-class-name=com.mysql.jdbc.Driver
这样,springboot就可以访问数据了。
①:首先创建entity(与数据库字段映射)在entity下创建User类实体
 1 package com.asideal.zhcx.model;
 2
 3 public class User {
 4
 5     private int id;
 6     private String username;
 7     private String password;
 8
 9     public int getId() {
10         return id;
11     }
12
13     public void setId(int id) {
14         this.id = id;
15     }
16
17     public String getUsername() {
18         return username;
19     }
20
21     public void setUsername(String username) {
22         this.username = username;
23     }
24
25     public String getPassword() {
26         return password;
27     }
28
29     public void setPassword(String password) {
30         this.password = password;
31     }
32
33     @Override
34     public String toString() {
35         return "User{" +
36                 "id=" + id +
37                 ", username=‘" + username + ‘\‘‘ +
38                 ", password=‘" + password + ‘\‘‘ +
39                 ‘}‘;
40     }
41
42 }
②:创建dao(数据库操作语句)在dao下创建UserDao
 1 package com.asideal.zhcx.dao;
 2
 3 import com.asideal.zhcx.model.User;
 4 import org.apache.ibatis.annotations.Select;
 5 import org.springframework.stereotype.Repository;
 6
 7 @Repository
 8 public interface UserDao {
 9
10     /**
11      * 根据id查找用户
12      * @param id
13      * @return
14      */
15     @Select("select * from t_user where id = #{id}")
16     User selectuser(int id);
17
18 }
③:创建服务,在service下创建UserService
 1 package com.asideal.zhcx.service;
 2
 3 import com.asideal.zhcx.dao.UserDao;
 4 import com.asideal.zhcx.model.User;
 5 import org.springframework.beans.factory.annotation.Autowired;
 6 import org.springframework.stereotype.Service;
 7
 8 @Service
 9 public class UserService {
10
11     @Autowired
12     private UserDao userDao;
13
14     public User selectUser(int id){
15         return userDao.selectuser(id);
16     }
17 }
④:创建controller,在controller包下创建MybatisController
 1 package com.asideal.zhcx.controller;
 2
 3 import com.asideal.zhcx.model.User;
 4 import com.asideal.zhcx.service.UserService;
 5 import org.springframework.beans.factory.annotation.Autowired;
 6 import org.springframework.web.bind.annotation.PathVariable;
 7 import org.springframework.web.bind.annotation.RequestMapping;
 8 import org.springframework.web.bind.annotation.RestController;
 9
10 @RestController
11 @RequestMapping("mybatis")
12 public class MyBatisController {
13
14     @Autowired
15     private UserService userService;
16
17     @RequestMapping("/helloUser/{id}")
18     public User selectUser (@PathVariable int id){
19         return userService.selectUser(id);
20     }
21 }
⑤:配置Mapper扫描,在启动类中添加MapperScan("")
 1 package com.asideal.zhcx;
 2
 3 import org.mybatis.spring.annotation.MapperScan;
 4 import org.springframework.boot.SpringApplication;
 5 import org.springframework.boot.autoconfigure.SpringBootApplication;
 6 import org.springframework.boot.web.servlet.ServletComponentScan;
 7
 8 //注册servlet注解
 9 @ServletComponentScan
10 //扫描的mapper
11 @MapperScan("com.asideal.zhcx.dao")
12 @SpringBootApplication
13 public class ZhcxApplication {
14     public static void main(String[] args) {
15         SpringApplication.run(ZhcxApplication.class, args);
16     }
17 }

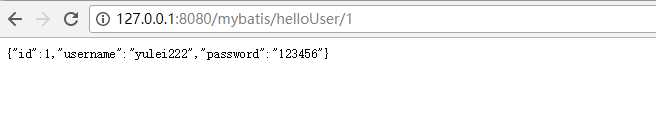
搞定!!!
SpringBoot自学教程 | 第四篇:Spring Boot整合mybatis
标签:服务 配置 time 第四篇 entity set 注解 size sch
原文地址:https://www.cnblogs.com/yaokaizhi/p/9562735.html