标签:obj ring post margin 继承 绝对路径 web model col
花了半天时间终于成功,记录以备查阅。
部署部分参考的是:把spring-boot项目部署到tomcat容器中
目标:把spring-boot项目按照平常的web项目一样发布到tomcat容器下
在pom.xml里设置 <packaging>war</packaging>
<groupId>com.study</groupId>
<artifactId>test</artifactId>
<version>0.0.1-SNAPSHOT</version>
<packaging>war</packaging>
在pom.xml里找到spring-boot-starter-web依赖节点,在其中添加如下代码:
<dependency>
    <groupId>org.springframework.boot</groupId>
    <artifactId>spring-boot-starter-web</artifactId>
    <!-- 移除嵌入式tomcat插件 -->
    <exclusions>
        <exclusion>
            <groupId>org.springframework.boot</groupId>
            <artifactId>spring-boot-starter-tomcat</artifactId>
        </exclusion>
    </exclusions>
</dependency>
下面两种方式都可以,任选其一
<dependency>
    <groupId>javax.servlet</groupId>
    <artifactId>javax.servlet-api</artifactId>
    <version>3.1.0</version>
    <scope>provided</scope>
</dependency>
<dependency>
    <groupId>org.apache.tomcat</groupId>
    <artifactId>tomcat-servlet-api</artifactId>
    <version>8.0.36</version>
    <scope>provided</scope>
</dependency>
我们平常用main方法启动的方式,都有一个App的启动类,代码如下:
@SpringBootApplication
public class Application {
    public static void main(String[] args) {
        SpringApplication.run(Application.class, args);
    }
}
直接让启动类继承SpringBootServletInitializer,并覆盖configure()方法:
@SpringBootApplication
public class Application extends SpringBootServletInitializer {

    @Override
    protected SpringApplicationBuilder configure(SpringApplicationBuilder builder) {
        // 注意这里要指向原先用main方法执行的Application启动类
        return builder.sources(Application.class);
    }

    public static void main(String[] args) {
        SpringApplication.run(Application.class, args);
    }
}
在项目根目录下(即包含pom.xml的目录),在命令行里输入:
mvn clean package即可, 等待打包完成,出现[INFO] BUILD SUCCESS即为打包成功。
mvn clean package 命令可以按需要添加参数,
-DskipTests 不执行测试用例,但编译测试用例类生成相应的class文件至target/test-classes下。
-Dspring.profiles.active=dev 如果配置了多环境,可以设置打包到哪个环境。
然后把target目录下的war包放到tomcat的webapps目录下,启动tomcat,即可自动解压部署。
最后在浏览器中输入

http://localhost:[端口号]/[打包项目名]/

发布成功
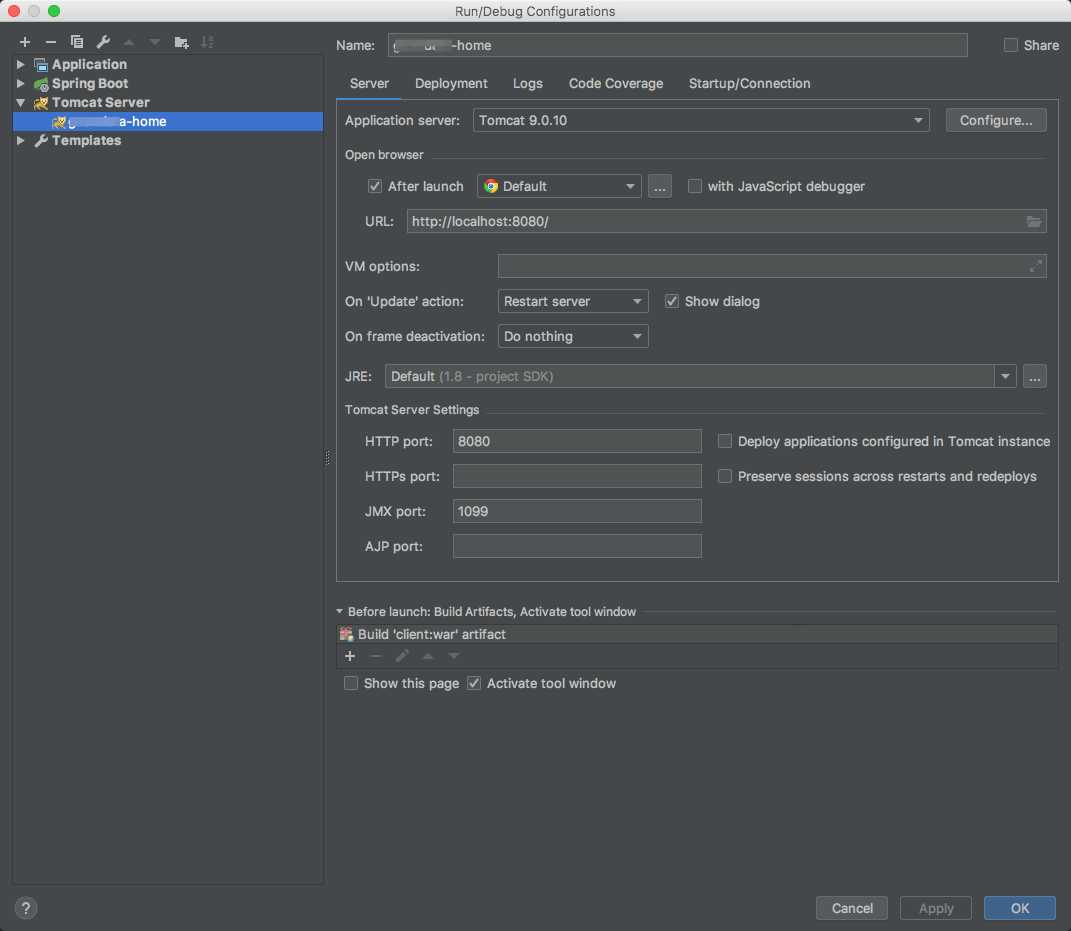
IDEA上方工具栏:Run->Edit Configurations
打开配置界面,左边"+"号->Tomcat Server->Local
完成后如下所示
然后在Deployment中点击"+"号,选择client:war,这样每次server启动的时候都会去打包一次war包(个人理解),然后去运行war包。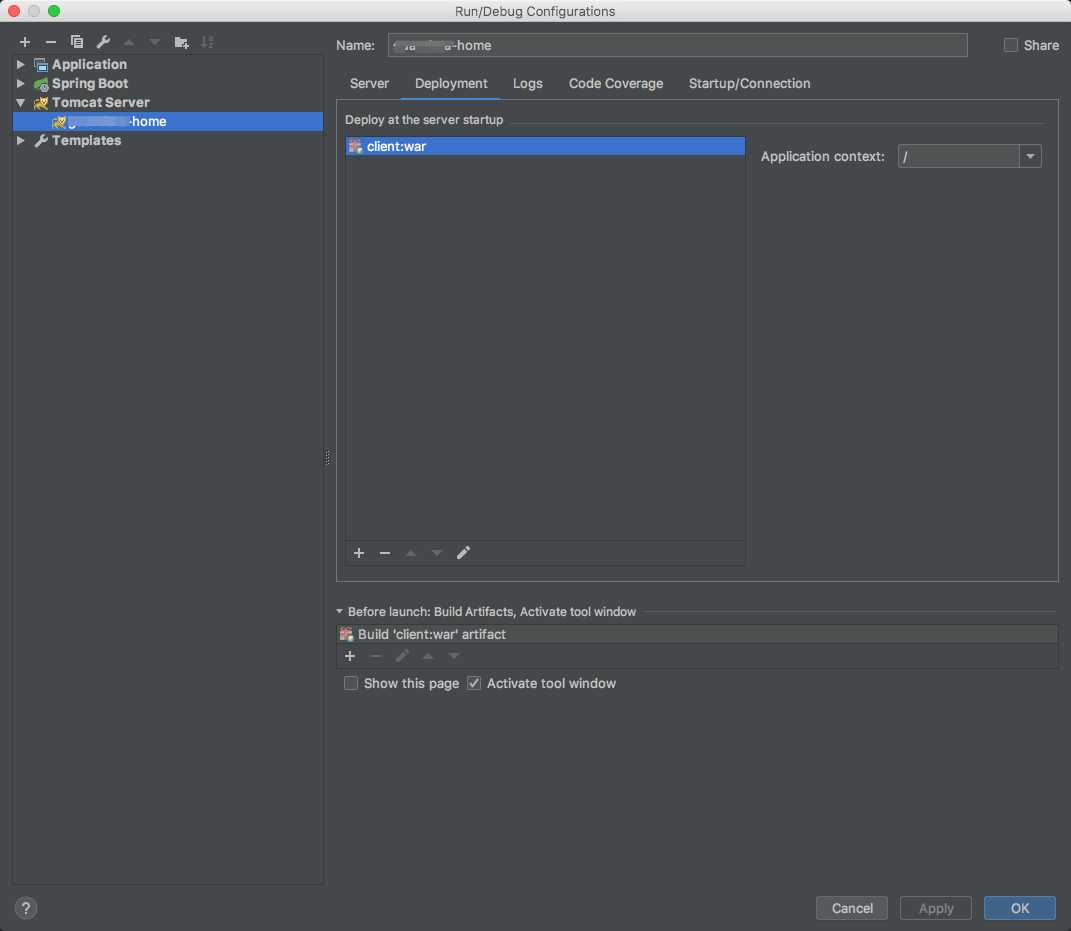
然后保存就可以了,然后启动项目就运行起来了。
log4j.appender.dailyFile.File=${catalina.base}/logs/guandata/log.log4j
在启动第三方Tomcat时,Tomcat会去环境变量中寻找叫CATALINA_HOME、CATALINA_BASE的环境变量,并将它们加入到Tomcat到系统变量中,这样我们就能在项目中使用它们了。
举例:
原本在springboot内置Tomcat中运行项目,资源访问路径URL类似于:http://localhost:8080/css/bootstrap.min.css
但是打包部署到第三方Tomcat中,Tomcat默认会在路径中加上项目名,类似于:http://localhost:8080/myproject/css/bootstrap.min.css
这样就导致了访问不到静态资源 404
原因:
由于在前端引用资源时使用了绝对路径:
<link href="/css/bootstrap.min.css" rel="stylesheet">
这样默认在 http://localhost:8080/css/bootstrap.min.css 下面寻找,因此,我们需要在前面加上项目名,但是写死的话万一改项目名就很麻烦,当然是有办法解决的。
解决:
1. 在Java后端定义一个拦截器,用来获取 request.getContextPath() 然后传到前端,request.getContextPath() 得到的是项目的根路径,具体参考:关于request.getServletPath(),request.getContextPath()的总结
 1 @Component
 2 public class CommonIntercepter implements HandlerInterceptor {
 3
 4     private final Logger logger = LoggerFactory.getLogger(this.getClass());
 5
 6     @Override
 7     public boolean preHandle(HttpServletRequest request,
 8                              HttpServletResponse response, Object handler) throws Exception {
 9          return true;
10     }
11
12     @Override
13     public void postHandle(HttpServletRequest request,
14                            HttpServletResponse response, Object handler,
15                            ModelAndView modelAndView) throws Exception {
16             request.setAttribute("ctx", request.getContextPath());
17             request.setAttribute("version", DateTimeUtils.currentTimeMillis());
18     }
19
20     @Override
21     public void afterCompletion(HttpServletRequest request,
22                                 HttpServletResponse response, Object handler, Exception ex)
23             throws Exception {
24
25     }
26
27
28 }
2. 前端在静态资源访问url前加上${ctx!},注意我用的是freemarker模版
<link href="${ctx!}/css/bootstrap.min.css" rel="stylesheet">
<link href="${ctx!}/css/font-awesome.min.css" rel="stylesheet">
<link href="${ctx!}/css/plugins/bootstrap-table/bootstrap-table.min.css" rel="stylesheet">
<link href="${ctx!}/css/animate.css" rel="stylesheet">
<link href="${ctx!}/css/style.css" rel="stylesheet">
这样就能正确访问到静态资源啦。
sudo chmod 777 /Library/Tomcat/apache-tomcat-9.0.10/bin/*.sh
IntelliJ IDEA SpringBoot 使用第三方Tomcat以及部署
标签:obj ring post margin 继承 绝对路径 web model col
原文地址:https://www.cnblogs.com/yfzhou/p/9668366.html