标签:osi gre class line lse div article for 天前
人在码上走,奇葩需求天天有。这不,今天前端让我返回一个带自定义水印的背景图片。一通google,有现成的代码,但是很多是直接在源图上添加水印,生成出来的文字样式也没有控制好,看来又只有自己造轮子了。
过程有点曲折,直接上最终代码:
import java.awt.AlphaComposite;
import java.awt.Color;
import java.awt.Font;
import java.awt.Graphics2D;
import java.awt.RenderingHints;
import java.awt.Transparency;
import java.awt.image.BufferedImage;
import java.io.File;
import java.io.IOException;
import javax.imageio.ImageIO;


/**
 * 图片处理工具类 基于https://blog.csdn.net/beinlife/article/details/53665152 改造
 */
public class ImageUtil {


    /**
     * 生成背景透明的 文字水印,文字位于透明区域正中央,可设置旋转角度
     *
     * @param width 生成图片宽度
     * @param heigth 生成图片高度
     * @param text 水印文字
     * @param color 颜色对象
     * @param font awt字体
     * @param degree 水印文字旋转角度
     * @param alpha 水印不透明度0f-1.0f
     */
    public static BufferedImage waterMarkByText(int width, int heigth, String text, Color color,
            Font font, Double degree, float alpha) {
        BufferedImage buffImg = new BufferedImage(width, heigth, BufferedImage.TYPE_INT_RGB);
        /**2、得到画笔对象*/
        Graphics2D g2d = buffImg.createGraphics();
        // ----------  增加下面的代码使得背景透明  -----------------
        buffImg = g2d.getDeviceConfiguration()
                .createCompatibleImage(width, heigth, Transparency.TRANSLUCENT);
        g2d.dispose();
        g2d = buffImg.createGraphics();
        // ----------  背景透明代码结束  -----------------

        // 设置对线段的锯齿状边缘处理
        g2d.setRenderingHint(RenderingHints.KEY_INTERPOLATION,
                RenderingHints.VALUE_INTERPOLATION_BILINEAR);

        //把源图片写入
//            g2d.drawImage(srcImg.getScaledInstance(srcImg.getWidth(null),
//                    srcImg.getHeight(null), Image.SCALE_SMOOTH), 0, 0,null);

        // 设置水印旋转
        if (null != degree) {
            //注意rotate函数参数theta,为弧度制,故需用Math.toRadians转换一下
            //以矩形区域中央为圆心旋转
            g2d.rotate(Math.toRadians(degree), (double) buffImg.getWidth() / 2,
                    (double) buffImg.getHeight() / 2);
        }

        // 设置颜色
        g2d.setColor(color);

        // 设置 Font
        g2d.setFont(font);

        //设置透明度:1.0f为透明度 ,值从0-1.0,依次变得不透明
        g2d.setComposite(AlphaComposite.getInstance(AlphaComposite.SRC_OVER, alpha));
        //获取真实宽度
        float realWidth = getRealFontWidth(text);
        float fontSize = font.getSize();
        //计算绘图偏移x、y,使得使得水印文字在图片中居中
        //这里需要理解x、y坐标是基于Graphics2D.rotate过后的坐标系
        float x = 0.5f * width - 0.5f * fontSize * realWidth;
        float y = 0.5f * heigth + 0.5f * fontSize;
        //取绘制的字串宽度、高度中间点进行偏移,使得文字在图片坐标中居中
        g2d.drawString(text, x, y);
        //释放资源
        g2d.dispose();
//        System.out.println("添加水印文字完成!");
        return buffImg;

    }
    public static BufferedImage waterMarkByText(int width, int heigth, String text, Color color, float alpha) {
        //jdk默认字体
        Font font = new Font("Dialog", Font.ROMAN_BASELINE, 33);
        return waterMarkByText(width, heigth, text, color,font, -30d, alpha);
    }
    public static BufferedImage waterMarkByText(int width, int heigth, String text, float alpha) {
        return waterMarkByText(width, heigth, text, Color.GRAY, alpha);
    }


    public static BufferedImage waterMarkByText(int width, int heigth, String text) {
        return waterMarkByText(width, heigth, text, 0.2f);
    }

    public static BufferedImage waterMarkByText(String text) {
        return waterMarkByText(200, 150, text);
    }

    /**
     * 获取真实字符串宽度,ascii字符占用0.5,中文字符占用1.0
     */
    private static float getRealFontWidth(String text) {
        int len = text.length();
        float width = 0f;
        for (int i = 0; i < len; i++) {
            if (text.charAt(i) < 256) {
                width += 0.5f;
            } else {
                width += 1.0f;
            }
        }
        return width;
    }


    public static void main(String[] args) {
        int width = 200;
        int heigth = 150;
        Font font = new Font("微软雅黑", Font.ROMAN_BASELINE, 33);//字体
        BufferedImage bi1 = waterMarkByText(width, heigth, "测试aB~,", Color.GRAY, font, -30d,
                0.2f);//给图片添加文字水印
//        BufferedImage bi = waterMarkByText(width, heigth, "测试aB~,", Color.GRAY, -30d,
//                0.2f);//给图片添加文字水印
//        BufferedImage bi2 = waterMarkByText(width, heigth, "测试aB~,");//给图片添加文字水印
//        BufferedImage bi3 = waterMarkByText("测试aB~,");
        try {
            ImageIO.write(bi1, "png", new File("D:/test.png"));//写入文件
            System.out.println(Color.decode("#00bcd4"));
        } catch (IOException e) {
            e.printStackTrace();
        }
    }
}
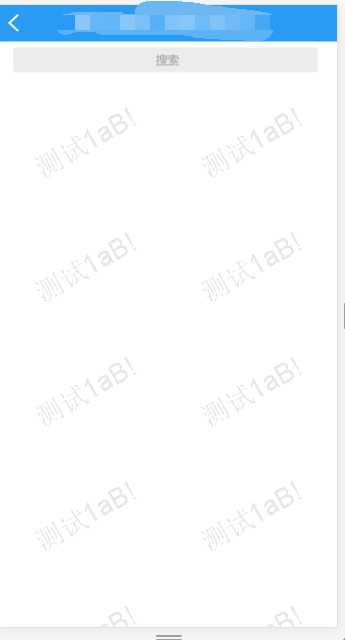
最终效果如下:

完美解决~
标签:osi gre class line lse div article for 天前
原文地址:https://www.cnblogs.com/wzluo09/p/9669989.html