标签:inf exce lock 数据存储 class nes pymongo char .exe
主要代码:
在settings.py中添加如下代码:
MONGODB_HOST = "127.0.0.1"  # 本机ip地址
MONGODB_PORT = 27017  # 端口号
MONGODB_DB = "DouBan"  # 数据库名
MONGODB_COL = "DouBanDuShu"  # 集合名
在pipelines.py中添加如下代码:
import pymongo
from DouBanDuShu.settings import MONGODB_DB, MONGODB_PORT, MONGODB_HOST, MONGODB_COL


class DoubandushuPipeline(object):
    def __init__(self):
        client = pymongo.MongoClient(host=MONGODB_HOST, port=MONGODB_PORT)  # 连接MongoDB数据库
        db = client[MONGODB_DB]  # 创建一个数据库
        self.post = db[MONGODB_COL]  # 创建一个集合

    def process_item(self, item, spider):
        data = dict(item)
        self.post.insert(data)  # 把数据存储到数据库中
        return item
前提:在MySQL数据库中建一个表来保存数据。
create table doubandianying(
name varchar(100) not null,
human varchar(100) not null,
score varchar(10) not null,
info varchar(200) not null
);
主要代码:
在settings.py中添加如下代码:
MYSQL_HOST = "localhost"  # 主机
MYSQL_PORT = 3306  # 端口号
MYSQL_DB = "DouBan"  # 数据库名
MYSQL_USER = 用户名
MYSQL_PSD = 密码
在pipelines.py中添加如下代码:
import pymysql
from DouBanDianYing.settings import MYSQL_DB, MYSQL_HOST, MYSQL_PSD, MYSQL_PORT, MYSQL_USER


class DoubandianyingPipeline(object):
    def __init__(self):
        self.conn = pymysql.connect(host=MYSQL_HOST, port=MYSQL_PORT, db=MYSQL_DB, user=MYSQL_USER, password=MYSQL_PSD)  # 连接MySQL数据库
        self.cursor = self.conn.cursor()  # 创建游标

    def process_item(self, item, spider):
        try:
            self.cursor.execute("insert into doubandianying(name,human,score,info) values (%s,%s,%s,%s)",
                                (item[‘name‘], item[‘human‘], item[‘score‘], item[‘info‘]))  # 向数据表中插入数据
            self.conn.commit()
        except Exception as error:
            print(error)
        return item
在Pycharm中点击右侧的Database,就会出现如下方框;

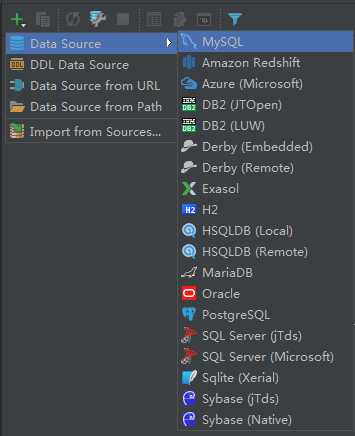
然后点击“+”按钮,选择Data Source,然后选择MySQL;

在弹出的对话框中输入以下信息,包括数据表名、用户名和密码(密码是自动隐藏的)。

添加信息无误后点击“OK”,在Pycharm中连接MySQL数据库就完成了,结果如下图。

(注:在链接MySQL数据库的时候记得先打开MySQL服务。)
最后附上源码地址:https://github.com/QAQ112233/DouBan
【Python3爬虫】Scrapy+MongoDB+MySQL
标签:inf exce lock 数据存储 class nes pymongo char .exe
原文地址:https://www.cnblogs.com/TM0831/p/9684875.html