标签:移位 扩展 space apt counter number connect content about


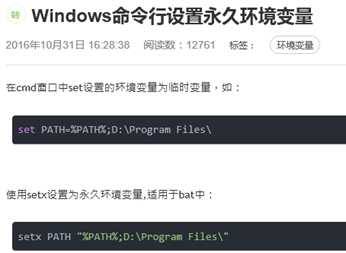
cmd设置环境变量可以方便我们bat脚本的运行,但是要注意的是变量只在当前的cmd窗口有作用(局部生效),如果想要设置持久的环境变量需要我们通过两种手段进行设置:一种是直接修改注册表,另一种是通过我的电脑-〉属性-〉高级,来设置系统的环境变量。
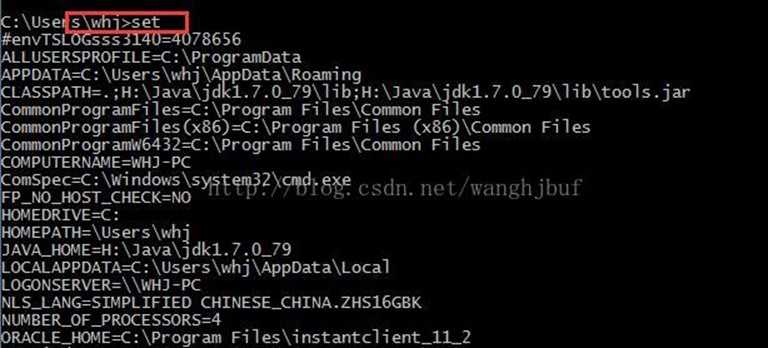
1、查看当前所有可用的环境变量:输入 set 即可查看。
2、查看某个环境变量:输入 "set 变量名"即可,比如想查看temp变量的值,即输入 set temp

当然也可以使用echo %temp%

3、修改环境变量 :输入 "set 变量名=变量内容"即可,比如将temp设置为"d:\tempfile",只要输入set temp="d:\tempfile"。注意,此修改环境变量是指用现在的内容去覆盖以前的内容,并不是追加。比如当我设置了上面的path路径之后,如果我再重新输入set temp="c",再次查看temp路径的时候,其值为"c",而不是"d:\tempfile";"c"。
4、设置为空:如果想将某一变量设置为空,输入"set 变量名="即可。如"set path=" 那么查看path的时候就为空。注意,上面已经说了,只在当前命令行窗口起作用。因此查看path的时候不要去右击"我的电脑"——"属性"........
5、给变量追加内容(不同于3,那个是覆盖):输入"set 变量名=%变量名%;变量内容"。如,为temp添加一个新的路径,输入" set path=%path%;d:\tempfile"即可将d:\tempfile添加到path中,再次执行"set path=%path%;c:",那么,使用set path语句来查看的时候,将会有:d:\tempfile;c:,而不是像第3步中的只有c:。
环境变量详细解释
1、查看当前可用的所有环境变量(=系统变量+用户变量)
set
查看某个环境变量,如PATH
set PATH
添加环境变量,如xxx=aa
set xxx=aa
将环境变量(如xxx)的值置为空
set xxx=
在某个环境变量(如PATH)后添加新的值(如d:\xxx)
set PATH=%PATH%;d:\xxx
[注]:以命令行方式对环境变量的操作只对当前窗口的应用有效!
2、Windows下JAVA用到的环境变量主要有3个:JAVA_HOME、CLASSPATH、PATH。
1)JAVA_HOME指向的是JDK的安装路径,如x:\ j2sdk1.4.2,在这路径下你应该能够找到bin、lib等目录。设置方法:JAVA_HOME=c:\ j2sdk1.4.2
2)PATH变量的作用
java程序在运行时首先在path变量所定义的路径去找java.exe,并以最先找到的为准,如果安装完j2sdk后不加设置,一般是C:\WINDOWS\system32目录。
j2sdk1.4(还有其它java开发工具如jbuilder8)在安装后会将java.exe拷贝到C:\WINDOWS\system32目录下,当执行java.exe时,需要装载这个SDK下的一些文件。
如j2sdk1.4在安装完成后,C:\WINDOWS\system32下的java.exe在运行时会在C:\Program File\java\目录下装载必需的一些文件。但安装j2sdk后一般会在PATH变量的最前面设置C:\ j2sdk1.4.2 \bin。
当先安装j2sdk1.4.2,后安装jbuilder8等开发工具时,由于jbuilder8的java.exe在拷贝到C:\WINDOWS\system32时可能覆盖了j2sdk1.4.2的java.exe,那么这时在运行的java.exe会到jbuilder8所在的目录去装载必需的一些文件。
3)CLASSPATH环境变量的作用
告诉类装载器到哪里去寻找第三方提供的类和用户定义的类。也可用使用JVM命令行参数-classpath分别为应用程序指定类路径,在-classpath中指定的类路径覆盖CLASSPATH环境变量中指定的值。
3、当机器内装有多个SDK版本时,如何查看所用的是哪个SDK?
java -verbose
在出现的屏幕信息中可以看出系统装载的是哪个目录下的文件。
4、Windows OS下设置PATH的方法
〔系统〕->〔环境〕-> 〔高级〕,在PATH变量的文本框中的最前面输入C:\ j2sdk1.4.2\bin
或在命令行窗口中执行 set path=c:\j2sdk1.4.2\bin;%path%; 这样在命令行窗口的任一路径下都可以执行java.exe程序了。或设置PATH=%JAVA_HOME%\bin;%PATH%
5、对于CLASSPATH环境变量的设置方法要加倍小心,是因为以后你出现的莫名其妙80%以上的怪问题都可能是由于CLASSPATH设置不对引起的。
CLASSPATH=.\;%JAVA_HOME%\lib\tools.jar
首先要注意的是最前面的".\;",——句点反斜杠分号。这个是告诉JDK,搜索CLASS时先查找当前目录的CLASS文件。
【Troubleshooting】
编译会出现以下情况,看你是否真得都理解环境变量的设置,并能解决它。
[T1]error:java不是一个可运行的程序?
由于没有设置环境变量path
[T2] error:不能打开某个目录?
可能是忽视了path环境变量中的目录的设置顺序。
[T3]Exception on thread "main" java.lang.DoClassDefFoundError:Test?
没有设置classpath的路径。
cmd查看环境变量
1、查看当前所有可用的环境变量:输入 set 即可查看。
2、查看某个环境变量:输入 "set 变量名"即可,比如想查看path变量的值,即输入 set path
3、修改环境变量
:输入 "set 变量名=变量内容"即可,比如将path设置为"d:\hacker.exe",只要输入set path="d:\nmake.exe"。注意,此修改环境变量是指用现在的内容去覆盖以前的内容,并不是追加。比如当我设置了上面的path路径之后,如果我再重新输入set path="c",再次查看path路径的时候,其值为"c:",而不是"d:\nmake.exe";"c"。
4、设置为空:如果想将某一变量设置为空,输入"set 变量名="即可。如"set path=" 那么查看path的时候就为空。注意,上面已经说了,只在当前命令行窗口起作用。因此查看path的时候不要去右击"我的电脑"——"属性"........
5、给变量追加内容(不同于3,那个是覆盖):输入"set 变量名=%变量名%;变量内容"。如,为path添加一个新的路径,输入" set path=%path%;d:\hacker.exe"即可将d:\hacker.exe添加到path中,再次执行"set path=%path%;c:",那么,使用set path语句来查看的时候,将会有:d:\hacker.exe;c:,而不是像第3步中的只有c:。
%ALLUSERSPROFILE% 局部
返回所有"用户配置文件"的位置。
%APPDATA% 局部
返回默认情况下应用程序存储数据的位置。
%CD% 局部
返回当前目录字符串。
%CMDCMDLINE% 局部
返回用来启动当前的 Cmd.exe 的准确命令行。
%CMDEXTVERSION% 系统
返回当前的"命令处理程序扩展"的版本号。
%COMPUTERNAME% 系统
返回计算机的名称。
%COMSPEC% 系统
返回命令行解释器可执行程序的准确路径。
%DATE% 系统
返回当前日期。使用与 date /t 命令相同的格式。由 Cmd.exe 生成。有关 date 命令的详细信息,请参阅 Date。
%ERRORLEVEL% 系统
返回最近使用过的命令的错误代码。通常用非零值表示错误。
%HOMEDRIVE% 系统
返回连接到用户主目录的本地工作站驱动器号。基于主目录值的设置。用户主目录是在"本地用户和组"中指定的。
%HOMEPATH% 系统
返回用户主目录的完整路径。基于主目录值的设置。用户主目录是在"本地用户和组"中指定的。
%HOMESHARE% 系统
返回用户的共享主目录的网络路径。基于主目录值的设置。用户主目录是在"本地用户和组"中指定的。
%LOGONSEVER% 局部
返回验证当前登录会话的域控制器的名称。
%NUMBER_OF_PROCESSORS% 系统
指定安装在计算机上的处理器的数目。
%OS% 系统
返回操作系统的名称。Windows 2000 将操作系统显示为 Windows_NT。
%PATH% 系统
指定可执行文件的搜索路径。
%PATHEXT% 系统
返回操作系统认为可执行的文件扩展名的列表。
%PROCESSOR_ARCHITECTURE% 系统
返回处理器的芯片体系结构。值: x86,IA64。
%PROCESSOR_IDENTFIER% 系统
返回处理器说明。
%PROCESSOR_LEVEL% 系统
返回计算机上安装的处理器的型号。
%PROCESSOR_REVISION% 系统
返回处理器修订号的系统变量。
%PROMPT% 局部
返回当前解释程序的命令提示符设置。由 Cmd.exe 生成。
%RANDOM% 系统
返回 0 到 32767 之间的任意十进制数字。由 Cmd.exe 生成。
%SYSTEMDRIVE% 系统
返回包含 Windows XP 根目录(即系统根目录)的驱动器。
%SYSTEMROOT% 系统
返回 Windows XP 根目录的位置。
%TEMP% and %TMP% 系统和用户
返回对当前登录用户可用的应用程序所使用的默认临时目录。有些应用程序需要 TEMP,而其它应用程序则需要 TMP。
%TIME% 系统
返回当前时间。使用与 time /t 命令相同的格式。由 Cmd.exe 生成。有关 time 命令的详细信息,请参阅 Time。
%USERDOMAIN% 局部
返回包含用户帐户的域的名称。
%USERNAME% 局部
返回当前登录的用户的名称。
%UserProfile% 局部
返回当前用户的配置文件的位置。
%WINDIR% 系统
返回操作系统目录的位置。
开始与终止批处理文件中环境改动的本地化操作。在执行 Setlocal 之后所做的环境改动只限于批处理文件。要还原原先的设置,必须执行 Endlocal。达到批处理文件结尾时,对于该批处理文件的每个尚未执行的 Setlocal 命令,都会有一个隐含的 Endlocal 被执行。Endlocal结束批处理文件中环境改动的本地化操作。在执行Endlocal 之后所做的环境改动不再仅限于批处理文件。批处理文件结束后,原先的设置无法还原。
语法:
Setlocal {enableextension | disableextensions} {enabledelayedexpansion | disabledelayedexpansion}
...
Endlocal
...
如果命令扩展名被启用,SETLOCAL 可以接受{}中的可选参数,启动或停用命令处理器扩展名及延缓环境变量扩展名。详细信息,请参阅 CMD /? 和 SET /? 。
无论在 Setlocal 命令之前它们的设置是什么,这些修改会一直保留到匹配的 Endlocal 命令。
示例:
@ECHO OFF
Echo Before Setlocal:
Set PATH
Pause
Setlocal
Rem reset environment var PATH
Set PATH=E:\TOOLS
Echo after Setlocal and reset PATH
Set PATH
Pause
Endlocal
Echo Recovery PATH by Endlocal
Set PATH
从上例我们可以看到环境变量PATH第1次被显示得时候是系统默认路径。被设置成了"E:\TOOLS"后显示为"E:\TOOLS"。但当 Endlocal 后我们可以看到他又被还原成了系统的默认路径。但这个设置只在该批处理运行的时候有作用。当批处理运行完成后环境变量PATH将会还原。
技巧:
如果有一个参数,SETLOCAL 命令将设置 ERRORLEVEL 的值。如果有两个有效参数中的一个,该值则为零。用下列技巧,您可以在批脚本中使用这个来决定扩展名是否可用:
VERIFY OTHER 2>nul
SETLOCAL ENABLEEXTENSIONS
IF ERRORLEVEL 1 echo Unable to enable extensions
这个方法之所以有效,是因为在 CMD.EXE 的旧版本上,SETLOCAL不设置 ERRORLEVEL 值。具有不正确参数的 VERIFY 命令将ERRORLEVEL 值初始化成非零值。


系统环境变量: |
VBScript Code:
复制代码代码如下:
‘ Create a WSH Shell object:
Set wshShell = CreateObject( "WScript.Shell" )
‘
‘ Create a new key:
wshShell.RegWrite "HKCU\TestKey\", ""
‘ Create a new DWORD value:
wshShell.RegWrite "HKCU\TestKey\DWordTestValue", 1, "REG_DWORD"
‘ Create a new subkey and a string value in that new subkey:
wshShell.RegWrite "HKCU\TestKey\SubKey\StringTestValue", "Test", "REG_SZ"
‘ Read the values we just created:
WScript.Echo "HKCU\TestKey\DWordTestValue = " _
& wshShell.RegRead( "HKCU\TestKey\DWordTestValue" )
WScript.Echo "HKCU\TestKey\SubKey\StringTestValue = """ _
& wshShell.RegRead( "HKCU\TestKey\SubKey\StringTestValue" ) & """"
‘ Delete the subkey and key and the values they contain:
wshShell.RegDelete "HKCU\TestKey\SubKey\"
wshShell.RegDelete "HKCU\TestKey\"
‘ Note: Since the WSH Shell has no Enumeration functionality, you cannot
‘ use the WSH Shell object to delete an entire "tree" unless you
‘ know the exact name of every subkey.
‘ If you don‘t, use the WMI StdRegProv instead.
‘ Release the object
Set wshShell = Nothing
用VBScript编写的WSH程序文件的扩展名为.vbs,该脚本程序在窗口界面是由wscript.exe文件解释执行的,在字符界面是由cscript.exe文件解释执行的,命令格式为:cscript filename.vbs
创建对象
用VBScript修改注册表,必须先创建一个能于操作系统沟通的对象,再利用该对象的各种方法对注册表进行操作,创建这个对象的方法和格式如下:
Dim OperationReGIStry
Set OperationRegistry=WScript.CreateObject("WScript.Shell")
上述这些代码就创建了一个能与操作系统沟通的对象OperationRegistry
对象的方法
有了以上这个对象,并不等于就能马上对注册表进行操作,我们还必须弄清该对象对注册表进行操作的几种重要方法.
1.对注册表的读操作RegRead
2.对注册表的写操作RegWrite
3.对注册表的删操作RegDelete
补充一点,WSH还有两个通用的方法:
WScript.Echo()用来显示一串文本信息,相当于VB中的MsgBox()。
Wscript.Quit()用来退出VBScript程序。
方法的参数
对于以上三种操作RegRead,RegWrite,RegDelete都需要带参数进行,并且这些操作的参数的个数和形式又不尽相同,下面我就把它们的一个共同且必不可少的参数讲一下:
该参数可称作是"路径参数",它包括根键,主键路径和键值,各部分表示的方法如下:
根键:
根键有两种表示方法。
方法一:直接用它在注册表中的字符串来表示,如:
HKEY_CLASSES_ROOT,HKEY_CURRENT_USER等
方法二:用缩写的四个字母来表示,前两个为HK,后两个即为根键单词的首字母。如:
根键HKEY_CLASSES_ROOT表示为:HKCR, 根键HKEY_CURRENT_USER可表示为:HKCU等。
主键路径:
主键路径就是目标键在注册表中的主键位置,各个主键之间用"\"符分隔开。如:"Software\Microsoft\Windows\CurrentVersion\Policies\"
键值:
键值参数直接接在主键路径之后。例如一个完整的路径如下所示:
"HKCR\Software\Microsoft\Windows\CurrentVersion\Policies\NoRun"
方法详解
1、RegRead操作详解
读操作RegRead主要是用来读取注册表中主键的默认值或键值的数据,我们可以将读得的数据送到相应的变量中,再利用VB中的MsgBox()函数将该数据显示出来,这就达到了读取注册表中数据的目的(也可以利用对象OperationRegistry的方法Popup()将读取的数据送至屏幕), 例如:
复制代码代码如下:
‘read.vbs(将以下代码存为read.vbs文件)
Dim OperationRegistry
Set OperationRegistry=WScript.CreateObject("WScript.Shell")
Dim Read_Data1,Read_Data2
Read_Data1=OperationRegistry.RegRead("HKCR\.xxf\")
‘读取根键HKEY_CLASSES_ROOT之下的.xxf主键的默认值,并将该数据送至变量Read_Data1
Read_Data2=OperationRegistry.RegRead("HKCR\.xxf\value")
‘读取.xxf主键之下的value键值的数据,并将该数据送至变量Read_Data2
MsgBox("Default="&Read_Data1&" value="&Read_Data2)
‘将读取的数据显示出来
2、RegWrite操作详解
写操作RegWrite主要是用来在注册表中新建主键或键值,并要赋予给它们一个初始值,该操作同样可以对注册表中以存在的主键或键值进行数据的修改,因此写操作的参数结构就比读操作要复杂一些,它不仅要路径参数,还要一个初始值和类型参数.
先来看初始值参数,该参数对于写操作来说是必不可少的,它可以为空(null)但却不能省掉。在新建主键时,初始值参数就赋给了该主键的默认值,在新建键值时,初始值参数就成了新建键值的初始数据.而初始值的类型,则是由类型参数决定的.类型主要有以下三种:
(1)REG_SZ:字符型.该类型为缺省类型
(2)REG_DWORD:双字节型.
(3)REG_BINARY:二进制型.
以上三种类型第1种和第2种用得最多,第3种类型在某些场合可以用第2种加以替代,这三种类型的赋值方法如下:
对于REG_SZ型:直接用字符串赋予,如"text","string"等
对于REG_DWORD型和REG_BINARY型则有两种赋值方式
i)直接用十进制的数表示,如:0,1等.
ii)用十六进制的数表示,如:0x12,0xff等. 看例:
复制代码代码如下:
‘write.VBs
Dim OperationReGIStry
Set OperationRegistry=WScript.CreateObject("WScript.Shell")
Default=OperationRegistry.RegRead("HKCR\")
‘获取一个空值 (null)
OperationRegistry.RegWrite "HKCR\.xxf\",Default
‘在根键HKEY_CLASSES_ROOT之下新建主键.xxf,并置其默认值为空
OperationRegistry.RegWrite "HKCR\.xxf\","xxffile"
‘在根键HKEY_CLASSES_ROOT之下新建主键.xxf,并置其默认值?quot;xxffile"
OperationRegistry.RegWrite "HKCR\.xxf\value1","string"
‘在主键.xxf之下新建一个字符串型键值value1,并置其初始值为"string"
OperationRegistry.RegWrite "HKCR\.xxf\value2",1,"REG_DWORD"
‘在主键.xxf之下新建一个REG_DWORD型键值value2,并置其初始值为1
OperationRegistry.RegWrite "HKCR\.xxf\value3",0Xff,"REG_BINARY"
‘在主键.xxf之下新建一个二进制型键值value3,并置其初始值为十六进制的ff
3、RegDelete操作详解
删除操作RegDelete主要是用来删除注册表中已存在的主键或键值,该操作是一种极其危险的操作,它能将主键或键值毫不留情的在注册表中"砍掉",无论该键值下面有多重要的数据,它都能畅行无阻,因此在使用该操作时务必小心。
删除操作的参数形式与读操作的参数形式几乎完全相同,只是有一点小小的区别,那就是删除操作不需要将操作的返回值送给某一变量,例如:
复制代码代码如下:
‘delete.vbs
Dim OperationRegistry
Set OperationRegistry=WScript.CreateObject("WScript.Shell")
OperationRegistry.RegRead("HKCR\.xxf\value")
‘删除.xxf主键之下的value键值
OperationRegistry.RegRead("HKCR\.xxf\")
‘删除根键HKEY_CLASSES_ROOT之下的.xxf主键
强调一点,不要更改注册表中已存在的主键或键值,更不要将它们删除,因为对注册表进行了不当的写操作或删操作,情况严重的会导致系统崩溃!如果你真想这么做,那就请你作好注册表的备份。
应用实例
1、读本机"计算机名"
复制代码代码如下:
‘ReadComputerName.vbs
Dim ReadComputerName
Set ReadComputerName=WScript.CreateObject("WScript.Shell")
Dim ComputerName,RegPath
RegPath="HKLM\System\CurrentControlSet\Control\
ComputerName\ComputerName\ComputerName"
ComputerName=ReadComputerName.RegRead(RegPath)
MsgBox("计算机名为"&ComputerName)
2、隐藏快捷方式图标上的小箭头
复制代码代码如下:
‘Hidden.vbs
Dim HiddenArrowIcon
Set HiddenArrowIcon=WScript.CreateObject("WScript.Shell")
Dim RegPath1,RegPath2
RegPath1="HKCR\lnkfile\IsShortCut"
RegPath2="HKCR\piffile\IsShortCut"
HiddenArrowIcon.RegDelete(RegPath1)
HiddenArrowIcon.RegDelete(RegPath2)
3、改造"开始"菜单
复制代码代码如下:
‘ChangeStartMenu.vbs
Dim ChangeStartMenu
Set ChangeStartMenu=WScript.CreateObject("WScript.Shell")
RegPath="HKCR\Software\Microsoft\Windows\CurrentVersion\Policies\"
Type_Name="REG_DWORD"
Key_Data=1
StartMenu_Run="NoRun"
StartMenu_Find="NoFind"
StartMenu_Close="NoClose"
Sub Change(Argument)
ChangeStartMenu.RegWrite RegPath&Argument,Key_Data,Type_Name
MsgBox("Success!")
End Sub
Call Change(StartMenu_Run) ‘禁用"开始"菜单中的"运行"功能
Call Change(StartMenu_Find) ‘禁用"开始"菜单中的"查找"功能
Call Change(StartMenu_Close) ‘禁用"开始"菜单中的"关闭系统"功能
4、向Windows中添加自启动程序
该程序能在开机时自动运行。
复制代码代码如下:
‘AddAutoRunProgram.vbs
‘假设该程序在c:\myfile文件夹中,文件名为autorun.exe
Dim AutoRunProgram
Set AutoRunProgram=WScript.CreateObject("WScript.Shell")
RegPath="HKLM\Software\Microsoft\Windows\CurrentVersion\Run\"
Type_Name="REG_SZ"
Key_Name="AutoRun"
Key_Data="C:\Myfile\autorun.exe"
‘该自启动程序的全路径文件名
AutoRunProgram.Write RegPath&Key_Name,Key_Data,Type_Name
‘在启动组中添加自启动程序autorun.exe
MsgBox("Success!")
chr(9) tab空格 chr(10) 换行 chr(13) 回车 Chr(13)&chr(10) 回车换行 chr(32) 空格符 chr(34) 双引号 chr(39) 单引号
chr(33) ! chr(34) " chr(35) # chr(36) $ chr(37) % chr(38) & chr(39) ‘ chr(40) ( chr(41) ) chr(42) * chr(43) + chr(44) , chr(45) - chr(46) . chr(47) /
Chr(48) 0 Chr(49) 1 Chr(50) 2 Chr(51) 3 Chr(52) 4 Chr(53) 5 Chr(54) 6 Chr(55) 7 Chr(56) 8 Chr(57) 9
chr(58) chr(59) ; chr(60) < chr(61) = chr(62) > chr(63) ? chr(64) @
chr(65) A chr(66) B chr(67) C chr(68) D chr(69) E chr(70) F chr(71) G chr(72) H chr(73) I chr(74) J chr(75) K chr(76) L chr(77) M chr(78) N chr(79) O chr(80) P chr(81) Q chr(82) R chr(83) S chr(84) T chr(85) U chr(86) V chr(87) W chr(88) X chr(89) Y chr(90) Z
chr(91) [ chr(92) \ chr(93) ] chr(94) ^ chr(95) _ chr(96) `
chr(97) a chr(98) b chr(99) c chr(100) d chr(101) e chr(102) f chr(103) g chr(104) h chr(105) i chr(106) j chr(107) k chr(108) l chr(109) m chr(110) n chr(111) o chr(112) p chr(113) q chr(114) r chr(115) s chr(116) t chr(117) u chr(118) v chr(119) w chr(120) x chr(121) y chr(122) z
chr(123) { chr(124) | chr(125) } chr(126) ~ chr(127) chr(128) chr(153)? chr(169) ? chr(174) ? |
格式1:Windows 95/98/ME/NT 4.0第一行必须是"REGEDIT4"。而到了Windows 2000/XP/2003/Vista等windows操作系统则必须要是"Windows Registry Editor Version 5.00"。 2:第一行后必须空一行。条与条之间最好也空一行。每行前不能留空格。 3:注册表信息头尾用"["与"]"包起来; 4:" "内就是字符串内容;"DWORD"为"0"就是用"dword:00000000"表示,反之是"1"则用dword:00000001来表示。 5:如果有两个以上的注册表信息,信息与信息之间就需要有空行隔开。 6:如果要删除某个注册表信息该怎么办?很简单,在注册表信息前面加上"-"(减)号 |
概要重要:此部分、 方法或任务包含一些介绍如何修改注册表的步骤。但是,如果不正确地修改了注册表,可能会出现严重的问题。因此,请确保仔细按照下列步骤操作。为增加保护,对其进行修改之前备份注册表。然后,您可以在出现问题时还原注册表。有关如何备份和还原注册表的详细信息,请单击下面的文章编号,以查看 Microsoft 知识库中相应的文章: 本分步指南介绍如何添加、
修改或删除注册表子项和值,通过使用注册项 (.reg) 文件。Regedit.exe 使用.reg 文件来导入和导出注册表子项和值。这些.reg 文件可用于远程分发到多台基于 Windows 的计算机的注册表更改。当您运行.reg 文件时,该文件的内容合并到本地注册表中。因此,分发.reg 文件时必须谨慎。 .Reg 文件的语法如下
︰ [HKEY_LOCAL_ MACHINE\SOFTWARE\Policies\Microsoft\Windows\System] .Reg 文件可以包含多个注册表路径。如果注册表中不存在路径语句中的层次结构的底部,将创建一个新子项。注册表文件的内容发送到注册表中输入它们的顺序。因此,如果您想要创建一个新子项与它下面的其他子项,则必须按正确的顺序输入行。
有关注册表数据类型的详细信息,请单击下面的文章编号,以查看 Microsoft 知识库中相应的文章: DataValuex立即跟随冒号
(或等号后 REG_SZ),并且必须是以适当的格式
(例如,字符串或十六进制)。对二进制数据项使用十六进制格式。 |
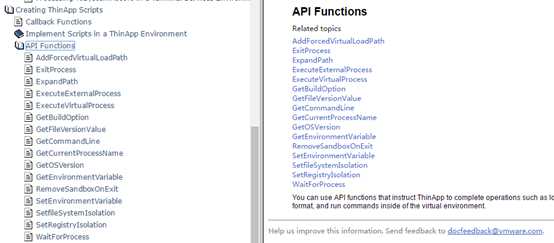

The AddForcedVirtualLoadPath(Path) function instructs ThinApp to load all DLLs from the specified path as virtual DLLs even if they are not located in the package. Use this function if the application needs to load external DLLs that depend on DLLs located inside the package. You can use the ForcedVirtualLoadPaths parameter in the Package.ini file to achieve the same result as this API function. For more information about "ForcedVirtualLoadPaths" see ThinApp Package.ini Parameters Reference Guide. [in] The filename or path for DLLs to load as virtual. You can load any DLL located in the same directory as the executable file as a virtual DLL. Origin = GetEnvironmentVariable("TS_ORIGIN") TS_ORIGIN is the path from which the executable file is running. You can delete the filename from TS_ORIGIN by finding the last backslash and removing all of the characters that follow it. LastSlash = InStrRev(Origin, "\") SourcePath = Left(Origin, LastSlash) You can instruct ThinApp to load all DLLs in the same or lower directory from where the source executable file resides. AddForcedVirtualLoadPath(SourcePath) This process enables you to drop additional files in the SourcePath tree and have them resolve import operations against virtual DLLs. |
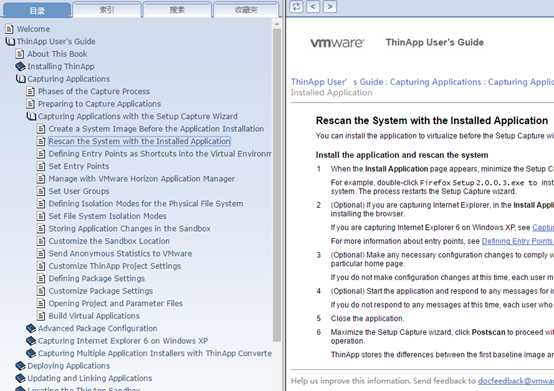
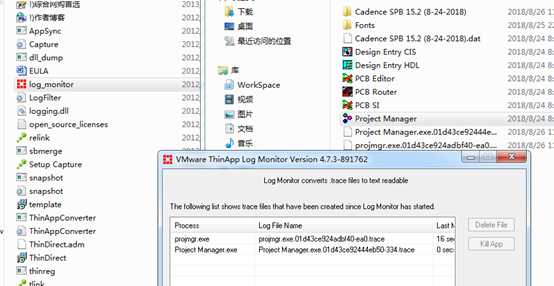
Checking ThinApp Installation Files The ThinApp installation generates the VMware ThinApp directory in C:\Program Files\VMware. You might check the files in this directory to perform operations such as starting the Log Monitor utility to view recent activity. The following key files in the VMware ThinApp directory affect ThinApp operations:
ThinApp starts this utility during the setup capture process.
The snapshot.exe file references the snapshot.ini file. Advanced users might modify the snapshot.ini file to ensure that ThinApp does not capture certain entries when creating an application package. You can customize this template to ensure that the .msi files generated by ThinApp adhere to company deployment procedures and standards. For example, you can add registry settings that you want ThinApp to add to client computers as part of the installation. This registration includes setting up shortcuts and the Start menu and setting up file type associations that allow you to open applications. |
You can adjust project files and build the application for deployment. Build virtual applications in the Setup Capture wizard You can build the package at a later time with the build.bat file in the virtual application folder. For example, a Firefox 2.0.0.3 path to the build.bat file might be C:\Program Files\VMware\VMware ThinApp\Captures\Mozilla Firefox 2.0.0.3\build.bat.
You can rebuild the package at any time after you click Finish to make changes. |
Predefined Environment Variables The values for PackageIniOverrideFile (global and per application), ProjectPostProcessingCommand (global and per application), and InstallationCommand can contain environment variables. ThinApp Converter expands the value before using it. ThinApp Converter adds these variables as predefined environment variables:
Following is an example of how predefined variables can be used in the PackageIniOverrideFile, ProjectPostProcessingCommand, and InstallationCommand parameters. PackageIniOverrideFile=%AppInstallersRootDir%\AppSyncSettings.ini ;will resolve to \\AppInstallerServer\AppInstaller\AppSyncSettings.ini InstallationCommand=AdbeRdr920_en_US.exe /sAll PackageIniOverrideFile=%AppInstallerDir%\override.ini ;will resolve to \\AppInstallerServer\AppInstaller\Adobe\AppSyncSettings.ini |
Preparing the Configuration File for ThinApp Converter A sample configuration file, ThinAppConverter.ini, is included in the ThinApp installation. The file is generally located in C:\Program Files\VMware\VMware ThinApp. Modify or create a copy of this file to suit your requirements. Use UTF-8 encoding when you specify parameter values. The ThinAppConverter.ini configuration file includes the following section headings:
The HostEnvironment section of the configuration file contains the connection parameters for connecting to VMware ESX Server, VMware vCenter Server, or VMware Workstation on a local machine. [HostEnvironment] parameters are mandatory.
The name of the virtual machine to which ThinApp Converter is to connect.
The following example shows a virtual machine specified by ESX server hostname. VirtualMachineHost=MyEsx.vmware.com The following example shows a virtual machine specified by IP address. VirtualMachineHost=10.13.11.23 The following example shows a local machine specified as localhost. The login user name for the host machine. Use the same login user name for connecting to the server as you use for logging in to the VMware vSphere Client. You must have sufficient privileges to turn on and off virtual machines, take virtual machine snapshots, and so on. You can use UPN format when you specify a user name for vCenter. For example, user@domain.com. HostLoginUserName is ignored when logging into VMware Workstation. HostLoginPassword or HostLoginPasswordBase64 The login password for the host machine. You have the following options when you specify passwords:
All passwords are handled in the same way. Specifies that the user be prompted to enter a password. If you do not want to store the vSphere Server password in the configuration file, specify the value as true. When set to true, a prompt always appears, even if a HostLoginPassword is specified in the configuration file. The following example shows a typical host environment specification. The virtual machine name is specified as the ESX server hostname. A password has been specified, however the user will still be prompted to enter as password, as specified in HostLoginPasswordPrompt. VirtualMachineHost=MyEsx.vmware.com The VirtualMachineN section of the configuration file contains a list of the Windows-based virtual machines that will be utilized in the conversion process. Create a VirtualMachineX section for each virtual machine that you want to include, and specify their parameters. X is 1, and subsequent virtual machine sections are numbered sequentially. [VirtualMachine N ] parameters are mandatory. Specify the configuration path of the virtual machine. For ESX Server or vCenter Server, you can identify the virtual machine configuration file path using the vSphere Client. Identify the virtual machine configuration path using the vSphere Client For Workstation, specify the entire file path on the host on which the VMX configuration file resides. For example, C:\MyVMs\Windows XP\WindowsXP.vmx. Do not place the path in quotation marks, even if the path contains a space. A valid user name for the virtual machine guest operating system. The user must have administrator privileges for the virtual machine guest operating system. You can use UPN format when you specify a user name. For example, user@domain.com. A valid password for the virtual machine guest operating system. You have the following options when you specify passwords: Specifying an encoded password does not increase security strength. You need to protect the actual INI file. All passwords are handled in the same way. If the Password setting is not used, the password for the guest is assumed to be blank. Most Windows virtual machines do not support automation with empty passwords, so you should specify a guest password. Specifies that the user be prompted to enter a password. If you do not want to store the virtual machine password in the configuration file, specify the value as true. When set to true, a prompt always appears, even if a password is specified in the configuration file. Following is an example for an ESX server-based environment. A password has been specified and, as PasswordPrompt is set to false, the user will not be prompted to enter a password. VmxPath=[Storage] WinXP_Converter/WinXP_Converter.vmx Following is an example for a VMware Workstation-based virtual machine. On virtual machine 1, PasswordPrompt has been set to true. The user will be prompted for a password even though a password has been specified in the configuration. VmxPath=C:\MyVMs\Windows XP\Windows XP.vmx VmxPath=C:\MyVMs\Windows 7\Windows 7.vmx UserName=adminuser@mydomain.com The Settings section of the configuration file contains the parameters for the application installation directory and ThinApp project output directory, in the form of UNC. It also contains several parameters controlling the conversion process behavior. ThinApp Converter only requires read-only permissions for the network share that contains the application installers. It requires read/write permissions for the network share that contains the ThinApp projects. If input and output directories are on the same file server, you must use the same user account to connect them. Specify the network share UNC path for the application installers. For example: \\fileserver\sharename, or \\fileserver\sharename\dirname. Specify the user name used for connecting to that network share. UPN format can be used when you specify a domain user, for example user@domain.com InputMountPassword or InputMountPasswordBase64 Specify the password for connecting to the network share. You have the following options when you specify passwords: Specifies that the user be prompted to enter a password. If you do not want to store the network share password in the configuration file, specify the value as true. When set to true, a prompt always appears, even if a password is specified in the configuration file. Specify the network share UNC path to the location of the generated ThinApp projects. For example: \\fileserver\sharename, or \\fileserver\sharename\dirname Specify the user name used for connecting to the OutputUncPath network share. UPN format can be used to specify a domain user, for example, user@domain.com. OutputMountPassword or OutputMountPasswordBase64 Specify the password for connecting to the network share. You have the following options when you specify passwords: Specifies that the user be prompted to enter a password. If you do not want to store the network share password in the configuration file, specify the value as true. When set to true, a prompt always appears, even if a password is specified in the configuration file. Following is an example of network share specifications.The user for the application installation directory has only read permissions. For both the input and output network shares, a prompt will display, requiring a user to enter a password. InputUncPath=\\AppInstallerServer\AppInstallers\ThinAppMigration InputMountUserName=readonlyUser OutputUncPath=\\DeploymentServer\ThinAppProj OutputMountUserName=readwriteUser OutputMountPasswordPrompt=true ThinApp Converter Logic for Detecting the Application Installation Processes For the application installer‘s network share, ThinApp Converter examines all subdirectories under the specified UNC path recursively, including their subdirectories. For each subdirectory, it determines which command to run for silent application installation using the following logic:
If none of the steps enable ThinApp Converter to find a correct installation command, the subdirectory is skipped. A warning is logged in the log file. You must remove all network connections to the file server referenced in the INI file from the host on which you run ThinApp Converter, to prevent conflict between user credentials. Specify the file path to the global Package.ini override file. This optional parameter enables you to specify a global override file for Package.ini that is generated for each ThinApp project. The values in the override file are merged into Package.ini in the ThinApp project that is generated for each application. Global overrides are useful when you have a global policy setting, for example, PermittedGroup in Package.ini. A Package.ini override file is formatted like a standard Windows INI file. You can add INI parameters and values that are relevant to the Package.ini file. The path is relative to the application installer‘s network share. Using the example for specifying the network shares for the application installers and ThinApp projects, if you specify PackageIniOverrideFile=override.ini, ThinApp Converter will try to find the file under \\AppInstallerServer\AppInstaller. You can provide a more explicit value by using predefined variables. For more information, see Predefined Environment Variables. You can specify a Package.ini file for each application. This process is described as part of the [AppSettings:AppName] section. Specify a comma- or semicolon-separated list of application directories that ThinApp will skip when searching for application installers. You can specify wildcards for DOS-style file names. For example, Microsoft*. ? and * are supported. Following is an example of an exclusion specification using a wildcard. ExclusionList=App?.old;FireFox1.0 Specify the file path to the project post processing command. The file path is relative to the application installer‘s network share. Using the example for specifying the network shares for the application installers and ThinApp projects, if you specify ProjectPostProcessingCommand=addscript.bat, ThinApp Converter will try to find the file under \\AppInstallerServer\AppInstaller. You can provide a more explicit value by using predefined variables. For more information, see Predefined Environment Variables. Specify whether ThinApp Converter should stop converting an application if it encounters an error, or continue with the other applications. The default value is false. Specify whether the ThinApp Converter should build the ThinApp Projects into packages following capture. Specify whether ThinApp Converter should try to detect if an application installer is stalled, for example when the application is waiting for user input on the guest virtual machine because incorrect silent installation switches were specified. The default value is true. ThinApp Converter might not be able to detect all situations in which the installer is idle. Specify how long ThinApp Converter should wait for an application installer to finish before it quits. By default, the value is 7200 seconds. This optional section provides parameters that you can use to add settings that are specific to an application. AppName is the actual name of the subdirectory that contains the application installer. These parameters can be added to each AppSettings section. In most circumstances, you will not need to configure this section. Specify how ThinApp Converter should start the application installer. If there is no value, ThinApp Converter attempts to select one installation command using the logic described in ThinApp Converter Logic for Detecting the Application Installation Processes. The Package.ini override file that is applied to a single application installer. When this parameter has a value, the global override file is processed first, followed by this application-specific override file. The file path is relative to the application installer subdirectory. Using the example at the bottom of this section, if you specify PackageIniOverrideFile=override.ini, ThinApp Converter will try to find the file under \\AppInstallerServer\AppInstaller\Adobe. You can provide a more explicit value by using predefined variables. For more information, see Predefined Environment Variables. Specify the project post processing command for the specific application. When this parameter has a value, the global override file is processed first, followed by this application-specific post processing command. Following is an example of how to apply an application-specific override during post processing. InstallationCommand=AdbeRdr920_en_US.exe /sAll PackageIniOverrideFile=override.ini InstallationCommand=silent_install.bat ProjectPostProcessingCommand=%AppInstallerDir%\addscript.bat |
Customizing the snapshot.ini File The snapshot.ini configuration file specifies what registry keys to exclude from a ThinApp project when you capture an application. For example, if you use Internet Explorer 7, you might need ThinApp to capture the following registry keys:
If the snapshot.ini file excludes the HKEY_CURRENT_USER\Software\Microsoft\Windows\CurrentVersion\Internet Settings\Connections key by default, you can remove this key from the snapshot.ini file to ensure that ThinApp captures the key in the capture process. If you do not customize the snapshot.ini file, the snapshot process loads the file from one of these locations:
This location is the AppData directory of the user.
This is the location from which ThinApp runs the snapshot.exe utility. | |||||||||||||||
Implement Scripts in a ThinApp Environment Add a Value to the System Registry You might implement a script in the following circumstances:
You can use any filename. ThinApp adds all .vbs files to the package at build time. |
Add a Value to the System Registry This script procedure adds a value to the physical system registry. Add a value to the system registry
Function OnFirstParentStart
RegFileName = ExpandPath("%Personal%\thin.reg") Set fso = CreateObject("Scripting.filesystemObject") Set RegFile = fso.CreateTextFile(RegFileName, true) The %Personal% directory is a directory that has Merged isolation mode by default.
RegFile.WriteLine("Windows Registry Editor Version 5.00") RegFile.WriteBlankLines(1) RegFile.WriteLine("[HKEY_CURRENT_USER\Software\Thinapp\demo]") RegFile.WriteLine(chr(34) & "InventoryName" & chr(34) & "=" & chr(34) & GetBuildOption("InventoryName") & chr(34)) RegFile.Close
RegEditPid = ExecuteExternalProcess("regedit /s " & chr(34) & RegFileName & chr(34)) WaitForProcess RegEditPid, 0 Wait until the process is complete.
fso.DeleteFile(RegFileName) End Function |
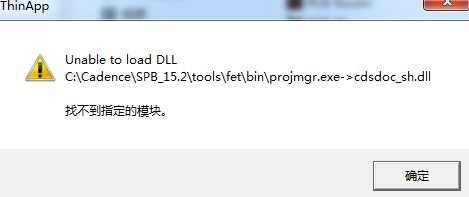
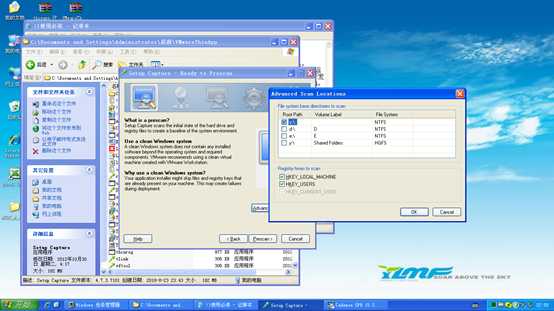
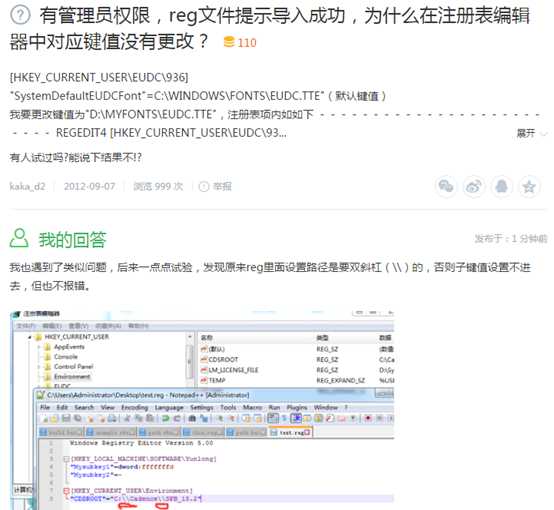
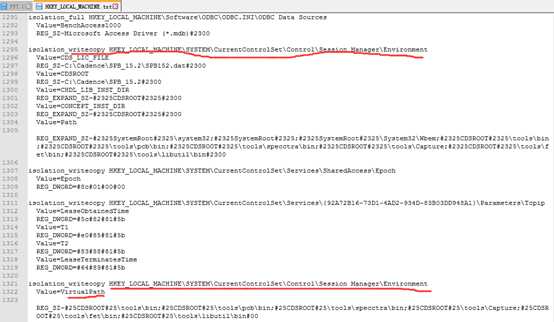
Cadence 15.2运行错误,提示缺少dll,但环境变量(HKEY_LOCAL_MACHINE.txt文件)里是有路径配置的:
1、@ 2、%、%% 3、:、:: 4、~ 5、>、>> 6、| 7、^ 8、& 9、&&、|| 10、() 11、+、-、*、/ 12、equ、neq、lss、leq、gtr、geq |
标签:移位 扩展 space apt counter number connect content about
原文地址:https://www.cnblogs.com/time93/p/9688801.html