标签:pytho 页面 sum 返回 thread kubectl name urlopen rom
接上一篇 快速搭建 Windows Kubernetes , 我们发现原来在 Windows Kubernetes 会有一些与在 Linux 上使用不一样的体验,俗称坑,例如 hostAliases。对于我们希望真的把 Windows 放入生产,感觉除了基本的 Pod、Volume、Service 、Log 以外,我们还需要监控。一般来讲我们会用 Prometheus 来做监控,然后通过 Grafana 来展示,但是 Prometheus 的 Node Exporter 是为 *nix 设计的,所以在 Windows 上我们的自己想办法了。在 Prometheus Node Exporter 里推荐使用 WMI exporter ,感兴趣的童鞋可以去试试,本文主要还是想从一个原始的角度去分析处理,来理解怎么去写一个 Prometheus 的采集程序。
<Node_IP>:10255/stats/summary上 expose metrics, metrics-server 与 kubectl top的数据也是来源于此,大致如下:{
"node": {
"nodeName": "35598k8s9001",
"startTime": "2018-08-26T07:25:08Z",
"cpu": {
"time": "2018-09-10T01:44:52Z",
"usageCoreNanoSeconds": 8532520000000
},
"memory": {
"time": "2018-09-10T01:44:52Z",
"availableBytes": 14297423872,
"usageBytes": 1978798080,
"workingSetBytes": 734490624,
"rssBytes": 0,
"pageFaults": 0,
"majorPageFaults": 0
},
"fs": {
"time": "2018-09-10T01:44:52Z",
"availableBytes": 15829303296,
"capacityBytes": 32212250624,
"usedBytes": 16382947328
},
"runtime": {
"imageFs": {
"time": "2018-09-10T01:44:53Z",
"availableBytes": 15829303296,
"capacityBytes": 32212250624,
"usedBytes": 16382947328,
"inodesUsed": 0
}
}
},
"pods": [
{
"podRef": {
"name": "stdlogserverwin-5fbcc5648d-ztqsq",
"namespace": "default",
"uid": "f461a0b4-ab36-11e8-93c4-0017fa0362de"
},
"startTime": "2018-08-29T02:55:15Z",
"containers": [
{
"name": "stdlogserverwin",
"startTime": "2018-08-29T02:56:24Z",
"cpu": {
"time": "2018-09-10T01:44:54Z",
"usageCoreNanoSeconds": 749578125000
},
"memory": {
"time": "2018-09-10T01:44:54Z",
"workingSetBytes": 83255296
},
"rootfs": {
"time": "2018-09-10T01:44:54Z",
"availableBytes": 15829303296,
"capacityBytes": 32212250624,
"usedBytes": 0
},
"logs": {
"time": "2018-09-10T01:44:53Z",
"availableBytes": 15829303296,
"capacityBytes": 32212250624,
"usedBytes": 16382947328,
"inodesUsed": 0
},
"userDefinedMetrics": null
}
],
"cpu": {
"time": "2018-08-29T02:56:24Z",
"usageNanoCores": 0,
"usageCoreNanoSeconds": 749578125000
},
"memory": {
"time": "2018-09-10T01:44:54Z",
"availableBytes": 0,
"usageBytes": 0,
"workingSetBytes": 83255296,
"rssBytes": 0,
"pageFaults": 0,
"majorPageFaults": 0
},
"volume": [
{
"time": "2018-08-29T02:55:16Z",
"availableBytes": 17378648064,
"capacityBytes": 32212250624,
"usedBytes": 14833602560,
"inodesFree": 0,
"inodes": 0,
"inodesUsed": 0,
"name": "default-token-wv5fc"
}
],
"ephemeral-storage": {
"time": "2018-09-10T01:44:54Z",
"availableBytes": 15829303296,
"capacityBytes": 32212250624,
"usedBytes": 16382947328
}
}
]
}class Node:
def __init__(self, name, cpu, memory):
self.name = name
self.cpu = cpu
self.memory = memory
class Pod:
def __init__(self, name, namespace,cpu, memory):
self.name = name
self.namespace = namespace
self.cpu = cpu
self.memory = memory
class Stats:
def __init__(self, node, pods):
self.node = node
self.pods = podsfrom urllib.request import urlopen
from stats import Node
from stats import Pod
from stats import Stats
import json
import asyncio
import prometheus_client as prom
import logging
import random
def getMetrics(url):
#获取数据集
response = urlopen(url)
string = response.read().decode(‘utf-8‘)
json_obj = json.loads(string)
#用之前定义好的 stats 的对象来做 mapping
node = Node(‘‘,‘‘,‘‘)
node.name = json_obj[‘node‘][‘nodeName‘]
node.cpu = json_obj[‘node‘][‘cpu‘][‘usageCoreNanoSeconds‘]
node.memory = json_obj[‘node‘][‘memory‘][‘usageBytes‘]
pods_array = json_obj[‘pods‘]
pods_list = []
for item in pods_array:
pod = Pod(‘‘,‘‘,‘‘,‘‘)
pod.name = item[‘podRef‘][‘name‘]
pod.namespace = item[‘podRef‘][‘namespace‘]
pod.cpu = item[‘cpu‘][‘usageCoreNanoSeconds‘]
pod.memory = item[‘memory‘][‘workingSetBytes‘]
pods_list.append(pod)
stats = Stats(‘‘,‘‘)
stats.node = node
stats.pods = pods_list
return stats
#写个简单的日志输出格式
format = "%(asctime)s - %(levelname)s [%(name)s] %(threadName)s %(message)s"
logging.basicConfig(level=logging.INFO, format=format)
#声明我们需要导出的 metrics 及对应的 label 供未来查询使用
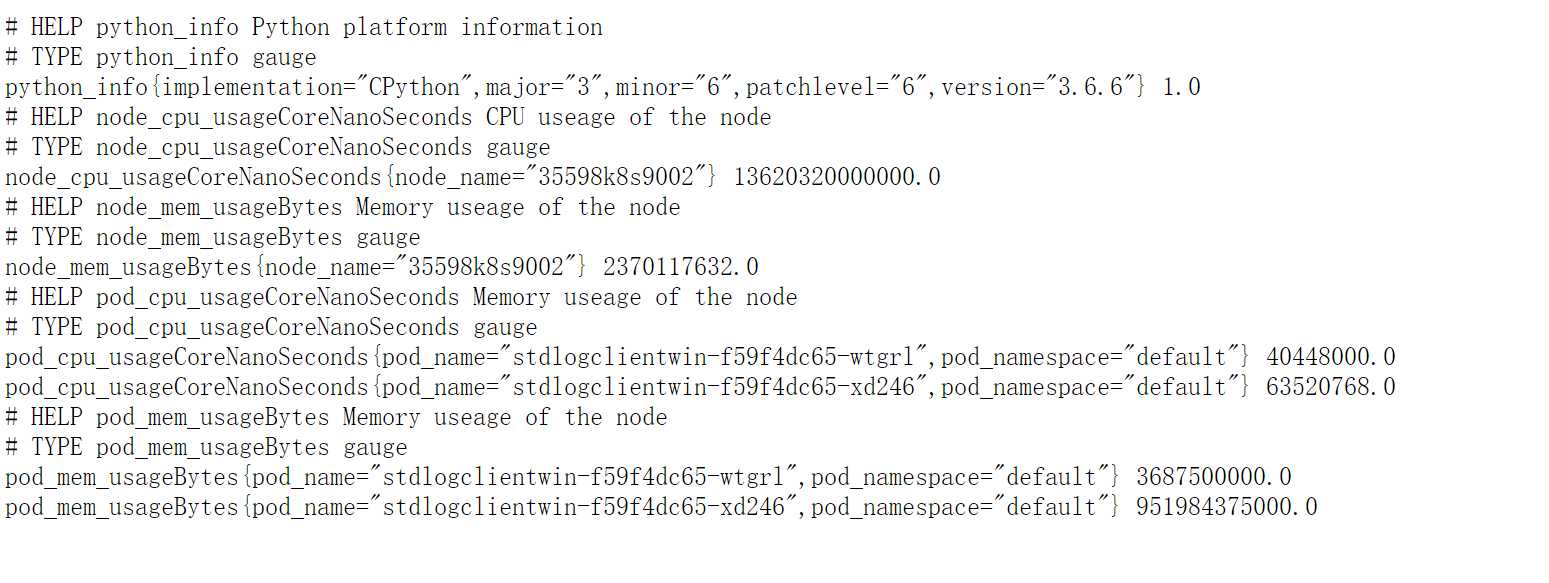
g1 = prom.Gauge(‘node_cpu_usageCoreNanoSeconds‘, ‘CPU useage of the node‘, labelnames=[‘node_name‘])
g2 = prom.Gauge(‘node_mem_usageBytes‘, ‘Memory useage of the node‘, labelnames=[‘node_name‘])
g3 = prom.Gauge(‘pod_cpu_usageCoreNanoSeconds‘, ‘Memory useage of the node‘, labelnames=[‘pod_name‘,‘pod_namespace‘])
g4 = prom.Gauge(‘pod_mem_usageBytes‘, ‘Memory useage of the node‘, labelnames=[‘pod_name‘,‘pod_namespace‘])
async def expose_stats(url):
while True:
stats = getMetrics(url)
#以打印 node 本身的监控信息为例
logging.info("nodename: {} value {}".format(stats.node.name, stats.node.cpu))
# 为当前要 poll 的 metrics 赋值
g1.labels(node_name=stats.node.name).set(stats.node.cpu)
g2.labels(node_name=stats.node.name).set(stats.node.memory)
pods_array = stats.pods
for item in pods_array:
g3.labels(pod_name=item.name,pod_namespace=item.namespace).set(item.memory)
g4.labels(pod_name=item.name,pod_namespace=item.namespace).set(item.cpu)
await asyncio.sleep(1)
if __name__ == ‘__main__‘:
loop = asyncio.get_event_loop()
# 启动一个 http server 来做 polling
prom.start_http_server(8000)
t0_value = 50
#可以在每一台 Windows 机器上都启动一个这样的程序,也可以远程部署脚本来做 exposing
url = ‘http://localhost:10255/stats/summary‘
tasks = [loop.create_task(expose_stats(url))]
try:
loop.run_forever()
except KeyboardInterrupt:
pass
finally:
loop.close()
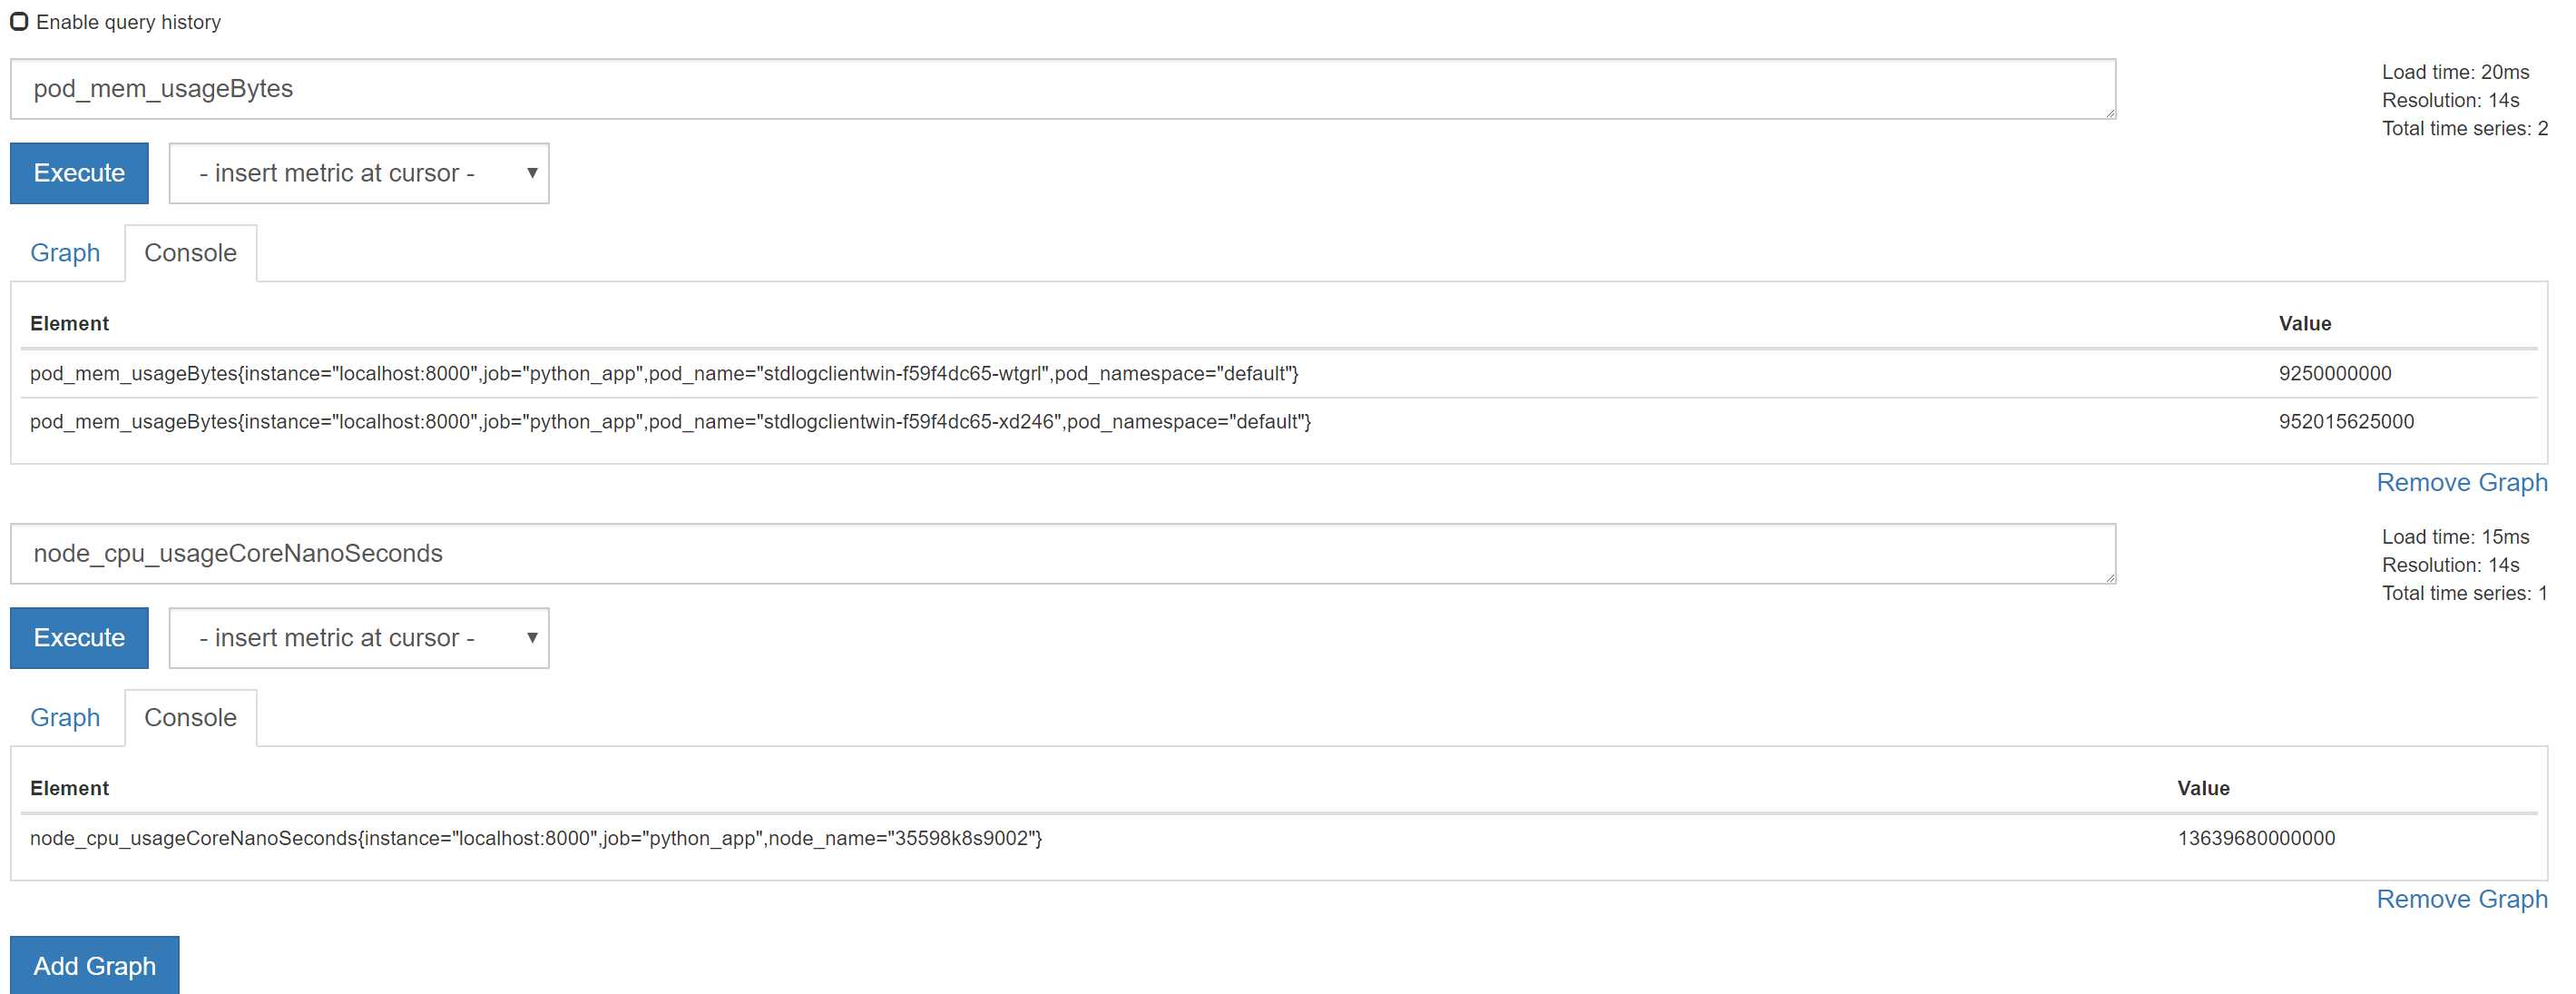
- job_name: python_app
  scrape_interval: 15s
  scrape_timeout: 10s
  metrics_path: /
  scheme: http
  static_configs:
  - targets:
    - localhost:8000
usageNanoCores 和 usageCoreNanoSeconds 怎么换算成我们通常理解的 CPU 使用百分比Ref:
解决 Prometheus 不能获取 Kubernetes 集群上 Windows 节点的 Metrics
标签:pytho 页面 sum 返回 thread kubectl name urlopen rom
原文地址:https://www.cnblogs.com/bigdaddyblog/p/9719878.html