标签:9.png tor lin .sql eric ace uid framework item
企业在做Asp.Net Mvc开发过程中,很多时候都是一些CRUD,最基本的就是一个列表页面,然后附带一些功能按钮。如果有数据列表,大多数就会涉及到对数据进行分页,这次就介绍一下Mvc PagedList控件分页的使用方法。Github PagedList链接 。
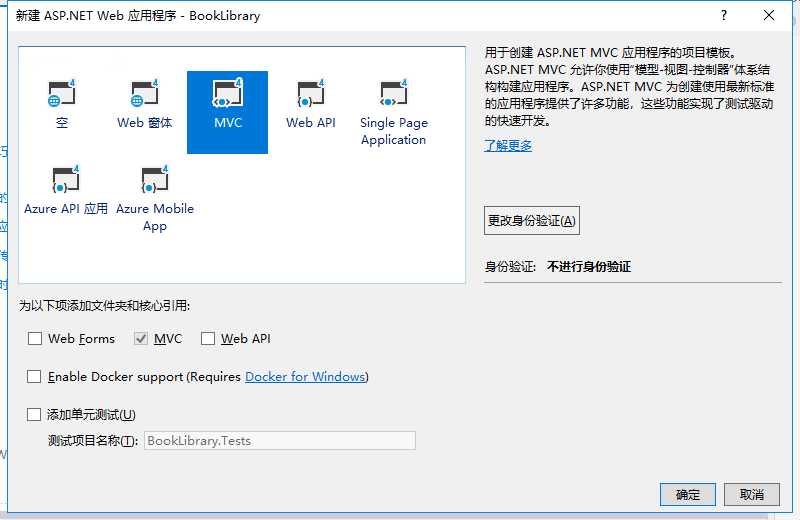
下面我通过新建Mvc项目来展示PagedList的使用方法。
一、新建BookLibrary解决方案
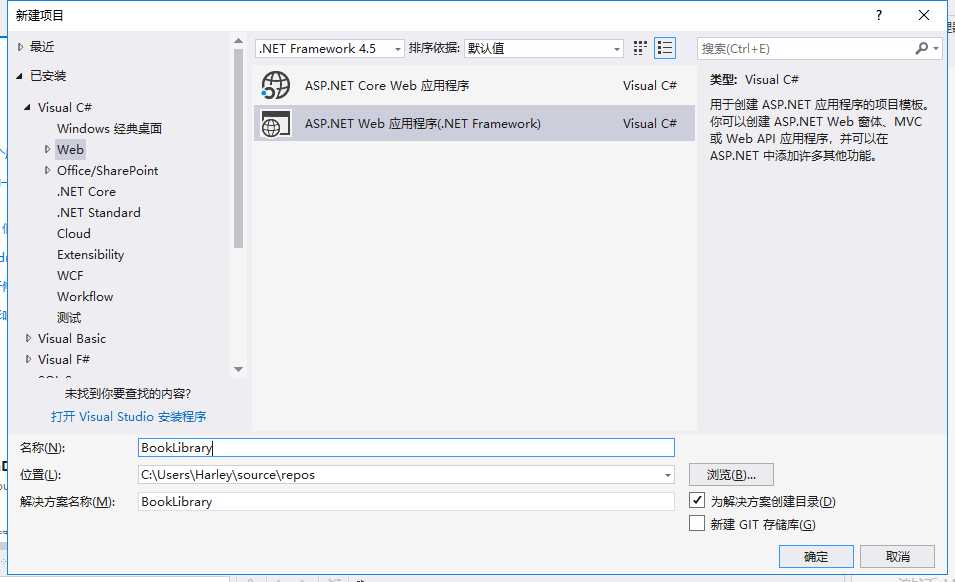
确定后,选择MVC
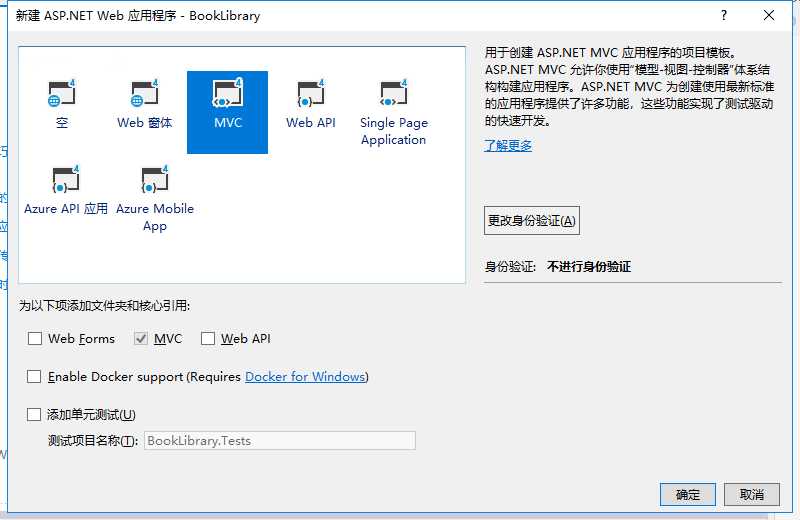
然后点击确定。
二、添加PagedList与PagedList.Mvc的程序包。
选择BookLibrary项目,鼠标右键选择“管理NuGet程序包”,在浏览框中输入PagedList.Mvc,选择最新稳定版,我这里选择4.5.0版本,点击安装,然后他会提示有依赖项
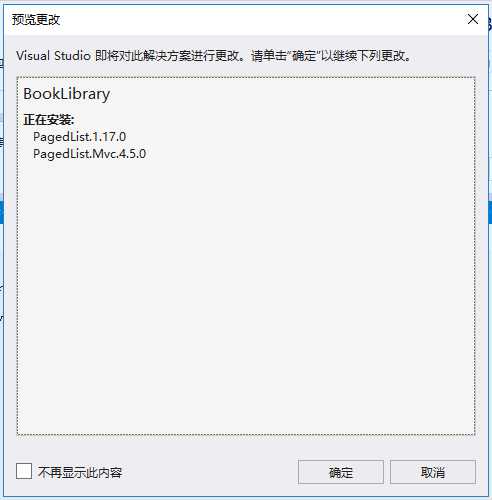
点击确定,他会自动安装PagedList与PagedList.Mvc程序包。同时看一下项目的Content文件夹,它会自动添加PagedList.css文件,这个是分页控件的样式表。
三、创建模型与上下文
1、创建Book模型类。
 1 using System;
 2
 3 namespace BookLibrary.Models
 4 {
 5     public class Book
 6     {
 7         private Guid _Id;
 8
 9         public Guid Id
10         {
11             get { return _Id; }
12             set { _Id = value; }
13         }
14
15         private string _BookName;
16
17         public string BookName
18         {
19             get { return _BookName; }
20             set { _BookName = value; }
21         }
22
23         private decimal _Price;
24
25         public decimal Price
26         {
27             get { return _Price; }
28             set { _Price = value; }
29         }
30
31         private string _Author;
32
33         public string Author
34         {
35             get { return _Author; }
36             set { _Author = value; }
37         }
38
39         private int _Sort;
40
41         public int Sort
42         {
43             get { return _Sort; }
44             set { _Sort = value; }
45         }
46
47     }
48 }
2、通过管理NuGet程序包,添加EntityFramework程序包。


3、Web.config添加数据库链接字符串
1   <connectionStrings>
2     <add name="BookConnection" connectionString="DataBase=|DataDirectory|\Book.mdf;Data Source=.;Initial Catalog=Book;UID=sa;PWD=123qwe;Integrated Security=True" providerName="System.Data.SqlClient"/>
3   </connectionStrings>
4、创建BookContext上下文类
 1 using System.Data.Entity;
 2
 3 namespace BookLibrary.Models
 4 {
 5     public class BookContext : DbContext
 6     {
 7         public BookContext() : base("BookConnection") { }
 8         public DbSet<Book> Books { get; set; }
 9     }
10 }
四、创建数据库初始化策略
在项目下新建DBInitializer文件夹,并新建BookInitializer类,使用数据库初始化策略
CreateDatabaseIfNotExists<BookContext>,在Seed中添加一些数据
  1 using System;
  2 using System.Collections.Generic;
  3 using System.Data.Entity;
  4 using BookLibrary.Models;
  5
  6 namespace BookLibrary.DBInitializer
  7 {
  8     public class BookInitializer:CreateDatabaseIfNotExists<BookContext>
  9     {
 10         protected override void Seed(BookContext context)
 11         {
 12             var bookList = new List<Book>();
 13             for (int i = 0; i < 15; i++)
 14             {
 15                 bookList.Add(new Book
 16                 {
 17                     Id = Guid.NewGuid(),
 18                     BookName = "你的善良必须有点锋芒",
 19                     Author = "慕颜歌",
 20                     Price = 50,
 21                     Sort=i
 22                 });
 23                 bookList.Add(new Book
 24                 {
 25                     Id = Guid.NewGuid(),
 26                     BookName = "月亮与六便士",
 27                     Author = "威廉.萨穆塞特.毛姆",
 28                     Price = 50,
 29                     Sort = i
 30                 });
 31                 bookList.Add(new Book
 32                 {
 33                     Id = Guid.NewGuid(),
 34                     BookName = "将来的你,一定会感谢现在拼命的自己",
 35                     Author = "汤木",
 36                     Price = 50,
 37                     Sort = i
 38                 });
 39                 bookList.Add(new Book
 40                 {
 41                     Id = Guid.NewGuid(),
 42                     BookName = "你只是看起来很努力",
 43                     Author = "李尚龙",
 44                     Price = 50,
 45                     Sort = i
 46                 });
 47                 bookList.Add(new Book
 48                 {
 49                     Id = Guid.NewGuid(),
 50                     BookName = "人性的弱点",
 51                     Author = "戴尔.卡耐基",
 52                     Price = 50,
 53                     Sort = i
 54                 });
 55                 bookList.Add(new Book
 56                 {
 57                     Id = Guid.NewGuid(),
 58                     BookName = "在痛苦的世界尽力而为",
 59                     Author = "俞敏洪",
 60                     Price = 50,
 61                     Sort = i
 62                 });
 63                 bookList.Add(new Book
 64                 {
 65                     Id = Guid.NewGuid(),
 66                     BookName = "做最好的自己",
 67                     Author = "李开复",
 68                     Price = 50,
 69                     Sort = i
 70                 });
 71                 bookList.Add(new Book
 72                 {
 73                     Id = Guid.NewGuid(),
 74                     BookName = "白夜行",
 75                     Author = "东野圭吾",
 76                     Price = 50,
 77                     Sort = i
 78                 });
 79                 bookList.Add(new Book
 80                 {
 81                     Id = Guid.NewGuid(),
 82                     BookName = "活着",
 83                     Author = "余华",
 84                     Price = 50,
 85                     Sort = i
 86                 });
 87                 bookList.Add(new Book
 88                 {
 89                     Id = Guid.NewGuid(),
 90                     BookName = "拆掉思维里的墙",
 91                     Author = "古典",
 92                     Price = 50,
 93                     Sort = i
 94                 });
 95                 bookList.Add(new Book
 96                 {
 97                     Id = Guid.NewGuid(),
 98                     BookName = "巨流河",
 99                     Author = "齐邦媛",
100                     Price = 50,
101                     Sort = i
102                 });
103             }
104             context.Books.AddRange(bookList);
105             base.Seed(context);
106         }
107     }
108 }
在Web.config文件中entityFramework节点下添加如下配置
1   <contexts>
2       <context type="BookLibrary.Models.BookContext,BookLibrary">
3         <databaseInitializer type="BookLibrary.DBInitializer.BookInitializer,BookLibrary"></databaseInitializer>
4       </context>
5     </contexts>
五、创建控制器与视图
新建BookController控制器
 1 using PagedList;
 2 using System.Configuration;
 3 using System.Linq;
 4 using System.Web.Mvc;
 5 using BookLibrary.Models;
 6
 7 namespace BookLibrary.Controllers
 8 {
 9     public class BookController : Controller
10     {
11         /// <summary>
12         /// 数据库上下文
13         /// </summary>
14         private BookContext db;
15         public BookController()
16         {
17             db = new BookContext();
18         }
19
20         // GET: Book
21         public ActionResult Index(int? page)
22         {
23             ///书籍列表
24             var books = db.Books.OrderByDescending(p => p.Sort);
25
26
27             ///page为null时默认设置为1
28             var pageNumber = page ?? 1;
29
30             ///每页显示项目数量
31             var pageSize = 10;
32             if (ConfigurationManager.AppSettings["PageSize"] != null)
33             {
34                 int.TryParse(ConfigurationManager.AppSettings["PageSize"], out pageSize);
35             }
36
37
38             ///进行分页生成model
39             IPagedList<Book> model = books.ToPagedList(pageNumber, pageSize);
40
41             return View(model);
42         }
43     }
44 }
创建视图
 1 @model PagedList.IPagedList<BookLibrary.Models.Book>
 2 @using PagedList.Mvc;
 3 @{
 4     ViewBag.Title = "书籍列表";
 5 }
 6 <link href="~/Content/PagedList.css" rel=" stylesheet" />
 7 <h2>@ViewBag.Title</h2>
 8 <style>
 9     .highLight {
10     }
11
12         .highLight > a {
13             background-color: #dc6969 !important;
14             color: #ffffff !important;
15             font-weight: 500;
16             font-family: ‘黑体‘;
17             /*font-size:15px;*/
18         }
19 </style>
20 <table class="table">
21     <thead>
22         <tr>
23             <th>
24                 书名
25             </th>
26             <th>
27                 作者
28             </th>
29             <th>
30                 价格
31             </th>
32         </tr>
33     </thead>
34     <tbody>
35         @if (Model != null && Model.Count > 0)
36         {
37             foreach (var book in Model)
38             {
39                 <tr>
40                     <td>@Html.DisplayFor(p => book.BookName)</td>
41                     <td>@Html.DisplayFor(p => book.Author)</td>
42                     <td>@Html.DisplayFor(p => book.Price)元</td>
43                 </tr>
44             }
45
46         }
47         else
48         {
49             <tr><td colspan="3">---</td></tr>
50         }
51
52     </tbody>
53 </table>
54 @Html.PagedListPager(Model, page => Url.Action("Index", "Book", new { page = page }), new PagedListRenderOptions
55 {
56     DisplayItemSliceAndTotal = true,
57     Display = PagedListDisplayMode.IfNeeded,
58     ItemSliceAndTotalFormat = "显示{0}页到{1}页,共{2}条",
59     //LinkToNextPageFormat = "?",
60     LinkToNextPageFormat = ">>",
61     LinkToLastPageFormat = "Last",
62     DisplayLinkToLastPage = PagedListDisplayMode.Always,
63     LinkToFirstPageFormat = "First",
64     DisplayLinkToFirstPage = PagedListDisplayMode.Always,
65     LinkToPreviousPageFormat = "<<",
66     // LinkToPreviousPageFormat = "?",
67     DisplayEllipsesWhenNotShowingAllPageNumbers = true,
68     DisplayPageCountAndCurrentLocation = true,
69     PageCountAndCurrentLocationFormat = "当前第{0}页,共{1}页",
70     ClassToApplyToLastListItemInPager = "highLight",
71     ClassToApplyToFirstListItemInPager = "highLight",
72     LiElementClasses = new List<string> { "highLight" }
73
74 })
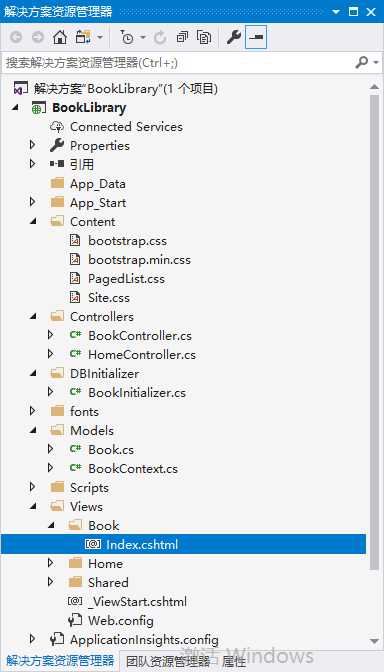
最终的项目结构如下
然后运行项目,输入控制器名字/Book,最终效果如下
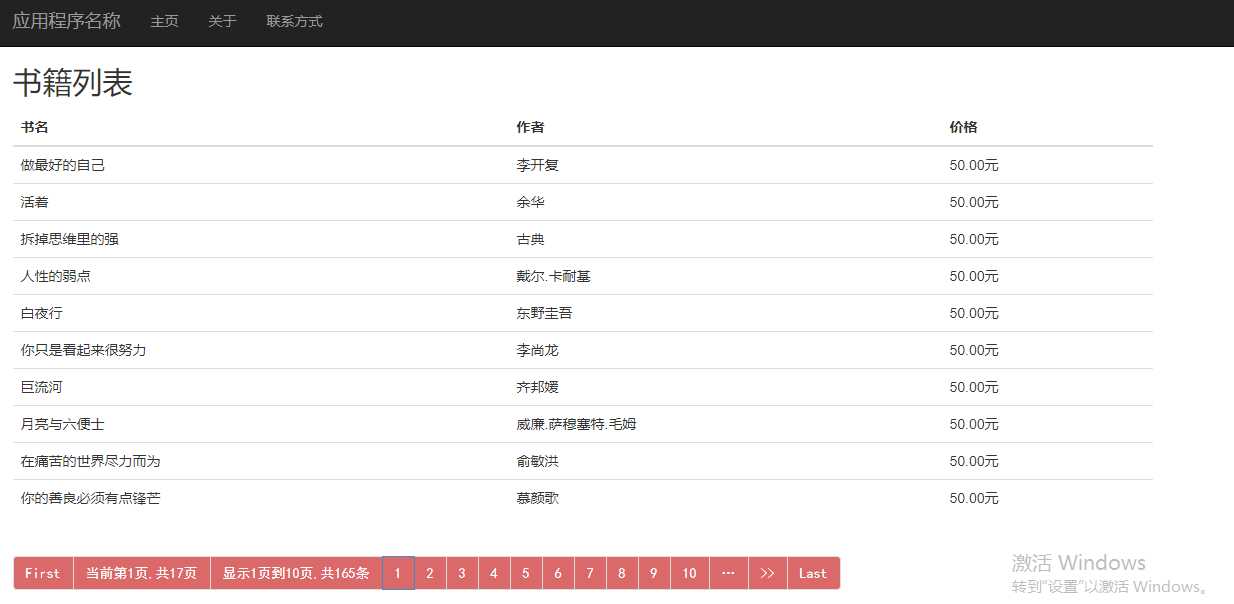
如果自己要更改分页样式的话,可以看一下PagedListRenderOptions这个类,配置还是很灵活的。
【随笔系列】Asp.Net Mvc分页控件PagedList的使用方法及配置
标签:9.png tor lin .sql eric ace uid framework item
原文地址:https://www.cnblogs.com/Harley520/p/9872249.html