标签:schema 文件中 enc his 现在 config argument tin set
前言:
本人是一个只有几个月工作经验的码小渣。这是我写的第一篇博客,如有不足之处还请大家不要介意,还请大佬可以指出问题。
在这几个月的实战开发中自己也遇到了很多问题,真的是举步艰难啊!!!
在实战开发中遇到最多的就是findViewById我相信这也是很多和我一样初入安卓行业的码小渣遇到的最多的代码。
现在来给码小渣同志们分享一个非常实用的框架 “ButterKnife”
这是“听着music睡”大佬给我推荐的。大家可以关注一下他,人特别好。我的这篇文章就是参考了他的文章。
废话不多说上图、上代码。
代码写的不规范不要介意。
这是我平时写的最多的,相信你们一开始也是这样写的。
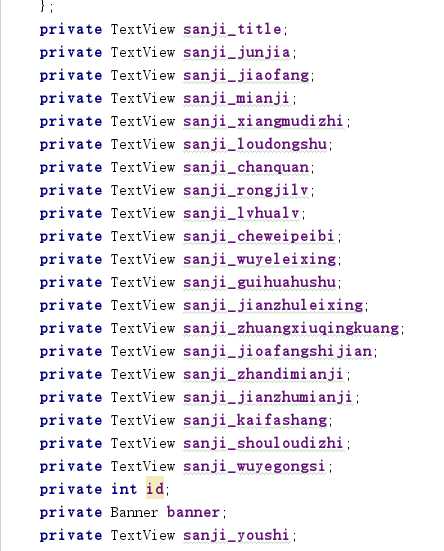
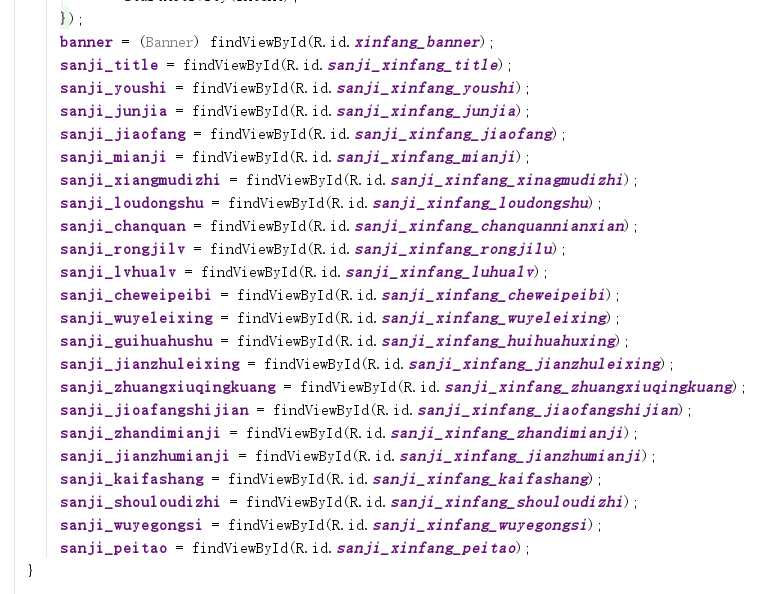
像我这样很多控件的时候代码就显得特别乱,不清晰。
今天我给大家介绍的ButterKnife框架就可以很好的解决这个问题。
使用ButterKnife框架
第一步:在项目中添加依赖
需要在app目录下的 build.gradle文件中添加 :
      implementation‘com.jakewharton:butterknife:7.0.1‘

 第二步:在Android Studio 中安装插件

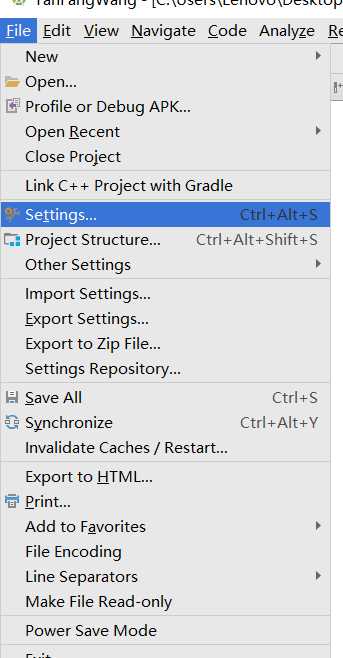
  首先在Android Studio主界面中选择 "File" —— "Settings" —— 进入设置
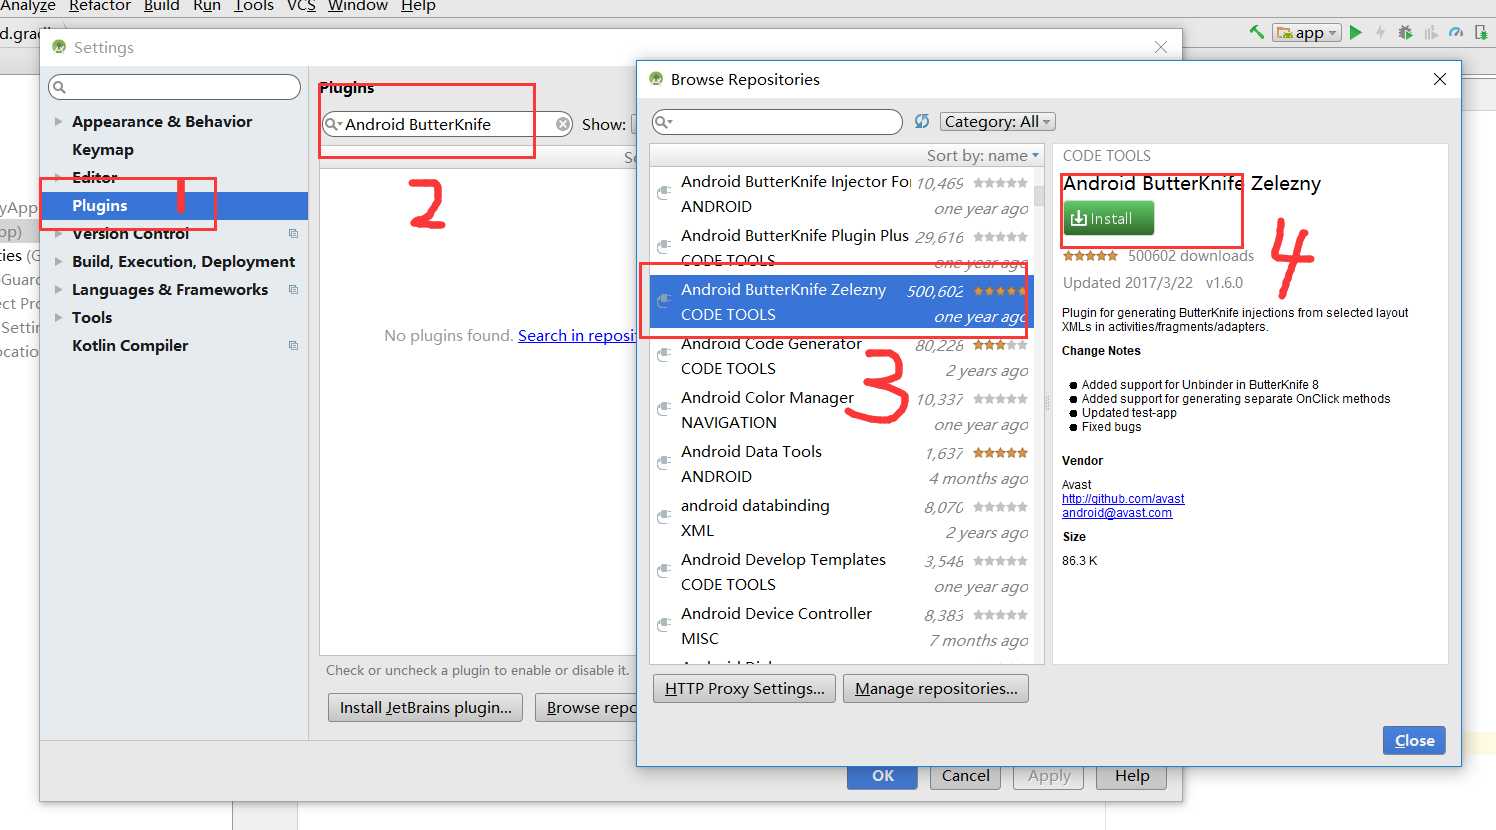
然后找到 "Plugins" 搜索 "Android ButterKnife" 安装插件 “Zelezny” 安装完成后Android Studio 会自动重启
下面就让我们来体验一下把。
新建一个新的布局:
<?xml version="1.0" encoding="utf-8"?>
<LinearLayout xmlns:android="http://schemas.android.com/apk/res/android"
    xmlns:app="http://schemas.android.com/apk/res-auto"
    xmlns:tools="http://schemas.android.com/tools"
    android:layout_width="match_parent"
    android:layout_height="match_parent"
    android:orientation="vertical"
    tools:context="com.example.lenovo.myapplication.MainActivity">

<TextView
    android:id="@+id/textView"
    android:gravity="center"
    android:text="你好"
    android:layout_width="match_parent"
    android:layout_height="50dp" />
    <TextView
        android:id="@+id/textView1"
        android:gravity="center"
        android:text="你是码小渣吗?"
        android:layout_width="match_parent"
        android:layout_height="50dp" />
    <TextView
        android:id="@+id/textView2"
    android:gravity="center"
    android:text="你好"
    android:layout_width="match_parent"
    android:layout_height="50dp" />
    <TextView
        android:id="@+id/textView3"
    android:gravity="center"
    android:text="你是第几个看我博客的码小渣"
    android:layout_width="match_parent"
    android:layout_height="50dp" />
    <TextView
        android:id="@+id/textView4"
    android:gravity="center"
    android:text="你好"
    android:layout_width="match_parent"
    android:layout_height="50dp" />
    <TextView
        android:id="@+id/textView5"
    android:gravity="center"
    android:text="谢谢你看我的博客"
    android:layout_width="match_parent"
    android:layout_height="50dp" />


</LinearLayout>


下面就开始在Activity中使用框架
新建一个Activity 在 Activity的中 右击布局文件 选择Generate...
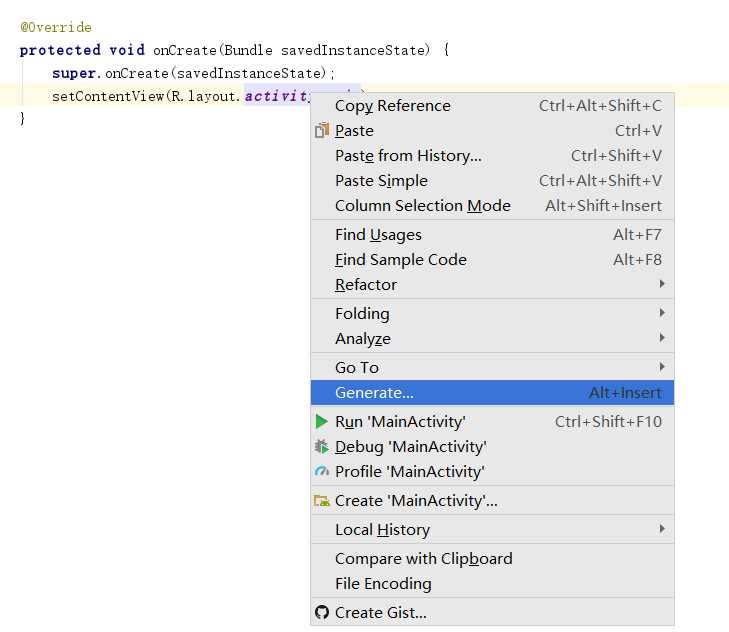
出现新的对话框 点击Generate Butterknife Injections
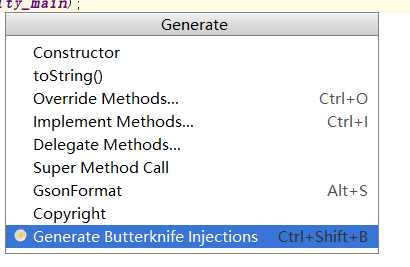
出现新的对话框 再这里我们可以选择 布局文件中的控件
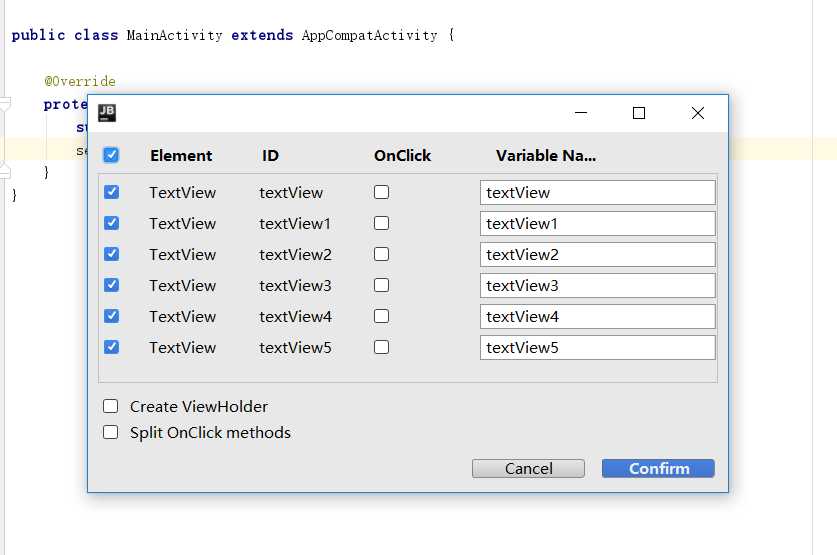
点击 Confirm 会自动帮你生成注解 在onCreate()里多了一行 ButterKnife.bind(this);代码
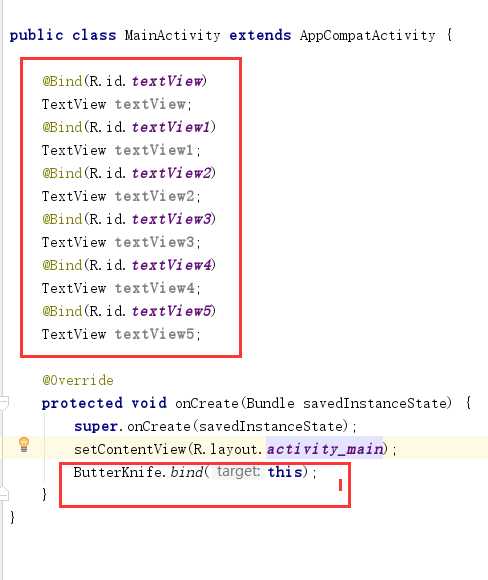
到这里 ButterKnife框架 就基本结束了 是不是很简单而且帮你省了很多事
但是有一部分人在运行项目的时候可能会遇见和我一样的问题

我也是翻遍度娘但是未曾找到解决方法 最后在大佬哪里得到解决办法
在app目录下的 build.gradle文件中的 defaultConfig 中加入下面的这些代码 就OK了。
 javaCompileOptions {
            annotationProcessorOptions {
                includeCompileClasspath = true
                arguments = [moduleName: project.getName()]
            }
        }
运行成功。
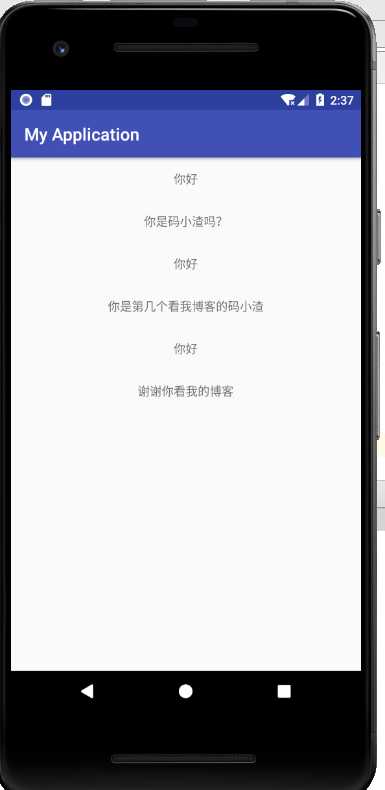
到这里 ButterKnife 框架 就结束了是不是很神奇啊。
希望我的这篇文章能为你带来帮助!!!
作者:码小渣

文章地址:https://www.cnblogs.com/nc-183/p/9902442.html

本文版权归作者所有,欢迎转载,但未经作者同意必须保留此段声明,且在文章页面明显位置给出原文链接,否则保留追究法律责任的权利。
标签:schema 文件中 enc his 现在 config argument tin set
原文地址:https://www.cnblogs.com/nc-183/p/9902442.html