标签:spring 请求方法 input ann Servle control 状态转化 servlet size
有疑问可以参考博主其他关于spring mvc的博文
此时直接进行代码的实现
一般的步骤:
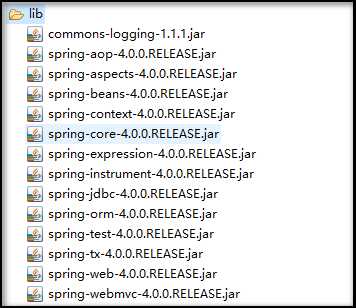
-加入jar包
-配置DispatcherServlet
-加入Spring MVC配置文件
-编写请求的处理器
-视图
创建web工程:
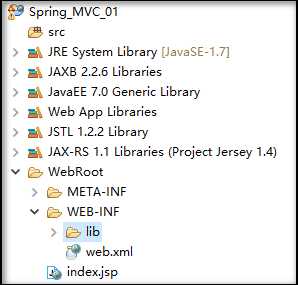
加入jar包
web.xml文件
 <!-- 配置DispatcherServlet -->
  <servlet>
         <servlet-name>springDispatcherServlet</servlet-name>
         <servlet-class>org.springframework.web.servlet.DispatcherServlet</servlet-class>

         <!-- 配置初始化参数 -->
         <!-- 配置 DispatcherServlet 的一个初始化参数: 配置 SpringMVC 配置文件的位置和名称 -->
         <!--
            实际上也可以不通过 contextConfigLocation 来配置 SpringMVC 的配置文件, 而使用默认的.
            默认的配置文件为: /WEB-INF/<servlet-name>-servlet.xml
            简单的列子:在WEB-INF文件夹下springDispatcherServlet-servlet.xml,init就不需要在配置了
          -->
         <init-param>
           <param-name>contextConfigLocation</param-name>
           <param-value>classpath:springmvc.xml</param-value>
         </init-param>
         <load-on-startup>1</load-on-startup>
  </servlet>

  <servlet-mapping>
         <servlet-name>springDispatcherServlet</servlet-name>
         <url-pattern>/</url-pattern>
  </servlet-mapping>
springmvc.xml以及所需要的类

springmvc.xml
<!-- 配置自动扫描的包 -->
<context:component-scan base-package="com.MrChengs.A"></context:component-scan>
<!-- 配置视图解析器 -->
<bean class="org.springframework.web.servlet.view.InternalResourceViewResolver">
     <property name="prefix" value="/WEB-INF/views/"></property>
     <property name="suffix" value=".jsp"></property>
</bean>
HelloWord.java
//自动扫描
@Controller
public class HelloWord {
     //返回值通过视图解析器解析为实际的物理逻辑视图,InternalResourceViewResolver解析器
     //<property name="prefix" value="/WEB-INF/views/"></property>
     //<property name="suffix" value=".jsp"></property>
     //通过前缀    prefix + 返回值  + 后缀
     //   ==  /WEB-INF/views/  + success + .jsp

    //使用注解来映射请求url
     @RequestMapping("/helloword")
     public String say(){
           System.out.println("hello");
           return "success";
     }
}
这里说明需要在路径下建立相关的 文件以及路径:

<body>
      <h4>success</h4>
</body>
在index.jsp
  <body>
           <a href="helloword">helloword</a>
  </body>
得到:注意看请求的url


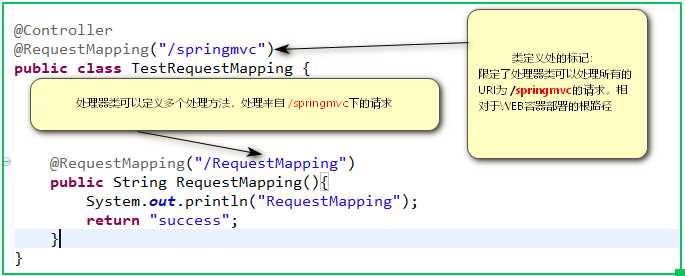
@Controller
@RequestMapping("/springmvc")
public class TestRequestMapping {

     @RequestMapping("/RequestMapping")
     public String RequestMapping(){
           System.out.println("RequestMapping");
           return "success";
     }
}
在index,jsp中:
<a href="springmvc/RequestMapping">testMethod</a>
在运行之后点击超链接,控制台会显示,主要看路径:

具体可看图的解释:
     @RequestMapping(value="/RequestMethod",method=org.springframework.web.bind.annotation.RequestMethod.POST)
     public String RequestMethod(){
           System.out.println("RequestMethod");
           return "success";
     }
index.jsp中:
 <form action="springmvc/RequestMethod" method="post">
                <input type="submit" value="submit">
           </form>

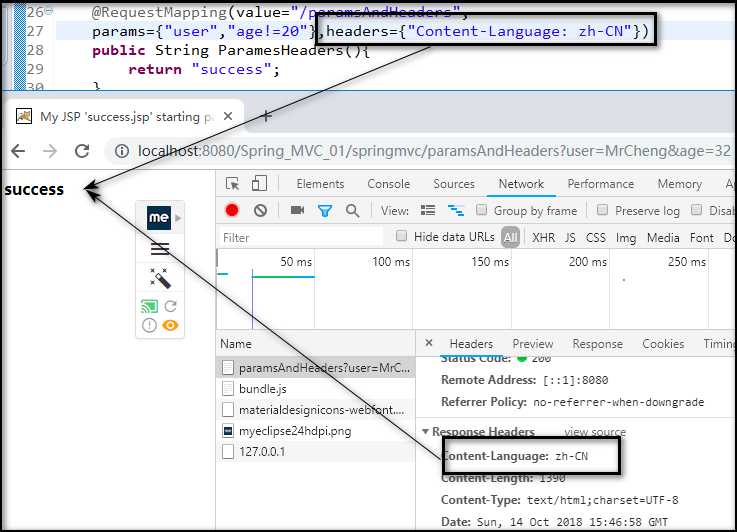
params
     @RequestMapping(value="/paramsAndHeaders",
     params={"user","age!=20"})
     public String ParamesHeaders(){
           return "success";
     }
index.jsp
<a href="springmvc/paramsAndHeaders">paramsAndHeaders</a>

header:
     @RequestMapping("/antpath/*/ant")
     public String AntPath(){
           return "success";
     }
index.jsp:
<a href="springmvc/antpath/mvcmmc/ant">Ant</a>

TestRequestMapping.java
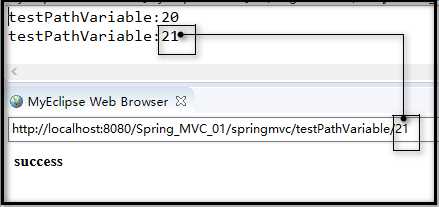
     @RequestMapping("/testPathVariable/{id}")
     public String testPathVariable(@PathVariable(value="id") int id){
           System.out.println("testPathVariable:" + id);
           return "success";
     }
index.jsp
<a href="springmvc/testPathVariable/20">testPathVariable</a>
需要在web.xml配置:
 <!-- 配置org.springframework.web.filter.HiddenHttpMethodFilter.class -->
  <!-- 可以把POST请求转为delete/post -->
  <filter>
      <filter-name>filter</filter-name>
      <filter-class>org.springframework.web.filter.HiddenHttpMethodFilter</filter-class>
  </filter>
  <filter-mapping>
      <filter-name>filter</filter-name>
      <url-pattern>/*</url-pattern>
  </filter-mapping>
java类中:
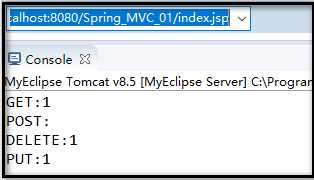
@RequestMapping(value="/test/{id}",method=org.springframework.web.bind.annotation.RequestMethod.GET)
     public String testGet(@PathVariable(value="id") int id){
           System.out.println("GET:" + id);
           return "success";
     }

     @RequestMapping(value="/test",method=org.springframework.web.bind.annotation.RequestMethod.POST)
     public String testPOST(){
           System.out.println("POST:");
           return "success";
     }

     @RequestMapping(value="/test/{id}",method=org.springframework.web.bind.annotation.RequestMethod.DELETE)
     public String testDelete(@PathVariable(value="id") int id){
           System.out.println("DELETE:" + id);
           return "success";
     }

     @RequestMapping(value="/test/{id}",method=org.springframework.web.bind.annotation.RequestMethod.PUT)
     public String testPUT(@PathVariable(value="id") int id){
           System.out.println("PUT:" + id);
           return "success";
     }
index.jsp
   <a href="springmvc/test/1">GET</a>
           <br>
           <form action="springmvc/test" method="post">
                <input type="submit" value="POST">
           </form>
           <br>
           <form action="springmvc/test/1" method="post">
                <input type="hidden" name="_method" value="DELETE">
                <input type="submit" value="DELETE">
           </form>
           <br>
         <form action="springmvc/test/1" method="post">
                <input type="hidden" name="_method" value="PUT">
                <input type="submit" value="PUT">
           </form>
@RequestMapping("/testRequestParam")
     public String testRequestParam(@RequestParam(value="username",required=false) String username,
                @RequestParam(value="age") int age){
           System.out.println("username:" + username + "--age:" + age);
           return "success";
     }
index.jsp
<a href="springmvc/testRequestParam?username=MrChang&age=22">testRequestParam</a>

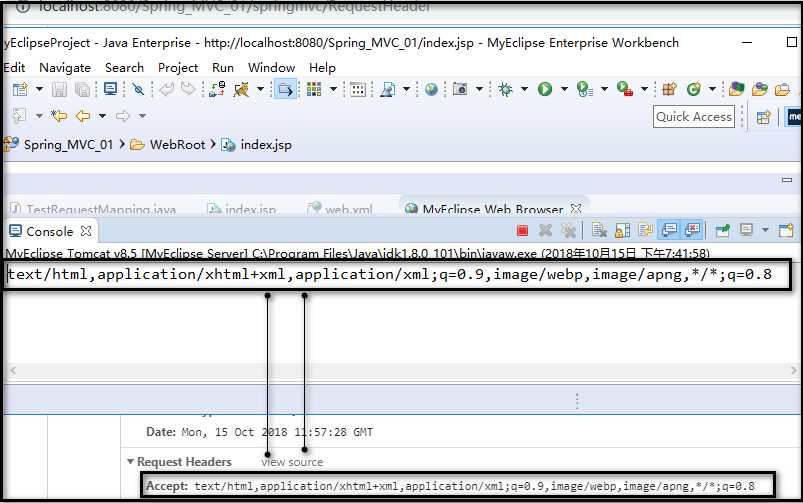
     @RequestMapping("/RequestHeader")
     public String testRequestHeader(@RequestHeader(value="Accept")String l){
           System.out.println(l);
           return "success";
     }
index.jsp
<a href="springmvc/RequestHeader">RequestHeader</a>
TestRequestMapping.java
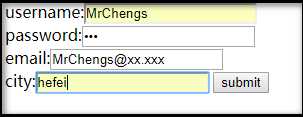
     @RequestMapping("/testpojo")
     public String testtestpojo(User user){
           System.out.println(user);
           return "success";
     }
User.java
public class User {
     private String username;
     private String password;
     private String email;

     private Address address;
}
Address.java
public class Address {
     private String city;
}
index.java
<form action="springmvc/testpojo" method="post">
           username:<input type="text" name="username">
           <br>
           password:<input type="password" name="password">
           <br>
           email:<input type="text" name="email">
           <br>
           city:<input type="text" name="address.city">
           <input type="submit" value="submit">
     </form>

使用 Servlet API 作为
TestRequestMapping.java
     @RequestMapping("/testServletAPI")
     public String testServletAPI(HttpServletRequest request,
                HttpServletResponse response){
           System.out.println("request:" + request + "-response:" + response);
           return "success";
     }
<a href="springmvc/testServletAPI">testServletAPI</a>
request:org.apache.catalina.connector.RequestFacade@7a434d60-
response:org.apache.catalina.connector.ResponseFacade@addea0e
标签:spring 请求方法 input ann Servle control 状态转化 servlet size
原文地址:https://www.cnblogs.com/Mrchengs/p/9940764.html