码迷,mamicode.com
首页 > 系统相关 > 详细

ubuntu下搭建testlink

时间:2018-12-03 17:17:40      阅读:281      评论:0      收藏:0      [点我收藏+]

标签:执行   ddd   stl   local   ubunt   src   idt   服务   bsp   

环境配置:

1. 安装mysql

  • 教程网上找

2. 安装apache

  • sudo apt-get install apache2
  • 重启apache服务 sudo /etc/init.d/apache2 restart 
  • 测试: Http:\localhost or IP地址
  • 配置apache:sudo subl /etc/apache2/apache2.conf
  • 添加:AddType application/x-httpd-php .php .htm .html
          AddDefaultCharset UTF-8
               ServerName localhost

  • 重启apache2 : sudo /etc/init.d/apache2 restart
  • 重启mysql:sudo /etc/init.d/mysql restart

3. 安装php

  • sudo apt-get install php 安装php(最新的版本)
  • sudo apt-get isntall libapache2-mod-php

4. 安装phpmyadmin-Mysql数据库管理

  • sudo apt-get install phpmyadmin
  • 在安装过程中会要求选择Web server:apache2或lighttpd,使用空格键选定apache2,按tab键然后确定。然后会要求输入设置的Mysql数据库密码连接密码Password of the database’s administrative user。
  •  phpmyadmin测试:在浏览器地址栏中打开http://localhost/phpmyadmin

5. 安装TestLink

  • 想办法把testlink复制到ubuntu服务器上
  • 复制到 /var/www 目录下
  • 解压 tar zxvf testlink-*.tar.gz,为了方便操作将文件夹更名为testlink sudo mv testlink-* testlink
  • sudo mv testlink /var/www/html 将testlink解压文件移动到我们站点配置文件夹里面  /html下面

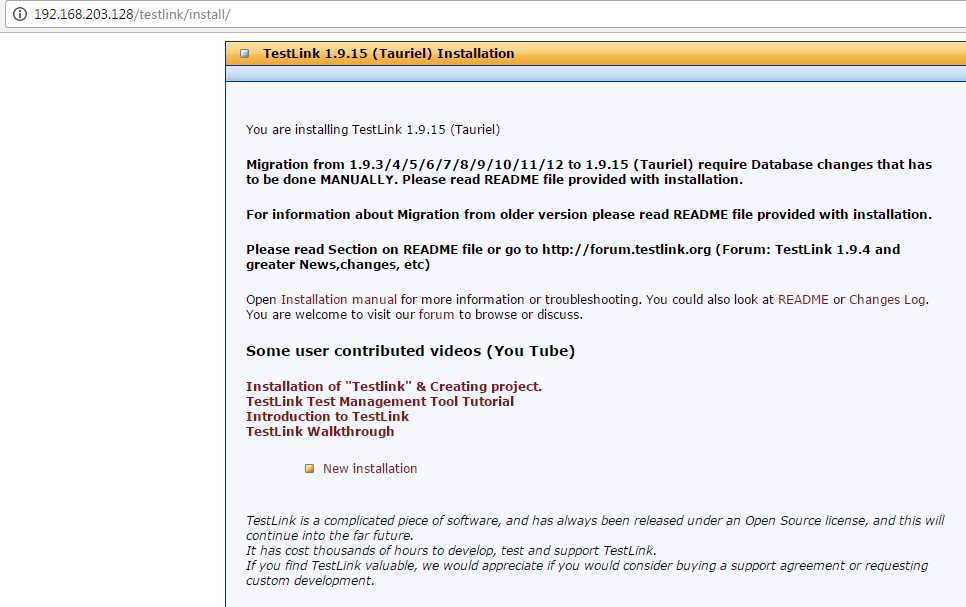
6. 执行Testlink安装向导

  • 技术分享图片

ubuntu下搭建testlink

标签:执行   ddd   stl   local   ubunt   src   idt   服务   bsp   

原文地址:https://www.cnblogs.com/lozz/p/10059421.html

(0)
(0)
   
举报
评论 一句话评论(0
登录后才能评论!
© 2014 mamicode.com 版权所有  联系我们:gaon5@hotmail.com
迷上了代码!