标签:oar 集群模式 端点 ams 127.0.0.1 com 图片 端口 public
1.创建一个dashboard项目
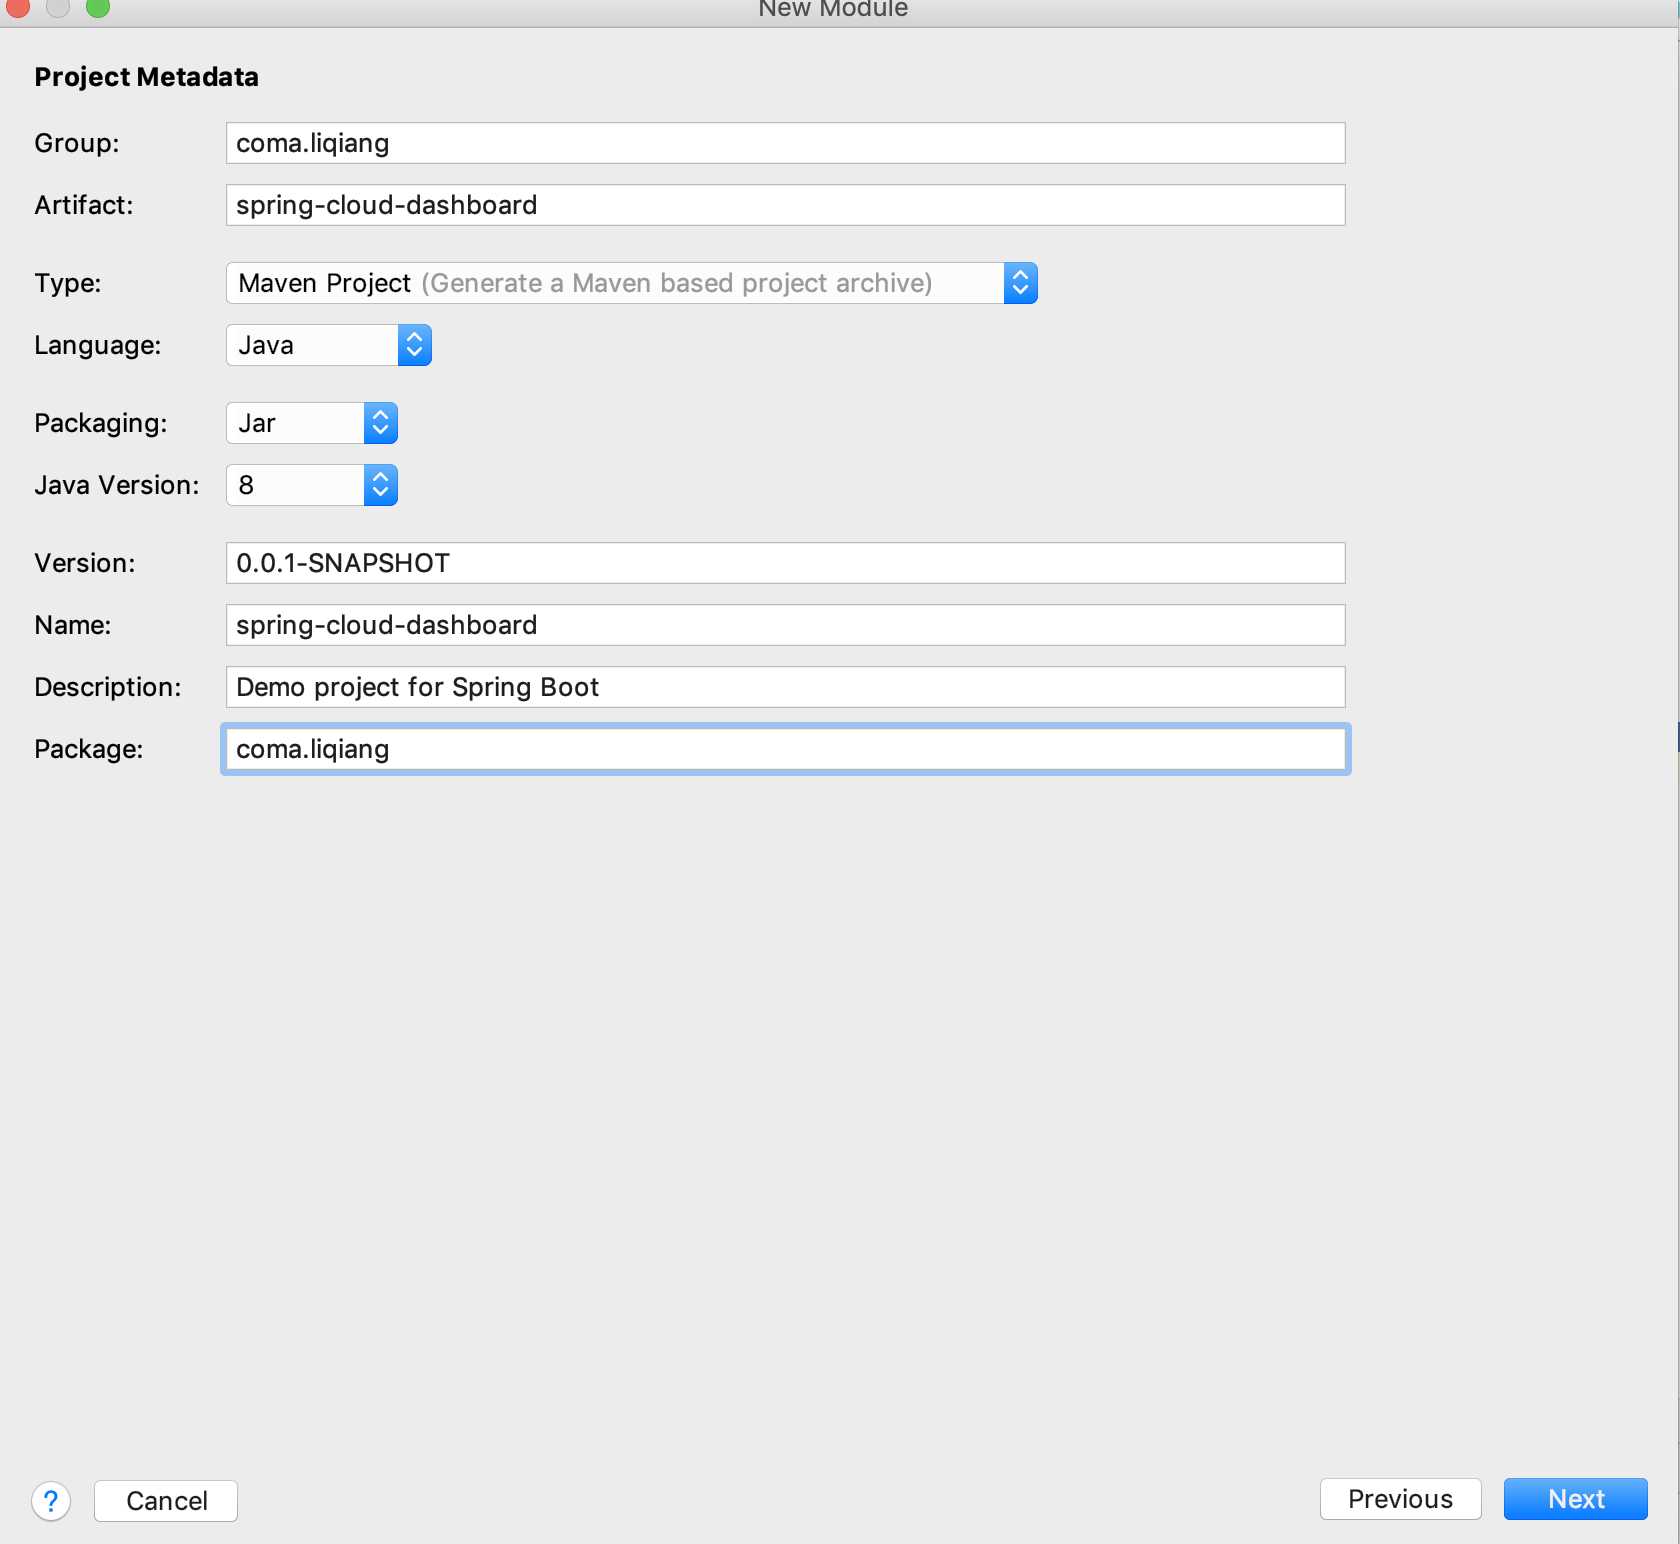
2.引入依赖
<!--histrix依赖-->
        <dependency>
            <groupId>org.springframework.cloud</groupId>
            <artifactId>spring-cloud-starter-netflix-hystrix</artifactId>
        </dependency>
        <!--dashboard依赖-->
        <dependency>
            <groupId>org.springframework.cloud</groupId>
            <artifactId>spring-cloud-starter-netflix-hystrix-dashboard</artifactId>
        </dependency>
        <!--端点依赖-->
        <dependency>
            <groupId>org.springframework.boot</groupId>
            <artifactId>spring-boot-starter-actuator</artifactId>
        </dependency>
3.在主类上打上注解@EnableHystrixDashboard开启dashboard
@SpringBootApplication
@EnableHystrixDashboard
public class SpringCloudDashboardApplication {

    public static void main(String[] args) {
        SpringApplication.run(SpringCloudDashboardApplication.class, args);
    }

}
4.配置文件配置应用名字和端口
spring:
  application:
    name: hystrix-dashboard
server:
  port: 2001
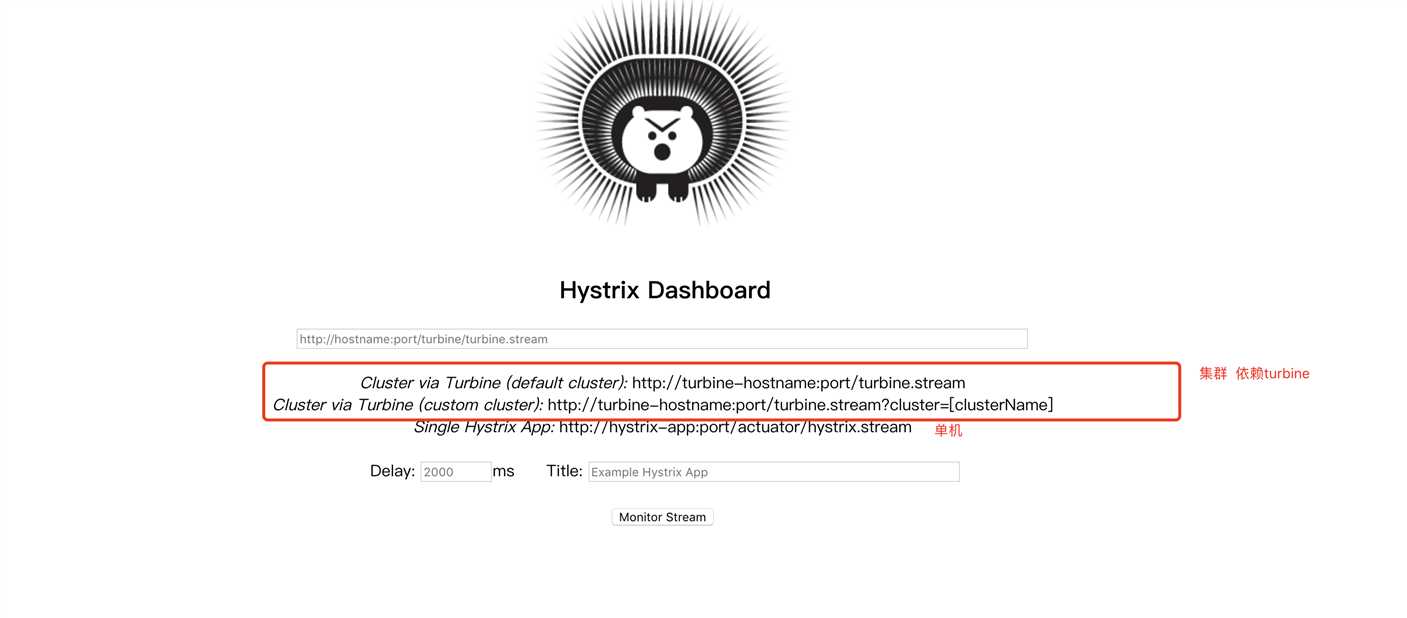
5.启动访问http://127.0.0.1:2001/hystrix
6.在consumer增加hystirx端点的Servlet
/**
 * 用于开启histrix 端点 用于dashboard图形化
 */
@Configuration
public class HystrixStreamServletConfig {
    @Bean
    public ServletRegistrationBean getServlet() {
        HystrixMetricsStreamServlet streamServlet = new HystrixMetricsStreamServlet();
        ServletRegistrationBean registrationBean = new ServletRegistrationBean(streamServlet);

        registrationBean.setLoadOnStartup(1);

        registrationBean.addUrlMappings("/actuator/hystrix.stream");

        registrationBean.setName("HystrixMetricsStreamServlet");


        return registrationBean;

    }
}
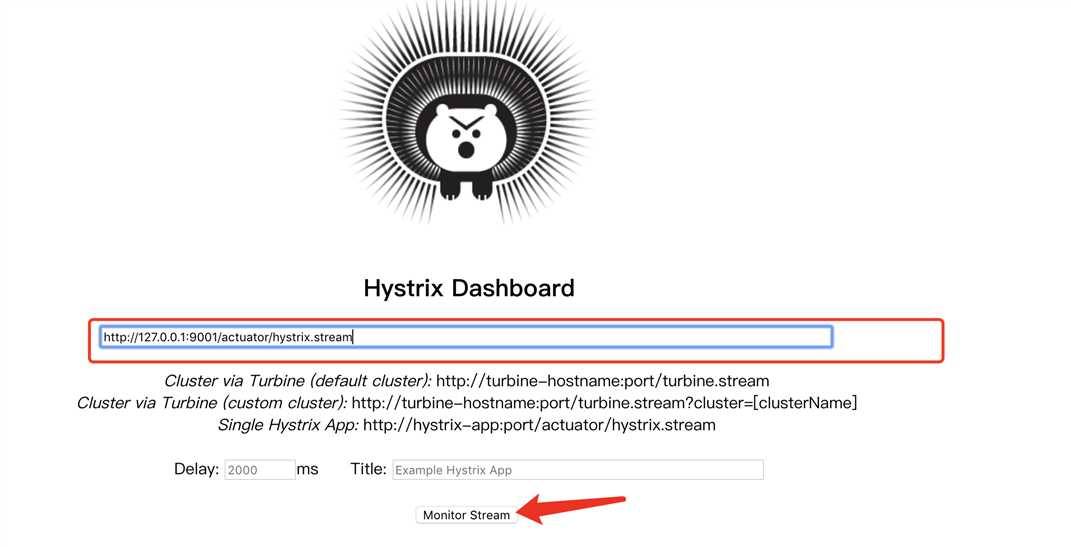
7.访问http://127.0.0.1:9001/actuator/hystrix.stream 出现以下内容表示成功 将连接粘贴到仪表盘 开启分析

8.将连接粘贴到仪表盘 开启监控和分析
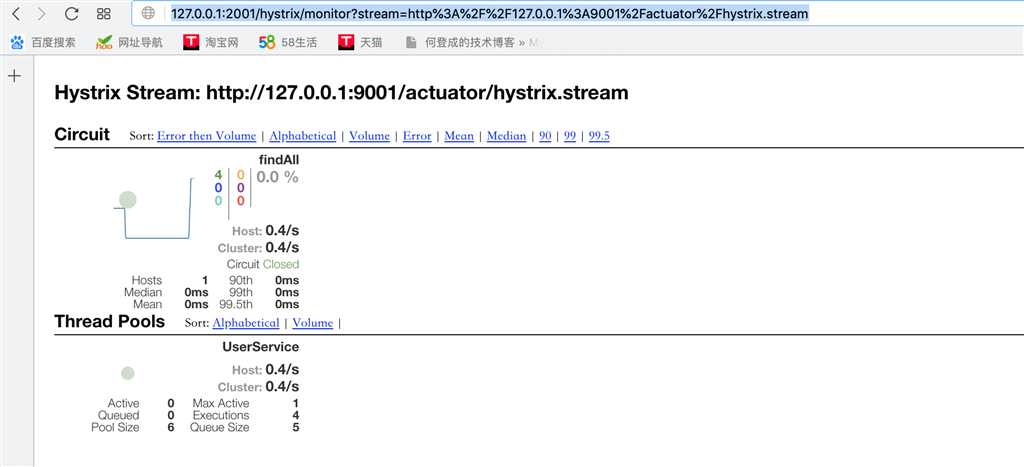
9.访问一个hystrix请求将会出现监控页面
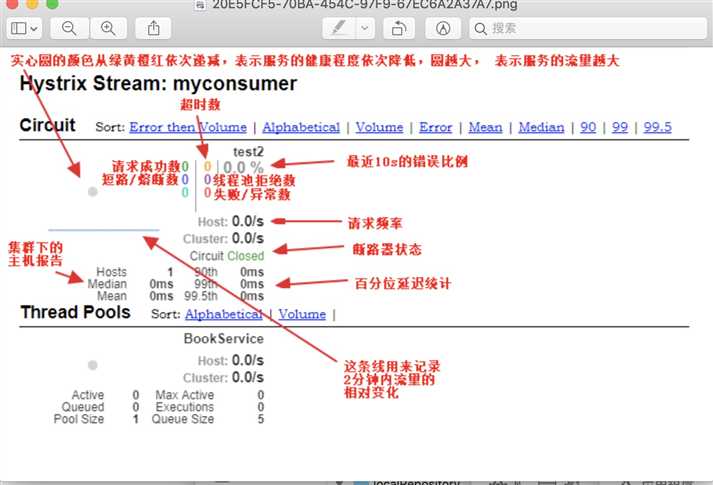
Spring Cloud-hystrix Dashboard(八)
标签:oar 集群模式 端点 ams 127.0.0.1 com 图片 端口 public
原文地址:https://www.cnblogs.com/LQBlog/p/10142956.html