标签:uap document index cursor height prototype directory ast south
vue-cli网址:https://github.com/vuejs/vue-cli
先在控制台安装 全局vue-clis
npm install -g vue-cli
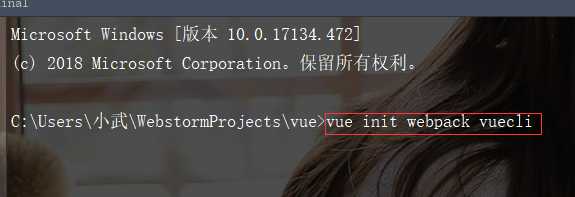
vue init webpack vuecli //vuecli是项目名

也可以在空项目中输入 vue init webpack 将项目变为 vue-cli项目
npm install
npm install axios -D
http-proxy-middleware中间件作为代理npm install -S http-proxy-middleware
为什么要http-proxy-middleware做为中间代理?
原因就是因为客户端请求服务端的数据是存在跨域问题的,而服务器和服务器之间可以相互请求数据,是没有跨域的概念(如果服务器没有设置禁止跨域的权限问题),也就是说,我们可以配置一个代理的服务器可以请求另一个服务器中的数据,然后把请求出来的数据返回到我们的代理服务器中,代理服务器再返回数据给我们的客户端,这样我们就可以实现跨域访问数据啦。

import Vue from ‘vue‘
import App from ‘./App‘
import router from ‘./router‘
import axios from ‘axios‘ // 1、在这里引入axios

Vue.prototype.$
ajax
= axios; // 2、在vue中使用axios Vue.config.productionTip = false /* eslint-disable no-new */ new Vue({ el: ‘#app‘, router, template: ‘<App/>‘, components: { App } })
http-proxy-middleware这个中间件进行本地代理配置,在vuecli 项目中找到config/index.js‘use strict‘ // Template version: 1.3.1 // see http://vuejs-templates.github.io/webpack for documentation. const path = require(‘path‘) module.exports = { dev: { // Paths assetsSubDirectory: ‘static‘, assetsPublicPath: ‘/‘, proxyTable: { ‘/api‘: { target:‘http://api.qingyunke.com/api.php‘, // 你请求的第三方接口 changeOrigin:true, // 在本地会创建一个虚拟服务端,然后发送请求的数据,并同时接收请求的数据,这样服务端和服务端进行数据的交互就不会有跨域问题 pathRewrite:{ // 路径重写, ‘^/api‘: ‘/api‘ // 替换target中的请求地址,也就是说以后你在请求http://api.jisuapi.com/XXXXX这个地址的时候直接写成/api即可。 } } }, ...剩下代码省略
如果不使用 http-proxy-middleware 这个中间件就会报如下错误:

这个错误就是因为跨域所引起的
<template>
  <div>
  <p>
    请输入您的问题:
    <input v-model="question" @keyup.enter="getAnswer()">
  </p>
    <p >{{ answer }}</p>
  </div>
</template>
<script>
  import ‘../../static/js/lodash.min‘;
    export default {
        name: "
",
        data(){
          return {
            question:"",
            answer:‘有问必答‘
          }
        },
        methods:{
          getAnswer: _.debounce(function () {
            var vm = this;
            vm.answer = ‘让我想想...‘;
            var url="?key=free&appid=0&msg="+vm.question;//这里是拼接url

            this.$ajax.get(‘/api‘+url)// 这里就是刚才的config/index.js中的/api
              .then(function(response) {
                vm.answer = _.capitalize(response.data.content);
                console.log(response);
              })
              .catch(function(error) {
                vm.answer = ‘发生了错误,不能调用该应用程序接口‘ + error
              })
          },1000)
        }
    }
</script>

<style scoped>

</style>
webpack-dev-server没有设置--open,所以打开package.json文件在”scripts”属性中的”dev”属性中手动添加--open,如下代码所示"scripts": {
"dev": "webpack-dev-server --open --inline --progress --config build/webpack.dev.conf.js",
"start": "npm run dev",
"unit": "jest --config test/unit/jest.conf.js --coverage",
"e2e": "node test/e2e/runner.js",
"test": "npm run unit && npm run e2e",
"lint": "eslint --ext .js,.vue src test/unit/specs test/e2e/specs",
"build": "node build/build.js"
},
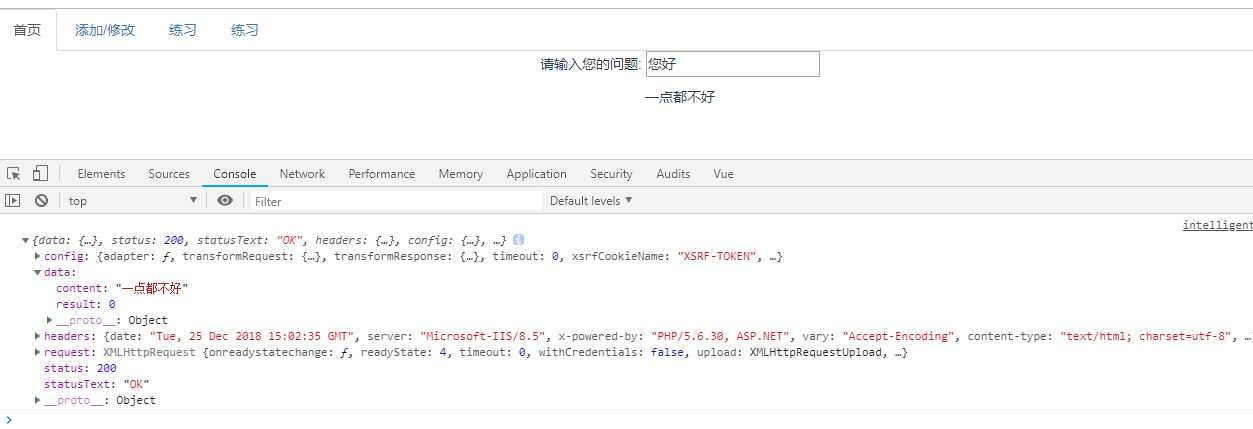
npm run dev 启动服务。效果图如下:
npm install
标签:uap document index cursor height prototype directory ast south
原文地址:https://www.cnblogs.com/zwwbky/p/10176969.html