标签:文件夹 推荐 cep 前后端分离 cdn res 简化 thymeleaf 字段
1、SpringBoot2.xHTTP请求配置讲解
简介:SpringBoot2.xHTTP请求注解讲解和简化注解配置技巧
1、@RestController and @RequestMapping是springMVC的注解,不是springboot特有的
2、@RestController = @Controller+@ResponseBody
3、@SpringBootApplication = @Configuration+@EnableAutoConfiguration+@ComponentScan
localhost:8080
Demo1:
SampleControler.java
 1 package net.xdclass.demo.controller;
 2
 3 import java.util.HashMap;
 4 import java.util.Map;
 5
 6 import org.springframework.boot.*;
 7 import org.springframework.boot.autoconfigure.*;
 8 import org.springframework.web.bind.annotation.*;
 9
10 @RestController
11 public class SampleControler {
12
13     @RequestMapping("/")
14     String home() {
15         return "Hello World!";
16     }
17
18     /*public static void main(String[] args) throws Exception {
19         SpringApplication.run(SampleControler.class, args);
20     }*/
21
22     @RequestMapping("/test")
23     public Map<String, String> testMap(){
24         Map<String,String> map = new HashMap<>();
25         map.put("name", "xdclass");
26         return map;
27     }
28
29 }
XdClassApplication.java
 1 package net.xdclass.demo;
 2
 3 import org.springframework.boot.SpringApplication;
 4 import org.springframework.boot.SpringBootConfiguration;
 5 import org.springframework.boot.autoconfigure.EnableAutoConfiguration;
 6 import org.springframework.boot.autoconfigure.SpringBootApplication;
 7 import org.springframework.context.annotation.ComponentScan;
 8
 9 @SpringBootApplication    //一个注解顶下面三个注解
10 /*@SpringBootConfiguration
11 @EnableAutoConfiguration
12 @ComponentScan*/
13
14 //启动类
15 public class XdClassApplication {
16
17     public static void main(String[] args) {
18         SpringApplication.run(XdClassApplication.class, args);
19     }
20 }
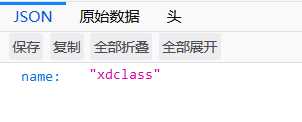
访问:http://localhost:8080/test
2、开发接口必备工具之PostMan接口调试工具介绍和使用
简介:模拟Http接口测试工具PostMan安装和讲解
1、接口调试工具安装和基本使用
2、下载地址:https://www.getpostman.com/
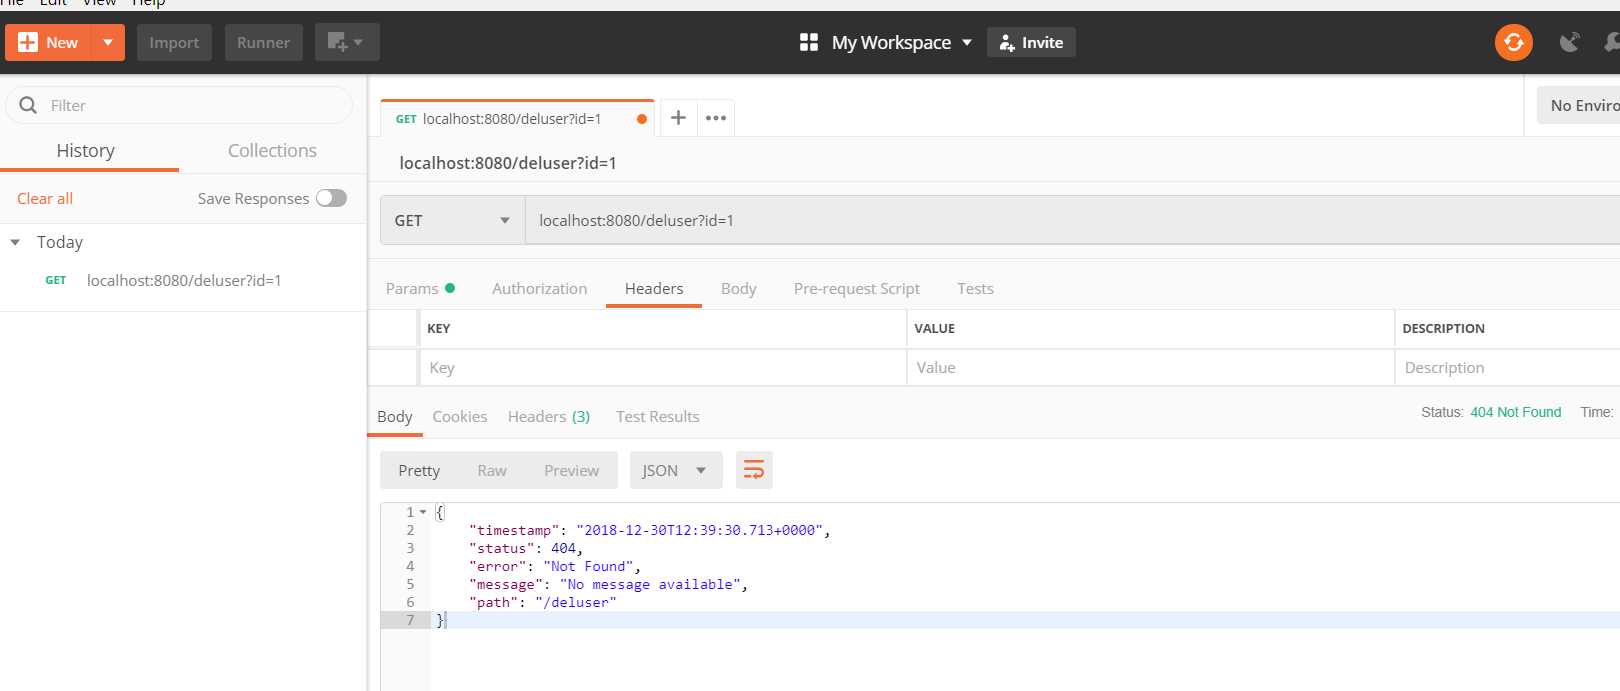
说明:
History可以保存历史请求
Collections:测试的请求没有问题后,可以保存到此处

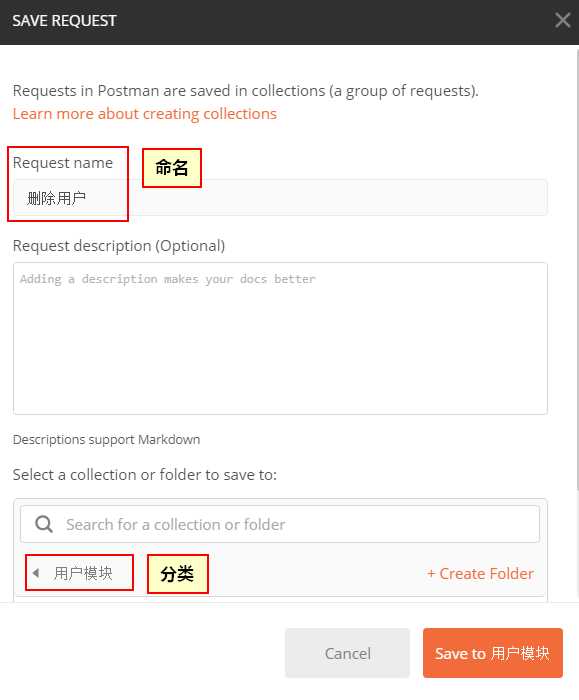
点击save
同时可以使用Download方式将内容以json形式导出
3、SpringBoot基础HTTP接口GET请求实战
简介:讲解springboot接口,http的get请求,各个注解使用
1、GET请求
1、单一参数@RequestMapping(path = "/{id}", method = RequestMethod.GET)
1) public String getUser(@PathVariable String id ) {}
2)@RequestMapping(path = "/{depid}/{userid}", method = RequestMethod.GET) 可以同时指定多个提交方法
getUser(@PathVariable("depid") String departmentID,@PathVariable("userid") String userid)
3)一个顶俩
@GetMapping = @RequestMapping(method = RequestMethod.GET)
@PostMapping = @RequestMapping(method = RequestMethod.POST)
@PutMapping = @RequestMapping(method = RequestMethod.PUT)
@DeleteMapping = @RequestMapping(method = RequestMethod.DELETE)
4)@RequestParam(value = "name", required = true)
可以设置默认值,比如分页
4)@RequestBody 请求体映射实体类
需要指定http头为 content-type为application/json charset=utf-8
5)@RequestHeader 请求头,比如鉴权
@RequestHeader("access_token") String accessToken
6)HttpServletRequest request自动注入获取参数
例:GetController.java
  1 package net.xdclass.demo.controller;
  2 import java.util.HashMap;
  3 import java.util.Map;
  4 import javax.servlet.http.HttpServletRequest;
  5 import net.xdclass.demo.domain.User;
  6 import org.springframework.web.bind.annotation.GetMapping;
  7 import org.springframework.web.bind.annotation.PathVariable;
  8 import org.springframework.web.bind.annotation.RequestBody;
  9 import org.springframework.web.bind.annotation.RequestHeader;
 10 import org.springframework.web.bind.annotation.RequestMapping;
 11 import org.springframework.web.bind.annotation.RequestMethod;
 12 import org.springframework.web.bind.annotation.RequestParam;
 13 import org.springframework.web.bind.annotation.RestController;
 14
 15 //测试http协议的get请求
 16 @RestController
 17 public class GetController {
 18
 19     private Map<String,Object> params = new HashMap<>();
 20
 21     /**
 22      * 功能描述:测试restful协议,从路径中获取字段
 23      * (协议的命名通常用字母组合和下划线方式,不用驼峰式命名)
 24      * @param cityId
 25      * @param userId
 26      * @return
 27      */
 28     @RequestMapping(path = "/{city_id}/{user_id}", method = RequestMethod.GET)
 29     public Object findUser(@PathVariable("city_id") String cityId,
 30             @PathVariable("user_id") String userId ){
 31         params.clear();
 32
 33         params.put("cityId", cityId);
 34         params.put("userId", userId);
 35
 36         return params;
 37
 38     }
 39
 40     /**
 41      * 功能描述:测试GetMapping
 42      * @param from
 43      * @param size
 44      * @return
 45      */
 46     @GetMapping(value="/v1/page_user1")
 47     public Object pageUser(int  from, int size ){
 48         params.clear();
 49         params.put("from", from);
 50         params.put("size", size);
 51
 52         return params;
 53
 54     }
 55
 56     /**
 57      * 功能描述:默认值(defaultValue),是否必须的参数
 58      * @param from
 59      * @param size
 60      * @return
 61      */
 62     @GetMapping(value="/v1/page_user2")
 63     public Object pageUserV2(@RequestParam(defaultValue="0",name="page") int  from, int size ){
 64
 65         params.clear();
 66         params.put("from", from);
 67         params.put("size", size);
 68
 69         return params;
 70
 71     }
 72
 73     /**
 74      * 功能描述:bean对象传参
 75      * 注意:1、注意需要指定http头为 content-type为application/json
 76      *         2、使用body传输数据
 77      * @param user
 78      * @return
 79      */
 80     @RequestMapping("/v1/save_user")
 81     public Object saveUser(@RequestBody User user){
 82         params.clear();
 83         params.put("user", user);
 84         return params;
 85     }
 86
 87     /**
 88      * 功能描述:测试获取http头信息
 89      * @param accessToken
 90      * @param id
 91      * @return
 92      */
 93     @GetMapping("/v1/get_header")
 94     public Object getHeader(@RequestHeader("access_token") String accessToken, String id){
 95         params.clear();
 96         params.put("access_token", accessToken);
 97         params.put("id", id);
 98         return params;
 99     }
100
101     @GetMapping("/v1/test_request")
102     public Object testRequest(HttpServletRequest request){
103         params.clear();
104         String id = request.getParameter("id");
105         params.put("id", id);
106         return params;
107     }
108
109
110 }
User.java
 1 package net.xdclass.demo.domain;
 2
 3 public class User {
 4
 5     private int age;
 6
 7     private String pwd;
 8
 9     private String phone;
10
11     public int getAge() {
12         return age;
13     }
14
15     public void setAge(int age) {
16         this.age = age;
17     }
18
19     public String getPwd() {
20         return pwd;
21     }
22
23     public void setPwd(String pwd) {
24         this.pwd = pwd;
25     }
26
27     public String getPhone() {
28         return phone;
29     }
30
31     public void setPhone(String phone) {
32         this.phone = phone;
33     }
34
35     public User() {
36         super();
37     }
38
39     public User(int age, String pwd, String phone) {
40         super();
41         this.age = age;
42         this.pwd = pwd;
43         this.phone = phone;
44     }
45
46
47 }
4、SpringBoot基础HTTP接口POST,PUT,DELETE请求实战
简介:讲解http请求post,put, delete提交方式
代码示例:
 1 package net.xdclass.demo.controller;
 2 import java.util.HashMap;
 3 import java.util.Map;
 4 import org.springframework.web.bind.annotation.DeleteMapping;
 5 import org.springframework.web.bind.annotation.PostMapping;
 6 import org.springframework.web.bind.annotation.PutMapping;
 7 import org.springframework.web.bind.annotation.RestController;
 8
 9 //测试http协议的post,del,put请求
10 @RestController
11 public class OtherHttpController {
12
13     private Map<String,Object> params = new HashMap<>();
14
15     /**
16      * 功能描述:测试PostMapping
17      * @param accessToken
18      * @param id
19      * @return
20      */
21     @PostMapping("/v1/login")
22     public Object login(String id, String pwd){
23         params.clear();
24         params.put("id", id);
25         params.put("pwd", pwd);
26         return params;
27     }
28
29
30     @PutMapping("/v1/put")//常用于更新
31     public Object put(String id){
32         params.clear();
33         params.put("id", id);
34         return params;
35     }
36
37
38     @DeleteMapping("/v1/del")//删除操作
39     public Object del(String id){
40         params.clear();
41         params.put("id", id);
42         return params;
43     }
44
45 }
5、常用json框架介绍和Jackson返回结果处理
简介:介绍常用json框架和注解的使用,自定义返回json结构和格式
1、常用框架 阿里 fastjson,谷歌gson等
JavaBean序列化为Json,性能:Jackson > FastJson > Gson > Json-lib 同个结构
Jackson、FastJson、Gson类库各有优点,各有自己的专长
空间换时间,时间换空间
2、jackson处理相关自动
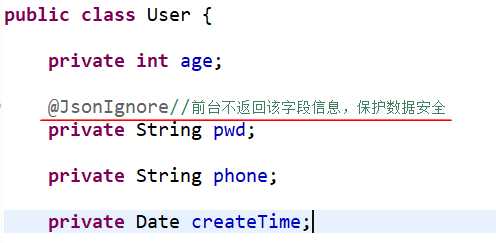
指定字段不返回:@JsonIgnore
User.java
测试:

前台返回信息:
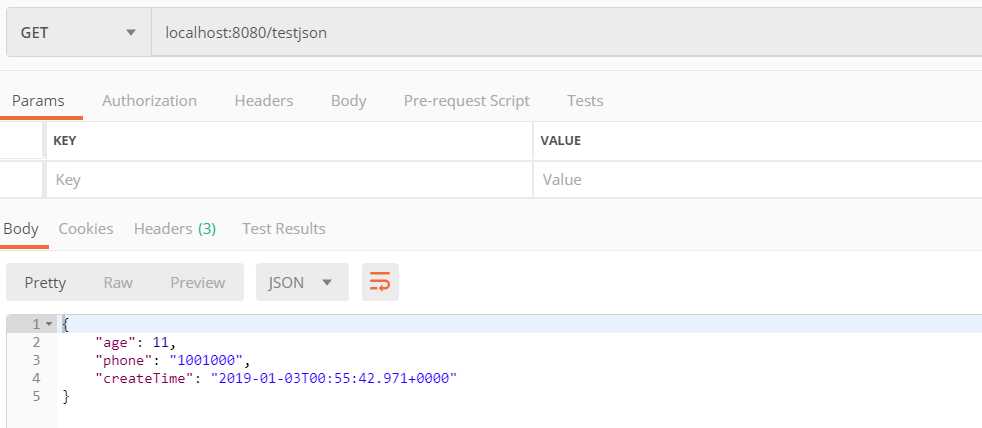
指定日期格式:@JsonFormat(pattern="yyyy-MM-dd hh:mm:ss",locale="zh",timezone="GMT+8")
空字段不返回:@JsonInclude(Include.NON_NUll)
指定别名:@JsonProperty
代码示例:
User.java
 1 package net.xdclass.demo.domain;
 2
 3 import java.util.Date;
 4 import com.fasterxml.jackson.annotation.JsonFormat;
 5 import com.fasterxml.jackson.annotation.JsonIgnore;
 6 import com.fasterxml.jackson.annotation.JsonInclude;
 7 import com.fasterxml.jackson.annotation.JsonInclude.Include;
 8 import com.fasterxml.jackson.annotation.JsonProperty;
 9
10 public class User {
11
12     private int age;
13
14     @JsonIgnore//前台不返回该字段信息,保护数据安全
15     private String pwd;
16
17     @JsonProperty("account")
18     @JsonInclude(Include.NON_NULL)
19     private String phone;
20
21     @JsonFormat(pattern="yyyy-MM-dd hh:mm:ss",locale="zh",timezone="GMT+8")
22     private Date createTime;
23
24     public Date getCreateTime() {
25         return createTime;
26     }
27
28     public void setCreateTime(Date createTime) {
29         this.createTime = createTime;
30     }
31
32     public int getAge() {
33         return age;
34     }
35
36     public void setAge(int age) {
37         this.age = age;
38     }
39
40     public String getPwd() {
41         return pwd;
42     }
43
44     public void setPwd(String pwd) {
45         this.pwd = pwd;
46     }
47
48     public String getPhone() {
49         return phone;
50     }
51
52     public void setPhone(String phone) {
53         this.phone = phone;
54     }
55
56     public User() {
57         super();
58     }
59
60     public User(int age, String pwd, String phone, Date createTime) {
61         super();
62         this.age = age;
63         this.pwd = pwd;
64         this.phone = phone;
65         this.createTime = createTime;
66     }
67 }
测试代码:
1     @GetMapping("/testjson")
2     public Object testjson(){
3
4         return new User(11, "abc123", "1001000", new Date());
5     }
前台返回结果:

6、SpringBoot2.x目录文件结构讲解
简介:讲解SpringBoot目录文件结构和官方推荐的目录规范
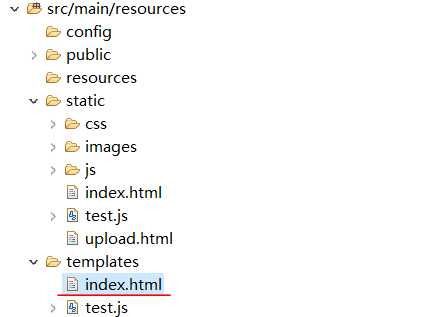
1、目录讲解
src/main/java:存放代码
src/main/resources
static: 存放静态文件,比如 css、js、image, (访问方式 http://localhost:8080/js/main.js)
templates:存放静态页面jsp,html,tpl
config:存放配置文件,application.properties
resources:
2、引入依赖 Thymeleaf
<dependency>
<groupId>org.springframework.boot</groupId>
<artifactId>spring-boot-starter-thymeleaf</artifactId>
</dependency>
注意:如果不引入这个依赖包,html文件应该放在默认加载文件夹里面,
比如resources、static、public这个几个文件夹,才可以访问(这三个文件夹中的内容可以直接访问)
例如,要访问templates下的index.html
index.html:
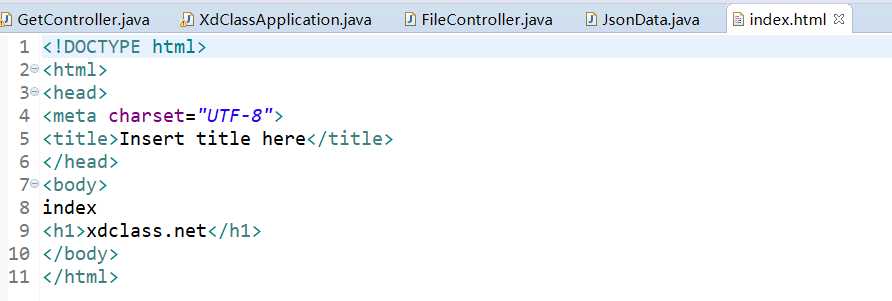
访问:http://localhost:8080/api/v1/gopage
浏览器结果:

3、同个文件的加载顺序,静态资源文件
Spring Boot 默认会挨个从
META/resources > resources > static > public 里面找是否存在相应的资源,如果有则直接返回。
4、默认配置
1)官网地址:https://docs.spring.io/spring-boot/docs/current/reference/html/boot-features-developing-web-applications.html#boot-features-spring-mvc-static-content
2)spring.resources.static-locations = classpath:/META-INF/resources/,classpath:/resources/,classpath:/static/,classpath:/public/
自定义文件夹代码示例:
在src/main/resources文件夹下创建application.properties
1 spring.resources.static-locations = classpath:/META-INF/resources/,classpath:/resources/,classpath:/static/,classpath:/public/,classpath:/test/
访问test文件夹下的test3.js
在配置文件中,加入classpath:/test/,访问:http://localhost:8080/test3.js
浏览器结果:
![]()
若不加入该内容,浏览器会提示错误信息,无法访问
5、静态资源文件存储在CDN
面试题:如何加快网站的访问速度?
答:大型公司通常将静态资源文件存储在CDN,响应快。SpringBoot搭建的项目通常会前后端分离。
2、SpringBoot接口Http协议开发实战8节课(1-5)
标签:文件夹 推荐 cep 前后端分离 cdn res 简化 thymeleaf 字段
原文地址:https://www.cnblogs.com/116970u/p/10200954.html