标签:绿色 新项目 tst 时间 orm 提交 com extension dir
相信习惯了var_dump调试的小朋友是很少使用debug的,博主就是其中的一个,但是var_dump能调试的项目大多是层次分明,结构清晰的,一旦拿到一个新项目,框架结构层次又很深的话,通过var_dump就会力不从心了。所以,博主花了一天的时间研究了一下debug,俨然已从一个debug小白晋升为熟练配置并使用,特此,记录一下我的心酸历程。
运行环境:
PHPstorm2018.3
PHP7.2.1
XDebug2.6.1
流程:
一、XDebug下载
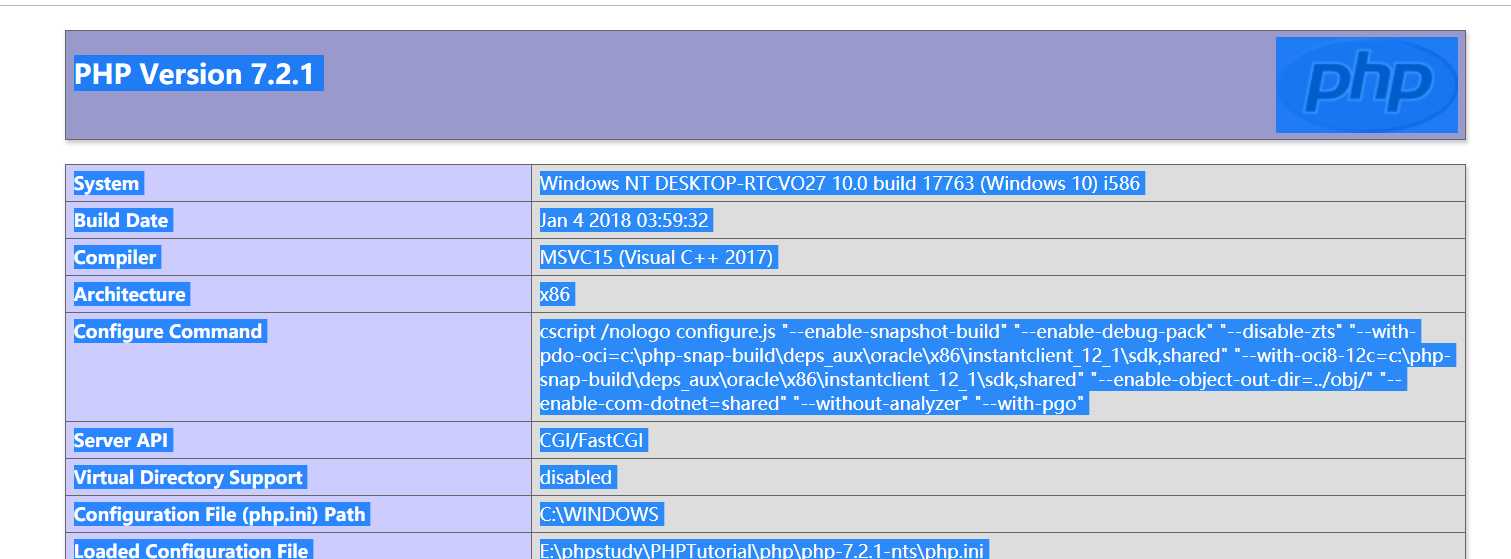
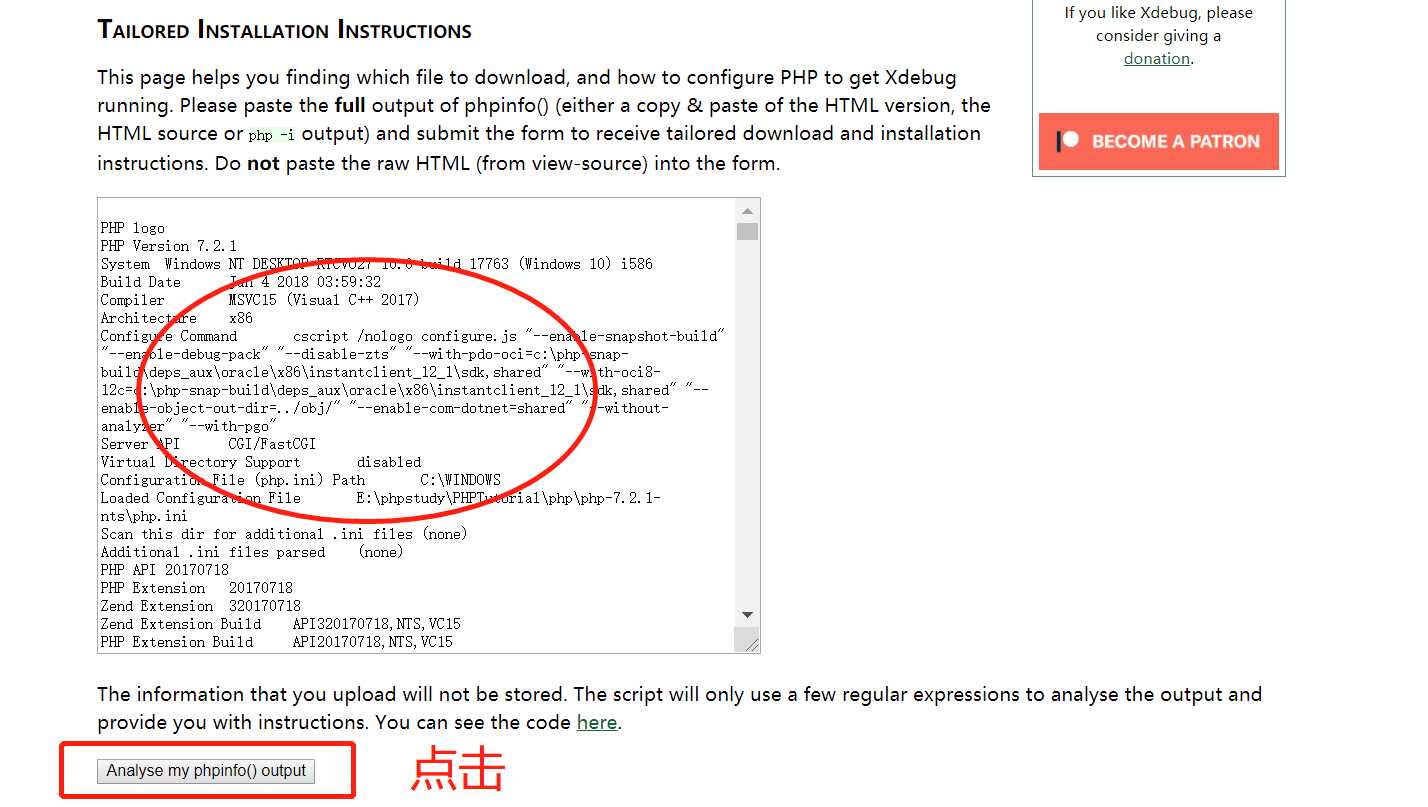
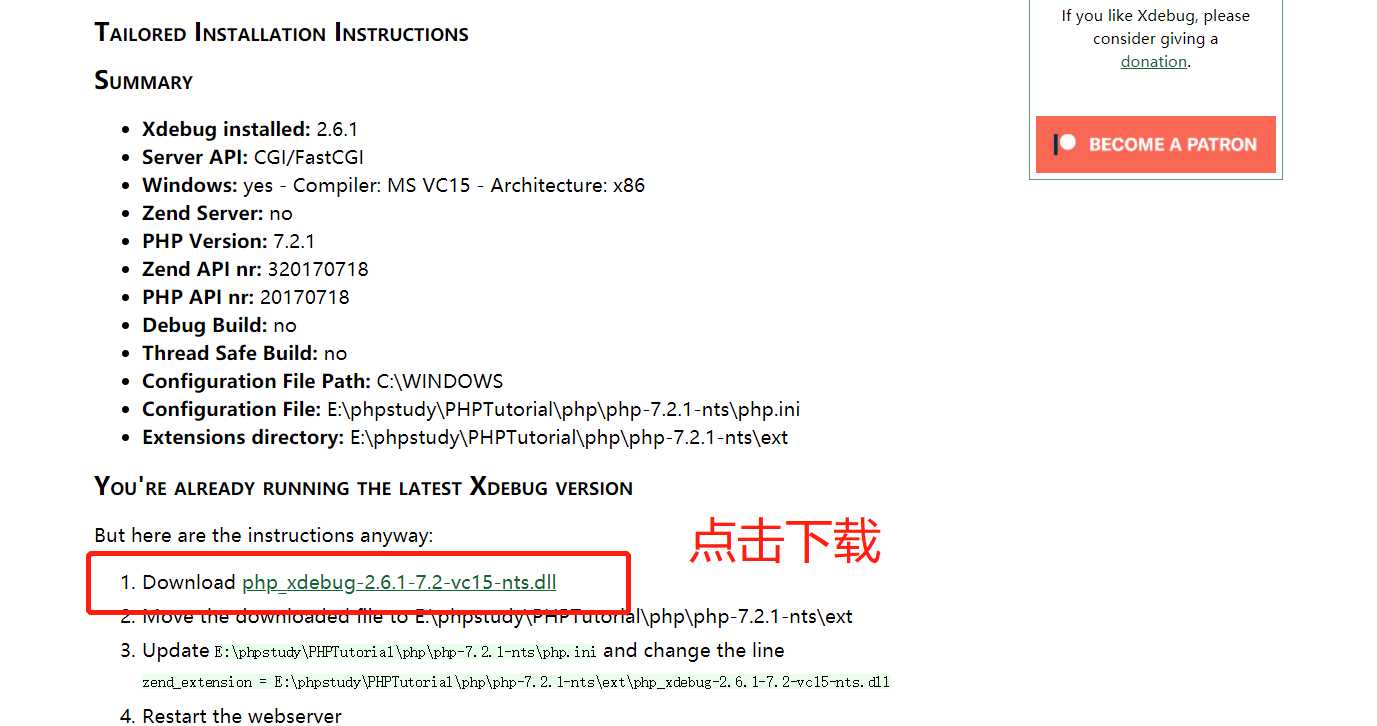
二、配置php.ini
打开我们的php.ini文件,在末尾添加如下内容
[XDebug]
zend_extension="E:\phpstudy\PHPTutorial\php\php-7.2.1-nts\ext\php_xdebug.dll"
xdebug.profiler_output_dir="E:\phpstudy\PHPTutorial\tmp\xdebug"
xdebug.profiler_enable = On
xdebug.profiler_enable_trigger = off
xdebug.profiler_output_name = cachegrind.out.%t.%p
xdebug.trace_output_dir="E:\phpstudy\PHPTutorial\tmp\xdebug"
xdebug.var_display_max_children=1024
xdebug.var_display_max_data=10240
xdebug.var_display_max_depth=7
xdebug.show_local_vars=0
xdebug.remote_enable = On
xdebug.remote_handler = dbgp
xdebug.remote_host= localhost
xdebug.remote_port = 9000
xdebug.idekey= PHPSTROM
注:
zend_extension 路径改成我们刚刚下载下来的debug路径
xdebug.profiler_output_dir 和 xdebug.trace_output_dir 路径改成自己想要输出的地方
remote_enable开启远程调试
xdebug.idekey调试的IDE
xdebug.remote_port这个是XDebug进行调试所需要监听的端口,可能会出现端口冲突问题,所以我们,提前检测一下:打开cmd,输入:netstat -ano,发现端口没有占用,很好
还差最后一步,再次打印phpinfo,搜索“xdebug”,如果能找到,代表我们配置成功
三、下载Chrome或Firefox的Debug插件
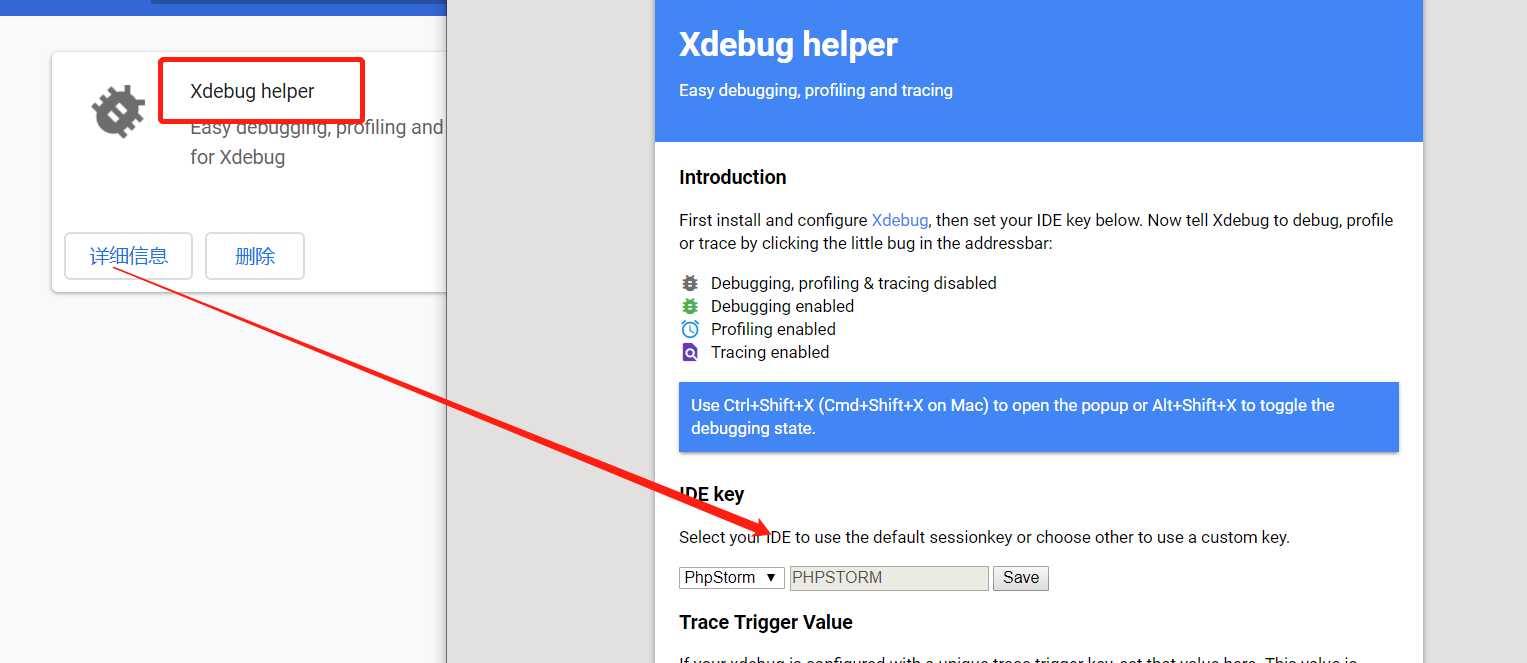
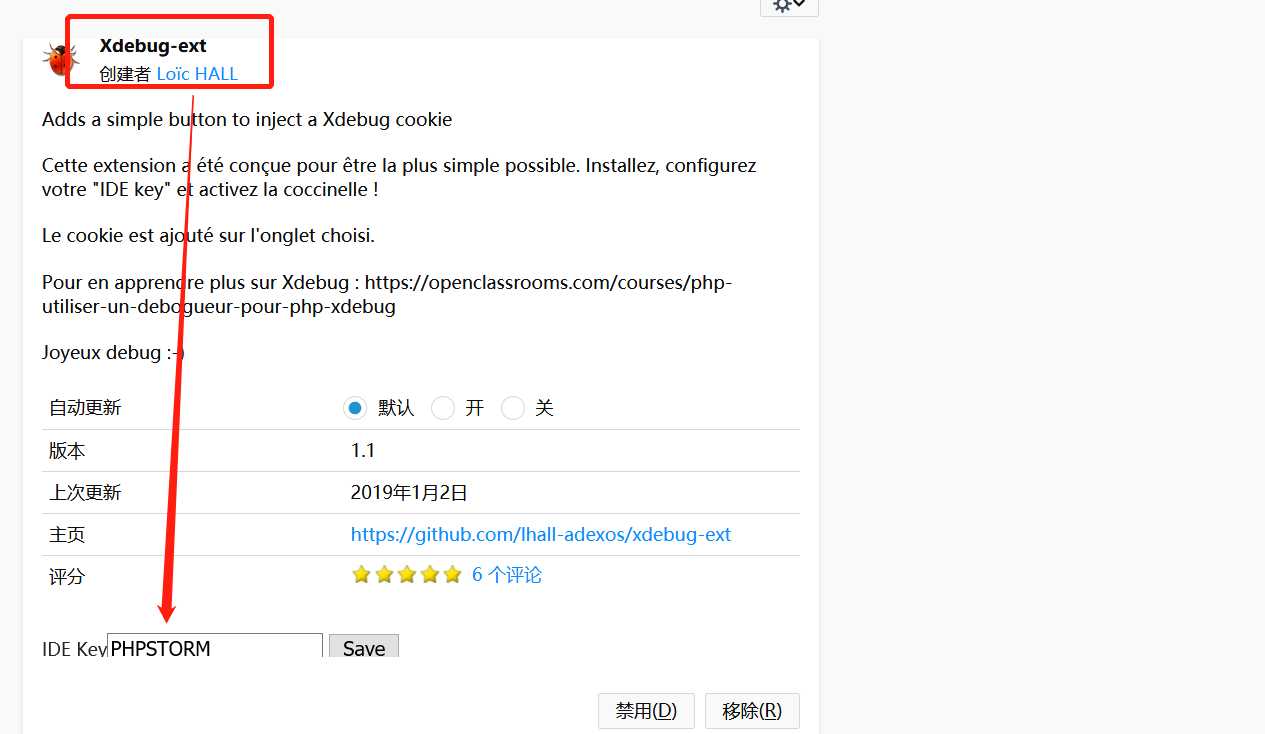
四、配置PHPstorm
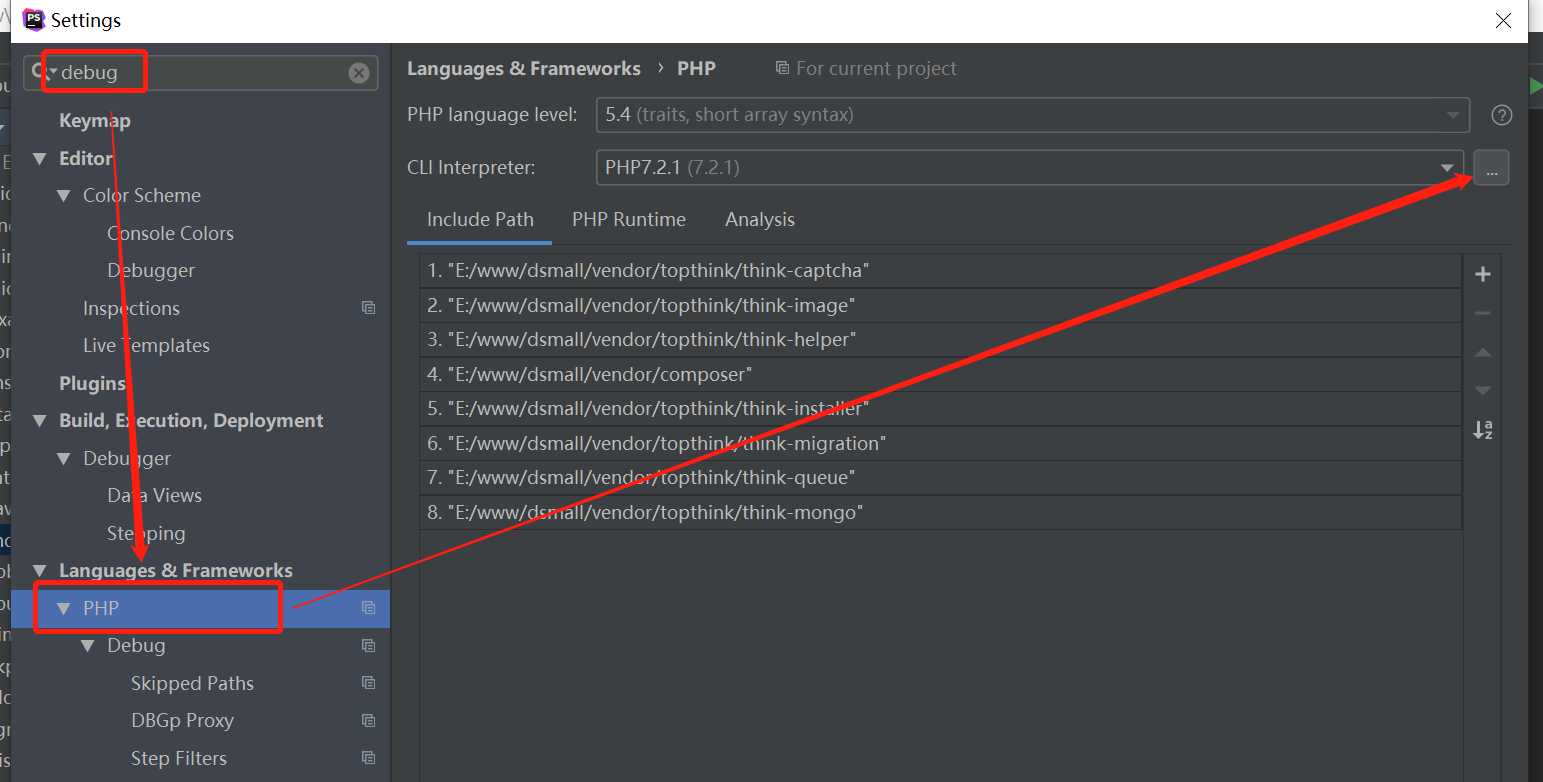
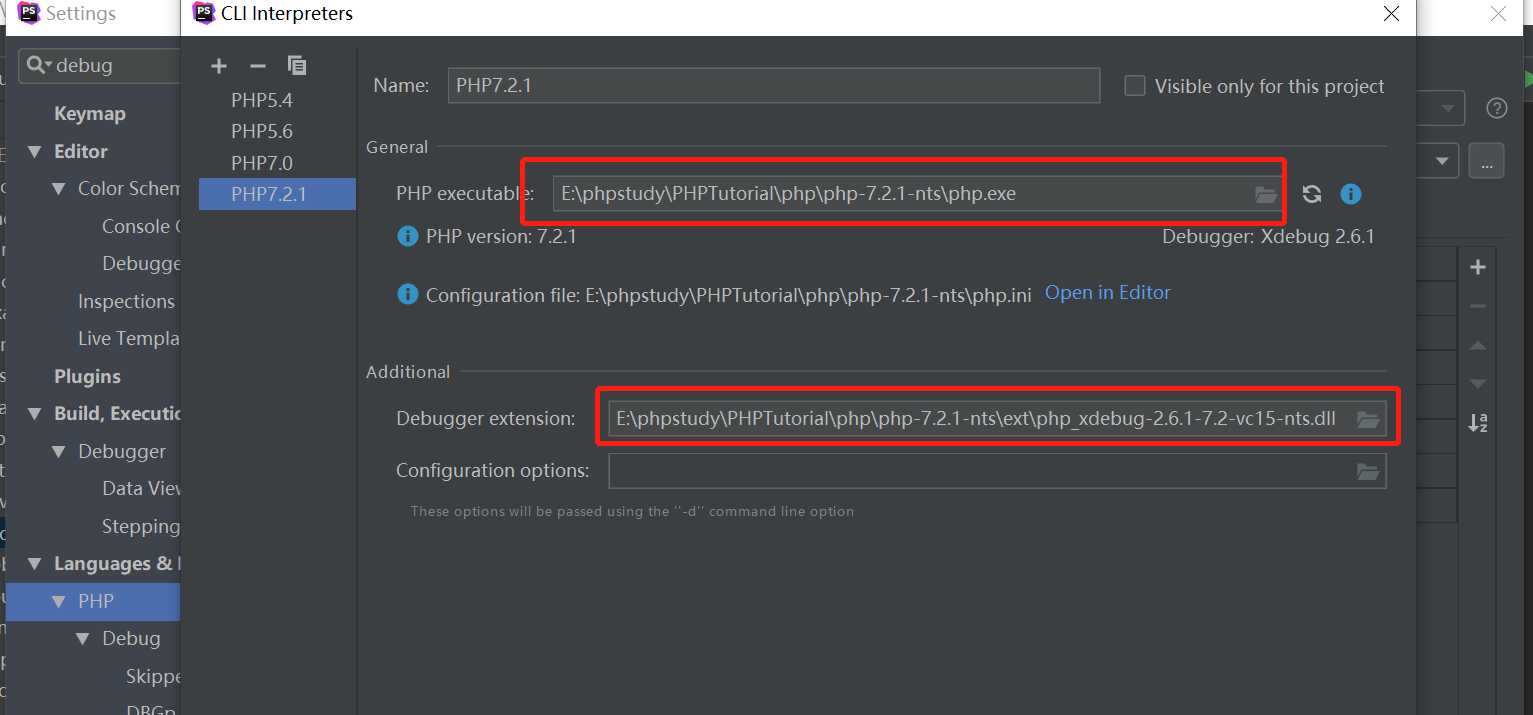
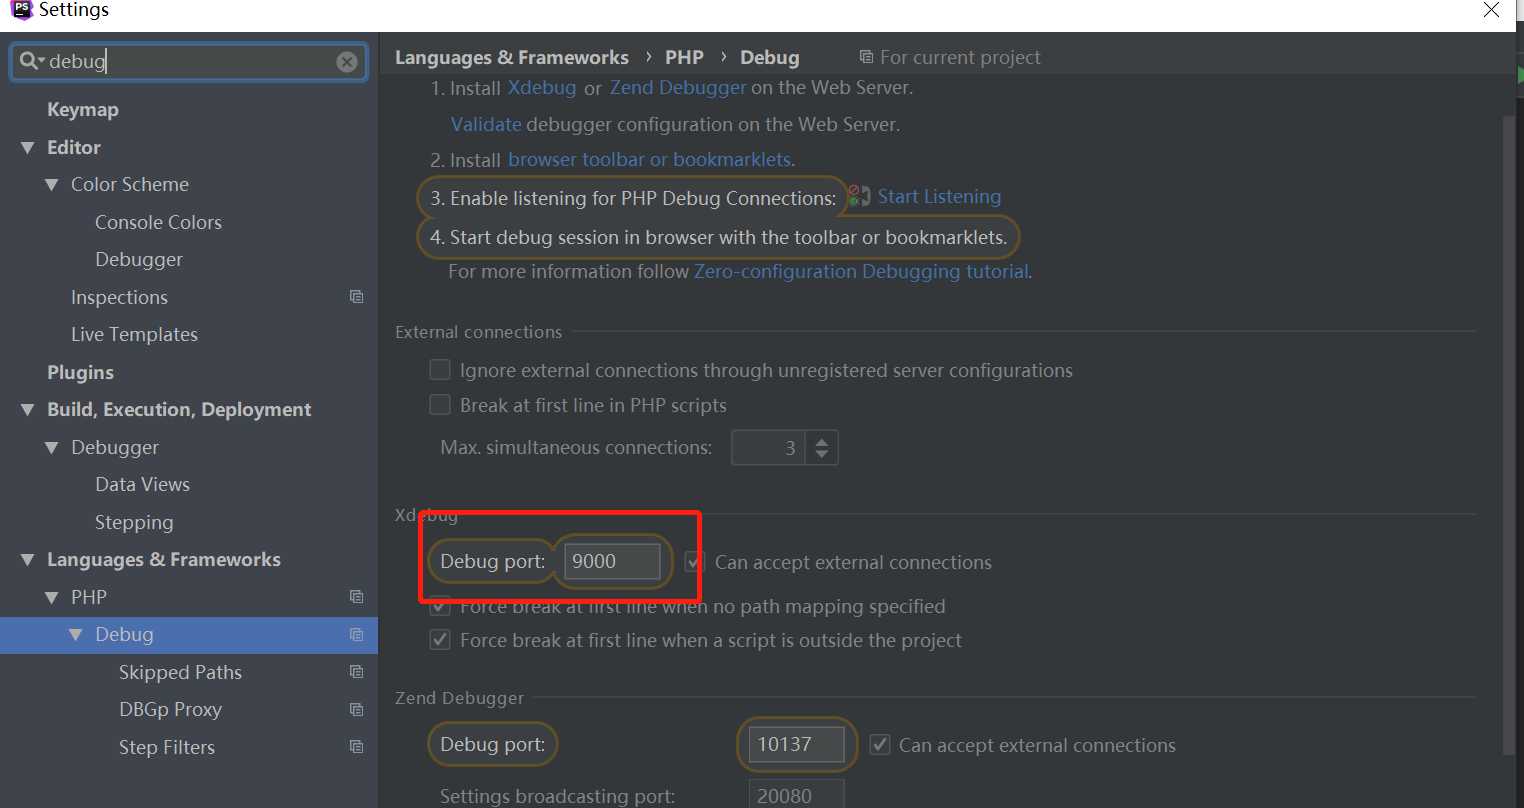
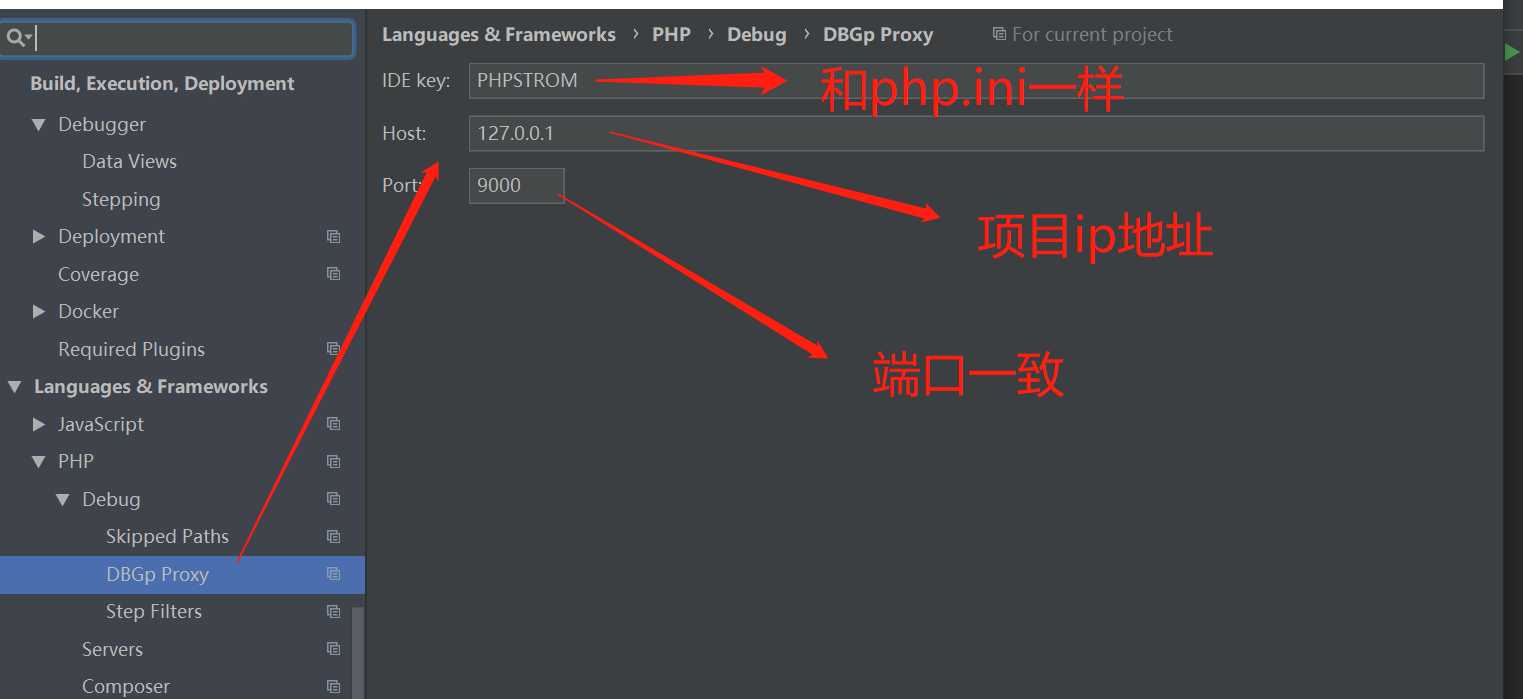
五、Debug配置
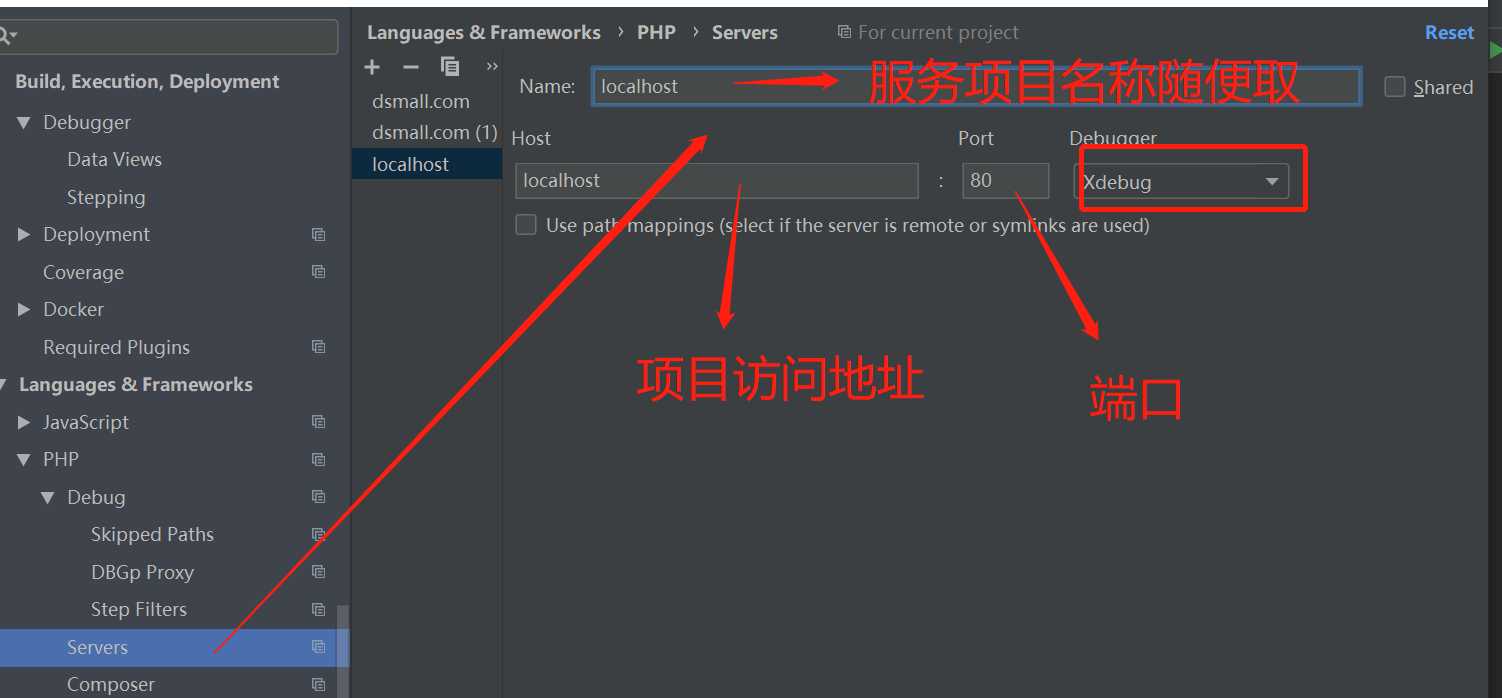

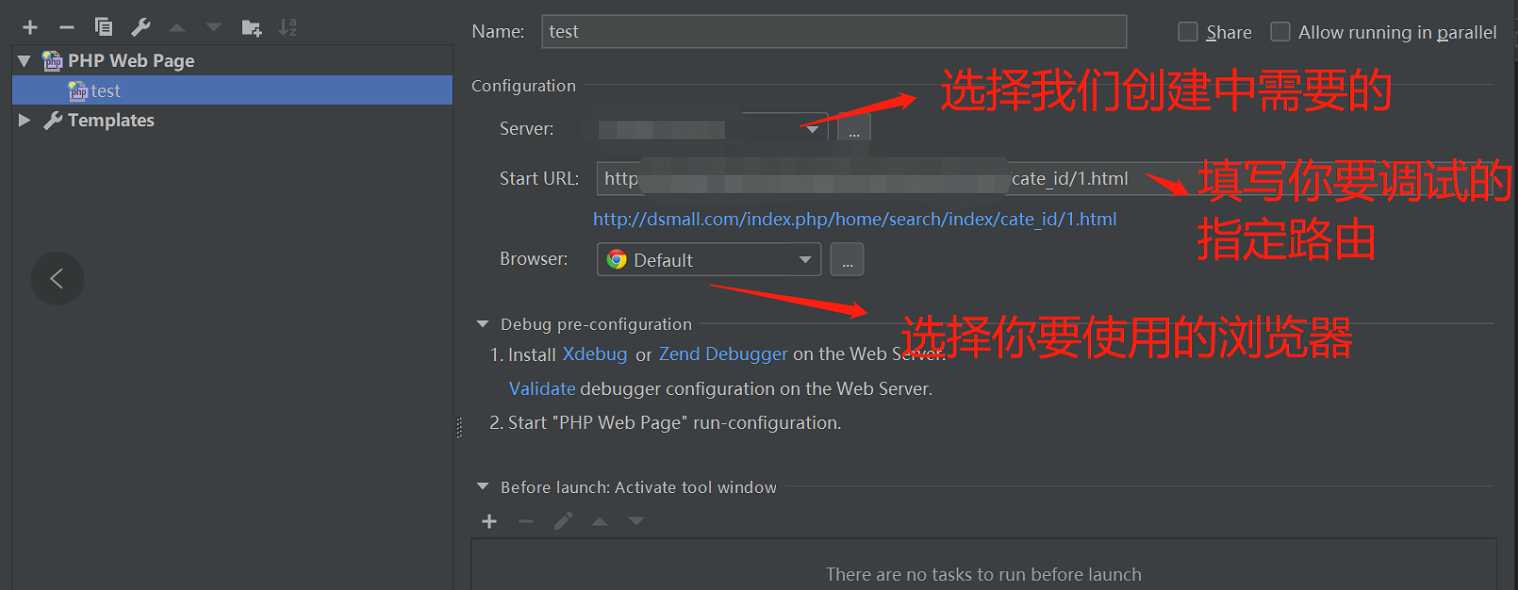
开始测试,如果是全局监听的话,浏览器中的debug打开监听,PHPstorm中打开监听,在我们需要调试的代码前面打上断点,就可以从浏览器中访问调试了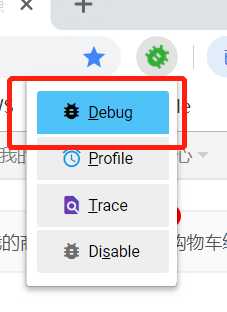

看到下面即代表配置成功!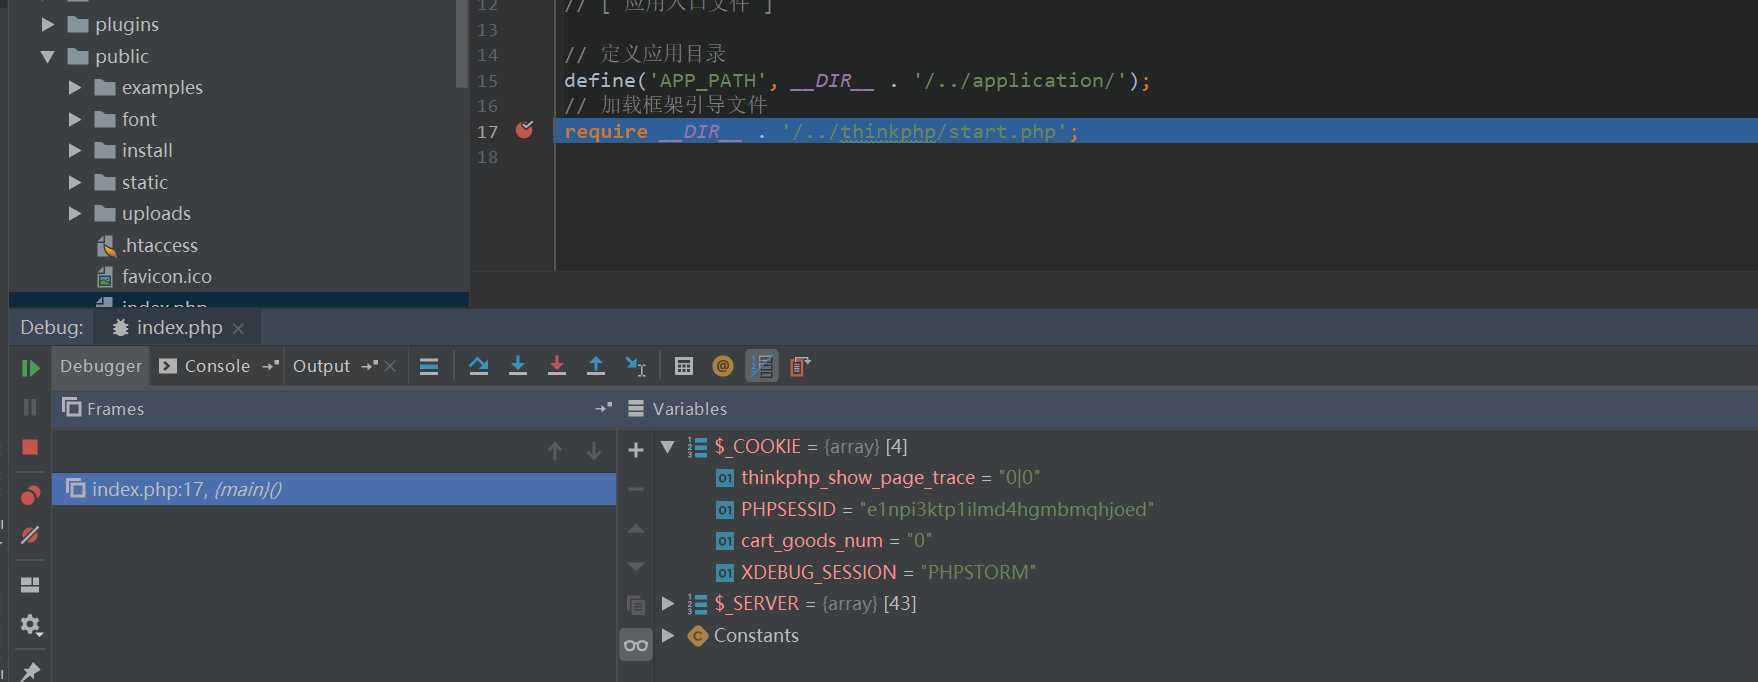
第二种,在指定的代码地方打断点,点击绿色的甲壳虫按钮即可(博主偷懒用了一个页面)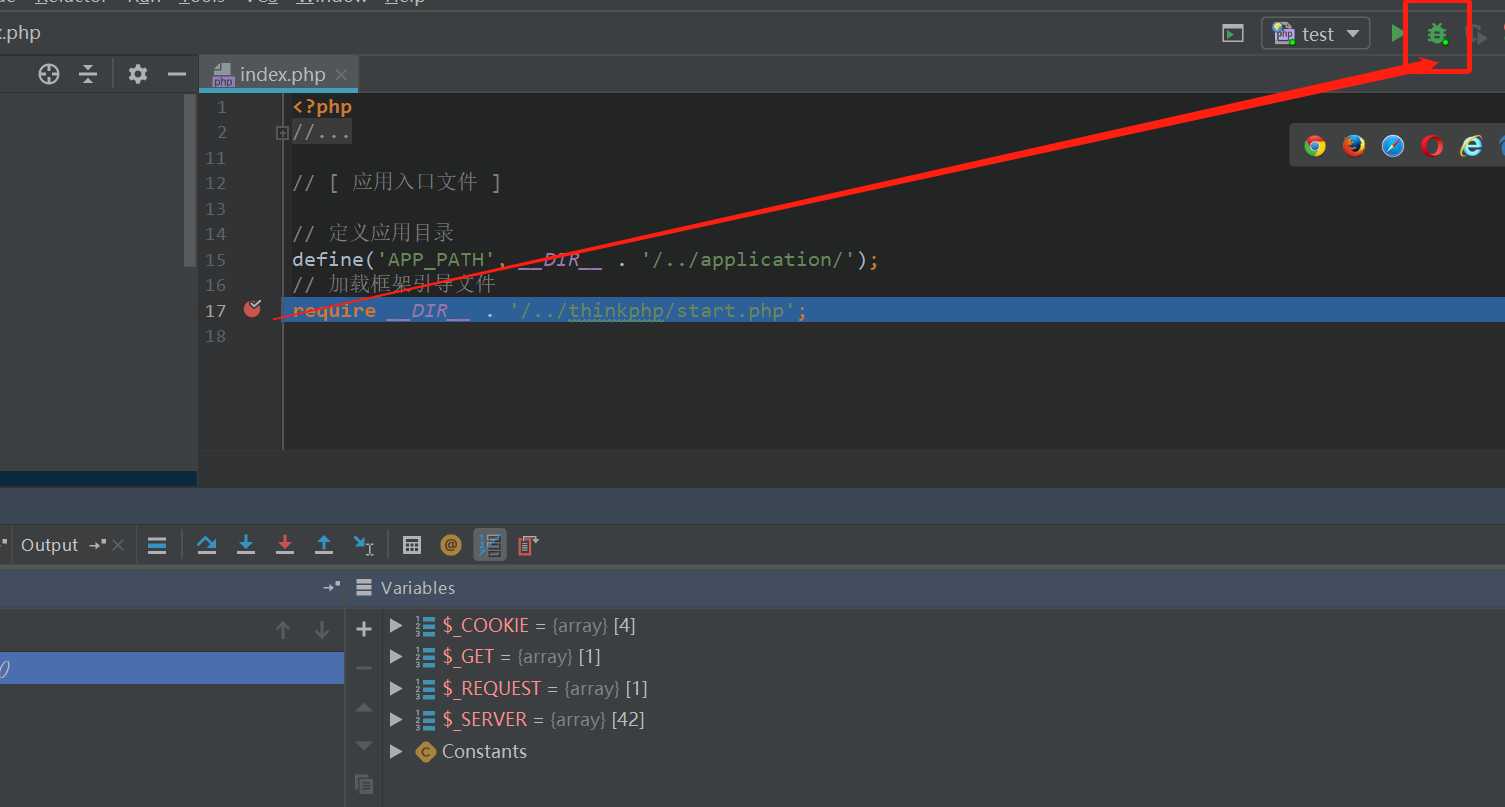
至此,我们的PHPstorm+XDebug的配置就完成了!如有疑问,欢迎留言!
PHPstorm+XDebug+Chrome/Firefox超详细教程(图文)
标签:绿色 新项目 tst 时间 orm 提交 com extension dir
原文地址:https://www.cnblogs.com/qyan/p/10290865.html