标签:网站 contain highlight 百度云 com pen 注册页面 get rop
场景目标现在大多数网站的「用户注册功能」都需要用户正确输入了验证码,才能发起注册的请求,如果想大量注册用户,正确识别验证码变的很关键。
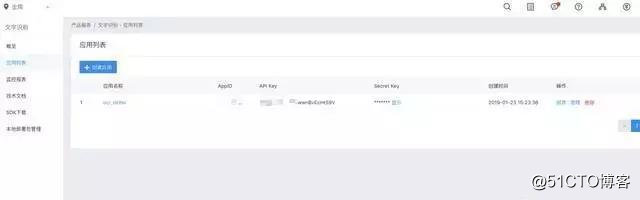
普通的验证码使用 tesserocr,加上训练可以完成,如果想简单一点,可以使用「百度云的文字识别 API」。
今天的目标是使用 selenium + 百度云OCR 批量注册「中知网」一批用户。
<pre style="-webkit-tap-highlight-color: transparent; box-sizing: border-box; font-family: Consolas, Menlo, Courier, monospace; font-size: 16px; white-space: pre-wrap; position: relative; line-height: 1.5; color: rgb(153, 153, 153); margin: 1em 0px; padding: 12px 10px; background: rgb(244, 245, 246); border: 1px solid rgb(232, 232, 232); font-style: normal; font-variant-ligatures: normal; font-variant-caps: normal; font-weight: normal; letter-spacing: normal; orphans: 2; text-align: start; text-indent: 0px; text-transform: none; widows: 2; word-spacing: 0px; -webkit-text-stroke-width: 0px; text-decoration-style: initial; text-decoration-color: initial;">from aip import AipOcr
""" 你的 APPID AK SK """
APP_ID = ‘1547‘
API_KEY = ‘VBoMZ6XUX11‘
SECRET_KEY = ‘GPvqLVeGIMOR57**‘
client = AipOcr(APP_ID, API_KEY, SECRET_KEY)
</pre>
分析思路
我们打开中国知网的注册页面,检查验证码图片的元素,通过 src 属性可以知道验证码的请求地址是:
「http://my.cnki.net/elibregister/CheckCode.aspx」
每次刷新页面或者点击验证码图片,都会重新加载一次验证码。这里我们只能使用截取验证码区域保存到本地。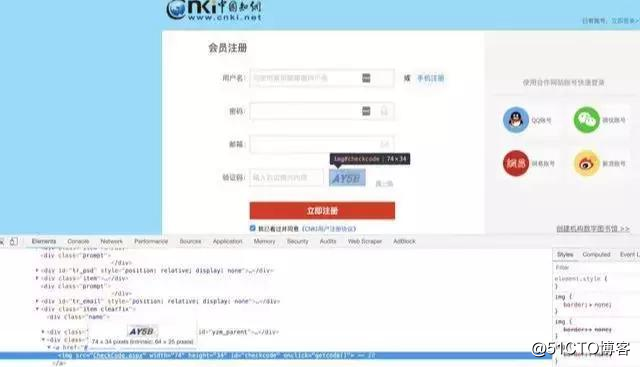
另外,截图验证码图片,需要使用「Phtotoshop」来获取验证码的左上角和右下角的坐标数据。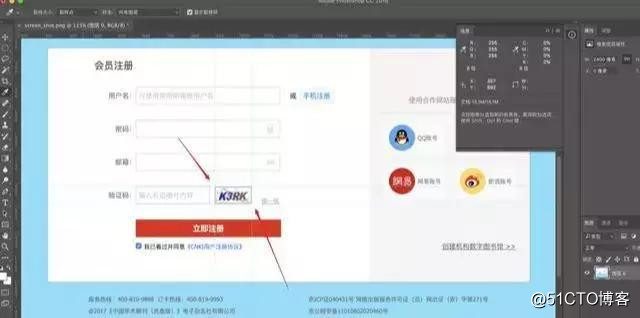
<pre style="-webkit-tap-highlight-color: transparent; box-sizing: border-box; font-family: Consolas, Menlo, Courier, monospace; font-size: 16px; white-space: pre-wrap; position: relative; line-height: 1.5; color: rgb(153, 153, 153); margin: 1em 0px; padding: 12px 10px; background: rgb(244, 245, 246); border: 1px solid rgb(232, 232, 232); font-style: normal; font-variant-ligatures: normal; font-variant-caps: normal; font-weight: normal; letter-spacing: normal; orphans: 2; text-align: start; text-indent: 0px; text-transform: none; widows: 2; word-spacing: 0px; -webkit-text-stroke-width: 0px; text-decoration-style: initial; text-decoration-color: initial;">def get_code(self):
1.截图并保存到本地
self.driver.get_screenshot_as_file(‘./%s‘ % self.screen_shot_file_name)
2.打开文件
screenshot_image = Image.open(‘./%s‘ % self.screen_shot_file_name)
3.设置要裁剪的区域(验证码所在的区域)
code_box = (899, 819, 1048, 883)
4.截图:生成只有验证码的图片
code_image = screenshot_image.crop(code_box)
5.保存到本地
code_image.save("./%s" % self.code_file_name)
6.以byte读取图片
image = get_file_content("./%s" % self.code_file_name)
7.使用百度OCR识别验证码
result = client.basicAccurate(image)
print(result)
识别的文字内容
word_result = result.get(‘words_result‘)[0].get(‘words‘)
return word_result
</pre>
然后使用 Image 类的 crop() 函数截取验证码图片并保存到本地,接着可以调用百度云 OCR API 去识别验证码。
另外,由于验证码识别率有一定几率的失败,需要循环去填入验证码,然后点击外侧容器元素操作,直到验证码识别正确。
<pre style="-webkit-tap-highlight-color: transparent; box-sizing: border-box; font-family: Consolas, Menlo, Courier, monospace; font-size: 16px; white-space: pre-wrap; position: relative; line-height: 1.5; color: rgb(153, 153, 153); margin: 1em 0px; padding: 12px 10px; background: rgb(244, 245, 246); border: 1px solid rgb(232, 232, 232); font-style: normal; font-variant-ligatures: normal; font-variant-caps: normal; font-weight: normal; letter-spacing: normal; orphans: 2; text-align: start; text-indent: 0px; text-transform: none; widows: 2; word-spacing: 0px; -webkit-text-stroke-width: 0px; text-decoration-style: initial; text-decoration-color: initial;">while True:
code = self.get_code().strip()
error_tips_element = self.driver.find_element_by_id(‘span_oldcheckcode‘)
print(‘验证码为:%s‘ % code)
code_input_element.clear()
code_input_element.click()
code_input_element.send_keys(code)
点击外围的容器,判断验证码是否输入正确
container_element.click()
显示了错误信息:验证码输入错误
if error_tips_element.text:
time.sleep(2)
print(‘验证码验证失败,点击验证码图片‘)
点击验证码图片,重新加载验证码
code_img_element.click()
continue
else:
print(‘验证码验证成功‘)
break
</pre>
现在就可以通过 webdriver 获取到其他输入框元素,填充用户名、密码、邮箱地址,点击注册按钮,实现注册一个用户的功能。
多次循环上面的操作,就可以实现批量注册的需求。
<pre style="-webkit-tap-highlight-color: transparent; box-sizing: border-box; font-family: Consolas, Menlo, Courier, monospace; font-size: 16px; white-space: pre-wrap; position: relative; line-height: 1.5; color: rgb(153, 153, 153); margin: 1em 0px; padding: 12px 10px; background: rgb(244, 245, 246); border: 1px solid rgb(232, 232, 232); font-style: normal; font-variant-ligatures: normal; font-variant-caps: normal; font-weight: normal; letter-spacing: normal; orphans: 2; text-align: start; text-indent: 0px; text-transform: none; widows: 2; word-spacing: 0px; -webkit-text-stroke-width: 0px; text-decoration-style: initial; text-decoration-color: initial;">def register(self, code):
用户名输入框
username_input_element = self.driver.find_element_by_id(‘username‘)
密码输入框
password_input_element = self.driver.find_element_by_id(‘txtPassword‘)
邮箱输入框
txtEmail_input_element = self.driver.find_element_by_id(‘txtEmail‘)
注册按钮
submit_btn_element = self.driver.find_element_by_id(‘ButtonRegister‘)
username_input_element.send_keys(self.username)
password_input_element.send_keys(self.password)
txtEmail_input_element.send_keys(self.email)
submit_btn_element.click()
</pre>
注:不能用于商业用途,批量注册然后在贩卖号哦!
最后,如果你跟我一样都喜欢python,想成为一名优秀的程序员,也在学习python的道路上奔跑,欢迎你加入python学习群:839383765 群内每天都会分享最新业内资料,分享python免费课程,共同交流学习,让学习变(编)成(程)一种习惯!
利用Python实现批量注册网站用户,注意不可用于商业用途哦!
标签:网站 contain highlight 百度云 com pen 注册页面 get rop
原文地址:http://blog.51cto.com/14186420/2347748