标签:create tde block dmi 安装 扩展性 教程 while line
在安装好Anaconda和django之后,我们就可以开始创建自己的第一个Web app,那么首先创建一个空文件夹,之后创建的文件都在这个文件夹内。
启动命令行进入此文件夹内,可以先通过如下命令查看一下自己的python版本和django版本。
python --version django-admin --version
我的python和django版本分别是3.7.0和2.1.5
使用如下命令创建第一个项目,命名为mysite。
django-admin startproject mysite
命令执行后,会在当前文件夹下生成一个名字为mysite文件夹,文件目录如下:
mysite/
    manage.py
    mysite/
        __init__.py
        settings.py
        urls.py
        wsgi.py
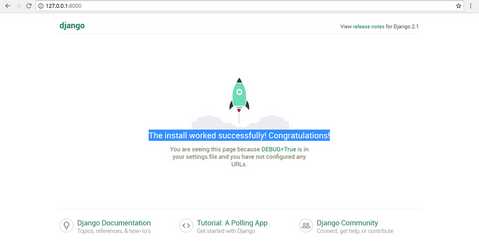
然后命令行进入mysite文件夹下,输入 python manage.py runserver ,即可启动django development server,在浏览器中输入http://127.0.0.1:8000/可看到如下界面,表示第一步成功了,该界面是django的默认界面,之后我们可以对此页面内容进行自定义。

此时可以按CTRL+C退出runserver,也可以重新打开一个命令窗口,然后输入如下命令创建第一个App,这里我将app命名为main。
python manage.py startapp main
命令执行后生成了一个新的文件夹main,此时主要文件结构如下,至此文件基本框架已经建成:
mysite/
    manage.py
    mysite/
    main/
那么django是如何呈现数据的呢,下面这段话很清楚的解释了django的工作原理,这段话来自一位YouTube的博主sentdex[1],他在YouTube上还有很多其他的python教程,感兴趣的可以看看,我的django入门也主要来自于他的教程,第一次读这段话刚开始可能并不理解,但跟着教程做一遍之后再回过头来看就能明白了:
Django uses what‘s called a Model View Controller paradigm. Every page you visit on a Django application is likely using these three things to serve you data.
- Model: Your database abstraction, which will contain objects that are mapped to your database. For example, we‘ll have a "Tutorial" model/object, a "User model/object," a "Tutorial Series" model/object...etc. All you need to do is define these models and Django handles the rest for you. You can even change your models down the line and, through migrations, Django can help you get it done within seconds, rather than the likely hour...or more... it would take you to do this yourself.
- View: How you will represent the data. This is where you will actually render things to a user.
- Controller: How you map URLs to views.
While we call it an MVC (model, view, controller), you can imagine it moreso working in reverse. A user will visit a URL, your controller (urls.py) will point to a specific view (views.py). That view can then (it doesn‘t actually HAVE to) interface with your models.
django的优势在于可扩展性好,当我们在后期想要对网站添加某些功能时非常方便,django可以保证这些文件仍然组织的很好。
接下来 我们修改主页内容,使其显示“Hello,World!”
第一步:进入mysite文件夹,打开urls.py,django把网站看作是一堆app的集合,django通过指向某个app下的ursl.py来指向该app,因此要把该app下的urls包含进来,mysite/ursl.py修改后如下,使用include别忘记从django.urls导入include,也不要忘记path命令行后的逗号:
1 from django.contrib import admin
2 from django.urls import path, include
3
4 urlpatterns = [
5     path(‘‘, include(‘main.urls‘)),
6     path(‘admin/‘, admin.site.urls),
7 ]
第二步:进入main文件夹,此文件夹下并没有urls.py,我们需要自己新建一个,写入如下内容:
1 from django.urls import path
2 from . import views
3
4 app_name = ‘main‘ #此处为了urls的命名空间
5
6 urlpatterns = [
7     path(‘‘, views.homepage, name=‘homepage‘),
8 ]
第三步:修改main文件夹下的views.py,该文件用来返回一些html页面,此时我们要在首页显示“Hello,World!”,为了简单我们直接使用HttpResponse,首先导入HttpResponse,然后定义一个函数用来显示内容:
1 from django.shortcuts import render
2 from django.http import HttpResponse
3 # Create your views here.
4 def homepage(request):
5     return HttpResponse("Hello, World!")
最后,我们再次runserver,进入http://127.0.0.1:8000/,可以看到如下界面:

在这个教程里,我产生了一个疑问:到哪里查找命令的用法呢?比如HttpResponse的用法是什么?这些可以在django的帮助文档中找到[2]。
参考链接:
[1] https://pythonprogramming.net/django-web-development-python-tutorial/
[2] https://docs.djangoproject.com/en/2.1/ref/request-response/
Anaconda+django写出第一个web app(一)
标签:create tde block dmi 安装 扩展性 教程 while line
原文地址:https://www.cnblogs.com/yunxiaofei/p/10398302.html