标签:本地 替代 lease 控制 main image png mave pen
一.创建一个Maven项目

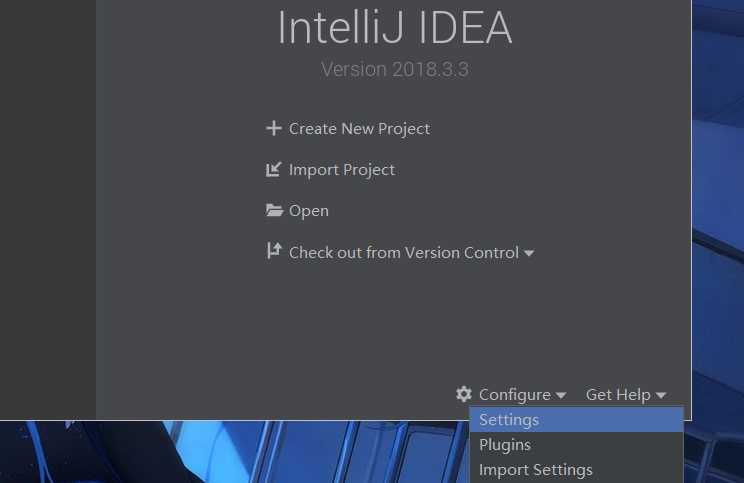
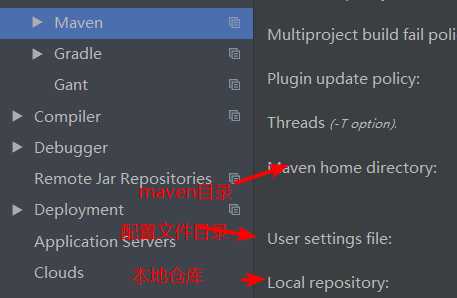
在setting里设置本地的Maven

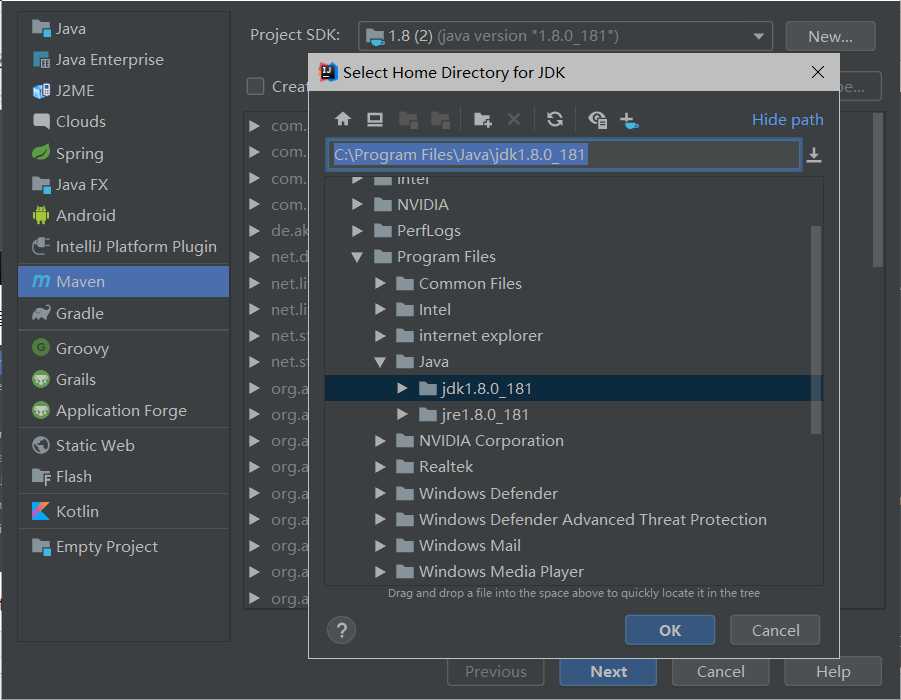
然后Create New Project ,选择Maven项目,选择JDK

二.项目创建完毕后打开pom文件,并在其中添加如下代码
<!--SpringBoot的依赖-->
<parent>
        <groupId>org.springframework.boot</groupId>
        <artifactId>spring-boot-starter-parent</artifactId>
        <version>2.1.2.RELEASE</version>
    </parent>
    <dependencies>
        <dependency>
            <groupId>org.springframework.boot</groupId>
            <artifactId>spring-boot-starter-web</artifactId>
        </dependency>
    </dependencies>

    <build>
        <!-- 将项目打包成一个可执行的jar包的插件-->
        <plugins>
            <plugin>
                <groupId>org.springframework.boot</groupId>
                <artifactId>spring-boot-maven-plugin</artifactId>
            </plugin>
        </plugins>
    </build>
三.创建一个主程序类和一个控制器
import org.springframework.boot.SpringApplication;
import org.springframework.boot.autoconfigure.SpringBootApplication;

/**
 * @SpringBootApplication 标注一个主程序类,说明这是一个Spring Boot应用
 */
@SpringBootApplication
public class HelloWorldApplication {
    public static void main(String[] args) {
        //Spring Boot 应用启动起来
        SpringApplication.run(HelloWorldApplication.class , args);
    }
}
import org.springframework.stereotype.Controller;
import org.springframework.web.bind.annotation.RequestMapping;
import org.springframework.web.bind.annotation.ResponseBody;

@Controller
public class HelloWorldController {
    @ResponseBody
    @RequestMapping("/hello")
    public String hello(){
        return "hello world";
    }
}
四.运行程序
程序启动后,在页面访问tomcat时出现以下页面替代了tomcat原有的页面

如果访问http://localhost:8080/hello就会得到想要的结果

标签:本地 替代 lease 控制 main image png mave pen
原文地址:https://www.cnblogs.com/ywb-articles/p/10604725.html