标签:使用 广播 https back config apt-get 发送 ast doc
参考官网:https://www.charlesproxy.com/documentation/installation/apt-repository/
wget -q -O - https://www.charlesproxy.com/packages/apt/PublicKey | sudo apt-key add sudo sh -c 'echo deb https://www.charlesproxy.com/packages/apt/ charles-proxy main > /etc/apt/sources.list.d/charles.list'sudo apt-get update
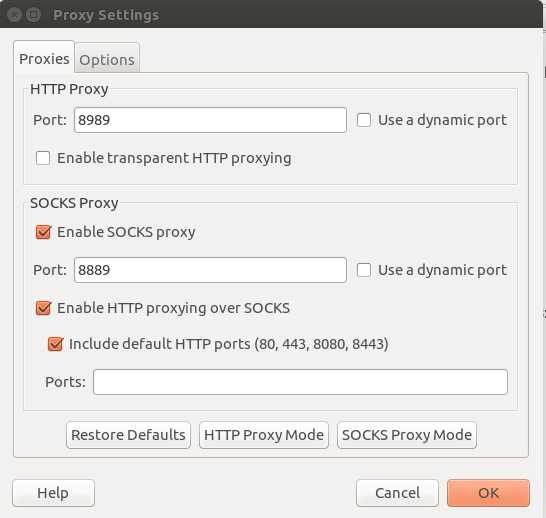
sudo apt-get install charles-proxy本地8888被占用了,就改成了8989

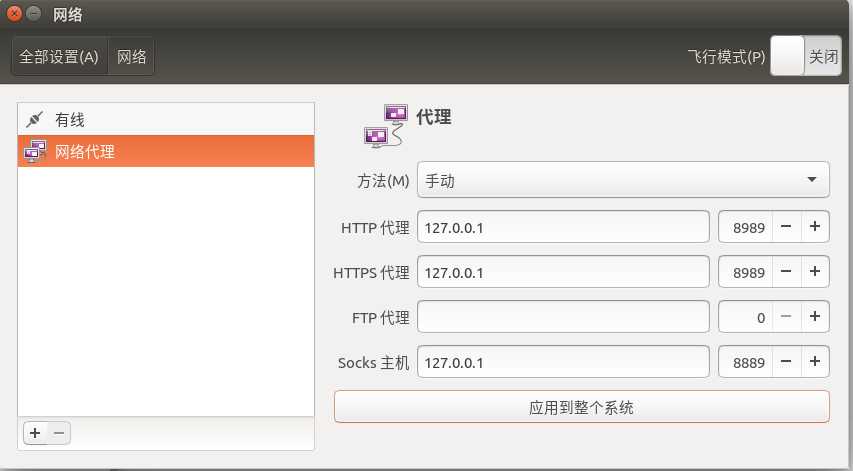
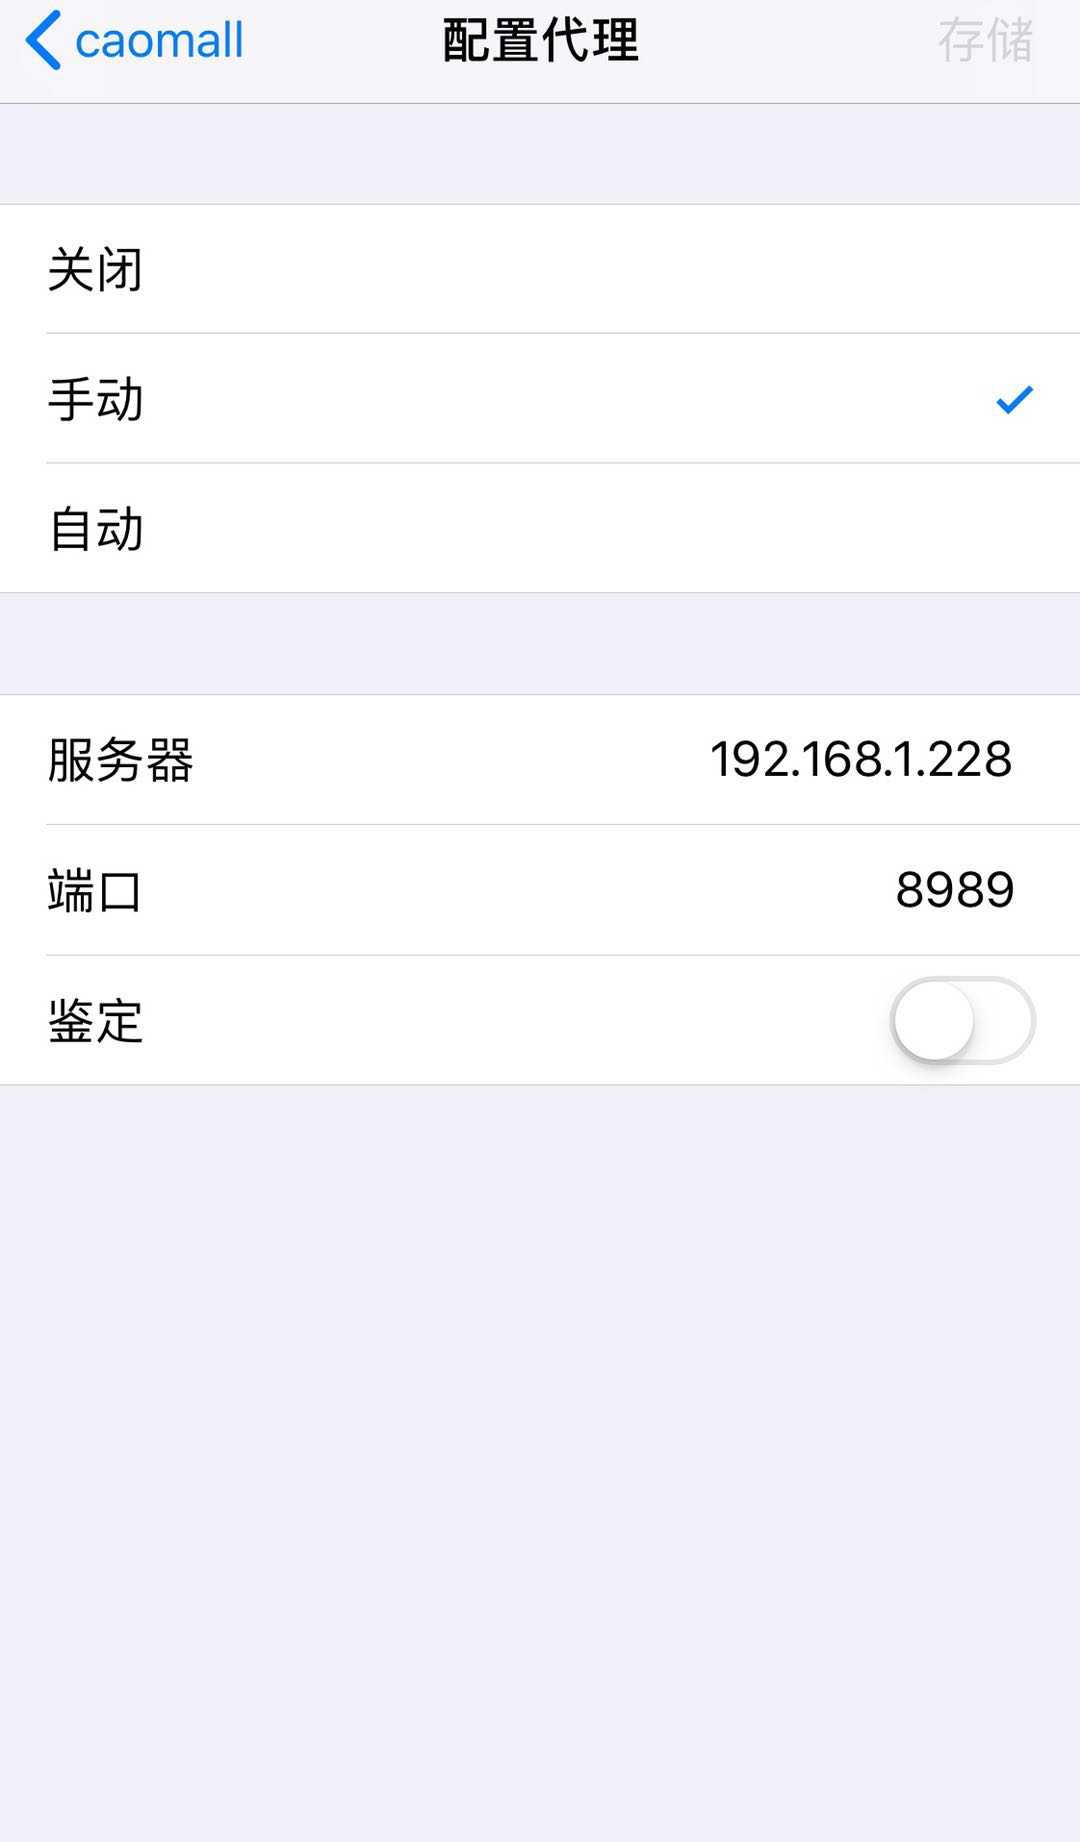
然后,配置网络

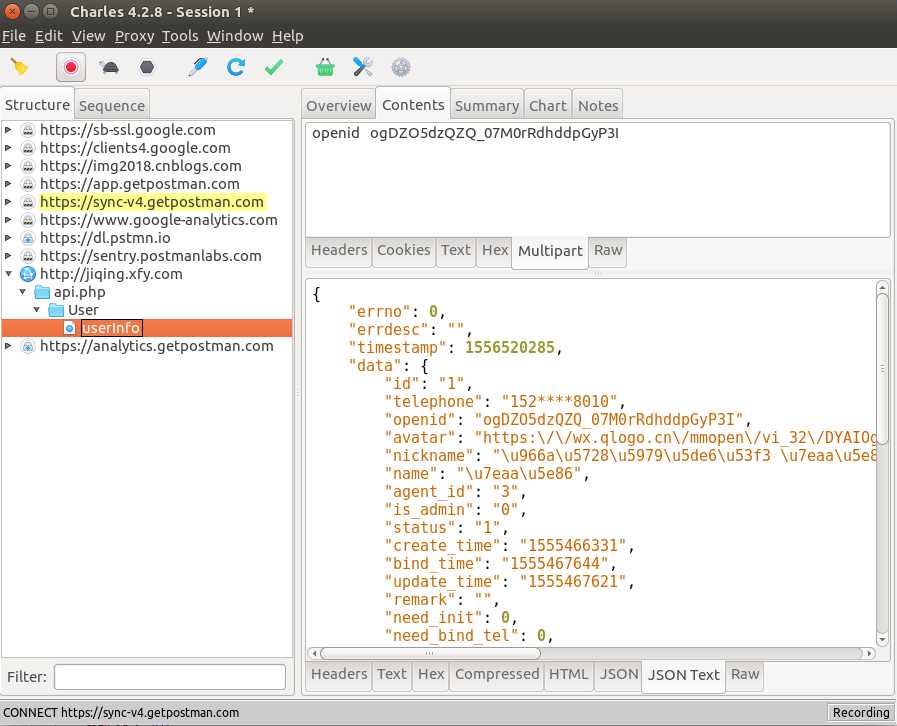
然后就可以使用了。

# ifconfig
enp3s0    Link encap:以太网  硬件地址 2c:4d:54:65:de:6e
          inet 地址:192.168.1.228  广播:192.168.1.255  掩码:255.255.255.0
          inet6 地址: fe80::94ac:7b8b:f536:b07d/64 Scope:Link
          UP BROADCAST RUNNING MULTICAST  MTU:1500  跃点数:1
          接收数据包:52748 错误:0 丢弃:0 过载:0 帧数:0
          发送数据包:32342 错误:0 丢弃:0 过载:0 载波:0
          碰撞:0 发送队列长度:1000
          接收字节:53700491 (53.7 MB)  发送字节:5451150 (5.4 MB)

lo        Link encap:本地环回
          inet 地址:127.0.0.1  掩码:255.0.0.0
          inet6 地址: ::1/128 Scope:Host
          UP LOOPBACK RUNNING  MTU:65536  跃点数:1
          接收数据包:2194 错误:0 丢弃:0 过载:0 帧数:0
          发送数据包:2194 错误:0 丢弃:0 过载:0 载波:0
          碰撞:0 发送队列长度:1000
          接收字节:586202 (586.2 KB)  发送字节:586202 (586.2 KB)

https解密处理...未完待续
标签:使用 广播 https back config apt-get 发送 ast doc
原文地址:https://www.cnblogs.com/jiqing9006/p/10790408.html