标签:super build color 状态 void layout XML hand xtend
10.3 Service的基本用法
10.3.1 定义一个服务
New——>Service
public class MyService extends Service {
    public MyService() {
    }

    @Override
    public IBinder onBind(Intent intent) {
        // TODO: Return the communication channel to the service.
        throw new UnsupportedOperationException("Not yet implemented");
    }
}
重写3个方法
//服务创建时调用
@Override
    public void onCreate() {
        super.onCreate();
    }
//每次服务启动时调用
    @Override
    public int onStartCommand(Intent intent, int flags, int startId) {
        return super.onStartCommand(intent, flags, startId);
    }
//服务销毁时调用
    @Override
    public void onDestroy() {
        super.onDestroy();
    }
在AndroidManifest.xml中已经自动注册好
<service
            android:name=".MyService"
            android:enabled="true"
            android:exported="true"></service>
10.3.2 启动和停止服务
修改activity_main中的代码,在布局中加两个按钮用于启动和停止服务
<LinearLayout xmlns:android="http://schemas.android.com/apk/res/android"
    xmlns:app="http://schemas.android.com/apk/res-auto"
    xmlns:tools="http://schemas.android.com/tools"
    android:orientation="vertical"
    android:layout_width="match_parent"
    android:layout_height="match_parent"
    tools:context=".MainActivity">

    <Button
        android:id="@+id/start_service"
        android:layout_width="match_parent"
        android:layout_height="wrap_content"
        android:text="Start Service"/>

    <Button
        android:id="@+id/stop_service"
        android:layout_width="match_parent"
        android:layout_height="wrap_content"
        android:text="Stop Service"/>

</LinearLayout>
修改MainActivity中的代码,构建Intent对象来启动和停止服务
public class MainActivity extends AppCompatActivity implements View.OnClickListener{

    @Override
    protected void onCreate(Bundle savedInstanceState) {
        super.onCreate(savedInstanceState);
        setContentView(R.layout.activity_main);
        Button startService = (Button)findViewById(R.id.start_service);
        Button stopService = (Button)findViewById(R.id.stop_service);
        startService.setOnClickListener(this);
        stopService.setOnClickListener(this);
    }

    @Override
    public void onClick(View v) {
        switch(v.getId()){
            case R.id.start_service:
                Intent startIntent = new Intent(this, MyService.class);
                startService(startIntent);
                break;
            case R.id.stop_service:
                Intent stopIntent = new Intent(this, MyService.class);
                stopService(stopIntent);
                break;
        }
    }
}
在MyService中增加打印日志
@Override
    public void onCreate() {
        super.onCreate();
        Log.d("MyService","onCreate executed");
    }

    @Override
    public int onStartCommand(Intent intent, int flags, int startId) {
        Log.d("MyService","onStartCommand executed");
        return super.onStartCommand(intent, flags, startId);

    }

    @Override
    public void onDestroy() {
        Log.d("MyService","onDestroy executed");
        super.onDestroy();
    }
运行程序,点击按钮
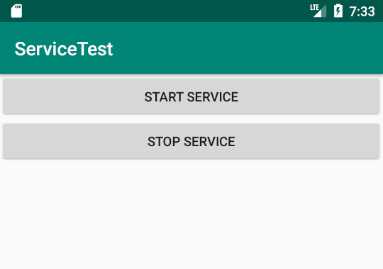
![]()
10.3.3 活动和服务进行通信
活动和服务之间通信需要借助onBind()方法。
比如希望在MyService中提供一个下载功能,然后在活动中决定何时开始下载,以及随时查看下载进度。
创建一个专门的Binder对象来对下载功能进行管理。修改MyService中的代码。
public class MyService extends Service {

    private DownloadBinder mBinder = new DownloadBinder();

    class DownloadBinder extends Binder {
        public void startDownload(){
            Log.d("MyService","startDownload executed");
        }
        public int getProgress(){
            Log.d("MyService","getProgress executed");
            return 0;
        }
    }
    public MyService() {
    }

    @Override
    public IBinder onBind(Intent intent) {
      1
    }

    @Override
    public void onCreate() {
        super.onCreate();
        Log.d("MyService","onCreate executed");
    }

    @Override
    public int onStartCommand(Intent intent, int flags, int startId) {
        Log.d("MyService","onStartCommand executed");
        return super.onStartCommand(intent, flags, startId);

    }

    @Override
    public void onDestroy() {
        Log.d("MyService","onDestroy executed");
        super.onDestroy();
    }
}
在activity_main中添加两个按钮用于绑定和解绑服务
    <Button
        android:id="@+id/bind_service"
        android:layout_width="match_parent"
        android:layout_height="wrap_content"
        android:text="Bind Service"/>

    <Button
        android:id="@+id/unbind_service"
        android:layout_width="match_parent"
        android:layout_height="wrap_content"
        android:text="Unbind Service"/>
修改MainActivity中的代码
当活动和服务绑定后,就可以调用该服务中Binder提供的方法了。
首先创建一个ServiceConnection的匿名类,在里面重写onServiceConnected()方法和onServiceDisconnected()方法,分别在活动与服务成功绑定以及活动与服务的连接断开的时候调用。
在onServiceConnected()方法中调用了DownloadBinder的startDownload()和getProgress()方法。
public class MainActivity extends AppCompatActivity implements View.OnClickListener{

    private MyService.DownloadBinder downloadBinder;
    private ServiceConnection connection = new ServiceConnection() {
        @Override
        public void onServiceConnected(ComponentName name, IBinder service) {
            downloadBinder = (MyService.DownloadBinder) service;
            downloadBinder.startDownload();
            downloadBinder.getProgress();
        }

        @Override
        public void onServiceDisconnected(ComponentName name) {

        }
    };
    @Override
    protected void onCreate(Bundle savedInstanceState) {
        super.onCreate(savedInstanceState);
        setContentView(R.layout.activity_main);
        Button startService = (Button)findViewById(R.id.start_service);
        Button stopService = (Button)findViewById(R.id.stop_service);
        Button bindService = (Button)findViewById(R.id.bind_service);
        Button unbindService = (Button)findViewById(R.id.unbind_service);
        startService.setOnClickListener(this);
        stopService.setOnClickListener(this);
        bindService.setOnClickListener(this);
        unbindService.setOnClickListener(this);
    }

    @Override
    public void onClick(View v) {
        switch(v.getId()){
            case R.id.start_service:
                Intent startIntent = new Intent(this, MyService.class);
                startService(startIntent);
                break;
            case R.id.stop_service:
                Intent stopIntent = new Intent(this, MyService.class);
                stopService(stopIntent);
                break;
            case R.id.bind_service:
                Intent bindIntent = new Intent(this, MyService.class);
                bindService(bindIntent, connection, BIND_AUTO_CREATE); //绑定服务
                break;
            case R.id.unbind_service:
                unbindService(connection);  //解绑服务
                break;
            default:
                break;
        }
    }
}
运行程序:
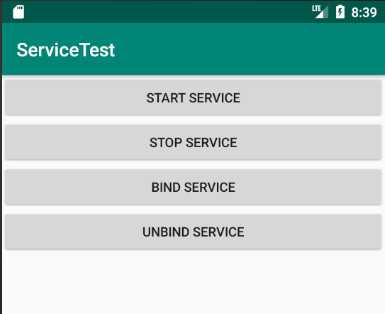
![]()
10.4 Service的生命周期
10.5 Service的更多技巧
10.5.1 使用前台服务
希望服务可以一直保持运行状态,而不会由于系统内存不足的原因导致被回收,可以考虑使用前台服务。
前台服务和普通服务最大的区别在于,它会有一个正在运行的图标在系统的状态栏显示,下拉状态栏可以看到更加详细的信息,非常类似于通知的效果。
修改MyService中的代码
 @Override
    public void onCreate() {
        super.onCreate();
        Log.d("MyService","onCreate executed");
        Intent intent =  new Intent(this,MainActivity.class);
        PendingIntent pi = PendingIntent.getActivity(this, 0, intent, 0);
        Notification notification = new NotificationCompat.Builder(this,"default")
                .setContentTitle("This is content title")
                .setContentText("This is content text")
                .setWhen(System.currentTimeMillis())
                .setSmallIcon(R.mipmap.ic_launcher)
                .setLargeIcon(BitmapFactory.decodeResource(getResources(),
                        R.mipmap.ic_launcher))
                .setContentIntent(pi)
                .build();
        startForeground(1, notification);
    }
类似于创建通知的方法。
运行程序:

10.5.2 使用IntentService
服务中的代码都是默认运行在主线程当中的,如果直接在服务里去处理一些耗时的逻辑,就很容易出现ANR(Application Not Responding/应用程序未响应)的情况。
Android专门提供了一个IntentService类,这个类很好的解决了忘记开启线程或忘记停止服务。
新建一个类继承IntentService
public class MyIntentService extends IntentService {
    public MyIntentService(){
        super("MyIntentService");
    }

    @Override
    protected void onHandleIntent(Intent intent) {
        //打印当前线程的id
        Log.d("MyIntentService", "Thread id is " + Thread.currentThread().getId());
    }

    @Override
    public void onDestroy() {
        super.onDestroy();
        Log.d("MyIntentService","onDestroy executed");  //打印日志以证明服务停止
    }
}
在activity_main中添加一个Button
    <Button
        android:id="@+id/start_intent_service"
        android:layout_width="match_parent"
        android:layout_height="wrap_content"
        android:text="Start IntentService"/>
修改MainActivity中的代码
public class MainActivity extends AppCompatActivity implements View.OnClickListener{

    private MyService.DownloadBinder downloadBinder;
    private ServiceConnection connection = new ServiceConnection() {
        @Override
        public void onServiceConnected(ComponentName name, IBinder service) {
            downloadBinder = (MyService.DownloadBinder) service;
            downloadBinder.startDownload();
            downloadBinder.getProgress();
        }

        @Override
        public void onServiceDisconnected(ComponentName name) {

        }
    };
    @Override
    protected void onCreate(Bundle savedInstanceState) {
        super.onCreate(savedInstanceState);
        setContentView(R.layout.activity_main);
        Button startService = (Button)findViewById(R.id.start_service);
        Button stopService = (Button)findViewById(R.id.stop_service);
        Button bindService = (Button)findViewById(R.id.bind_service);
        Button unbindService = (Button)findViewById(R.id.unbind_service);
        Button startIntentService = (Button)findViewById(R.id.start_intent_service);
        startService.setOnClickListener(this);
        stopService.setOnClickListener(this);
        bindService.setOnClickListener(this);
        unbindService.setOnClickListener(this);
        startIntentService.setOnClickListener(this);
    }

    @Override
    public void onClick(View v) {
        switch(v.getId()){
            case R.id.start_service:
                Intent startIntent = new Intent(this, MyService.class);
                startService(startIntent);
                break;
            case R.id.stop_service:
                Intent stopIntent = new Intent(this, MyService.class);
                stopService(stopIntent);
                break;
            case R.id.bind_service:
                Intent bindIntent = new Intent(this, MyService.class);
                bindService(bindIntent, connection, BIND_AUTO_CREATE); //绑定服务
                break;
            case R.id.unbind_service:
                unbindService(connection);  //解绑服务
                break;
            case R.id.start_intent_service:
                Log.d("MainActivity", "Thread id is " + Thread.currentThread().getId());
                Intent intentService = new Intent(this, MyIntentService.class);
                startService(intentService);
                break;
            default:
                break;
        }
    }
}
最后在AndroidManifest中注册
<service android:name=".MyIntentService"/>
运行程序:

MyIntentService和MainActivity所在的线程id不一样,而且onDestroy()方法也得到了执行,说明MyIntentService在运行完毕确实自动停止了,集开启线程和自动停止于一身。
<Android基础> (十)Service Part 2 基本用法
标签:super build color 状态 void layout XML hand xtend
原文地址:https://www.cnblogs.com/HarSong13/p/10833051.html