标签:fetch fir lease des ddr sshd min 连接 doc
在CentOS7环境下,kubernetes单机版环境,成功部署一个服务,在虚拟机中访问服务没问题,下面这样:
curl http://172.27.73.26:8888/eureka-server/default/master
{"name":"eureka-server","profiles":["default"],"label":"master","version":null,"state":null,"propertySources":[{"name":"eureka-server-default","source":{"server.port":"${SERVER_PORT:8761}","eureka.instance.preferIpAddress":"true","eureka.instance.lease-renewal-interval-in-seconds":"10","eureka.server.renewal-percent-threshold":"0.85","eureka.instance.lease-expiration-duration-in-seconds":"30","eureka.client.registerWithEureka":"true","eureka.client.fetchRegistry":"true","eureka.client.serviceUrl.defaultZone":"http://${EUREKA_SERVER_HOST}:${EUREKA_SERVER_PORT}/eureka/","eureka.server.waitTimeInMsWhenSyncEmpty":"0","eureka.server.enableSelfPreservation":"false","eureka.server.eviction-interval-timer-in-ms":"10000"}}]}
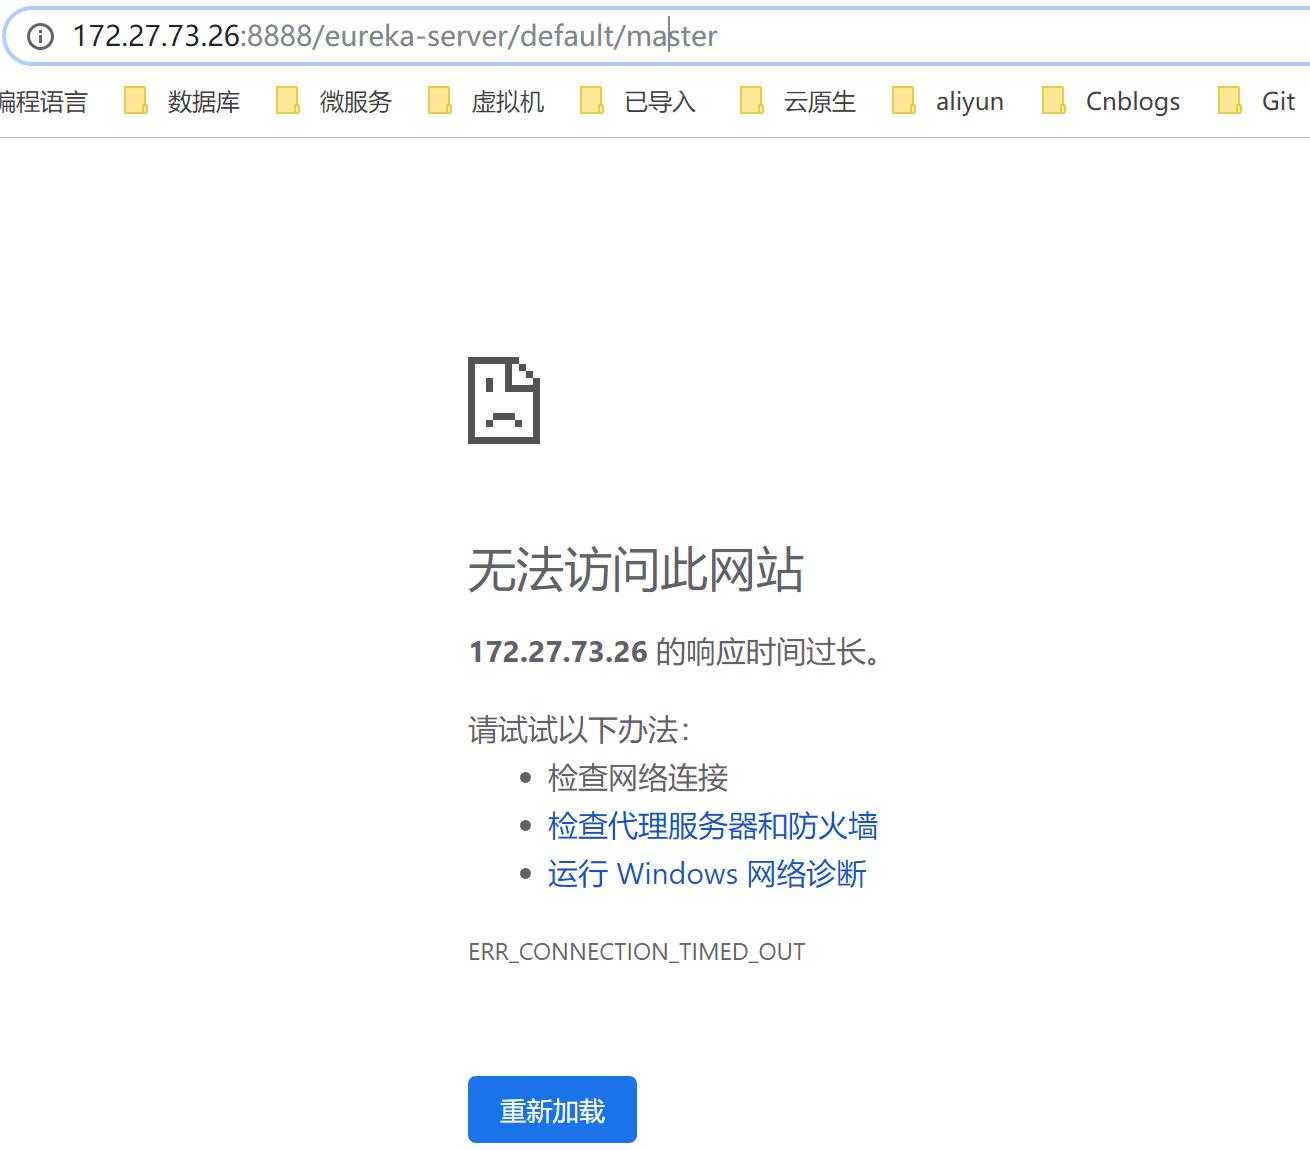
但是在虚拟机外访问不是超时就是连接不上:

查找原因,防火墙在安装kubernetes时已经关闭,于是:
1. 重新打开防火墙:
systemctl start firewalld
2. 添加8888端口的访问权限,这里会永久生效
firewall-cmd --zone=public --add-port=8888/tcp --permanent
3. 重新载入防火墙,添加的端口才能生效
firewall-cmd --reload
4. 循环2-3步,添加想要的端口,然后关闭防火墙
systemctl stop firewalld
5. 查询防火墙开放端口
sudo iptables-save
这时,我们发现在虚拟机外访问,就没有问题了。
似乎这个问题解决了,但当我们关闭虚拟机,再次打开虚拟机,启动kubernetes时,再次访问访问,还是不能访问。这就奇怪了,为什么呢?
1. 使用命令查询虚拟机监听的端口
[root@localhost ~]# netstat -tlunp
Active Internet connections (only servers)
Proto Recv-Q Send-Q Local Address           Foreign Address         State       PID/Program name
tcp        0      0 127.0.0.1:10248         0.0.0.0:*               LISTEN      1562/kubelet
tcp        0      0 127.0.0.1:10249         0.0.0.0:*               LISTEN      1571/kube-proxy
tcp        0      0 127.0.0.1:10250         0.0.0.0:*               LISTEN      1562/kubelet
tcp        0      0 127.0.0.1:2379          0.0.0.0:*               LISTEN      1247/etcd
tcp        0      0 127.0.0.1:2380          0.0.0.0:*               LISTEN      1247/etcd
tcp        0      0 127.0.0.1:10255         0.0.0.0:*               LISTEN      1562/kubelet
tcp        0      0 127.0.0.1:8080          0.0.0.0:*               LISTEN      1534/kube-apiserver
tcp        0      0 0.0.0.0:22              0.0.0.0:*               LISTEN      890/sshd
tcp        0      0 172.27.73.26:8888       0.0.0.0:*               LISTEN      1571/kube-proxy
tcp        0      0 127.0.0.1:25            0.0.0.0:*               LISTEN      1025/master
tcp6       0      0 :::4194                 :::*                    LISTEN      1562/kubelet
tcp6       0      0 :::2375                 :::*                    LISTEN      1322/dockerd-curren
tcp6       0      0 :::5000                 :::*                    LISTEN      1473/docker-proxy-c
tcp6       0      0 :::10251                :::*                    LISTEN      1551/kube-scheduler
tcp6       0      0 :::6443                 :::*                    LISTEN      1534/kube-apiserver
tcp6       0      0 :::10252                :::*                    LISTEN      1544/kube-controlle
tcp6       0      0 :::22                   :::*                    LISTEN      890/sshd
tcp6       0      0 ::1:25                  :::*                    LISTEN      1025/master
udp        0      0 127.0.0.1:323           0.0.0.0:*                           646/chronyd
udp        0      0 0.0.0.0:68              0.0.0.0:*                           1211/dhclient
udp6       0      0 ::1:323                 :::*                                646/chronyd
发现8888端口确实是被监听的,这里为什么不能访问我也没找到原因。
但是发现一个特点,在tcp6下监听的端口,就可以访问,tcp下的不可以,你要说22端口不也是tcp下的么?可是你没注意到在tcp6下也有监听。
如果我关闭tcp6是不是可以访问服务呢?
这里普及下,tcp就是ipv4;tcp6就是ipv6,所以我们要关闭ipv6。
关闭ipv6,注意我们在虚拟机安装的是CentOS7系统。
修改/etc/default/grub文件,在引导时就不加载IPV6模块。
编辑/etc/default/grub,在GRUB_CMDLINE_LINUX加上的后面句首加上ipv6.disable=1。
修改前:
[root@localhost Desktop]# cat /etc/default/grub
GRUB_TIMEOUT=5
GRUB_DISTRIBUTOR="$(sed ‘s, release .*$,,g‘ /etc/system-release)"
GRUB_DEFAULT=saved
GRUB_DISABLE_SUBMENU=true
GRUB_TERMINAL_OUTPUT="console"
GRUB_CMDLINE_LINUX="rd.lvm.lv=centos/root rd.lvm.lv=centos/swap rhgb quiet"
GRUB_DISABLE_RECOVERY="true"
修改后:
[root@localhost Desktop]# cat /etc/default/grub
GRUB_TIMEOUT=5
GRUB_DISTRIBUTOR="$(sed ‘s, release .*$,,g‘ /etc/system-release)"
GRUB_DEFAULT=saved
GRUB_DISABLE_SUBMENU=true
GRUB_TERMINAL_OUTPUT="console"
GRUB_CMDLINE_LINUX="ipv6.disable=1 rd.lvm.lv=centos/root rd.lvm.lv=centos/swap rhgb quiet"
GRUB_DISABLE_RECOVERY="true"
修改完毕后保存,运行grub2-mkconfig -o /boot/grub2/grub.cfg重新生成grub.cfg文件。
[root@localhost ~]# grub2-mkconfig -o /boot/grub2/grub.cfg
Generating grub configuration file ...
Found linux image: /boot/vmlinuz-3.10.0-957.12.2.el7.x86_64
Found initrd image: /boot/initramfs-3.10.0-957.12.2.el7.x86_64.img
Found linux image: /boot/vmlinuz-3.10.0-957.el7.x86_64
Found initrd image: /boot/initramfs-3.10.0-957.el7.x86_64.img
Found linux image: /boot/vmlinuz-0-rescue-9cebd9e98d7e482499f2d4215498df5b
Found initrd image: /boot/initramfs-0-rescue-9cebd9e98d7e482499f2d4215498df5b.img
done
重启系统,运行lsmod|grep ipv6,可以看到ipv6已经关闭
验证IPV6是否关闭
[root@localhost ~]# cat /proc/sys/net/ipv6/conf/all/disable_ipv6
1
If the output is 0, IPv6 is enabled.
If the output is 1, IPv6 is already disabled.
重新使用命令查询虚拟机监听的端口:
[root@localhost ~]# netstat -tlunp
Active Internet connections (only servers)
Proto Recv-Q Send-Q Local Address           Foreign Address         State       PID/Program name
tcp        0      0 0.0.0.0:2375            0.0.0.0:*               LISTEN      4991/dockerd-curren
tcp        0      0 127.0.0.1:10248         0.0.0.0:*               LISTEN      5215/kubelet
tcp        0      0 127.0.0.1:10249         0.0.0.0:*               LISTEN      5222/kube-proxy
tcp        0      0 127.0.0.1:10250         0.0.0.0:*               LISTEN      5215/kubelet
tcp        0      0 0.0.0.0:10251           0.0.0.0:*               LISTEN      5194/kube-scheduler
tcp        0      0 0.0.0.0:6443            0.0.0.0:*               LISTEN      5173/kube-apiserver
tcp        0      0 127.0.0.1:2379          0.0.0.0:*               LISTEN      4906/etcd
tcp        0      0 0.0.0.0:10252           0.0.0.0:*               LISTEN      5187/kube-controlle
tcp        0      0 127.0.0.1:2380          0.0.0.0:*               LISTEN      4906/etcd
tcp        0      0 127.0.0.1:10255         0.0.0.0:*               LISTEN      5215/kubelet
tcp        0      0 127.0.0.1:8080          0.0.0.0:*               LISTEN      5173/kube-apiserver
tcp        0      0 0.0.0.0:22              0.0.0.0:*               LISTEN      3912/sshd
tcp        0      0 172.27.73.28:8888       0.0.0.0:*               LISTEN      5222/kube-proxy
tcp        0      0 127.0.0.1:25            0.0.0.0:*               LISTEN      4371/master
tcp        0      0 0.0.0.0:4194            0.0.0.0:*               LISTEN      5215/kubelet
udp        0      0 0.0.0.0:68              0.0.0.0:*                           4869/dhclient
udp        0      0 127.0.0.1:323           0.0.0.0:*                           3196/chronyd
已经没有tcp6了,表明ipv6已经关闭。
从外部访问部署好的访问,ok,即使重启CentOS7系统或者虚拟机,都没问题。
在虚拟机环境(CentOS7系统)下将kubernetes中部署服务成功,但在虚拟机外部无法访问到服务
标签:fetch fir lease des ddr sshd min 连接 doc
原文地址:https://www.cnblogs.com/feiyujun/p/10886759.html