标签:android style blog http io os ar 使用 sp
Android是在Android 3.0 (API level 11)引入了Fragment的,中文翻译是片段或者成为碎片(个人理解),可以把Fragment当成Activity中的模块,这个模块有自己的布局,有自己的生命周期,单独处理自己的输入,在Activity运行的时候可以加载或者移除Fragment模块。
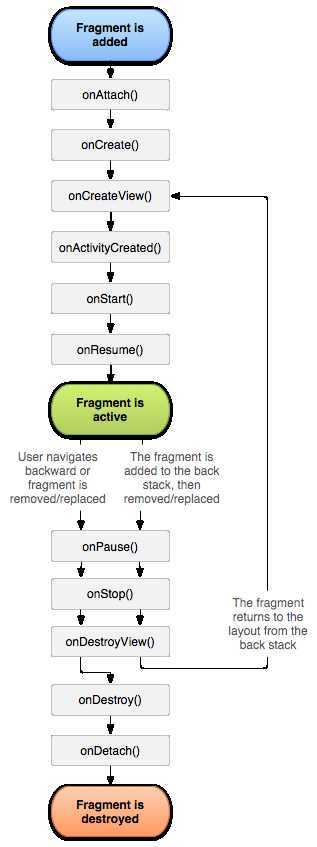
其中有个经典图,大家就字面上理解下就行:

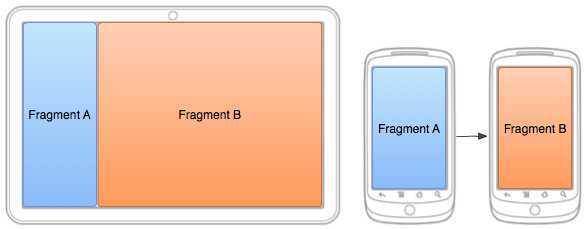
可以把Fragment设计成可以在多个Activity中复用的模块,为了在Android上创建动态的、多窗口的用户交互体验,你需要将UI组件和Activity操作封装成模块进行使用,在activity中你可以对这些模块进行切入切出操作。可以使用Fragment来创建这些模块,如果一个fragment定义了自己的布局,那么在activity中它可以与其他的fragments生成不同的组合,从而为不同的屏幕尺寸生成不同的布局(一个小的屏幕一次只放一个fragment,大的屏幕则可以两个或以上的fragment),比如说下图:

首先,新建一个布局文件fragmentcontent.xml
<?xml version="1.0" encoding="utf-8"?>
<FrameLayout xmlns:android="http://schemas.android.com/apk/res/android"
    android:id="@+id/content_container"
    android:layout_width="match_parent"
    android:layout_height="match_parent" >

    <ImageView
        android:src="@drawable/content"
        android:layout_width="wrap_content"
        android:layout_height="wrap_content" />

</FrameLayout>
这时候与对应的是建立一个显示布局文件的ContentFragment类:
public class ContentFragment extends Fragment {
	@Override
	public View onCreateView(LayoutInflater inflater, ViewGroup container,
			Bundle savedInstanceState) {
		// TODO Auto-generated method stub
		return inflater.inflate(R.layout.fragmentcontent, container, false);
	}
}
inflate()方法的三个参数:
第一个是resource ID,指明了当前的Fragment对应的资源文件;
第二个参数是父容器控件;
第三个布尔值参数表明是否连接该布局和其父容器控件,在这里的情况设置为false,因为系统已经插入了这个布局到父控件,设置为true将会产生多余的一个View Group。
如果需要在Mainactivity中显示的话:
    <fragment
        android:id="@+id/fragment1"
        android:name="com.example.fragmenttest.ContentFragment"
        android:layout_width="match_parent"
        android:layout_height="wrap_content" />
activity_main.xml中的代码为:
<LinearLayout xmlns:android="http://schemas.android.com/apk/res/android"
    xmlns:tools="http://schemas.android.com/tools"
    android:layout_width="match_parent"
    android:layout_height="match_parent"
    android:orientation="vertical"
    tools:context="com.example.fragmenttest.MainActivity" >

    <TextView
        android:layout_width="wrap_content"
        android:layout_height="wrap_content"
        android:text="中共十八大四中全会召开" />

    <fragment
        android:id="@+id/fragment1"
        android:name="com.example.fragmenttest.ContentFragment"
        android:layout_width="match_parent"
        android:layout_height="wrap_content" />

    <TextView
        android:layout_width="match_parent"
        android:layout_height="wrap_content"
        android:text="依法治国,以人为本" />

    <LinearLayout
        android:id="@+id/parentTest"
        android:layout_width="wrap_content"
        android:orientation="vertical"
        android:layout_height="wrap_content" >
    </LinearLayout>
</LinearLayout>
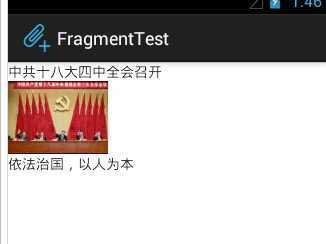
显示的结果为:

这个时候可以在Mainactivity中加一段代码:
		FragmentTransaction fragmentTransaction = getFragmentManager()
				.beginTransaction();
		ContentFragment fragment = new ContentFragment();
		fragmentTransaction.add(R.id.parentTest, fragment);
		fragmentTransaction.commit();
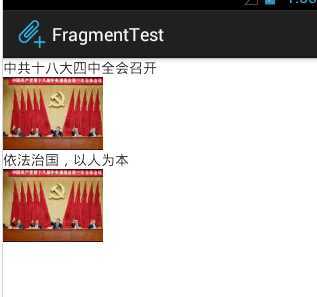
结果如下:

基本操作的就是添加,替换,删除(如果是定义在xml文件中的是不可以删除的)
自定义的添加:
		FragmentTransaction fragmentTransaction = getFragmentManager()
				.beginTransaction();
		ContentFragment fragment = new ContentFragment();
		fragmentTransaction.add(R.id.parentTest, fragment);
		fragmentTransaction.commit();
替换:
		FragmentTransaction fragmentTransaction = getFragmentManager()
				.beginTransaction();
		TitleFragment fragment = new TitleFragment();
		fragmentTransaction.replace(R.id.fragment1, fragment);
		fragmentTransaction.commit();
如果仔细看一下,上面应该还是可以看出来基本上操作就是获取Manager,然后就行添加,删除操作,关于内部Fragments之间的交互还在研究中,希望有机会可以补发~
标签:android style blog http io os ar 使用 sp
原文地址:http://www.cnblogs.com/xiaofeixiang/p/4041739.html