标签:apt-get inux 图片 password www word 低版本 logs apt
这里是Ubuntu 18.04的mysql安装教程,ubuntu低版本或其他非Debian的Linux发行版可能不适用。
sudo apt-get install mysql-server
sudo apt-get install mysql-client
sudo apt-get install libmysqlclient-dev
这里我安装完了没有提示设置密码或其他配置项的步骤,所以有需要的话可以看下一步更改默认密码。
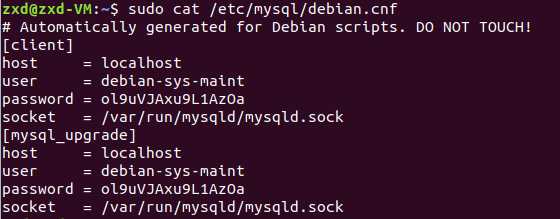
sudo cat /etc/mysql/debian.cnf
结果如下:

图有‘user=debian-sys-maint’,即为自动配置的默认用户;‘password=ol9uVJAxu9L1AzOa’,即为自动配置的密码。
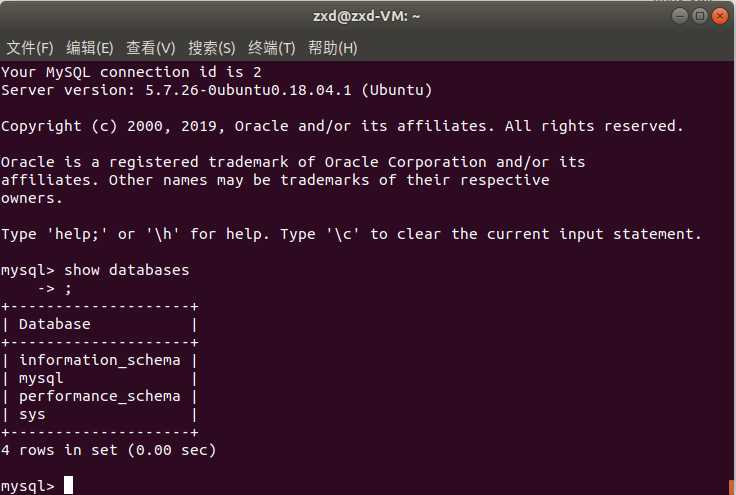
mysql -u debian-sys-maint -p // 用户名以自己的配置文件为准
提示输入密码,这里要输入的就是上一步的‘password=ol9uVJAxu9L1AzOa’(密码以自己的配置文件为准)。
use mysql;
// 下一行,密码改为了yourpassword,可以设置成其他的
update mysql.user set authentication_string=password(‘yourpassword‘) where user=‘root‘ and Host =‘localhost‘;
update user set plugin="mysql_native_password";
flush privileges;
quit;
sudo service mysql restart
mysql -u root -p
输入新密码:yourpassword

参考:
标签:apt-get inux 图片 password www word 低版本 logs apt
原文地址:https://www.cnblogs.com/guangnianxd/p/10990247.html